Attic finishing. Requirements for the interior design of the premises. Cladding methods and materials used. Self-finishing of the attic - we carry out beautifully and efficiently The better to sheathe the attic inside
The attic refers to a special type of attic space. It has quite extensive square meters, allowing you to equip an additional usable area, and to decorate the attic with your own hands, the photos of finishing options are presented below, maybe using a variety of materials.
Any interior decoration begins with the choice of finishing material. The photo shows the most popular building materials used to decorate the attic.
Lining
One of the simplest and most economical design options is the lining of the attic. Various shades and a unique texture of the finishing material made of plastic allow you to create different styles interior and luxurious design of the attic space. Due to the ease of installation, even a beginner can decorate the wall with his own hands.
The disadvantages of the material include the fragility of the material and poor resistance to external influences.
Wooden lining has a unique pattern and excellent natural texture. The finishing material will ideally fit into any interior of the room and will help create an atmosphere of home comfort. The material is absolutely harmless, but at the same time it can undergo decay processes. Troubles can be avoided by treating the natural massif with special impregnations.
MDF panels
If it is planned to equip in the attic home gym or a personal account, MDF panels are used for wall decoration. If given finishing material used to decorate a bedroom or nursery, then the interior will turn out to be quite strict and boring. It is best to combine MDF panels with other finishing materials such as wallpaper, plaster or paint. See the photo for interesting examples of combining materials.
MDF panels have a number of advantages:
- have excellent sound and heat insulation properties;
- their installation does not require preliminary leveling of the surface;
- relatively low cost;
- there are many types of material that differ in texture and colors... The panels can imitate brickwork, natural stone, and so on;
- ease of installation.
Drywall
Due to its excellent quality characteristics and low cost, the finishing material is often used for interior decoration. Finishing the attic with plasterboard allows you to bring original design solutions to life. All communications that spoil the interior are conveniently placed under the structure. The finishing material easily absorbs moisture, but if you use a special moisture-resistant type, then finishing the attic with plasterboard will last more than a dozen years.
The main advantages of the material include:
- environmental friendliness;
- ease of installation;
- the ability to hide all communications wiring behind a similar design;
- excellent sound and heat insulation qualities.
As for the disadvantages, they are also available:
- installation of complex structures requires special skills;
- the material does not withstand heavy loads;
- sheets are easily deformed if stored improperly.
As well as osb, it is used to divide a room into several separate rooms. Creation of an exclusive design using plasterboard partitions shown in the photo.
PVC panels
Plastic panels for walls are particularly durable, reliable and able to withstand various mechanical loads. Quick and easy installation of the material allows you to do the decoration of the attic with your own hands. If the wall to be decorated has a perfectly flat and smooth surface, then the plastic is glued to it with glue. PVC panels besides traditional white have a wide range of colors, which allows you to create a unique interior in the attic room.
The advantages of this material are as follows:
- wide area of \u200b\u200buse;
- a wide range of colors;
- strength and dimensional stability;
- ease of installation;
- ease of care.
Among the main disadvantages should be noted the poor tolerance of ultraviolet radiation, low impact resistance.
Block house
Lumber is a type of Euro lining. Decorating the attic with wood allows you to decorate a room in a popular eco style or recreate a traditional Russian interior. The modern cladding perfectly imitates log walls. In the photo you can see the options for decorating a country house. In order to significantly extend the life of the interior coating, the wood is better treated special composition.
The block house has a number of undeniable advantages:
- perfectly resists dampness and mold;
- helps to create an original and interesting design;
- has a positive effect on health;
- helps to create a cozy atmosphere.
Timber imitation
Imitation of a bar - it is processed on both sides wooden plank small thickness. At the ends there are grooves and grooves for firmly attaching the boards to each other. To create a false timber, whole pieces of natural solid are used.
The quality characteristics of wood finishing material are in many ways similar to the clapboard. This is, first of all, the environmental friendliness of the material, ease of installation and long service life. Using a false timber or osb for interior decoration, you can create a wonderful interior, align the walls and hide flaws in the work.
Do-it-yourself attic interior decoration
Before proceeding with the interior decoration of the attic space, it is necessary to carry out a certain series preparatory work... To create a functional living space under the very roof of the house, it is necessary to carry out additional insulation of all surfaces. The technology for carrying out thermal insulation works largely depends on which insulation options were used during construction.
The attic is a fairly spacious room with sloping roof, in which it is necessary to install modern double-glazed windows. Regular airing of the rooms will help maintain the required moisture level.
In addition, skylights on the attic floor will help create an exclusive interior design. Well-located load-bearing beams constructions. The photo shows the design options for the rooms on the upper floor.
Preparatory work
Most often, attics are settled in those houses where the roof is broken. One roof slope is made steep, and the other flat. In order for a functional attic to turn out from an ordinary attic space, it should be slightly raised in height, around the entire perimeter of the house.
During the preparation of the attic room for finishing, it is necessary to carry out work on the insulation of the gables and walls. This should be done only if their insulation was not provided at the stage exterior decoration houses.
It should be noted that many finishing materials have excellent thermal insulation characteristics. These include lining, OSB slabs, drywall or fiberboard. If you plan to equip a kitchen or bathroom under the roof, then it is worth allocating additional time for preliminary preparation of the floor. It is better to make the floor completely sealed. To do this, a simple building structure is created with your own hands.
First of all, the entire floor surface is treated with a special waterproofing mixture. After that, an insulating tape is glued to the joints. Subsequently, a primer mixture is applied to the entire floor surface, including corners and joints smeared with sealant. On a completely sealed and level base, you can put osb plates and the material selected for finishing.
Insulation of the attic with extruded polystyrene foam  Insulation of the attic with mineral wool
Frame installation
To decorate a small attic space, you can create wooden structure... If the area under the roof has big sizesthen you need metal structure... To erect a frame with your own hands you will need:
- screwdriver or drill;
- suspensions;
- self-tapping screws;
- glue for insulation.
If the future frame is metal, you need to have a grinder, knife and tape measure on hand.
If a metal frame is provided, then first of all, the marking is carried out, then the guides are firmly fixed along the perimeter of the entire floor. Vertical profiles are installed at a distance of 60 cm from each other. They are attached to the base with self-tapping screws.
If the frame is wooden, then the wooden beams must be dried before work. The slats should be free of bluing, blackness or mold. To increase the service life wood material processed with a special protective agent. Wooden beams are attached using self-tapping screws in a similar way. A frame correctly installed with your own hands will allow the structure to become as strong and reliable as possible.
 Metal carcass
 Installation of wooden lathing
 Warming and waterproofing
Before you start decorating the attic room with finishing materials or OSB, the interior rooms need to be insulated and protected from drafts and moisture. The material for waterproofing houses is produced in rolls, which must be cut into pieces of the desired size. A construction stapler or ordinary wooden planks can be used to secure the waterproofing.
The canvases are fixed with a slight overlap - this allows you to create an absolute tightness of the structure. Waterproofing will not only protect the premises under the roof from moisture, but will also create additional noise and sound insulation.
Most often used as a heater mineral wool... Insulation can be found in mats and in rolls. Affordable and inexpensive material will not cause any problems even with self-insulation houses. Mineral wool is laid out in a dense layer between the frame parts. The insulation is fastened with liquid nails, glue or wooden slats. The insulation should be laid in such a way that there is room for full air circulation.
Cladding
The arrangement of the attic requires a special approach to the selection of finishing materials and original design solutions. In the photo, decorators offer various design options for the attic space.
On the top floor of the house, you can create a wonderful guest room, billiard room, mini gym, private office and even a bedroom with a small bathroom. For implementation design idea You can use a variety of finishing materials, but the most popular are drywall, wood and OSB board.
Registration wooden clapboard will allow you to create a wonderful environmentally friendly interior in a rustic style. It is not necessary to sheathe the entire room with wood; it is enough to decorate only the walls or ceiling. Decoration with OSB boards or drywall is used less often, this building material is more suitable for creating interior partitions... In any case, after installation, the OSB surface must be painted or pasted over with wallpaper. Each type of finish with one or another material has a number of features.
 Billiard room
  Guest room
  Personal Area
  Gym
Gym Block house
House block assembly is carried out as follows:
- before starting work, the panels, as well as the lathing beams, must be carefully treated with an antiseptic;
- panels are mounted on wooden crate, wooden beams of which must be at least 4 cm;
- panels are attached at a short distance from the wall, which will provide good sound and thermal insulation;
- after finishing work, the material should be coated with a primer and varnish.
 House block assembly in corners
  Sheathing block house on the crate
 Lining
There are several options for fixing the lining:
- installation to the frame;
- fixation with a stapler in the groove;
- secret method using cleats;
- with nails in the lining groove.
The fastening of the lining panels starts from the top. In order to hide the place of fixation, it is worth using cleats, which are attached to the groove, rafters or crate. Subsequent boards are joined to each other using a tenon and a groove. The joint of the last board is hidden with a plinth.
 Lining installation scheme
 Plywood
Working with plywood begins with the preparation of the frame, on which the elements will subsequently be attached using nails or self-tapping screws. Fasteners are attached at a distance of 30 cm from each other.
Lining the attic is an environmentally friendly option, affordable for every consumer, the surface has an excellent appearance. Special property material - ease of installation, which allows you to do the entire cycle of work with your own hands. How to do this, the article will tell you.
Features of finishing the attic room
An attic is an attic that acts as an additional room for living. It is most often used only in summer, it is built without insulation, and its main difference from the attic is the floor arrangement.
Due to the location of the room under the roof, in summer it heats up much stronger than other rooms, and in winter it cools down rather quickly. In the spring-autumn period, dampness appears here most of all.
Tip: If the attic will not be used as a living space all year round, then its decoration can be done in the most inexpensive way.
For lining the attic, lining is used from almost any coniferous wood.
It can be:
- Cedar - a noble wood species with an attractive texture that has a positive effect on the human body. Siberian cedar for the manufacture of lining perfectly complements the decoration of any room.
- Pine... It is a durable and wear-resistant material at a reasonable price for the consumer. In the decoration of the attic, it is used as decorative paneling. More popular is Scandinavian pine with a pinkish tint of wood, with a smooth surface that does not have knots and irregularities.
- Spruce. Wood preserves well appearance, protects against the appearance of mold and insects.
You can use larch. This is an elite tree, close to oak in its characteristics. It has high strength, does not rot from prolonged use, is often used as a decorative element.
For the production of lining are taken:
- Oak. It is characterized by high strength and the highest grade. Material:
- does not shrink;
- does not get wet from moisture;
- does not rot;
- has many shades and textures.
But its high cost does not allow its widespread use.
- Linden. It is a versatile tree species with pronounced healing properties... Linden is easily processed with improvised means, the lining from it has no knots.
Tip: Before sheathe the attic with clapboard, you should choose the material, taking into account its purpose and the characteristics of the room.
Besides:
- For aesthetic perception, the color with which the attic is finished with clapboard is also important. Lighter colors visually expand the room. In this case, lining the attic with clapboard is not desirable with dark types of wood, and for decorative elements a dark color is acceptable. An example of attic design with light panels with dark finishing elements is shown in the photo.

- Sheathing boards can be:
- flat shape;
- with decorative grooves on the sides;
- with imitation of round timber;
- with overlapping laying.
However, finishing with clapboard attic includes mounting the material on a surface that is located at an angle, which does not recommend using flat lamellas, otherwise the room will visually appear smaller.
- Decorating the attic with clapboard can be done in two ways of installation:
- horizontal... In this case, laying is carried out on the rafters, while it visually expands the room;
- vertical. This requires the construction of a horizontal sheathing, and the installation itself raises the ceiling.

Combined installation helps to give the room a zest.
Tip: Clapboarding of walls and ceilings should be done with insulation, even when using the attic only in summer. This will prevent the negative effects of moisture and cold, which can quickly deprive the finishing material of its attractiveness.
How to sheathe an attic with clapboard
Before starting the repair of the attic, the clapboard is finished with the processing of wooden lamellas.
To do this, they:
- They are impregnated with protective compounds.
- Are covered with varnish (see).
Tip: When using stain and oil, keep in mind that these compounds do not close the pores, this can lead to contamination and the need for frequent cleaning of surfaces.
The instructions for carrying out the work are as follows:
- Mandatory waterproofing of surfaces is performed. For this, a film is used, which is attached in such a way that a layer of air remains between the waterproofer and the roof.
- The crate is being erected. Depending on the method of mounting the lining - horizontal or vertical. Rafters can be used as lattice elements on roof slopes. For this, slats from a wooden bar are used, the cross section of which is more than 15x45 millimeters, which depends on the width of the board: with an increase in width, the cross section is chosen more. The pitch of the fasteners is approximately 50 centimeters.
- When performing insulation, heat-insulating material is placed in the spacer between the battens of the sheathing. This could be:
- mineral wool;
- foam or foam-plex plates;
- fiberglass.
The material, if necessary, is additionally fixed with "umbrellas". Then a layer of a vapor barrier, such as isospan, is placed on top, fixed in the battens of the sheathing with staples.
Tip: When carrying out work, it is necessary to ensure that the insulation and the vapor barrier layer are located in the recess of the cell without protruding from it. If the lamellas fit tightly to the insulator, ventilation is very difficult, this should be avoided. It is allowed to install a counter grill.
- Depressions are made on the beams with a step of half a meter by half the section so that the holes are offset relative to each other. Such channels are necessary to improve ventilation.
- The installation of the lining is carried out from the bottom up, and on the ceiling - from the window to the opposite wall, which depends on the way the lamellas are laid. When the elements are tightly joined together, it is recommended to additionally process their ends with a sealant, and fix them to the bars with special brackets or galvanized nails. Fasteners are made into a groove wall, and then closed with a ridge located on the next board.

- When installing the starter plank, it is trimmed to the required size and fixed with finishing nails. In this case, the kleimer is located in special depressions and is attached to the structure or rafters. The next panel with a tenon falls into the first groove.
- After installing all the elements, the final strip is adjusted in width, and if there is a gap, it must be hidden with a plinth.
It is better to process the material with protective equipment after two to three years, which is associated with the greatest influence of unfavorable weather factors on this room. In the video in this article, you can see the stages of installing the lining in the attic.
The attic of a country house, if desired, is not difficult to convert into a living space - a bedroom, an office or a nursery. At the same time, the appearance from the inside will largely depend on what kind of finish is chosen for the decoration of the walls, floor and ceiling.
Today there is a wide variety of materials that are perfectly suited for this purpose. Which one should you choose in one case or another, and how to do the attic trim with your own hands? We will talk about this later in the article.
Varieties of finishing materials
Do-it-yourself attic decoration can be done using only two main types of materials - traditional and modern. The traditional ones include lining, imitation of a bar, a blockhouse. Modern - drywall, plywood, cork panels, decorative plaster, etc. The choice of finishes depends largely on what style of attic design is provided for by the design project. If it's country, Provence, Scandinavian or classic, traditional materials should be used. For cladding the attic inside in high-tech or minimalism style, you should use modern species finishes.
On a note: In some cases, the finishing of the attic floor can be performed with a deviation from this rule. For example, in a room whose interior is decorated in the Provence style, decorative plaster of a light shade with a discreet "pattern" may look good.Thus, there are the most different variants attic finishes. The photos below clearly demonstrate exactly how this room, sheathed with one or another type of material, might look like:


Pros and cons of using drywall
So, how to sheathe the attic inside? Very often, the interior surfaces when decorating this room are finished with plasterboard. The main advantage of this material is that with its use it is possible to carry out a very original finish of the attic floor, arranging curved surfaces.

Attic cladding made using drywall can be very original and unusual
The only difficulty may arise when marking for sheets, since the walls of the attic are beveled at a certain angle. However, using a level, a sufficiently high-quality finish of the attic with plasterboard can be made. The video demonstrates the markup technique in detail:
Plasterboard sheets are mounted on the crate.
Important: Of course, before starting the plasterboard finish, the roof should be insulated and waterproofed.As you can see, the question of how to sheathe the attic with drywall is not particularly difficult.
There are some drawbacks in using this material for sheathing the attic floor from the inside. The fact is that roof structures sometimes move slightly as a result of house shrinkage or for other reasons. As a result, cracks may appear along the skin. However, the likelihood of such an outcome of events is not very high. The result can exceed all expectations.

Finishing the attic with plasterboard. Photo of the finished result
Advantages and disadvantages of lining
The main advantage of the lining is its environmental friendliness. Moreover, wood contributes to the creation of a healthy microclimate in the room. In addition, lining the attic with clapboard will help create a special "rustic" atmosphere in this room. The walls, decorated with wood, look extremely aesthetically pleasing. The lining can be used both for finishing the attic floor of a wooden house, and for brick or concrete. The only drawback of this material is considered only some difficulty in installation. Wall cladding with clapboard is a somewhat more laborious process than decorating with the same drywall.

Imitation timber sheathing
How to decorate the attic from the inside yet? Today, for cladding rooms, you can use not only ordinary lining in the form of a board. Highly interesting option attic design can be surface finishing with imitation of timber - one of the varieties of this material. When using it, the walls and ceiling look like folded from ordinary or glued beams.

The lining of the attic with imitation of timber gives the attic a stylish appearance
Blockhouse cladding
Often the attic is trimmed with a blockhouse - another type of lining. With its use, you can get cladding that imitates chopped walls. This allows even concrete and brick structures to be decorated in a "rustic" style. At the dacha, this finish looks just great.

Finishing the attic with a blockhouse. "Chopped" walls
Important: Various options for wood finishing of the attic floor allow a very harmonious design. However, the blockhouse, lining and imitation of a bar must be treated with special compounds that reduce the risk of fire and prevent rotting.The attic can be finished with clapboard of light wood species and dark ones. In small rooms, it is best to use the first option.

Interior decoration attic. Photos of rooms with dark and light lining
Other finishes
To the question of how to sheathe the attic from the inside, there is another answer - with plywood. The advantages of this finishing method include not only maximum ease of installation, but also low cost source material... The disadvantage of using plywood for cladding is that when the roof moves, the sheets can diverge and gaps form between them.

Plywood sheathing allows for a fairly aesthetic design of the attic
Plywood looks quite aesthetically pleasing on the walls of the attic. However, often when decorating it is pasted over with wallpaper. In the same way, you can finish on top and drywall. In the latter case, decorative plaster is sometimes also a fine finish.
You can beautifully decorate the attic using any of the commercially available materials. The choice of a particular type of finish depends mainly on the tastes of the owners of the house. With a little imagination, it shouldn't be hard to get something like this:


Clapboard attic finishing technology
Further, in all details, we will consider how to decorate the attic inside with clapboard. The use of this material for cladding implies a mandatory roof waterproofing device. For this, a special membrane is attached to the rafters from the outside. A counter-lattice is mounted on it for the roofing material.
Before proceeding with the finishing of the attic floor, the ceiling, walls and floor should also be insulated. On the inside of the roof slopes, thermal insulation material (usually mineral wool) is inserted between the rafter legs. On the pediments under cotton wool and lining, a crate is previously arranged. Next, using brackets, a vapor barrier layer is mounted.

The attic should be insulated before sheathing.
On a note: In order to prevent the heat insulator from falling out, the wire should be pulled between the rafters and the battens of the sheathing.After installing the vapor barrier, you can proceed with the actual installation of the lining. So, sheathing is done as follows:
- Before starting the sheathing, each lamella must be treated with a special compound that prevents rotting;

Before installation, the lining should be treated with special compounds
- A counter-lattice must be filled on the gable crate and rafter legs on top of the vapor barrier material. This is necessary for the ventilation gap device. The counter lattice will serve as the basis for the lining. In the event that the sheathing boards are located horizontally, the slats under them are stuffed vertically and, accordingly, vice versa. As a last resort, you can skip this step and do the cladding directly over the film. However, in this case, make sure that the heat insulator, together with the film, is between the rafters, and does not protrude outward;
- The decoration of the attic walls begins from the top if the lining is located horizontally (while the elements are mounted with grooves downward to prevent moisture from entering them) and from the window to the opposite wall in vertical orientation;

Finishing the attic with clapboard. Photo of the process of wall cladding with lamellas. In vertical orientation, work begins from the window
- For fastening the cladding elements, special clamps can be used, which must be installed in the groove and then closed with the comb of the next board. You can also use nails for this purpose, which must be sunk into the wood. When performing open fastening, use finishing nails. In the event that the counter-lattice is assembled not from a bar, but from metal profile, use self-tapping screws;

The lamellas are fastened during cladding using special clamps
- Decorating the attic with wood also involves facing window openings. At the final stage, they are trimmed with platbands made of the same wood as the lining. Further, all joints are closed with a layout.
In order to make it clearer for you how to decorate the attic with your own hands, we present to your attention a video in which this process is considered step by step.
So, we looked at a variety of examples of wall decoration, floor and ceiling attic. For cladding, you can use both plywood and drywall or lining. Of course, finishing the attic floor of a wooden house is best done using the latest material. Thus, you can preserve the general stylistic idea of \u200b\u200ba suburban building.
5186 0 0
Attic decoration: my experience in choosing solutions and materials
The photo shows the interior of the attic floor in my house.
Glazing
When building the attic, I preferred panoramic glazing - windows in the full size of both gables. There were several reasons for this:
- Such glazing helps to heat the room in winter. Absolutely free, I dare say, heating. Tested in the very first winter: at a street temperature of about zero, the attic warms up during the day to +13 - +17 degrees with the heating turned off;
- Natural room lighting is optimal for the eyes. Panoramic windows allow you to use it from sunrise to sunset;
- The attic with panoramic windows looks much more spacious - part of the visual border of the room disappears;
- Finally, they allow you to admire the surrounding landscapes - the sea and the mountains. Lack of beautiful views in Crimea is not observed.

Glazing with an area of \u200b\u200b26 square meters cost a total of 65,000 rubles (2013 price). Single-chamber packages with one energy-saving i-glass were installed in metal-plastic frames. After three years of operation, some conclusions can be drawn:
- Despite the large area, windows do not contribute to a significant increase in heat loss. Suffice it to say that in freezing temperatures (at -15 - -20C), heating of the attic with an area of \u200b\u200b60 square meters was provided by one inverter air conditioner with a capacity of 12,000 BTU (4.1 KW);
- Energy-saving glasses provide quite effective protection from the sun: sunny days the air conditioner manages to keep the temperature within the comfortable + 25C at +35 on the street;
- The illumination of the attic in sunny weather becomes excessive, and the curtains have to be kept closed for most of the day.

entrance
In my case, the presence of a separate entrance to the attic was dictated by the architecture of the house: the attic was built on the site of a cold attic above the slab. However, as it turned out, in a warm climate, such a scheme is optimal:
- On the top floor, guests can be accommodated or accommodate themselves at the time of their arrival. At the same time, you will not interfere with each other from the word at all: early awakening or late return home of one of the family members will not be a problem for the rest;
- The premises remain reliably soundproofed from each other. Watching a movie or a noisy feast in one of them will not interfere with a person relaxing in another;
- The staircase does not take up the useful area of \u200b\u200bthe interior. Moreover, its construction made it possible to provide the attic with a comfortable balcony.
Floor
I started the work inside the attic with the subfloor. OSB was chosen as its material on floating logs, laid directly on the floor slabs. Purchased thickness sheet material was equal to 15 millimeters, the step between the lags is 30 cm.

Significant differences between the slabs forced the logs to be laid on supports made of scraps of boards and plywood. The sheets were stacked in a checkerboard pattern, with the seams shifted from row to row, and were attached to the logs with self-tapping screws 51 mm long with a pitch of 30 cm.
Why didn't I cover the floor with wood - edged or grooved boards? Simply because it cost twice the OSB.
The final floor was laid last, after all other work was completed. A 32-grade laminate with a thickness of 7 mm was laid on a 3 mm polyethylene foam backing.

Finishing floor covering - laminate.
How did the floor perform after three years of using the attic?
- Laminate is very easy to maintain and tolerates moderate moisture - small puddles of spilled water and moisture when cleaning floors;
- There are no signs of wear even where the floor is constantly wiped by the feet of frequently moved furniture;
- The substrate also fulfills its functions conscientiously: the laminate does not creak when walking;
- Floating lags turned out to be a mistake... In some places, the subfloor began to creak under my weight. For the future, I made a conclusion for myself that the lags still need to be anchored to the overlap.
Ceiling
The finishing of the ceiling began with the filing of the galvanized ceiling profile CD for plasterboard to the rafters and crossbars. It was mounted on straight hangers, the step between the attachment points corresponded to the step between the rafters (about 0.9 meters). At the ends of the attic, the CD profile was inserted into the UD guide profile sewn directly to the window frames.

As a filing for the ceiling, a 12.5 mm thick Maestro plasterboard was purchased. A thinner and cheaper ceiling, I did not dare to use, since the sloped ceiling of the attic ends at the side walls at a height of only 1.9 meters and can be subjected to mechanical stress. The gypsum board was fastened with phosphated self-tapping screws 25 mm long with a pitch of 15 cm.
The last stage was filling with ABS Saten gypsum finishing putty (by the way, it left a very pleasant impression). Instead of the traditional serpyanka, I used rolled fiberglass to reinforce the seams. The procedure was as follows:
- Each seam was putty twice (gypsum putty gives a slight but noticeable shrinkage);
- Then the seam was roughly sanded with a # 80 mesh clamped in a vibrating sander;
- After grinding, the gypsum board was swept with a brush to remove dust residues;
- Then, on the PVA glue diluted with water in a ratio of 1: 1, fiberglass was glued. For the convenience of the sticker, I cut it into strips about a meter long;
- After the glue had dried, the fiberglass was covered with another layer of putty.

The plastered ceiling was painted with white latex water-dispersion paint. I had to paint in four layers: with a thinner layer of paint, the base shone through. Of course, each layer was applied with a roller perpendicular to the previous one, and the last one was applied parallel to natural light (along the attic).
Over the past time, no cracks at the seams characteristic of gypsum boards have appeared; the ceiling looks the same as after finishing work.
Walls
How to decorate the walls from the inside? In a wooden house, I would, without hesitation, sheathe them with the same drywall without a frame, but in this case it was not suitable. The frame of the side walls consisted of racks under the bend of the rafters with a step of 90 centimeters. GKL could be attached to them only along the crate from the profile, which meant an unwanted loss of usable area.
Decorating the attic with OSB slabs, followed by varnishing and installing wooden slats, was discussed, but was rejected for aesthetic reasons. In the end, the choice settled on 15mm plywood, followed by wall cladding made of MDF with textured vinyl.

By the way: if you are thinking of how to decorate the attic in the country except for the lining, take a closer look at the plywood. Coated with varnish - transparent or tinted - it looks very impressive. The seams between the sheets are closed with thin strips of a contrasting color.
The plywood was sewn to the walls with self-tapping screws; fine finishing the attic clapboard was made without clamps, screws and nails: the panels were glued to the silicone sealant.

By the way: it turned out to be most convenient to cut the lining and laminate with the help of a grinder with diamond disc... It gives a narrow and precise cut. At the same time, unlike an abrasive disc, a diamond disc does not overheat the edges of the cut and does not cause the material to burn.
What did the do-it-yourself wall clapboard look like?
- The panel is cut to fit the wall section;
- A sealant is applied to it with a step of about 15 cm in dotted or short strips;
- The panel is pressed against the wall and pressed at the bottom and top by a pair of inclined boards with weights piled on them (I used discs from the bar);
- While the silicone dries, the next panel is trimmed (taking into account the length of the segment remaining from the first);
- A sealant is applied to the new panel, after which it snaps into the tongue-and-groove lock of the panel previously glued, pressed against the wall and again propped up with a pair of boards;
- By the time the third panel is glued, the supports from the first one can be rearranged: over the past 10 - 15 minutes, the silicone has time to reliably grab.
The junction of the walls to the ceiling was decorated with a foam ceiling plinth, which closed the remaining gaps between the drywall and MDF panels. It was glued to the Titan universal glue.

A little trick: after applying the glue, the skirting board should be pressed into place, then removed and held for about a minute, and then pressed again against the wall and ceiling - already finally. The instruction is connected with the fact that liquid glue allows the baseboard to slide down under its own weight, and thickened glue will hold it.
Part of the space between the side walls and roof slopes was used for cabinets and niches. All of them are made from the remnants of plywood and edged with a plastic corner.


The joint of the walls with the floor is decorated plastic skirting board with cable channel. The skirting board is used for wiring electricity; all sockets except the supply instantaneous water heater in the bathroom, located directly above it.

At the end of three years, wall decoration has shown its practicality: the lining has completely retained its appearance, including the area at the head of the bed. There are no scratches or other damages on its surface.
Partition
The attic was divided into two rooms (according to the number of windows) - a study-living room and a bedroom. The partition is made of gypsum plasterboard, the frame is made of CW rack-mount profiles and UW guides 50 millimeters thick. Puttying, joint reinforcement and painting are completely identical to those for finishing the ceiling.

I decorated the jumper to the side walls with a universal sticker plastic corner width 25 mm. He, like the lining, was glued to the sealant. At the time of the silicone setting, the corner was fixed with plywood scraps nailed with thin nails.

Partition frame installed metal-plastic door with a somewhat unusual glass unit - mirrors on both sides. Such a door visually expands the room and allows the female half of the population at home at any time to make sure of their own attractiveness.

Bathroom
Location
A toilet and a bathroom in a private house are traditionally located at the outer walls and are equipped with light windows. However, the location at the gables is not always convenient, and in my case (remember, both gables are panoramic windows) it was completely impossible.
The combined bathroom was placed in the middle of the attic, equipped with forced exhaust ventilation over the false ceiling and a skylight leading to the hall.

Floor
It is customary to make the floor of the bathroom concrete, laying an insulated screed over the slab. I did differently:
- On top of the subfloor, I laid 25 mm thick DSP sheets on the mounting foam and pulled them in with self-tapping screws. The foam in this case was used as an adhesive, it binds the layers of the floor;
- Tiles were laid directly on the DSP. I used CM-17 elastic tile adhesive from Ceresit.
The design is quite viable. The floor has sufficient rigidity and does not play under the weight of a person. There were no leaks either, although water occasionally spills onto the floor.
Niches
The space between the vertical side wall and the roof slope was also used in the bathroom. There are a couple of niches in it for household chemicals, toilet paper and other little things. Walls of niches - plasterboard, fixed on a frame from a profile; I placed the same tiles on the shelves as on the floor. The edges of the shelves are decorated with a plastic corner.

Apron
The tiled apron above the bathroom was glued in a somewhat unusual way - on silicone sealant. Silicone was spotted on the back of the tile, then used to seal the joints. There are no leaks, for three years not a single tile has tried to peel off. Moreover, I have serious suspicions that now the tile can be removed only with a fragment of the plasterboard wall.

Plumbing
The bathroom has necessary minimum sanitary ware - acrylic corner bath and a floor-standing toilet with a lower cistern. The water is diluted with metal-plastic pipes. For heating, an Atmor Basic flow heater with a power of 3.5 kW is used.

The connection of a shower and a tap for washing deserves a separate mention.
For them, two on-board water taps were purchased. Both taps are installed on the bath shelf at different ends. Instead of the gander of one of them, the thread on the body is supplemented with a 3/4 - 1/2 inch adapter, to which a flexible line is connected. The second supply nut is connected to the inlet pipe of the flow heater.

The sewage system is brought out into the street in the gap between the side wall and the roof slope. The drain pipe runs right along the facade of the house and ends in a septic tank. The climate of Crimea allows such liberties: the average January temperature in Sevastopol is above zero.
The only plumbing incident occurred in winter, when a sewer pipe laid along the facade froze over in an unusually strong frost. To fix the problem, a self-regulating heating cable was quickly and decisively purchased. Repeated freezing did not create any problems.

Ventilation
If you are planning to decorate the attic in the country, and the cottage is visited only in the summer, opening windows with mosquito nets are enough for ventilation. I had a different situation: it was required to provide round-the-clock and year-round ventilation with constant, independent of wind strength and direction productivity. Of course, it was made compulsory.

An ordinary plastic sewer pipe was used as a venkanal. It is fixed with clamps above the crossbars rafter system and brought out through the top of one of the gables above the window. To prevent water from flowing through the pipe, its last section is fixed with a slight slope from the wall; the corner at the end of the ventilation duct is equipped with a deflector umbrella located just above the ridge level.
A duct fan with a diameter of 100 mm and a capacity of 105 m3 / h is inserted into a compensating branch pipe installed in a pipe break. The ceiling under the branch pipe is equipped with a self-tapping plywood hatch with a window insulation glued to it from above. A hatch and a branch pipe are needed to repair or replace the fan.

The ventilation supply circuit is dimmed; the dimmer is installed next to the light switch in the bathroom. It can be used to increase productivity or reduce noise levels to a minimum.

A tee is located in front of the fan in the direction of air movement. One of its outlet opens into the ventilation grill in the ceiling of the bathroom, the other into the space above the ceiling. For air intake in the bedroom and study, four more ventilation grilles are installed in the corners of the attic ceiling; they provide continuous air circulation in the space above the ceiling.

The ventilation is working properly; its performance is sufficient to ensure that the air in the attic is always fresh, and perspiration does not appear on the windows.
Lighting
I shared my own experience in the field of how to decorate the attic, but how to light it?
The best lighting ideas come from the use of center and area lights. However, in my case, light zoning was not required: the only functional area in the entire attic was my desk, which was perfectly illuminated by a desk lamp.
After some thought, my choice settled on a pair of 5-meter LED strips on smd 5630 LEDs powered by 12 volts.

The reasons? As they say in the hero city of Odessa, I have them:
- With a luminosity of more than 1000 lumens per running meter the tape provides sufficiently bright lighting throughout the attic area;
- It does not give shadows, which is very convenient when performing any small work (for example, when soldering);
- Finally, the tape is very economical: with a total luminosity of over 10,000 lumens, it consumes a little over 100 watts.
Nuance: it is better to glue an LED strip with a power of more than 10 watts per linear meter on a heat dissipator - an aluminum profile or any material with a sufficiently high thermal conductivity. In my case, the role of a heat dissipator was performed by ... a 10x40 mm cable channel that hides the wiring. The solution has shown its effectiveness: during long-term operation, the tape does not heat up above 50 degrees.

The power supply unit of the tape is retracted into one of the niches in the side wall and is equipped with a pair of switches - one-key in front of the power supply unit and two-key after it.

In addition, one of the terminals of the power supply is used to connect the emergency lighting - a piece of tape with a group of three LEDs. They burn around the clock and allow you not to stumble in the dark.

Conclusion
I sincerely hope that my experience will be useful to the dear reader. You can learn more about how and with what materials the interior decoration of the attic can be performed by watching the video in this article. I look forward to your additions and comments. Good luck, comrades!
October 4, 2016If you want to express gratitude, add clarification or objection, ask the author something - add a comment or say thank you!
A modern person, building a house, wants to get the largest possible usable area. That is why attics with heaps of old things and dust are becoming a thing of the past, and in their place are attic floors, which provide more living space and are especially loved by children.
The attic room can be decorated with various materials, but they say that the classics are always in fashion. That is why, decorating the attic with your own hands is the topic of this article.
So:
- In the course of the article, you will learn everything or almost everything about the lining, its advantages and disadvantages, about various design solutions, about the combination with various materials and much more. The same will be given detailed instructions for finishing the ceiling and walls with clapboard.

- Lining is a finishing material, which is a panel cut from natural wood, and having a groove-tongue docking system. This material is widely used for both interior and exterior decoration of premises.
- Recently, the market has appeared new Product, which is called eurolining. In fact, this is the same lining, but it is produced in strict accordance with European standards.
This lining has a working surface width of 96mm. The thickness ranges from 12 to 15 mm. Length - from 2 to 6 meters. - Among other things, this material does not need post-processing, as it is done during production. Euro-lining is resistant to the appearance of various types of fungi and mold, as well as it is not afraid of moisture.
- Using wood indoors is a good solution. Since besides the fact that it has excellent heat and sound insulation properties, do not forget that it is an environmentally friendly material.
The smell of wood will create an amazing atmosphere of cleanliness and comfort in the room. - The clapboard decoration of the attic floor is also good because you can do all the work yourself, without the help of specialists. The assembly will be within the power of even an inexperienced master.
All you need is a set the right tools and basic skills for working with them.
Like any other material, eurolining is divided into classes or grades of quality.
There are only four such varieties:
- "Extra" - the board of the highest quality from the best wood... In it, the presence of knots, cracks, mechanical damage, resin pockets, rot, exit to the outside of the core and even a change in color is unacceptable. The price of this class ranges from 500 to 1000 rubles per 1 square meter.
- Class "A" - here the roughness of the board surface is allowed; unlimited number of intergrown dry knots; ingrown bark in places, but not more than half of the board; several small cracks; up to two resin pockets and minor color changes. For such a lining you will have to pay from 220 to 250 rubles.
- Class "B" - the quality of this board is even lower. The presence of end chips and cracks, up to three mechanical damage, processing defects, longitudinal curvature, damage to the bottom of the groove, the presence of resinous areas and three wormholes up to 5% of the surface of the entire board are allowed. The average price of this class is 180 rubles per square meter.
- Class "C" - lining of the lowest quality, having, accordingly, the lowest price (145 rubles per 1 sq. M.). The presence of up to five fallen knots, through cracks, wormholes, resin pockets and blind blue is allowed.

Important! All grades of Euro lining are made according to a single technology in compliance with all norms and requirements, using the same equipment. They are equally dried and processed. Grade marking occurs in the process of sorting finished products.
Types of lining
In addition to varieties, eurolining differs in the structure of the profile and the complexity of the section.
Let's highlight the main five types:
- "Standard" - the front side of the board has straight chamfers. Its thickness is 16 mm, and its surface width is 96 mm (see photo 3).
- "Soft-line" (Soft lines) - differs from the previous one in that its upper and lower surfaces are strictly parallel and have rounded chamfers.
- "American" - the section of this lining is wedge-shaped. Simulates overlapping boards during installation.
- "Block house" is a wider board, the front side of which has a cylindrical shape.
- "Land House" - the upper and lower surfaces of such a lining are profiled.

- Separately, you can highlight the type of board that imitates a bar. This is what the people call it - "Imitation of a bar".
The main difference is that this board does not have an intermediate groove, and its thickness reaches 35 mm.

Raw materials
Eurolining can be divided into 2 more classes, differing in the type of wood used for production:
- The first type is larch lining. The raw material is Siberian larch.
Due to its increased resin content and density, it has excellent resistance to decay and moisture resistance. The same advantage is the absence of blue, resistance to insects and fungi, strength, beautiful texture, environmental friendliness and saturation with antioxidants, which will have a positive effect on the health of a person who constantly breathes air in a room with larch. - The second type is a lining made of coniferous trees. The useful properties and advantages of this wood are known to everyone. But it is worth noting some of them separately.
- More often in stores we find a product made from Angara pine. The main advantages of this tree are as follows: ease of processing, good density, a minimum of knots, and saturation with phytoncides (substances that disinfect the air).
- Fir lining does not withstand the weather and is susceptible to mold and insect infection. However, this wood is very soft, has a high knotty (good texture), and a complete absence of resinous areas.
- Spruce is a dense and durable material that, however, rotting on contact with the ground. Therefore, spruce lining is used for internal works, additionally processing with special compounds.
- Cedar - ideal for outdoor use, as it is resistant to temperature extremes. It has beautiful texture with pronounced annual rings.
Separately, it should be noted the most non-budget option - mahogany lining. This material is obscenely expensive, but if you can't afford it, don't be discouraged.
You can achieve absolutely any color of wood using different stains.
Design ideas
What you want to see after renovation, no one can better imagine and reproduce you. Work professional designers costs a lot, and not always they can guess everything that you need.
Therefore, having studied various manuals, having viewed a fair amount of photos and videos, you can always create a corner of comfort in your home yourself.

So:
- Attic rooms are never distinguished by the correctness of shapes and angles. There are roundings, sharp and obtuse corners, trapezoidal areas, bevels, slopes, and more.
And all these seemingly shortcomings will become the main feature of the finish. - In shaping the appearance of the room, use slopes, beams, rafters, ceilings and even chimneys. All of the above elements can be finished with the same clapboard, or with some other material, for example, drywall (see Finishing the attic with drywall: installation features).

- The lining looks great in combination with other materials, whether it be cladding panels, or OSB panels, or ordinary plaster and whitewash. In the next photo, you can see the option of finishing the attic, where the walls are made of plasterboard, plastered and whitewashed.
Only the ceiling is lined with lining. The flooring imitates wood and is matched in the same color scheme as the ceiling.

- The chimney in the center of the room is disguised with a material imitating a spiral. Windows with an unusual location also fit in organically.
Thanks to them, the room is very bright and it becomes possible to use a place along the walls for furniture.

- The combination of several types of eurolining also looks very nice. In the image above, there is a combination of two types: "standard" - the ceiling, and "block house" - the walls.
- To obtain an original effect, entire walls, or small parts of them, can be sheathed at an angle of 45 degrees. Also don't be afraid to experiment with colors. The right contrast will highlight the brightness and beauty of your attic.

Eurolining installation
As we have already said, finishing the attic floor with clapboard is not too tricky. The main thing is to know the basics and some subtleties that will make your job easier.
So:
- Starting to finish, in addition to the lining itself, you need to purchase material for the frame, insulation, waterproofing and other consumables required during installation.
- The attic floor is in direct contact with the roof, the walls of which do not have necessary level thermal insulation. Also, in this part of the house there is a fairly high level of humidity due to condensation formed from temperature differences.
In addition, no roofing system guarantees 100% leakage. - Before starting work, you need to take into account all these nuances and take appropriate measures.
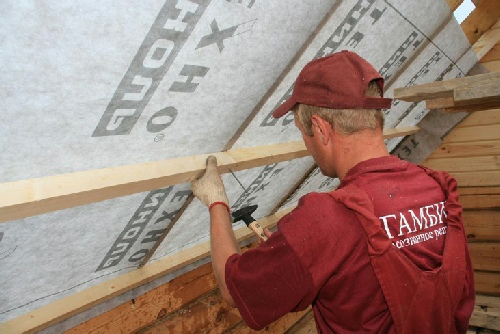
Waterproofing
The first step is to install a layer of waterproofing film:
- A good film should not allow water to pass through, without interfering with the evaporation of moisture from the inside. The most popular film is Hydrobarrier.

- With this film, we cover the walls with a continuous layer. It is fastened using a construction stapler, or ordinary nails with a wide head.
Additionally, you can strengthen the connection with a counter-rail. Joints and seams can be additionally treated with mastic. - The film has a front side with brighter markings.