How to replace the laser level. How to make a laser level with your own hands? Required tools and materials
The laser level is designed to determine the horizontal and vertical lines and planes in the construction of building structures and finishing. With this device, the geometry of the element can be observed with great accuracy. This is important for the strength and durability of the facility being built. But it is not always possible to purchase an industrial device. However, a skilled craftsman is able to create a laser level with his own hands. Let's consider how to do this, and whether it is possible to repair a broken level at home.
What is a laser level
The body of this instrument contains LEDs, which are sources of laser radiation. With the help of a bright glowing line, you can mark any object both horizontally and in vertical plane... Moreover, one person can easily cope with this work.
Lasers are of three types:
- prismatic;
- rotary;
- point.
Prism instruments create a linear ray projection. When the luminous line collides with an obstacle, the device captures the data and shows the required marking. Such levels are equipped with an auto-leveling system required to compensate for errors up to 6 °. The projection angle of the laser beam does not exceed 120 °.
The prismatic laser level has a short beam range - on average from 10 to 50 m.
Prism laser level allows you to obtain horizontal and vertical planes intersecting at right angles
Rotary devices are classified as professional instruments. They are equipped with point laser devices, but not fixed ones, but rotating at an adjustable frequency. Designed for marking very large areas such as construction sites. The rotary level can project a plane 360 \u200b\u200b°.
Rotational levels are distinguished by a longer range of the laser beam - from 200 to 500 m.
By installing a rotary level in the middle of the room, you can mark all the necessary points around the entire perimeter
The point level has the simplest structure: the laser device is clearly fixed, and behind it is only a focusing lens. It directs the light flux to one point. Set up the device manually. Such levels are equipped with one or more lasers. In the latter case, they are directed in different directions, which makes it possible to transfer markings from several planes - walls, floor and ceiling of a large area. The projection angle of the laser beam does not exceed 160 °.
The working range of the point level is from 15 to 50 m, depending on the model.
The compact and versatile point laser is designed for any leveling work at short distances
What is the device for?
The purpose of laser devices is varied. They are necessary for the following types of work:
- breakdown of the territory and installation of equipment with control of the horizontal and vertical position;
- marking and direction determination;
- surface leveling of the floor, walls and ceiling;
- arrangement concrete screed and assembly of floors with an adjustable level;
- conducting communication highways;
- installation of bulkheads and hanging accessories;
- installation of staircases.
In the latter case, such an ability of the device as marking inclined planes is used. For example, you need to install a railings on a flight of stairs. Having fixed a level with a laser on it, it is easier to install the railing parallel to the march.
You can understand how to use the level using the example of common construction and renovation works.
Leveling floor, wall and ceiling surfaces
When carrying out such work, additional control marks will be needed. Then the laser beam is directed along the plane. The laser is rearranged along the marks for more accurate determination of the evenness of surfaces.
When using a laser level and obtaining the same data, the floor is completely flat
Laying ceramic tiles
For such works, it is better to take a device with the function of cross-projection of rays in the horizontal and vertical. Thanks to them, even a novice master will be able to flawlessly lay out the tiles.
The intersection of the level lines is exposed to the center of the proposed tile joints
Wallpaper gluing
The gluing process itself is quite easy, but using a level makes the work flow even easier. Focusing on the laser beam projected onto the wall, it is much more convenient to align the wallpaper.
Horizontal projection will contribute to the correct gluing of fillets and borders
Assembly of cabinet furniture
Even in the presence of even walls in the house, which is quite an infrequent occurrence, the interior can be spoiled by crookedly hung cabinets, shelves and other hanging accessories. And with the help of a laser that creates a circular level line, you will immediately see how to install hanging furniture without distortions.
The horizontal beam of the laser level will help with the installation of curtain rods
Redevelopment
The plane builder makes this process easier. To determine the exact placement of plasterboard walls and partition elements, you will need to install the laser so that its projection onto the floor, walls and ceiling is a mark for the intended partition.
When installing a metal frame under plasterboard wall the laser level is installed on the floor, the beam is directed upward so that it marks the line of installation of the profile
A simple device can be used outdoors only in cloudy weather or at dusk.
If a lot of external work is expected (digging trenches, carrying out communication lines, making a foundation), it is better to get a professional plane builder with a beam visible in sunlight.
How to do it yourself
The idea of \u200b\u200ba laser level with your own hands is quite simple - the pointer is mounted on a movable platform. The use of such a mechanism allows marking by turning it at one level through 360 °.
Required tools and materials
In addition to the laser pointer, the following materials are required:
- glue;
- files for metal;
- jigsaw;
- a piece of corrugated plastic (for example, a headlight from a bicycle).
Step by step guide
You can make a laser level with your own hands from a pointer in just an hour:
- Let's improve the pointer. Saw off its tip, leaving the threaded part.
Laser pointer emits a point
- From a piece of plastic, cut a circle with a diameter, like the tip of a laser pointer.
If you pass the pointer beam through corrugated plastic, you get a line
- We glue the plastic circle on the tip of the pointer.
The place where the parts are glued can be additionally coated with cold welding and turned
The imperfection of this version of the level is its one-sided mobility - only horizontally.
The laser level must be fixed perpendicular to the plane
If you need to apply markings not only horizontally, but also vertically, you can try to mount a more advanced device:
- A hole is drilled in a wooden post so that a long groove is obtained (or a ready-made plastic tube is taken). A pin, bolt or self-tapping screw is inserted into the hole in the center and fixed. The hardware is placed with the head down and secured with an adhesive.
- A wide articulated fork is mounted on the pin. To prevent it from loosening and scrolling, a rubber gasket is installed between it and the rack. The plug fits a base made of plastic or wood. A screw fastener passes through it, fixing the workpiece on both sides of the fork.
- The building level and an improved pointer are fixed on the base.
This type of assembly allows the device to change the position of the laser in the vertical direction. If you are smart and find the right fork, you can actually assemble a device with a vertical rotation of 270 °.
It should be borne in mind that what bigger size forks, the wider the workpiece will be required to create a stable position.
This device is collapsible. For the stability of the base, you will need to find a fork with a hinge part of the desired section.
If there is no suitable plug, you can make it yourself from a durable metal-plastic ring of the desired section.
You will need to drill three holes: two on the sides, opposite each other, and the third exactly in the center between the two future "teeth" of the fork. Then the ring is trimmed to form a semicircle with three holes.
A home-made laser can be modified: screw an ordinary nut or "wing" onto the mounting screw, which allows you to quickly loosen and fix the base, as well as change the direction of the laser up or down.
Video: DIY laser level
Setup and Calibration
After assembly homemade device do-it-yourself laser level adjustment is required.It is necessary to check it - to calibrate it for measurement accuracy. An additional bubble level is required to run the test. Calibration is carried out as follows:
- The device is placed in the center of the room and marks are made on the opposite walls at the point of intersection of the planes.
- The level is transferred to one of the walls at a distance of about half a meter, another mark is made above or below the first.
- The device is turned to the opposite wall, a mark is placed.
- The distance between the marks on both walls is measured and the error is calculated.
For example, the difference between the marks on the first wall is 4 mm, and on the second - 3 mm. As a result, the error is 1 mm. If it is more, then the device requires adjustment.
The self-assembled measuring device can be placed on a tripod or an adjustable pedestal, which will give the product convenience and functionality
To calibrate the vertical, mark two points in the vertical plane and check the marks against the bubble level.
If no deviations are noticed, then the plane builder is ready to work. If there is a discrepancy in the readings, the homemade laser device is adjusted by changing the location of the platform or articulated fork.
How to repair
Due to the failure of the laser mechanism, it may show an incorrect level or not work at all.
Homemade device needs repair:
- in case of diode breakdowns;
- with sticking or failure of buttons and switches;
- in case of malfunctions of the emitter, when the laser does not shine or the beam is very dim.
Most often, repair of laser levels is required after the device falls. At the same time, the settings are lost, which leads to the device issuing incorrect indicators.
If repair of a homemade laser is required, you must disassemble the device and reassemble it. If the problem is with the pointer, it is easier to replace it with a new one.
In order to avoid repairing a homemade laser level, it is important to be careful when working with it, especially on the street.
For building flat planes on large-scale construction sites, industrial levels with a large working range have been created. For minor repairs, you can make a laser level yourself.
The building level is a fairly simple device that allows you to determine the deviation of a certain surface from a strict vertical or horizontal. The level is used in most finishing and home repair work, as it can significantly improve their quality.
However, the level is not always at hand. What to do in this case? Postpone work until buying a level or take measurements "by eye"? If you are faced with just such a choice, then it is better, of course, to first acquire a level, then start working.
However, now we will look at how to make a homemade level with our own hands.
First, let's try to collect a level based on communicating vessels. Naturally rather primitive. Meanwhile, with its help, you can check how flat the floor and ceiling are, as well as evaluate the deviations from the horizontal of other surfaces.
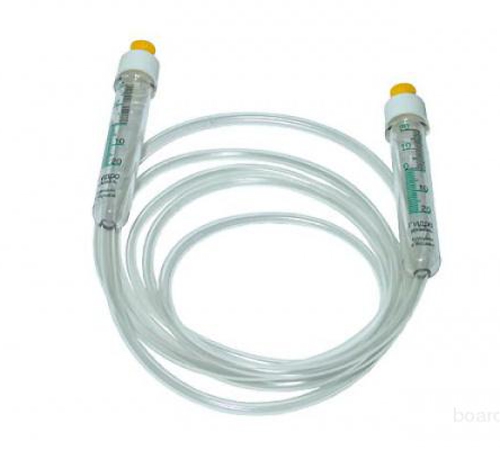
For the manufacture of this level, only 2 syringes and one flexible tube (the best option is from a dropper). If you plan to evaluate the evenness of floors or ceilings, then the tube should be of sufficient length - equal to the length of the room. It is advisable to choose larger syringes so that you can clearly see the divisions on them.
We connect them with a tube, and that's it - the level is ready to go.
- Pull the plunger out of the syringes and fill in water so that it fills the entire tube and each syringe approximately halfway.
- It is advisable to tint the water, at least with tea.
- Please note that during operation, it is not necessary to insert the pistons back.
- Syringes are brought up to the ceiling surface at different locations (for example, at opposite ends of the room) and secured.
- Due to the fact that the liquid in communicating vessels always has the same level, if the ceiling has a slope, then the liquid will fill the syringes to different heights. With a flat ceiling, the marks will show the same fill. This will be clear evidence of the presence or absence of bias.
- If you are measuring the slope of the floor, then the syringes must be installed on two slats of the same height so that the tube does not lie on the floor (this will affect the result).
Using a syringe, you can also make a regular bubble homemade level do it yourself. It will allow you to determine deviations from the horizontal or vertical of a certain surface (planks, window sills, etc.).
For this we need only one syringe, no matter what size, and a wooden block.
The procedure is as follows:
- Fill the syringe with water.
- Let the air out so that there is little left.
- Plug the hole for the needle (even gum will do).
- Thus, we have a sealed flask with water and an air bubble, that is, the main component of the bubble level.
- We fix the syringe to the bar with scotch tape, and proceed to work in the same way as with the usual level - we apply the bar to the surface of interest to us and look at the position of the bubble in the syringe. On a flat surface, it will take a strictly central position.
Beforehand, you may have to experiment with bubble volume. It is also recommended to put marks on the syringe indicating its middle. If you plan to determine the evenness of vertical surfaces, then the syringe will need to be fixed across the bar so that it is perpendicular to the surface. If the syringe is "standing", measurements will be interfered with by its tip intended for attaching the needle, since air will go there.
It is impossible to imagine the production of any construction and repair work without using a level. A good level is a guarantee of the quality of the work performed. It is thanks to the building level, of course, in conjunction with the conscientiousness of the builders themselves, that ideally rectangular corners in the rooms, smooth walls, smooth horizontal floors, correctly installed door and window openings are obtained. It is impossible to imagine repairs without using the level, even an elementary cosmetic one. The level is applied when gluing wallpaper, while laying tiles. At the same time, it is not at all necessary to buy it. The building level is easy to do with your own hands.
Varieties of building levels
The building level is a device by which the vertical and horizontal position of the planes is determined. It is thanks to the application of the level construction Materialsused in decoration and repair are installed as accurately, smoothly and correctly as possible.

Modern industry offers users building levels for every taste. Different lengths, from different material... When choosing a device for a particular type of work, you need to pay special attention to its ease of use and, of course, accuracy.
The following main types of building levels are distinguished:
- Water level.
- Bubble level.
- Laser level.
- Pipe level.
- Magnetic level.
Consider each of the listed types levels, their disadvantages and advantages in more detail.
Water level
The water level allows you to determine if the surface deviates from the horizontal position. It consists of two flasks connected by a tube. The length of the tube ranges from 5 to 25 m. The flasks are marked with a scale. The weight of the water level depends on the model and ranges from 300 to 1100 g.
The main advantages of the water level:
- Ease and ease of use.
- Long hose length.
- Low cost.
During the operation of the water level, a number of problems arise:
- When filling the tube with water, do not allow air bubbles to get there. Air in the tube will result in significant measurement errors.
- Do not use the device near heat sources. Place the measuring device at least 1.5 m away from heating devices.
- The device is designed to work exclusively on horizontal surfaces.
- Using a long hose in small room not very convenient.
Bubble level
One of the most popular types of the building level is the bubble level. Consists of a one-piece body with one or more ampoules built into it. The maximum number of ampoules is 3 .. They are filled with a liquid, usually alcohol. The liquid necessarily contains an air bubble.
The purpose of the device, equipped with one ampoule, is to work with horizontal surfaces.

But with the help of a device equipped with two ampoules, it becomes possible to work with vertical surfaces.
Thanks to the third ampoule, it became possible to display turning levels.
Most often, bubble levels are made in a rectangular shape. The size range is very large. The length of the device ranges from 0.2 to 2.5 m. There are models up to 4 m in length.
The materials for the production of the housing of these measuring instruments are aluminum, wood, impact-resistant polystyrene and many others. The main filler for ampoules is alcohol.
Among the main advantages of the bubble level, I would like to highlight:
- High precision.
- Ease of use.
- Acceptable price.
- A huge variety of models.
The price range for such measuring devices is very wide. The cost of the device depends on its size, manufacturer and many other factors. It is impractical to purchase the cheapest devices. They are neither precise nor durable. Even if a very irregular use of the level is planned, the construction professional device will become the best choice... It is made of a more durable material, better withstands shocks, and has the highest accuracy.
When buying a bubble level, pay attention to the following points:
- The flasks must be very secure. Staggering is unacceptable. You should not choose a model with flasks fastening with screws. The possibility of self-adjustment brings the consumer only unnecessary worries and problems. The adjustment almost immediately gets lost. You have to do the setup again. The best way - flasks mounted tightly.
- The divisions on the flask should be clear, the bubble is clearly visible. The smaller the gap between adjacent divisions, the more convenient it is to work with the device.
- It has long been noted that the heavier the bubble level, the more accurate it is. When choosing a tool, pay attention to the models, the body of which is made of aluminum.
- The most popular among consumers are models made in the shape of the letter "X" and equipped with rubber handles. Their ease of use has been repeatedly noted.
Magnetic building level
One of the types of bubble level is the magnetic building level. Its main difference is the presence of special magnetic mounts. Thanks to them, the level is easy to attach to metal surfaces. It does not fall or slip.

Pipe construction levels
Another type of bubble level is the pipe level. Distinctive feature pipe building levels - small size and weight. As a rule, they are made in the form of a rectangle. A less common option is folding pipe levels. The main area of \u200b\u200buse is working with profiles and pipes.
In order to securely attach to the pipe, this type of measuring device is equipped with additional accessories:
- Magnets.
- Perforated tape.
- With a cord.

Laser level
The laser level is a small device that can be attached to any surface. Among the most popular types of fastening, I would like to highlight:
- Magnets.
- Tripod.
- Fastening with straps.
Distinguish between laser levels used for the purpose of building a direction and building a plane. The level intended for plotting the direction simply bounces off the points. But the device for constructing a plane is equipped with an optical system that turns the beam into a plane.

There are several types of laser levels:
- Rotary. This device rotates around an axis. This creates a line. Differs in a very durable body, good protection from external influences. Perfect for many renovation work, for example, for installing stretch ceilings.
- Positional. Two sources of radiation allow the formation of visible planes. The main application is interior decoration work.
- Self-leveling. The laser level is equipped with an internal pendulum that emits five beams and a cross-shaped sight.
The main advantages of the laser level:
- Long range. Some models operate at a distance of 100 m.
- Highest precision.
- Some models are equipped with cross lines.
The main disadvantage of laser levels is their very high cost. The price of the most ordinary and very unassuming laser level is the same as the price of a professional bubble device.
How to make a water level with your own hands
The simplest type of level is the water level. And it's very easy to make it yourself:
- Take two 20 ml syringes without needles and a thin hose of any length. An ordinary dropper is perfect as a hose.
- Remove the plunger from one syringe and connect it to one end of the hose.
- Prepare liquid to fill the level. Use ordinary tap water, lightly tinted with tea leaves, as a liquid.

- Use a second syringe to fill the system with fluid. Not only the hose should be completely filled, but also the first syringe.
- Remove the plunger from the second syringe, having previously connected it to the hose. The water level is ready. It is a fluid-filled construction of two syringes connected by a hose.
The device works on the principle of connecting vessels. To mark a horizontal surface, you must:
- Measure and mark the desired height on one of the walls.
- Apply one of the syringes to the mark so that the water level coincides with the mark. Secure the syringe to the wall with tape. When working together, there is no need to attach the syringe, it will be supported by a partner.
- Apply the second syringe to the walls and mark the water level. All elevations obtained will correspond to the same level above the sea surface. When combined, you get a perfect horizontal surface.
When storing a homemade water level, the syringes are closed with pistons.
The main advantages of using a homemade water level are:
- Low cost of the device.
- Ease of manufacture.
- Simplicity of work with the device.
How to make a laser level with your own hands
The purpose of using a laser level is to mark the plane, both vertical and horizontal. They are indispensable in the process of pouring the floor, during installation interior partitions, tile laying, wallpapering and many other works. Even for even arrangement of furniture, the laser level will come in handy.
There are two ways to make a laser level with your own hands.
The first manufacturing method:
- Take laser pointer... Cover the hole in the nozzle with a piece of cardboard. It is better to take a nozzle without a pattern. Punch a small hole in the middle of the nozzle. Place the attachment on the laser pointer. Turn on the pointer and aim at a vertical surface. If a small bright dot appears on the surface, everything is done correctly.
- Take the wooden block. Its length is about 130 cm. Use an ax to cut one end. The result is a stake sharpened on one side.
- Take a straight piece of plywood or board. The shape of the piece is square. Side size 10 cm. Attach to the flat end of the peg.
- Attach a strip to the center of the plywood with a screw or nail. The length of the bar should match the length of the bubble level. The bar must be able to rotate in a circle.
- Attach a bubble level to the bar.
- Place a piece of thick rubber on the level. Attach the laser pointer to the rubber using a clamp.
- The device is ready.
The way to use such a laser level is as follows:
- Place the stake on the site. Level it up using a bubble level. When correct installation the bubble of the level is in the center and does not move when the bar is rotated.
- Turn on the laser pointer. Mark the spot where the ray reflects on the wall.
- Rotate the plank to mark other points where the beam hits the walls. All the marks obtained lie on one horizontal surface.
Let's consider how to make a level in the second way:
- Take a small container and fill it to the brim with water. This can be a basin, a bucket, or a regular saucepan.
- Attach a laser pointer to a piece of styrofoam. Use a nozzle without a pattern, in the form of a dot. Try to keep the pointer flat on the foam. You can attach it with an elastic band or a clamp.
- Place the container with water at the required height for marking.
- Dip the styrofoam into the water.
- Turn on the laser pointer.
- By rotating the foam around its axis, mark the points of intersection of the laser beam with the surfaces. The resulting elevations are on the same horizontal surface.
Of course, the considered self-made levels are far from ideal. However, they are quite workable.
How to make elementary devices for determining horizontal and verticality
- The most basic device for verifying verticality is the plumb line. It is widely used during renovations, such as wallpapering: Take a small, heavy object. A fishing weight is perfect. As a last resort, even scissors will do.
- Tie a thick thread or fishing line about 2 m long to the weight. The length of the thread depends on the height of the room.
- Attach the end of the string to the top of the wall, loosening the weight. The load must not touch the floor.
- Using a pencil or marker, mark the wall along the taut thread. As a result of connecting the marks, a perfectly vertical line is obtained.

Checking the horizontal surface is also very easy:
- Take the most ordinary wooden isosceles triangle.
- Drill a small hole in the top opposite the base.
- Attach a string or weighted line to the hole. A lead weight for fishing is ideal as a load.
- Mark the middle of the base of the triangle with a line.
- Place the base of the triangle on the surface to be tested so that the weight falls freely downward. The coincidence of the thread with the line on the base means that the surface is horizontal.
The laser level is an irreplaceable thing in the household. Operation of the device does not require special skills, it is enough to install the device in the required area and wait until the lines are built. The markup is performed in accordance with the position, it can be vertical or horizontal installation. The finished product is sold on the stalls at prices that are not affordable for every home craftsman, so there are ways to make the device yourself.
Design features of laser levels
The appearance of the device is compact, the mounting design allows installation on any type of surface. Before making a laser level with your own hands, you need to familiarize yourself with its main components:
- magnetic construction;
- tripod elements;
- special fastening belts.
In addition to the installation method, construction laser-type leveling devices differ in the method of transmission and projection to the beam surface. Materials applied to indicate precise direction project the highlighted element. Plane state devices have optical elements capable of converting a beam into a plane. To date, there are many levels, but the masters of their craft are in demand a few installations, the subcategories of which:
- The rotary design of the instrument allows the optical head to rotate around its axis, which projects accurate readings. The universal device is suitable for various construction works, the robust housing provides protection from aggressive environments.
- Multiple laser level sources allow you to create a positional plane. The device is used in finishing works of structures.
- The self-leveling device is equipped with an internal pendulum. The optical head is configured for parallel operation with five directions, with a cross-shaped sight. It can be used in various types of finishing works.
The design is indispensable for repair or construction at home; professionals often use the devices. For a home craftsman, purchasing a finished device will cost a pretty penny, and marking a large volume with the usual level takes a lot of time. Therefore, there are ways to make a laser level with your own hands, production differs in the level of complexity of execution.
Basic materials
The simplest design can be made from unused items with your own hands. It is not difficult to make a level with a laser pointer, it is enough to prepare required material and follow the instructions. Do not neglect the instructions and do it your own way, before introducing a change, it is necessary to study the design, because output parameters may become invalid. For simplest installation would need:
- an ordinary laser pointer, sold in stationery or children's toy stores;
- porous rubber of sufficient thickness, but small size;
- small bubble level simple type, which is checked for accuracy of readings before use;
- wooden block, size matchboxpre-sanded;
- support in the role of an even stick;
- plywood sheet 10 × 10;
- a metal clamp or thick plastic straps corresponding to the diameter of the pointer;
- screws.
After preparing the entire list of materials, you can start assembling the required product with your own hands.
The simplest level of a laser pointer
The usual installation option may require financial costs only for the purchase of a laser pointer, the rest of the components are available to every home craftsman. You need to make with your own hands suitable mount pointers so that it can rotate. A homemade laser level will require the following additional tools:
- pointer;
- a bar measuring 2.5 cm, 50 cm long;
- electric drill;
- cord;
- stick in the form of a support.
The assembly is carried out observing the sequence, it is not difficult to perform the actions, it is important to have the material at hand.
- In the bar, holes are drilled on both sides, a cord is installed in one of them, the other is intended for the indicator.
- After installing the laser pointer with your own hands, a rope is attached, the main task of which is to hang the structure. The diameter of the holes should be slightly larger than the cord for free play.
- The rope must be tightened tightly, and any suitable stick is used as support.
The main requirement is the reliable fastening of the support, if this condition is not met, the level readings are considered incorrect.
Laser level made of foam and water tank
A more accurate mechanism created is possible at home by adding some component parts to the structure. You will need a convenient container with which you can freely position the mechanism, plasters or plasticine, a floating element, dense foam is well suited as it.
The laser level is made by hand, has some features during the assembly process, which are important to observe in order to obtain an accurate measuring device.
- A small container, which can be an unused pot or bucket, is filled with water.
- A laser indicator must be fixed on a piece of foam, the nozzle must be point-like, fastening is done with a clamp, plasticine or other in an accessible way... Shrinkage is performed strictly vertically, without deviations, in this case it is possible to miss the accuracy of the entire installation.
- The tank is installed at the required height, the indicator turns on.
- By smoothly changing the position of the indicator, points are marked on the walls of the room, all marks are exactly in relation to the horizon.
Measurement accuracy in this case is difficult to achieve, however, during finishing work, this level is quite capable of replacing primitive marking systems.
DIY laser cross
In everyday life, it is important to install high-quality interior details, furniture, paintings and many other items on the walls. For these purposes, a home-made level is made, the projection of which at the exit looks like a cross. Of the materials, a tripod mechanism from a camera or video camera is used, which can be made by hand, an old disk player.
The tripod is fitted with a cross shape made from laser pointers, with a position that allows rotation in the desired direction. For this, it is possible to use a drive component from a disc player. The height adjustment is set by means of the position adjustment tube. Discs with a quantity of several pieces are glued together and mounted to the player's drive. A homemade design is fixed at the end of the work, for this you can apply super glue or clamps.
This self-made design will allow you to adjust the installation in any direction without changing the height of the marking. With such a device, it is possible to most accurately set the level on any surfaces, but manufacturing will require small financial costs.
The main advantages of a homemade tool
It is important to understand when using a hand-made device that it is impossible to obtain super-accurate data from it. Operations performed by the device can be in open space, small distances, in contrast to purchased counterparts. In a domestic environment, a modified laser level will allow the mechanism to be used instead of a conventional bubble device.
The main differences are:
- The marking speed is significantly increased as the level sets the exact values \u200b\u200bon the plane. When working with a partner, it is possible to mark the premises in a matter of minutes, which significantly saves valuable time.
- There is an error, but its value is minimal and is suitable for almost all types of finishing work. Simple construction will allow even a novice master to use the device.
- The length of the beam depends on the power of the purchased laser; for large volumes, it is possible to increase the parameter using a special material purchased from radio components.
The main advantage of the device is the possibility of projection on a horizontal plane. This feature allows the home craftsman to control the quality of the layout of both vertical and horizontal position. The laser structure is used for finishing works, furniture installation, and other types of construction. It is also possible to use a self-made level on the street, when erecting fences or small extensions.
Every home craftsman understands the importance of the device, but there is no need to go straight to the hardware store. It is necessary to understand exactly if the work is not so complicated, you can make a mechanism with your own hands from improvised means, significantly saving the budget.
After manufacturing homemade device you need to correctly configure it. When using the version with a water measuring system, there are no problems, the basic structure requires the basic adjustment.
The process is as follows:
- The peg is installed in the floor by driving in or by a fixing stand. The support is screwed in until it matches the bubble level in the ideal position.
- The indicator turns on, aims at the required surface. By careful rotation it is possible to mark the walls.
- A self-tapping screw is screwed in the marked area, the second place is marked next to it, after which the rail is installed.
After adjustment, the level moves a short distance to check if the values \u200b\u200bmatch, it is possible to continue working. When working with the tool, it is necessary to observe safety precautions, wear protective goggles, and exclude direct eye contact with the beam.
When using a homemade structure, it is important to follow the exact markings, if the device goes wrong, you can get incorrect readings. It is necessary to monitor the vertical or horizontal position of the beam, and when using the foam component, wait until the device takes the desired position.
A DIY laser level made from scrap materials will help save a decent amount of money and become a good alternative to professional construction equipment. During repair and construction work, it is very often necessary to carry out markings on the same level, but at a great distance. The bubble level is too inconvenient for this type of marking, so you need to get a tool to create marks at a distance. A construction laser is great for this kind of work. But such a tool is incredibly expensive, so the only option for most may be to create such a tool with your own hands.
The laser level is an indispensable tool for repair and construction, which can be made by hand.
Differences of a homemade model
A homemade laser level can be used for mirror and symmetrical markings over a long distance during construction or renovation. Of course, homemade option has a small radius of action: about 10-12 meters. But this is enough to complete most of the necessary notes.
Professional instruments are capable of making markings, calculating angles, and much more. But the big disadvantage of such devices is their price.
Some of the electronic models start at two hundred dollars, which is not so cheap. But in most cases, many of the capabilities offered by professional equipment will not be needed, so you can do without homemade construction... A homemade level will cost ten times cheaper, and you will need materials at hand to assemble it.
Tripod or adjustable foot option

Do-it-yourself laser level can be placed on a tripod or adjustable stand. It will be a pretty convenient and functional design. Of the tools you will need:
- drill;
- set of wrenches;
- hammer;
- needle.
We use as materials:
- wooden block;
- laser pointer;
- bubble level;
- electrical tape;
- plastic clamps;
- scotch;
- nails, screws, screws or screws;
- plastic and wooden plane of the same size (planks, tiles).
The design idea is quite simple - the laser pointer is placed on a movable element. With the help of such a device, you can make markings 360 degrees around the axis at the same level. We'll need a childish or more powerful laser pointer, depending on the budget. It is with this small element that the work begins.
How to make such a device is described below:

- Let's start by modifying the pointer. The glass or plastic lens must be removed from the attachment. Instead, you can place a small piece of cardboard inside or seal the hole with electrical tape on the outside.
- Next, using a needle, you need to make a hole exactly in the center where the beam will pass. A small hole made by the needle will reduce scatter and increase the accuracy of the instrument.
- The next element is the platform. To make a movable plane, you can connect plastic plate and a wooden plank of the same size with a self-tapping screw. Such a detail will allow our device to rotate around an axis.
- Place a bubble level on the platform, and on it a rubber shock absorber (a piece of rubber of a suitable size).
- We install a laser pointer on the rubber and fix it with tape, clamps or in another possible way.
The homemade construction is ready. But it must be tested before work.
For calibration, you can select two points, mark them using the resulting laser level and connect them with a thread or fishing line. Check the slope with a level. If there are no oversights, then the equipment is suitable for creating marks.
More flexible option
The disadvantage of the first type of construction is its limited mobility - only horizontal rotation. If there is a need to make marks not only horizontally, but also vertically, you can try to build the following type of structure:
- You will need a plastic or wood base.
- A small pin, bolt or screw is fixed at the base. The last elements are placed head down.
- A wide articulated fork clings to the resulting mount.
- The articulated fork will hold a piece of plastic or wood to hold the laser pointer.
- A hole is drilled in the workpiece, in diameter equal to the screw, which will pass through it approximately equal to the diameter of the fork ears.
- A pointer is attached to the workpiece, and if there is room left, a bubble level.

Thanks to this type of construction, the vertical position angle can be changed. Depending on the ingenuity and the fork found, almost a full 270 degree vertical rotation can be achieved. The lug nut allows you to quickly loosen the fixing screw and change the position. It is worth considering that the larger the fork, the wider the base will be needed to ensure a stable position.
The design can also be improved:
- A groove can be made in a wooden blank, in which it is convenient and reliable to fix the pointer.
- In the adjusting screw, you can use both a regular nut and an element with ears, but the second is much more convenient.
- The non-threaded pin design will be collapsible. For it to be stable, you will have to choose the appropriate diameter for the articulated yoke coupling. In the case of a thread, you can also use a homemade fork.
- If there is no fork, its likeness can be made from a metal-plastic ring of sufficient strength, you just have to choose the right diameter. You will need to make three holes: two on the sides, opposite each other, and the third at an equal distance from the two future "ears". Next, you need to cut the ring opposite the last hole. You get a semicircular blank with a hole at the bottom and bolt ears on the sides.
- To prevent the homemade fork from loosening and spinning when turning, you can place a rubber gasket under it.
Conclusion on the topic
If there is no way to purchase expensive building tools, you can try to make them a home analogue.
Using available materials, you can get a cheap functional model great for creating markup. Such a tool can be used to mirror the layout of rooms during renovation or planning. suburban area... Just take into account the small radius of the laser. While the tool does not look impressive, it is great for marking points.


