How to make a corner sofa with your own hands. Do-it-yourself corner wardrobe: device Make a corner built-in wardrobe
A corner cabinet with your own hands can be made in one day or even in a few hours. It all depends on the skills of the performer, the quality of the instrument used. This task is within the power of even a beginner who has never dealt with the creation of furniture.
A corner wardrobe is a handy piece of furniture that allows you to store things while saving space. The dimensions of the product depend on where you plan to install it. For example, for a small room, narrow products are made with swing doors, and if there is enough space, you can afford a full-fledged wardrobe.
Tools, materials and general working principle
The work will need the following tools and consumables:
- joinery boards (humidity not more than 15%), chipboard or drywall;
- screwdriver;
- jigsaw;
- sandpaper or angle grinder;
- paints and varnishes and tools for their application;
- furniture conductor;
- dowels;
- wood glue or PVA;
- hinges or guides, depending on the selected type of opening;
- door handles and other accessories;
- furniture edge (for chipboard);
- plywood or fiberboard (for the back wall);
- measuring instruments.
A corner cabinet with your own hands can be made of wood, chipboard or drywall. The principle of working with the first two materials is the same, the only difference is that chipboard does not require additional processing. A drywall cabinet will be as cheap as possible, but you need to create a clear drawing that will correspond to a specific installation site.
Wardrobe made of wood or chipboard: step-by-step guides
The number, height and location of shelves can be changed at your own discretion. The presented drawings assume the possibility of choosing doors - you can make both swing and sliding doors.


Regardless of which drawing is selected, there is a general working order. Step-by-step instruction:
- Preparation of parts.
- Wall blank.
- The canvases are cut in accordance with the dimensions that the selected schemes offer.
- Wood materials leveled if necessary, then sanded.
- Holes are made on the canvases for the subsequent fastening of parts to each other with screws. For this, a furniture conductor is used - it will allow you to clearly observe the indents, to prevent the mismatch of the grooves.
- If there are shelves in the wall, then the easiest way to attach them is to put them on dowels. Blind holes are made for them in the walls. The depth is half the length of the dowel. Installation is done with glue.
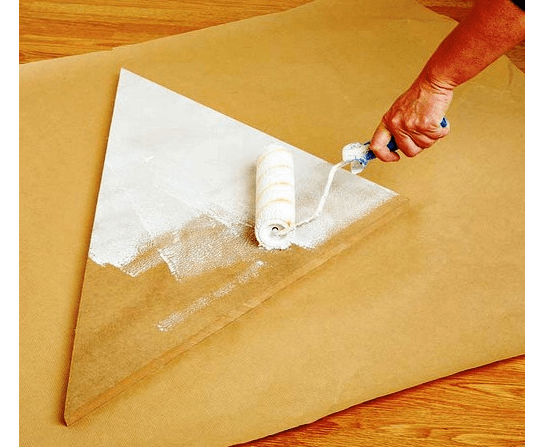
- Wooden walls are covered with paintwork materials. If the cabinet is made of chipboard, then a furniture edge must be attached to the end - special tapewhich will protect the material from moisture ingress.
- Manufacturing of shelves and other cabinet parts. The work is done in the same order.
- Wall blank.
- Assembling the cabinet. If all the parts are made correctly, then the assembly will not be difficult.
If you are making a cabinet out of wood, then it is important to take your time and let the paintwork dry.

How to make a drywall cabinet
Only a built-in wardrobe can be made of drywall. This material is not structural, but finishing, its sheets cannot be fastened together - any connection will turn out to be unreliable. Therefore, plasterboard furniture is created on a different principle than furniture made of wood or chipboard. First of all, a frame is created, onto which the material is subsequently sewn.
In work you will need:
- Screwdriver.
- Metal corners. You can also use wooden slats, but it is more labor intensive and less reliable.
- Electric jigsaw.
- Hardware.
- Fasteners for connecting metal corners.
- Measuring tools, level.
- Paint and tools for its application.

Instructions:
- Planning. It is necessary to create a drawing for a specific installation location. In this case, you can use existing drawings. Schemes should be as detailed and accurate as possible. If you cannot make them yourself, it is better to ask a specialist.
- Markup. The most important stage of work. It should be noted the location of all frame rails. The "evenness" of the future cabinet directly depends on the accuracy of the marking. Therefore, everything needs to be drawn, controlling the level. It should be remembered that measuring seven times is much easier and faster than assembling a crooked cabinet, and then dismantling it and doing all the work again.
- Assembling the frame. The corners are attached to the walls with self-tapping screws, they are fastened to each other using special fasteners. Everything needs to be controlled by the level. At this stage, the curvature can still be corrected.
- Backlighting. If it is provided, then before creating the case, it is necessary to conduct all the wires, draw conclusions for the light bulbs.
- Corpus creation.
- Drywall is cut to fit a ruler with a sharp knife.
- Patching drywall sheets. They are attached using special self-tapping screws gypsum-metal or gypsum-wood (depending on what the frame is made of).
- Strengthening the corners. They are the most vulnerable point of the design. So that the cabinet does not break off at the edges, and gypsum dust does not appear in the house, it is necessary to protect it with an angular metal profile. A layer of plaster is placed on top of it.
- Doors are made of chipboard or wood. It is better to give preference to a wardrobe, as it is more problematic to fasten the hinges. After the products are created, the guides are installed and the doors themselves are installed on them.
- Painting the product in the desired color.
Not everyone can boast of a spacious kitchen where there is room for large furniture. In small spaces, everyone square meter is of great importance, especially in the area of \u200b\u200bthe table, where you want to organize as many seats as possible. For such a task, perhaps optimal solution is the use of a soft corner sofa, which will make it possible to use free space... Below we will consider a few enough simple options of how to make a kitchen corner with your own hands. Drawings and diagrams, combined with step-by-step photo instructions, will allow even an inexperienced master to understand the process and complete the work without the involvement of professionals.
If you want to minimize carpentry work, then ready-made Ikea shelves of appropriate dimensions can be used as a frame. To make such a kitchen corner, you will need the following materials:
- ikea shelves with facades;
- Chipboard or plywood;
- furniture foam rubber;
- upholstery fabric;
- drill;
- electric jigsaw;
- construction stapler;
- bolts with nuts.
Coziness and comfort in a small kitchen

Installation and connection of the frame
When choosing the size of the shelves, certain standards must be taken into account: the height and depth of the seat of the soft corner in the kitchen should, on average, be 40-45 cm. The use of shelves is convenient because you can easily create not only an L-shaped structure, but also a U-shaped one, if for this, it has the area and layout of the room.
Structural elements are connected to each other using bolts. To do this, you first need to drill holes of the appropriate diameter in the side walls. It is best to drill two shelves at once, fastening them together with clamps. However, this is not always possible due to the rather small internal space. If the drill does not fit inside the shelf, then a hole for the mount is drilled from the outside - separately in each wall. In this case, it is very important to make the correct measurements in order to maintain alignment when connecting structural parts.
Advice! Excessive tightening of the bolts can deform the wood. To avoid this, it is necessary to use additional spacers under the bolt head and nut.

Making a kitchen corner frame with your own hands
Installation of fronts and seat bases
After installing the frame, you need to fix the facades of the shelves. Of course, you can do without them, which will significantly reduce the cost of the design. However, if you want extra storage space for your kitchen utensils, then doors are essential.
The base for the seats is made of chipboard (OSB) or plywood with a thickness of 10 mm. The use of wood-strand or oriented strand board is the cheapest option. Although, when choosing a material, it should be borne in mind that plywood can be subjected to higher loads and has better moisture resistance.
The board is cut with a jigsaw according to the dimensions of the corner. After that, all ends must be sanded with medium-grain sandpaper.

Fastening of door-facades and installation wooden base for seat
Upholstery with soft material
Making upholstered seats for a corner in the kitchen is perhaps the most difficult stage work. Furniture foam rubber 80 mm thick is cut in the same way as a chipboard (plywood) sheet, and then glued to the base.
Note! For reliable bonding of foam rubber with wooden surface you must use special glue. At furniture factories, glue "88" or "Foam-2" is often used, which are universal compounds for joining dissimilar materials.

The soft base must be covered with a fabric, for which a construction stapler is used - the distance between the staples is 1-2 cm. The complexity of this work depends on the selected fabric. Even an inexperienced person can perform upholstery with a monochromatic material, but correctly pulling a fabric with a complex pattern is a completely different task that requires professional skills.
The finished product can be decorated with pillows, which will additionally function as a soft back.

Kitchen corner from Ikea shelves
Simple kitchen sofa made of furniture board
Another affordable option is making a corner for the kitchen with your own hands from furniture board... To complete this venture, you should purchase the following materials:
- furniture board (18 mm);
- acrylic paint;
- foam rubber (80 mm and 20 mm);
- the cloth;
- drill;
- jigsaw;
- self-tapping screws for wood.
Opening the board and connecting parts
Before you start cutting the board, draw up a drawing of the kitchen corner with dimensions that will meet your criteria. The scheme must be developed so that at least 3 people can comfortably sit on the sofa.

The easiest way to cut the shield is with a jigsaw, although you can also use a hand hacksaw. The main thing is that all ends are located at an angle of 90 ° in relation to the main plane, for which the tool should be held strictly perpendicular during the cut.
The details of the structure are interconnected with self-tapping screws. In order to prevent the formation of a crack during the tightening process, a hole must first be drilled under the screw.
Note! The drill diameter should be 0.5-1 mm less than the screw diameter.

Body painting
To paint the kitchen corner, you can use both alkyd enamel and acrylic. The second option is more preferable in terms of the stability and durability of the layer. In addition, acrylic paint does not have a strong smell, so it can be applied directly indoors.
Before applying the first layer of enamel, the body must be treated with a primer to increase the adhesion of the paintwork to the wooden surface. Usually 2 coats of paint are enough to get an even color. Although dark tones may require 3 coats.

Making soft pillows
For the soft part, as in the previous version of making a kitchen corner with your own hands, the best option is furniture foam rubber. Unlike materials such as synthetic winterizer or holofiber, which also give volume, foam rubber also has good density, so it is more comfortable to sit on it.
Note! For the backrest, it is enough to use 20 mm thick foam rubber, while for the seat you will need a thicker layer - 80 mm.
If you know how to work on a sewing machine, you can sew removable covers with elastic or zippers for the foam pillows. This approach is convenient in that the old fabric can always be replaced with a new one, without much effort.

A simple version of a soft corner for small kitchen
Cute corner made of wood plank
A simple but pretty kitchen corner can be made from a wooden board. For this you will need:
- wooden board 100x40 mm;
- plywood or chipboard;
- round dowel with a diameter of 15 mm;
- drill with a crown 15 mm;
- jigsaw;
- construction stapler;
- batting;
- upholstery fabric;
- pVA glue;
- stain, varnish.

The scheme of the corner for the kitchen from wooden boards
Sawing and grinding parts
According to a previously prepared drawing that can be drawn with computer program or draw by hand on plain paper, the board is cut into separate pieces. To give the kitchenette a more elegant look, we cut out curly elements with our own hands.
Advice! For smooth shapes, bends can be drawn using a long flexible ruler.
All parts are rough and fine sanding using sandpaper with different grain sizes. Where necessary, holes are drilled for dowels, which sit on PVA glue. Actually, the whole corner will be assembled with dowels and glue.

The connection based on dowels and glue is considered one of the most reliable in furniture production
Staining and varnishing
Instead of enamel, we will use a wood stain as a coating, which impregnates the wood without creating a film characteristic of paint on the surface. Thus, the structure of the tree is fully preserved, while its color can be very different - from light "pine" tones to dark red.
Note! The stain has the ability to lift wood pile during the staining process. Therefore, after it dries, additional surface grinding will be required.
Varnish, like stain, is applied in two layers. To speed up the process, it is recommended to use a water-soluble varnish, the drying time of which under normal temperature conditions is 30 minutes.

Base of the kitchenette after staining and varnishing
Before we grease the ends with glue, we assemble the kitchen corner "dry" with our own hands. It is important to adjust all holes and dowel lengths so that the frame is assembled without gaps.
If all the ends and corners converge perfectly, then we carry out the assembly of the frame with the help of glue. To strengthen the structure, you can use ordinary 4x4 metal corners, which are attached to inner corners.
The bottom of the boxes is made of plywood or chipboard plates, which can be simply placed on any furniture corners fixed to the bottom of the frame.


The base for the seat is cut according to the dimensions indicated in the drawing from the same plywood or chipboard as the bottom of the drawers. Sheathing with soft material is carried out in the following sequence:
- Cut out a shape from foam rubber, which should be 2-3 cm longer than the base in length and width.


- We cover the seat with batting, roughly cutting it along the contour and fixing it with the same glue.

Covering the seat with batting
- We attach the upholstery fabric to the base with staples.

The result is quite decent corner sofathat can decorate any kitchen.

Do-it-yourself wooden corner in the kitchen
The original idea - a corner sofa made of pallets (pallets)
The construction of wooden pallets used to transport various goods is quite simple. At the same time, the reliability of such elements allows them to be used not only for their intended purpose, but also for the production of original furniture.
For your information! To make a pallet that can withstand heavy loads, manufacturers use premium quality sawn timber. Therefore, even used pallets are very reliable.
Of course, a corner sofa made of pallets, given their dimensions, will not fit in every kitchen. However, it is quite possible to use it in a gazebo, especially since the assembly of the corner is not particularly difficult.

Drawing of a wooden pallet with standard sizes
Selection and adjustment of pallets
At the first stage of manufacturing a corner sofa, each pallet should be carefully examined and only those structures that are free from defects should be selected. Particular attention should be paid to cracks and large chips, which can cause unpleasant consequences during the operation of the sofa.
Based on the dimensions of the pallet, a corner sofa is designed. If the area allows, you can assemble a structure from solid elements. Otherwise, you will have to use a circular or hand saw to fit the required size.

Integrity check and pallet preparation according to the required dimensions
Connecting parts
It is very easy to make a corner for a kitchen or a gazebo from pallets with your own hands. To do this, you need to assemble a kind of designer from the prepared parts and fasten them together with screws.
To equip the seat, you need to install the pallets in two rows. Such a height will be sufficient, given that a layer of foam rubber (about 100 mm) or, for example, a thick mattress is supposed to be placed on top.
To make the backrest, you need to set the pallet vertically and screw it to the bottom of the base. Actually, this completes the assembly of the frame.

Manufacturing of soft elements
As noted above, the soft part of the corner (seat and back) can be made of foam rubber, covered with a beautiful fabric. Given the rather large area of \u200b\u200bthe product, in this case, you will have to spend well, since furniture foam rubber is not cheap.
For your information! The price of one sheet of foam rubber measuring 2000x1000x100 mm starts at 1200 rubles.
If you use old mattresses and pillows as soft elements, you can seriously save money. Of course, you will still have to buy upholstery fabric, but the costs will still be significantly lower.

An original soft corner made of pallets for a summer cottage or a private house
The article offers the simplest and most affordable master classes for making a kitchen corner with your own hands. Perhaps, in these products there is not much design thought and there are no modern technological solutions, but such work is quite realistic to be performed by a person who does not have solid experience in carpentry... There are specialists for more serious tasks.
Video: how to make a kitchen corner with your own hands
Beautiful kitchen corner "Etude" with a sleeping place
The kitchen corner is an attractive element of the kitchen interior that allows you to save space and get the whole family together in a small kitchen. Humanity has been using kitchen corners since the postmodern era. Despite the large assortment kitchen furniture in modern stores, it is not always possible to find a suitable one. But this is not a problem for a person with basic carpentry skills. A do-it-yourself kitchen corner is an opportunity to have furniture that is ideally suited for style and functionality, without large financial investments.

Soft kitchen corner made of leatherette with drawers for storage

An unusual shaped soft kitchen corner
Kitchen corners are popular for several of their properties:
- Compactness. They allow you to save space, which is the main advantage for a small kitchen that combines a kitchen and a dining room.
- Functionality. A corner sofa for the kitchen may contain drawers for placing things, stocking food or dishes, vegetables.
- Comfort. A large family or company can be seated at the table.
- Large selection of options. There are many different designs... You can choose and assemble with your own hands a corner that is suitable in size, style, finishing material.
- Cheapness. A kitchen corner made by yourself will always cost less than one bought in a store.

DIY wooden corner for the kitchen
Determining the design and construction

Yellow kitchen corner with irregular table
The kitchen corner includes a short and long sofas and a connecting corner between them. Those who do not know how to make a kitchen corner with their own hands should take into account a few tips:
- You need to start by determining the place for the corner, its size, think over the design, color scheme.

Drawing with a description of parts and their connections
- For inspiration, look at the photos in magazines or websites specializing in design and furniture.

Soft and comfortable brown corner of custom sizes
- The design can be as simple as possible: a frame, seats and backs on it. Storage boxes will increase the functionality of the new furniture. They can be made sliding or with an opening lid. They can be used for temporary relaxation, corner kitchen sofas with a berth can be left to spend the night. Their production requires additional investments, more professional skills, the acquisition of special accessories and a mechanism that allows you to fold and unfold the sofa.

Beautiful kitchen corner made of wood
- The corners are right-handed and left-handed. This is important to consider.

Do-it-yourself right-sided kitchen corner

Left-sided kitchen corner in the interior of the kitchen
- For cladding, it is better to use leatherette, synthetic materials. They are easy to clean, stronger and more durable than fabrics.

Sheathing material for kitchen corner
- If the product is intended to be soft like a filler, it is most practical to use polyurethane plates or foam rubber.

Foam rubber for a soft kitchen corner
- The corner should be made according to the drawings. You can sketch them yourself or find drawings and diagrams for a wooden kitchen corner with your own hands in specialized publications or on the Internet. The found schemes will still have to be modified to fit your conditions: to change the size. The drawn drawing simplifies the work, allows you to more accurately calculate the materials, saves time.

Corner drawing with dimensions - side view
- After that, they make a list of all the elements of the corner, the materials that should be purchased.

Details for the frame of the future corner
- All missing tools, fixtures, fittings, materials should be purchased in advance before starting work.
Necessary materials

Materials for the manufacture of kitchen furniture
To make a corner sofa in the kitchen you will need:
- laminated, sanded chipboard, plywood;
- fasteners: dowels, screws;
- loops;
- glue;
- nichrome thread;
- edge for decorating ends, thrust bearings;
- furniture corners;
- polyurethane plates if a soft corner is planned;
- upholstery;
- primer for wood, paint, varnish;
Required tools

DIY tools for assembling a kitchen corner
In the process of making furniture you will need:
- electric jigsaw;
- furniture stapler;
- drill, screwdriver;
- hammer;
- roulette;
Manufacturing process: step by step instructions

Upholstered kitchen corner with a shelf in the corner
For a long sofa, the following parts are cut:
- bottom, it can be made of plywood;
- bars for the frame;
- two sidewalls made of chipboard;
- two side parts for the long sides of the box (can be made of plywood);
- back;
- sitting.

Assembling most of the kitchen couch
The assembly of the sofa is carried out in the following order.
- Close the ends of the sidewalls with an edge, and the bottom with heels.
- Using a screwdriver and self-tapping screws, a frame is made, then a box.
- Collect the back, attach to the sidewalls with dowels. The fastening can be reinforced with metal corners.
To make a short sofa, all the steps must be repeated. The differences are only in the size of the parts.

Assembling the smaller part of the kitchen couch
A long and short sofa are combined into a single structure using a corner connector. Using dowels, metal corners, the seat is connected to the back, then attached to the sidewalls.

The finished painted frame of the future corner
At the final stage, upholstery is performed, if it is planned:
- The filler is cut out of the polyurethane plates. Filler size slightly more size the element for which it is intended. Soft filling is prepared for sofa seats and backrests. Fastened with glue or double-sided tape.
- The upholstery parts are made in a similar way, but their size should allow the material to be wrapped and secured with a stapler.

Corner with upholstery and pillows in the interior of the kitchen
If soft upholstery is not provided, then the wood is treated with a primer and varnish. You can use paint or tint to change the color.

Do-it-yourself beautiful kitchen corner made of natural wood
Decorating a finished corner is a kitchen design element

Pillow-style kitchen corner decor with removable covers
Decorating is carried out in accordance with the interior of the kitchen and the preferences of the owners. Therefore, there can be many options. Here are some:
- Natural wood looks great in the interior of any room. It is worth stopping at this option if the rest of the furniture is made of the same material. It is safe, environmentally friendly, always looks decent, brings warmth and comfort. Natural wood covered with tinting, varnishes.
- If you have conceived a sofa without upholstery, you can paint it with paint in the color of the kitchen furniture or, on the contrary, support the interior decor element with color. A combination of two harmonious colors will look spectacular.
- To decorate the kitchen corner sofa, use leatherette upholstery, dense fabrics. Such a corner can be filled, soft, or without it, then the seats will be hard. A large assortment of similar materials in the trade network allows you to choose the right color.
- Decorating kitchen sofas with plastic and similar modern materials... They are easy to clean, do not lose their original appearance for a long time, a large selection of colors and shades is on sale. But this material is not suitable for every interior style.

Simple corner with soft removable seats with your own hands
Kitchen corner sofas will not go out of fashion for a long time, because they are comfortable, functional, save space, and create coziness. The kitchen is the most versatile room. For most, the kitchen is the place that unites all family members at one table. The desire to make this time more pleasant and the place more attractive is understandable. New Item interior makes the atmosphere warm and cozy, combined with the right lighting... An additional lamp at an adjustable height or a sconce will be an effective decorative element.

Brown kitchen couch with storage boxes
Video: Do-it-yourself soft kitchen corner
A selection of photos with self-made kitchen corners
The ability to make furniture yourself provides many benefits. Ready-made sofa or armchair with individual sizes will fit perfectly into the living space, and the upholstery selected in the right way will match the interior of the room. It is also important that a new piece of furniture will cost half the price, or even less. Many home craftsmen have stuffed their hands on ottomans and stools, and now they dream of making a corner sofa with their own hands.
The advantages of making a sofa yourself
Anyone can make a sofa with a small set of tools and a minimum level of training. The sofa, which we offer you to make, will not be inferior in quality to the assortment that is available in 90% of modern stores, and even surpass many offers. In favor self-creation there are some compelling arguments:
- you save cash... A sofa will cost three to five times less than a store-bought one. We suggest that you design a sofa with maximum care about the level of savings, while not compromising on quality.
- You make a corner sofa with your own hands, and therefore you yourself are engaged in quality control! You should not be afraid that there is raw timber in your sofa, there are knots in critical places, and low-quality foam rubber in the upholstery.
- You can make a corner sofa of the design you need. For your needs and sizes.
- In the future, you will be able to make the banner of the sofa yourself and save money again. For example, you can see how much it costs to order a professional furniture hauling today
- And, of course, nothing can be compared to job satisfaction and pride in a handmade product.

Choice of materials
We plan to achieve reliability with the help of thoughtful design, high-quality assembly and manual selection of materials. It is not worth using labor-intensive and complex connections, for example, spike products - which are not available to inexperienced DIYers. Expensive materials (laminated plates, beams with a large section) should not be taken.
For work, you will need the following materials: coniferous timber with a section of 30 by 50 millimeters (mainly pine), fiberboard, chipboard, birch plywood, which has a thickness of 5 and 15 millimeters, screws or self-tapping screws for wood, nails, synthetic winterizer with a density of about 140-170 g / dm, batting, foam rubber with a thickness of 20 and 40 millimeters and a density of at least 30 kg / m3, wood glue and glue for foam rubber, foam crumbs, furniture fabric, furniture legs 50 mm high, sofa lifting mechanism.

Do not try to simplify the task - you should not fasten the parts with nails, because they loosen quickly, the corner sofa begins to creak and falls apart before our eyes. Self-tapping screws are the best solution. Having crashed into wood once, such hardware will hold the load for a long time.
Glue is indispensable in joinery. But before you smear and connect the surfaces, you should make sure that the assembly is correct. When even the most ordinary glue sets, it will no longer be possible to separate the parts. Non-laminated boards must be varnished to prevent the release of formaldehyde into the air, so prepare varnish.
Instrument preparation
To make a corner sofa with your own hands, you will need such a tool: a hand saw with the simplest miter box to create an even cut, an electric drill with speed control to use it as a screwdriver, a furniture stapler, sewing machine, a sharp knife for cutting foam rubber.

You can make the simplest miter box yourself, or you can buy it. Some difficulties may arise with hand saw in the process of sawing chipboard and plywood. Better to use circular saw... There is also a simpler solution - to order a cut according to the dimensions you need in the place where you plan to purchase the material. This is true if you work in a city apartment, because such an operation is the most dusty when self-production corner kitchen sofa or sofa.
Making a corner sofa
First of all, decide on the design of the future corner sofa and its location in the living space. Leave the complex designs with oval tables and shelves for later. First, learn how to make a sofa with your own hands of the simplest shape and configuration, and then create detailed drawing do-it-yourself corner sofa with all sizes and details.
Armrests
The sofa requires two mirrored armrests. The armrests should be 900 millimeters long, 200 millimeters wide and 550 millimeters high. Take a large piece of chipboard and 2 long beams, the screws turn in the direction from the chipboard to the timber. The fastening step is at least 20 centimeters. We screw 4 screws into each bar, and 2 into the end of the bar.

Then it is worth nailing the fiberboard. It is necessary to use nails 2 by 25 in steps of 10-15 centimeters. If you want to make a corner sofa eurobook with your own hands "for centuries", additionally use wood glue to the nails. Screw the chipboard cover on tightly and align it with the bottom and back edges.
After assembling the armrest, glue it with foam rubber. Slightly grind sharp edges and corners on the top of the product with a rough file or a plane before gluing. Please note that it is not customary to glue the foam rubber on the back wall of the armrest, you should stick a layer of batting there.
Left side assembly
First, fasten the two chipboard pieces together with a plywood cover on the screws and wood glue. There should be four screws in each half. Screw two posts from a bar and make a tie with bars. Attach a "ladder" to the main sofa. The upper bar should be close to the lower one and rest on it.
When assembling the seat frame, remember that this part carries heavy loads. For work, it is better to choose a high-quality timber that does not have knots, especially on long bars. If the knot occupies more than 40% of the section, then you should refuse to use such a bar when making a kitchen corner sofa with your own hands. When assembling the frame, measure the diagonals of the frame with a tape measure - they should be the same.

Install the assembled frame into the frame. To make it easy to insert, loosen the front bar attachment. Do not forget to coat all surfaces with glue, and you can tighten with screws. Screw long screws into the ends of the longitudinal bars, which are 70-90 millimeters long.
Fasten plywood with screws and glue. The distance between the screws should be no more than 20 centimeters. If you are going to use a dense fabric for upholstery that does not allow air to pass through, it is recommended to make holes in the plywood every 30 centimeters, which have a diameter of 15-20 millimeters for air exhaust.
Attach the fiberboard to the back with large-headed nails and glue and glue the foam cushions. Make the upper layer of foam rubber on the seat intact, and the lower ones can be made from several spliced \u200b\u200bpieces, as long as there are no voids.
Assembling the right side
After you have successfully assembled the left side of the folding corner sofa with your own hands, the issue of making it is almost resolved. Begin to lay out the components of the right side and remember that its bottom usually acts as a linen drawer. Cover all parts of the chipboard with varnish or choose laminated chipboard for work.
There is another method: before assembly, you can cover the side of parts made of timber, chipboard and fiberboard, which will turn into the box, teak or coarse calico. Pre-sand all sharp edges with sandpaper to prevent the fabric from rubbing against them.

In a familiar way, fasten the chipboard parts with a plywood overlay and assemble all the blanks according to the drawing. Screw the bars along the perimeter, the boxes will rest on them. You can use any bars and even with knots - everything that you ranked as waste. Nail the bottom of the fiberboard.
Mark and drill bolt holes for the corner sofa lift. Use furniture bolts. They should look out from the side where there is a bar. To glue the foam rubber cushion for the seat, follow the same principle - place a single layer of foam rubber on top, stuff the two lower layers from pieces.
Filling frames
First, take measurements from all surfaces, because you will be cutting the foam rubber on them. Having cut out the part, immediately stick it in place. It will be easier to customize each next one. For seats, you need to use foam rubber, which is 100 millimeters thick.

If you have not found a similar one, you can glue it from 2 sheets of 40 millimeters and one of 20 millimeters. All trimmings can be used to cut out a suitable geometric shape and fit such pieces to each other. If you do all the work carefully and slowly, soon you will be able to make do-it-yourself corner sofas to order, which will be a good weld to the family budget.
Homemade sofa upholstery
For tight-fitting surfaces, make templates. The first thing to do is measure your own sofa. Divide the sofa visually into sections. Remember that the cut pieces anyway, and even if your sofa has a non-standard shape, must be rectangular. Measure the two armrests, backrest and seat.
Next, you need to cut out patterns from wallpaper and newspapers, checking their sizes with the drawings. You can cut out the fabric from the patterns. If you find it difficult, simply attach the material to the seat or backrest, marking the borders with chalk. The fabric is cut with the wrong side up. Leave seam allowances of at least 5 centimeters, and if the edges of your chosen fabric are falling, then you should leave more.

The fabrics used must be washed and ironed. The fabric must be laid on a flat surface with the wrong side up on the sofa section, which corresponds to the fabric sections. The video about a corner sofa with your own hands shows how to fasten the pieces with a sofa with pins and fix their position. Without removing them from the sofa, join the pieces together and sweep them with a contrasting thread.
In order for the cover to sit perfectly on the sofa, all its corners and bends should be taken into account. After the sweeping procedure, you need to cut off the excess fabric and sew all the seams on a typewriter. Turn the cover on the front side and try it on the sofa. If you plan, make the necessary adjustments and make additional stitches, after removing unnecessary fabric.
Braces can change the look of the sofa, hold fabric and reduce wrinkling. Make holes for them in the slabs in advance. For tightening, it is customary to use nylon cord loops pre-sewn to the upholstery.
In order to reduce the level of abrasion of foam rubber between the casing and this material, lay agrotextile, which is known among the covering materials for gardens. Then target the upholstery fabric with a stapler. As a result, you get a comfortable, neat and budget corner sofa.
Now you can make a corner sofa or bed with your own hands. The main thing is not to choose complex structures and drawings that are not clear to yourself. Everything should happen gradually. If you cannot do some things on your own or do a certain stage, then watch the video we have proposed or contact the professionals and be sure to watch the process. And of course, if you do not want to waste your time and make a sofa yourself, you can buy corner sofas, which are presented in a large assortment in modern stores.
The space problem is relevant for small and large apartments. It is very difficult to fit everything you need in a limited square footage.It is almost impossible to imagine a house, office or apartment without comfortable shelves. The element performs an aesthetic, decorative role.
Shelves help free up space and diversify the familiar interior of the room.
Shelves are used in absolutely any room and for completely different purposes. Looks great in bathrooms, kitchens and living rooms.

Consider the features and benefits of building corner shelves yourself.
Previously, the craft production of any furniture was considered the lot of the poor. Wealthy people preferred to purchase interior items in stores. But everything there had almost the same design, so thirty years ago the interiors in different houses were almost identical.

Today, original home-made furniture is a real pride.
There are dozens of different models furniture, but even among such a variety it is difficult to choose one option that can meet all the preferences of the owner of the house. In this case, there are only two ways out: order furniture directly from the manufacturer, or build it yourself.

Making shelves on the wall with your own hands is not at all difficult, and you can use a wide variety of materials.
The first option may seem ideal. However, not every master will be able to make furniture of high quality, inexpensive and take into account all your wishes. Finding such a specialist is not easy, and there is no point in searching if you need a simple wall shelf.

This design element is easier to build on your own.
Self-manufacturing a shelf has many advantages.

We make the shelf ourselves: how to decide on the design and materials?
Any wall shelf can have different shape and design. They can be complex (with additional elements) or simple. Simple shelves can be used in the kitchen.

They are used to store seasonings or kitchen utensils, so there is no point in coming up with a complex design.
It is very easy to make shelves in a semicircle. This option is ideal if you don't have the time and desire to do something more difficult. Also, simple shelves can be used in apartments and houses decorated in minimalist directions.

Styles like these do not favor complex shapes and intricate designs.
Shelves with additional elements can be used in living rooms. They can consist of several sections, or have an unusual shape, for example, in the form of the letter "G".

Often, such furniture takes up not only the corner, but also some part of the wall.
You can decorate such furniture and in an original way cutting if you have experience in this business. The shelves located in the corner also differ in the presence of the back wall. It can be present, or it can be replaced by a wall. If there is a desire to preserve the wall decoration, then it is still better to build a furniture wall.

It doesn't take much effort.
In this article, we will look at the process of building a classic-shaped corner shelf. This form is very simple and versatile. Its production does not even take two hours.

To get started, you need to decide not only on the shape of the product, but also on the material.
Consider the types of materials and their advantages.

To quickly determine the raw materials, be sure to consider comparative characteristicspresented in the table.
| Characteristics | Materials | |||
| Wood | Plastic | Glass | Metal | |
| Aesthetics | + | + | + | +/- |
| Durability | + | – | + | + |
| Ease of processing | + | + | – | – |
| The cost | high | low | high | low |
| Moisture resistant | + | +/- | + | – |
| Resistant to high temperatures | + | – | + | + |
| Strength | + | – | +/- | + |
Having analyzed all the characteristics, you can see that it is easier and easier to create corner shelf it is made of wood.

In this article we will look at detailed instructions for making such furniture.
Tools
To make a shelf from wood, you need to properly prepare raw materials and tools. You should start by preparing the tools. To build a corner shelf made of wood, you need to find:
- Electric jigsaw;
- Regular ruler 50 cm;
- Hacksaw;
- Glue;
- Drill;
- Building level;
- Sandpaper;
- Shelf mount.

Shelf making tools.
Materials
In the role of the main raw material for creating a shelf, the most ordinary board, which was lying around on the balcony after repair, is suitable. You can also use leftovers old furniture, or buy a board in the store. Consider several criteria when choosing the main raw material:
- Design. The board should have a suitable color and beautiful ornament;
- Quality. It is better not to use rotten and old boards;
- Integrity. The sheet for making furniture should be free of scratches and dents.

You need to cut blanks from the prepared board.
Cut the pieces of plywood diagonally, sand the edges with sandpaper, and four of the remaining pieces of wood can be cut. They must be the same size.
Manufacturing process: step by step instructions
As you can see, the process of making a shelf does not require special costs and tools that are difficult to find at home. Almost all materials and equipment are available from any owner. In this section we will consider in more detail,how to make a corner shelf.
VIDEO: Master class on making a corner shelf.
Corner shelves in the interior - 50 photo ideas:


