Material for the slopes of the front door. Technical justification for the choice of material for installing slopes on the front door. PVC panels
When the repair and installation of the front door is completed, the doorway around it often has an unsightly appearance, which can spoil the feeling of joy after the repair is completed. In addition, unshaped edges allow drafts to penetrate inside and lower the temperature in the room. Therefore, it is very important to correctly make and arrange door slopes in order to prevent the influence of all these negative factors.


Peculiarities
When doors are already installed in the apartment, many people think that protection from external factors, such as noise and cold, is provided. But it is not so. It is necessary to make additional finishing in order to complete the repair and give the doorway a harmonious appearance. From the outside, the entrance doors are always trimmed with platbands or a special solution during installation, but the internal slopes of the master during the installation of the door frame are always left to the discretion of the owners of the house.

Finishing the slopes is not included in the work of installing the door. That is why concrete, brick or other materials without external decoration are in full view before our eyes. To hide all this, you need to correctly arrange the slopes. Not all companies that install doors provide additional services for the design of slopes. That is why given task very often it is shifted to the shoulders of the owner of the house, and he has to do this work on his own.

The purpose of installing this element is to give an elegant appearance to the door and doorway, as well as to complete its outlines.
In addition, door slopes are installed in order to hide all door fasteners from prying eyes and increase protection against burglary. In addition, with their help they provide heat and sound insulation, as well as protection from dust and dirt flying from the street or from the landing.
Slopes are a very important and necessary element, who can do doorway more presentable and tidy. They are beautiful design that complements any hallway. The slopes are designed in accordance with the style of the front door, as well as in accordance with its colors and with the stylistic design of the hallway. That is why choosing the right slopes is a very important task.


Apart from the decorative function, the slopes also very effectively insulate the door frame and allow you to hide the joints between the box and the wall. Slopes also hide mounting foam. Thus, this element also allows you to additionally perform the role of thermal insulation. Mounting foam, located in plain sight in the room, absorbs moisture and loses its protective properties, and at the same time it looks very neat.
Thus, the door slope is a very important element that is paid attention to during the repair.
Kinds
There are three main systems of slopes for door structures, which differ in the method of installation:
- Applying cement to the wall and subsequent plastering. Such a finishing system is considered the most reliable and quite cheap. But not everyone can cope with such a task, it is a very time-consuming and painstaking process. In order to create very smooth and high-quality surfaces, it is necessary to have the skills to prepare the right plaster mortar and experience in its uniform application and distribution.


- Slope design system using panels and special glue. In this case, an adhesive mixture is made and ready-made finishing panels are applied to it. This principle is quite costly. In another way, it is called wet.
This process is very time consuming as each layer of adhesive needs to dry well before you apply the next layer. But even with the long duration of such work, they are quite simple and even a beginner in the installation business can handle them.
Fixing the finish to an already finished frame. It's very simple and fast way, which allows you to achieve ideal in shape and very neat door slopes. So you can not only hide from prying eyes concrete wall, bricks and polyurethane foam, but also close all wires and other communication networks.
In addition, you can install additional lighting in the door frame and beautifully play with the light in this area of the room. This option is suitable for both panel apartments and private houses.


The only drawback of this method is the low strength and susceptibility of finishing materials even on a steel frame to mechanical stress. Thus, this option will be more prone to hacking. As a rule, it is used for finishing wooden door structures inside the apartment.
For more information on how to make a slope of an MDF front door, see the following video.
materials
For the design of slopes, high-quality and stable finishing materials are often used.
Dye
This is one of the most popular coatings, which allows you to decorate the door slope very brightly and interestingly. You can make it an interesting accent of your hallway. In addition, you can choose the paint to match the color of the door. In this way, even a metal door can be decorated. You can buy water-based paint or use the usual version. In addition, you can apply a beautiful textured pattern that will look very original and will decorate any hallway.


Wallpaper
This perfect solution for those who decided not only to change the door in the hallway, but also to completely renovate the hallway. Decorating a door slope with wallpaper is quite simple, but this requires a flat base. Very often, the same wallpaper is used on the walls as on the slopes. This creates the impression of a monolithic surface. Thus, it is possible to visually expand the doorway and the space of the hallway as a whole.


One-sided sandwich panels
These panels are a sheet of polymer plastic, on which a layer of extruded polystyrene foam is glued. It has a fairly dense texture, which has excellent soundproofing properties and acts as great option for insulation. Thus, you will not need to additionally insulate the doors and take special measures for soundproofing.


Such panels are very light in weight and therefore adhere well to the door even with special glue without additional fasteners. In addition, their design can be very diverse, there are even wood-like models and products that imitate other materials and surfaces.
Plastic panels
This is a fairly easy-to-install option, which differs interesting decor. Plastic panels are somewhat similar to the previous version, but they are less reliable and thinner. If the slopes are deep, then plastic laying is not recommended.. This is due to the fact that it can be easily deformed and damaged. Equal stiffness throughout the door slope plastic panels won't give. But their undoubted advantage is an interesting and varied design.


Among plastic options vinyl panels are very popular. They are pretty reliable. Also, if this element door structure lined with vinyl, it will respond well to temperature changes and air humidity levels, which is typical for areas near the front door. Therefore, they are often used for sheathing slopes.
MDF
This is a very durable material that is resistant to external influences. He holds up very well various impacts and on its surface there are practically no scratches and other point damage. Externally, this material is similar to wood panels, so it looks very elegant. In addition, MDF is very easy to install and can be installed on almost any door slope. Best of all, such models look on wooden products., but there are also models for metal doors.


parquet board
This natural quality material perfect for decorating door slopes. Usually it is chosen for wooden doors or the color floor covering. It is important to choose the most appropriate tone, texture and relief. Thus, this composition will look very beautiful and harmonious. Manufacturers represent a huge number of types of parquet boards that can outwardly match any wooden door, wenge models are especially beautiful.


Laminate
Another option that is perfect for finishing slopes. It can imitate a door pattern, so it is perfect for models made from natural materials. They can repeat the pattern of any other materials, including stone, marble and other finishes. Thus, it can be matched to almost any type door leaf.


Since laminate is often used as a floor covering, it is distinguished by its strength and endurance, so the slopes will last a very long time.
But there are a number of materials that are used to insulate the door frame. For this, foam, penoizol, metvat, as well as other materials are used. But in the case when the width of the slopes is small, it is quite difficult to make insulation, so sandwich panels are perfect. For finishing wide doorways, frame slopes are often used. When installing thin sheets, such as plastic panels, heaters are often used - polyurethane foam, sealant and other materials, acting as a heat barrier.


What drywall to use?
Any drywall is a layer of gypsum between two strong cardboard sheets. This is one of the easiest materials to install. They allow you to level the surface without putty and primer. Even a novice in this business can handle the installation of drywall sheets.

In addition, this design of the slopes allows you to get rid of excess debris that could arise when using a different finishing method. In this case, the slopes are perfectly smooth and even, which gives room for imagination and their further design.
For the design of slopes at the front door, it is important to take not standard models, but materials that differ in quality and water resistance. It well withstands the increase in air humidity characteristic of the hallway. To ensure greater safety, it is better to give preference to sheets with the addition of fiberglass, since such material is non-flammable and provides insulation for the entrance structure.


How to close up for a metal sheet?
To finish the slopes at the metal entrance door, the frame method is most often used. To create the base, you must use metal profiles. Finishing with wooden bars is also acceptable. It is important that the canvas adheres tightly to the surface.


To strengthen the metal door frame, you need to install a lintel on the supporting part of the structure. Their installation at the corners of the structure is especially important. At this stage, you can lay cables and other wires. After that, it is necessary to fix the selected canvas with screws or nails.
It is also very popular to seal the slopes of metal doors with a cement-sand slope. But for this it is necessary to level all the slopes with a primer and focus on the subsequent installation of finishing materials. For metal structureit is important to take into account the thickness of the solution layer and the thickness of the finishing material so that such a finish is not too massive and does not violate the overall picture of the door structure.
For sealing slopes approx. metal door drywall works great. This is due to its small thickness and versatility. But this material requires additional insulation.


Finishing after installation
After installing the door, it is important to correctly arrange the slopes in order to ennoble the appearance of the entrance to the house as a whole. This can be easily done with your own hands, the main thing is to correctly align the door slopes from the inside. Very interesting option finishing after installing the doors is the use of extensions. You can also use the following options.
Natural or artificial stone
It's pretty fancy and beautiful option, which performs a decorative role. It is quite expensive, especially when it comes to natural stone. This method has many advantages, since the material is considered very durable and of high quality. Natural stone is a completely eco-friendly option that is resistant to external mechanical influences.


But cheaper fake diamond is not of the same quality. It has a large number of disadvantages, since it is made on a gypsum basis. It is easily damaged and crumpled. In addition, it can easily crumble or warp when exposed to water or high humidity.
Tile
This method of finishing after installing the door is quite complicated. Not all tile options can be used for this. In particular, it is better to avoid using glazed models, as they will look very strange and cheap on the door slopes. It is best to give preference to clinker tiles.
This option can mimic brickwork or natural stone. Therefore, it can be chosen for any stylistic design hallway. It is best to choose not very easily soiled and not glossy tiles. This finish option is good because these surfaces are quite easy to care for. In addition, manufacturers present a wide variety of models for decoration.


PVC panels
Very simple finishing material, which is cheap, beautiful, but short-lived. Some low-quality models can be easily pierced, even leaning on them with an elbow or hitting them hard with a foot.

Decorative plaster
This is a very interesting, but rather laborious installation option. Applying decorative plaster is a whole art, so it is better to entrust this process to professionals. But in the end, the slopes and the space near the door can noticeably change.
All finishing methods are used both individually and in combination with each other. So you can not only beautifully design the door structure and slopes, but also make the door more reliable, insulate and protect it from external factors and from breaking.

Mounting and design options
There are two main options for mounting slopes:
- frameless;
- frame.
Before moving on to finishing, you need to make sure that the structure is installed correctly, that the exact parallel between the opposite borders of the door frame is observed and that all seams are sealed. First of all, it is necessary to check the structure for cracks. To do this, light a match or candle and run it along the entire doorway. Where the flame begins to deviate or even go out, it is necessary to additionally insulate the slopes and add sealant.
When all the insulation work has been completed, you need to cut off the excess dried layer of mounting foam and additionally cover the door frame with masking tape. After that important to get rid of old plaster and loose concrete and brick wall elements.
After that, you need to move on to plastering. First you need to completely clean the wall of construction dust and level it. Then you need to use a deep penetration primer. It will make the base of the frame more durable and even.


It is very important to pay special attention to the concrete lintel on the door. For its processing, it is better to use the so-called concrete contact.
If the surface does not absorb moisture well, then it is also necessary to use a special primer. After the soil layer dries, you will need to install the profiles. But before that, it is better to wait about 8 hours until it dries completely. Profiles are necessary in order to even out the layers of plaster on all slopes.


To do this, it is necessary to mark the position of the vertical line on the side of the door about 3-4 cm with a laser or the simplest level. There it is necessary to drill several holes with a diameter of 6 mm in increments of 30 cm. Dowels are inserted into the holes, and then the level of their caps is leveled with twine. After installing all these items it is necessary to check their correctness and even vertical. By the same principle, it is necessary to install a profile on top and on the opposite side of the doorway.


After completing the installation process, you need to do cement mixture. It is best to use sand and cement grade M150 for this. All these finishing materials must be sieved through a sieve with small cells. To create a high-quality solution, it is necessary to mix sand with cement in a ratio of 3: 1. You need to gradually add clean water to the dry mixture and at the same time stir the resulting solution with a special drill nozzle.
When the mixture becomes homogeneous and thick, like dough, the solution can be used to finish the slopes. Using a spatula, it must be sharply and quickly thrown onto the wall and ironed, closing the profiles. Thus, you can make a perfectly flat surface without unnecessary deformations.
The panel version without a frame is simpler. In this case, laminate, drywall, sandwich panels, MDF, chipboard and other options are often used. And you absolutely do not have to smooth the surface of the slopes. Finishing is carried out by means of mounting on glue. It is important that the surface is straight. There should be no defects or irregularities on the surface.


Even if the door frame itself has some defects, they can be corrected using this design of the slopes. In this case, it is necessary to additionally plaster the door exactly in the places missing for a flat surface. If the original surface is flat and smooth, then the frame method will be very simple. Initially, you need to apply primer to the base where the panels will be fixed.
Then you need to measure all the slopes and select the right amount of finishing materials. On the panels, you need to make all notes and put points. Then you need to connect all the lines and check them with a tape measure and a special square. This must be done very carefully. A sheet of such a panel must be cut into the required amount individual elements and prepare them for installation.


As for laminate or parquet, they can be installed both vertically, one for each slope in width, and horizontally, using several short panels. Then, it is necessary to apply glue on the finishing material using the nest method in increments of approximately 15 cm in the shape of a square. All adhesive spots must be dried a little so that a film begins to form on their surface. Only after that it is possible to apply slope elements, but it is important to be very accurate, since it will be possible to align the finishing panels only a couple of centimeters, no more.
Then, starting from the top and moving down, you need to gently press the panels against the wall, but do not press hard on them so as not to push them through. This is especially true for plastic panels.
Design and decor
The design of the door slopes is the final touch after finishing them. As a rule, models from MDF and decorative materials do not require additional decoration, since these materials look quite elegant and without additions. This also applies to options with laminate, parquet board and plastic panels. To complete finishing works in this case, platbands are installed and the joints and all joints are masked with the help of special furniture stickers or mastic, which is selected in exact accordance with the color of the finishing materials.

But if the doorway is only plastered, then it is necessary to use other methods of decoration for it. So, paint is used for this, decorative plaster or wallpaper. But before that, the slope is covered with two layers of putty to hide the bumps and get a smooth layer. When finishing with paint, a primer is applied first, and then a layer water-based paint And bright accent on a layer of acrylic paint. So you can interestingly arrange the slope and make it very bright, playing in contrast with the door. This decor looks especially interesting in black and white.


Another option for finishing is wallpapering. But it is better to choose them in the color of the walls in the hallway, so either you need to choose the most similar coating, or finish both the slopes and all the walls with one material. If you have chosen wallpaper only for the decoration of slopes, then it is better to pay attention to options without a pattern, as they may look a little strange near the door. This is due to the fact that most doors have a classic simple design.


Wallpaper should completely cover the entire width of the door slope, taking into account the overlap over the corner line, so that you can cut off the excess at any time. Wallpaper can be textured, embossed, and even have an interesting mother-of-pearl tint. They will look very beautiful and elegant. But try to use soft wallpaper for decorating door slopes, which can also be washed and cleaned. This is due to the fact that dust and dirt from the street very often accumulates near the front door.
Read in 8 min.
Listen to articleInstallation of slopes is an important stage in the installation of the front door. If they are not installed, gaps may remain between the door and the opening, through which frost will penetrate into the house, and heat will go outside. And the entrance group will not look aesthetically pleasing.
Ways to finish slopes
You can trim the slopes in different ways:
- Cement and carefully putty;
- Install slopes from a sandwich panel. This is an inexpensive finish. But sandwich panels are fragile and short-lived.
- Install slopes from MDF. This is a more expensive and at the same time reliable way of finishing. Slopes made of MDF are more durable. In addition, they can be matched to the color of the door. Torex produces slopes that fully match the selected door model in color and texture.
You can perform any of these options both independently and with the help of professionals. You can order the installation of MDF slopes from a certified Torex team. In this case, we guarantee the high quality of the work performed. Since the installation of slopes from MDF is the most difficult and time-consuming, you need to know a number of nuances. If you decide to do it yourself, use our instructions.
What is needed to install slopes?
To install slopes from MDF, you will need the following tools:
- 1 – Miter saw;
- 2 - tape measure;
- 3 - pencil;
- 4 - angle;
- 5 - knife;
- 6 - hammer;
- 7 - masking tape;
- 8 - fastening elements;
- 9 - screwdriver;
- 10 - polyurethane foam;
- 11 - drill.
Stage 1. Control measurement of the opening after door installation
We make accurate measurements of the actual dimensions after the installation of the door - even if we know the exact factory dimensions. It is necessary to measure the width, height of the vertical and length of the horizontal extensions.
Door trims are decorative strips that cover the walls of the doorway. They are installed if the opening is wider than the door frame. Most often, MDF panels are used for this.

Be sure to measure at three points vertically on each side and at two points horizontally (top).

The additional element must necessarily adjoin the door frame, so we measure the length along the width of the door.
Stage 2. Postponing and marking the required sizes of extensions

After we have measured the required dimensions of the extensions, we put them aside on the blanks of the additional elements. We make preliminary markup directly on the panel.

With the help of masking tape, we mark the future cut lines.
On one blank for additional elements, two parts can be set aside - the threshold and the upper part of the extension.
In the same way, we set aside the dimensions of the second part, make a preliminary marking on the workpiece and glue it with masking tape.

We re-mark the length of the extension directly on the masking tape.
If you do not glue the edge of the additional element with masking tape, chips may appear on it during sawing.

Once again, we check the correctness of the markup.

Use a corner to mark a cut line perpendicular to the edge of the panel.
Stage 3. Trimming the extensions of the required sizes

Using a miter saw, we cut blanks for additional elements exactly according to the marks.

We saw off the first and then the second horizontal parts of the extension.
The procedure is repeated for the vertical parts.
Stage 4. Assembly of the dobor box
Before installation, we collect the extensions in a solid hard box.

Using a drill, we drill holes for self-tapping screws - for fastening from the inside. This is a mandatory step so that when screwing in, the self-tapping screw does not split the MDF panel.

We make several holes at a distance of 10-15 cm from each other.
Stage 5. Installing the box of extensions

We install the dobor box in the opening. We expose it relative to the door so that the gaps between the door and the box of extensions are the same on all sides.

Spacer elements are needed in order to fix the box of extensions in the opening. We cut them out of a wooden block. The thickness of the spacer element is selected according to the size of the gap.

A total of 10-12 spacer elements are needed. 3-4 pieces for each vertical extension. Top and bottom - 2 pieces each.

Since in the future we will need to install platbands and close the gap, it is important that the expansion element does not protrude beyond the extension and the wall.

In the same way, we clog all spacer elements.
Stage 6. Installation of platbands

We attach the casing and note the required length. The size is set by the angle of the inner intersection of the horizontal and vertical extensions.

Similarly, set aside the length of the second cashier.

Mark the length inner corner dobor.

We cut the platband with a miter saw at an angle of 45 degrees.

Mounting foam is used to fix the dobor box. It gives the structure rigidity, additional sound and heat insulation.

It is important not to overdo it with the amount of foam, so as not to deform the extension.
At the same time, if there is too little foam, the opening will be leaky and not rigid enough.
To remove excess foam, you need to wait for it to cool and cut it off with a knife.
Try to avoid getting the mounting foam on the extensions, walls and flooring.

First we install the vertical extensions, then the horizontal ones.
We fasten the platband to the dobor with decorative nails.

To install the platbands, you will need about 20 decorative nails. They are clogged at a distance of 20-30 cm from each other.
On average, 7 decorative nails are required for each vertical trim, and 3–4 for horizontal ones.

We measure the size of the horizontal platband.
Starting from bigger size, we do sawing at 45 degrees to reduce.
The horizontal platband is fixed to the dobor box and the vertical platband.

We press the structure to the door frame and fix it with masking tape until the mounting foam hardens - for 1-2 hours. Exact time depends on the drying time of the foam, which can be seen on the package.
After that, you can remove the masking tape. Your front door is ready!
Slope installation: video
If you have never installed a door and slopes before, we recommend that you contact the Torex installation team, which will perform the installation as quickly and efficiently as possible. The result of the work of our professionals is guaranteed.
No matter how chic the door you set for yourself, and without a decent frame, it will look, to put it mildly, unpresentable. Finishing the slopes of the front door is no less important than its installation. But often a person has no idea how to finish the slopes of the front door. Let's talk about how to improve the doorway, discuss the pros and cons of the most popular materials.
Often, it is the slopes that are responsible for the presentable appearance of the doorway.
Before you decorate the doorway, let's figure out what the openings of the entrance doors are in general.
- The classic regular rectangle is the standard, most common option. No matter how strange it may sound, but deciding how to finish the doorway of the front door with classic shapes is the most difficult thing. You can decorate with anything, but the problem lies in the large selection of materials, which can be difficult to decide on. The main plus is that the finish doorways Do-it-yourself rectangular shape will not cause much difficulty.
- The arch looks more impressive, but finishing the door slopes after installing the arched entrance door is technologically more difficult. Plus, not all materials will fit. Except for the branded overlays that come with the door, then only plaster, drywall and elastic polyurethane slopes remain.

Arched openings look more impressive.
If the arched design of the doorways haunts you, it is not necessary to equip a real arch: it is much easier to install a decorative overlay in the form of an arch in the area of \u200b\u200bthe lintel (upper crossbar). This can be done both from the inside and outside, the door itself and the slopes will be rectangular.

A decorative overlay will help to design the doors in the form of an arch.
How and with what you can finish the slopes of the main door of your home
If you are faced with the task of how to finish the slopes of the front door, with step by step instructions you can see in and on the video in this article, and we will try to analyze to the smallest detail all the pros and cons, which are often forgotten to be mentioned in brochures.
Option number 1. Good old plaster
Finishing doorways with cement plaster is deservedly considered the patriarch of the direction. This finish of the door slopes appeared along with the doors themselves.
A well-plastered and finished slope will last for more than a dozen years, it is not afraid of any temperature changes, or humidity, or cold. The plaster will fill all voids and irregularities. To spoil such a slope, you need to beat on it with a hammer. If you are not going to influence your doors so radically, then you can be calm about the rest. To freshen up the surroundings, the plastered slope can be repainted, wallpapered or lined with a fashionable now reflective film with a 3D effect: a smooth and durable surface will withstand everything.
But plaster also has a downside. Of all the finishing methods, plastering slopes is the most time-consuming and dirty process.

Plastering the slopes of the entrance doors is not an easy task.
Of course, if you install the beacons correctly, buy good plaster mixes and high-quality tools, then things will go much faster. Although believe me, if you have never plastered doorways with your own hands, this kind of design is not for you. In addition, plaster is, in fact, a stone, only artificial, and you should not expect any serious insulation from such a finish.
There is one more professional nuance. Even on a well-leveled slope, you can only paste wallpaper, and then after two layers of primer. For high-quality painting, one plaster is not enough: the surface will still have to be additionally puttied and sanded, and puttying and grinding will take no less time, effort and money than plaster.

plastered doorways look simple but elegant.
By the way, if you plan to finish the slope with natural or artificial stone, then the plaster will be the best and most reliable base, you do not need to putty it.
Option number 2. Drywall slopes
The next most reliable is the finishing of the doorway of the front door with drywall sheets. This cladding is also called dry plaster.
Drywall attracts with speed and relative ease of installation, plus, if necessary, door jambs can be closed almost completely. If you conditionally break down all the work, then in short, finishing the front door opening with sheets of moisture-resistant drywall consists of 5 stages:
- According to the rules, before finishing the front door opening, the surface must be cleaned of debris and covered with soil. But if the base is solid, for example, a brick wall, then it is enough to brush off the dust and walk through the solution blue vitriol to keep the fungus from growing.
- Next, we install a frame of metal profiles. There are wall and ceiling profiles, so for slopes it is better to take ceiling (UD / CD). If a large space is covered, then a solid frame is mounted, and when there is not enough space, only extreme vertical guides are placed.

- GKL is better to take wall (12.5 mm), and the sheets must be moisture resistant. If an arch is formed, then there is an arched drywall (7.5 mm) for it. Sheets are fastened to the frame with self-tapping screws, and glued to the wall with tile adhesive or a similar building mixture.
- When the structure is assembled, it must be puttied. Remember - nothing is glued to the "bare" sheets, it is not painted or attached.
- The last step is the decor of the doorway. It all depends on taste, skill and financial capabilities. The easiest way is to paste over the slopes with wallpaper. They don't need to be carefully sanded. Next comes the painting, but before it you have to sand the slope well. Tiles or stone are more expensive, but glued quickly and easily.

A hollow plasterboard slope has another indisputable advantage: it can be filled with insulation, thereby increasing heat and sound insulation. In this case, it is better to take polystyrene as a heater. There is an option to blow the mounting foam inside, but you need to act carefully: when it expands, it can squeeze out the sheet. It is advisable not to use mineral or any other wool for warming the passages of the entrance doors: it will become damp from condensate and become useless.

Many people reproach drywall for allegedly easily breaking through, but believe me, if you mount a good frame with a gap between the profiles of no more than 200 mm, and when mounting on glue you do not regret the glue, then you can not worry about the strength of the slope.
Option number 3. MDF
Entrance jamb finishing MDF doors plates at the moment is considered perhaps the most common. It's pretty tough and at the same time beautiful material, such panels behave well at temperature extremes and in conditions of high humidity.
When choosing MDF panels, there is a small nuance: you can take any sheets to finish the front door from the inside, but under the outer slopes, especially if the doors go straight to the street, you should buy only moisture resistant ones (their back has a greenish tint), otherwise after a year all beauty will bubble.
In this case, we are only interested in laminated panels, it makes no sense to take ordinary ones and then paint them separately. There are also panels covered with veneer in the line natural wood. The price for them is about half as high as for laminated ones, but such slopes are practically indistinguishable from expensive wood.

A backlit slope made of veneered MDF is not only beautiful, but also convenient.
Concerning self-assembly, then dobors, platbands, mounting angles and other things to buy and install are not a problem. Essentially, you are dealing with a constructor. First, a frame of wooden bars is constructed along the perimeter of the opening, and panels are already attached to it.
From a relatively expensive tool, you will need a miter saw or at least a jigsaw, as well as a drill and a screwdriver. A hammer, tape measure, etc. are usually in the arsenal of any home craftsman.
The downside of MDF slopes is only the price of the material itself. More expensive than such a cladding is only natural wood of elite species, by the way, it is mounted in the same way, but it’s better not to take it on yourself: the risk of spoiling is too great.

To equip a door slope from MDF is not as difficult as it seems.
Option number 4. Clapboard
Price for a good wooden lining approximately equal to the cost of MDF, but in this case you get slopes made of natural wood. This design of the doorway looks pretty solid, but there are nuances.
Any lining is mounted on wooden crate, which means that you should have enough space for such a crate. Accordingly, it is problematic to make small slopes from the lining.
Natural wood is a good material, but rather capricious. In extreme conditions of entrance doors, wood must be covered with antiseptics, fire retardants and other protective compounds.

Previously, the lining was completely varnished, now design experts do not recommend varnish. The fact is that most people associate varnished lining with balconies and garages, and the front door is still the face of the home. It is best to buy an oil-wax impregnation and apply it. The result pleases: quickly, beautifully and inexpensively.
Option number 5. PVC
Slopes from PVC finishing panels can be mounted within 1 day, plus the price of this material is affordable for almost everyone, but decorating a doorway with plastic has a number of negative points.

Plastic PVC slopes are mounted easily and quickly.
You can break through a hollow thin panel by simply leaning on it. As practice has shown, even the highest quality plastic panels on a good crate in the area of \u200b\u200bthe front doors last no more than two to three years.
Under the plastic you need a wooden or metal crate. Theoretically, such a panel can be glued to a plastered slope liquid nails, but if you have a good plastered slope, then why do you need plastic then.
In addition, according to fire regulations, it is extremely undesirable to mount plastic in the entrance area. In the event of a fire, it will actively melt and emit suffocating acrid smoke, thereby blocking the exit.
Although, on the other hand, as a temporary solution to the problem, plastic fits perfectly. And when you have enough funds, you can quickly dismantle it and install solid slopes from high-quality MDF on the same crate.

PVC panels have a fairly wide range of decor.
Option number 6. Decorative polyurethane lining
If you dream of seeing your doors decorated with luxurious moldings, we recommend that you pay attention to decorative polyurethane linings. Visually, such a finish cannot be distinguished from good stucco, and the performance of such slopes is an order of magnitude higher. The only problem is that the price for such decorations is quite serious, plus you can’t glue an overlay on a curved base. In other words, you will first need to level the slope with plaster or drywall, and then glue polyurethane beauty on it.

If the slopes are decorated with luxurious stucco, this speaks of good taste and the status of the owner.
A few words about the decorative finishing of door slopes
Finishing decorative finish is applied only on a solid prepared base, respectively, we can only choose between plaster and drywall.
- Most often, people choose simple staining. The quality of modern paints is such that they can retain their original appearance for quite a long time and under any weather conditions, plus, if you get tired of the color, you can always repaint.
- The next in the ranking of finishing door slopes is decorative tiles. Tiles for entrance doors are not suitable, so it is better to give preference to clinker tiles. If funds allow, then it is possible to line the slopes with artificial stone, by and large this is the same tile, only made from stone dust and polymers.
- The top three leaders are natural stone. Pleasure is far from cheap, in addition, it is better not to undertake it with your own hands and without preparation. Natural stone is a heavy and difficult material to process.

High-quality artificial stone is visually no different from natural.
Conclusion
In conclusion, we would like to note that it is better for homemade ones to dwell on materials designed for crates. These are MDF, wood and PVC. If you are confident in yourself, then you can swing at drywall. But we recommend leaving the plastering of slopes to professionals.

MDF door slopes are one of the most affordable for self-arrangement.
The installation of the front door can be considered complete as soon as the canvas is put in place, all fittings are attached and the correct operation of the locks is checked. However, at this stage, only installation work, and ahead is still to finish the door slopes. For a fee, you can entrust this task to the specialists who installed the input structure, but this process, most often, will not be done immediately, because you need to choose a finishing method and select the material. And does it make sense to spend finances if you can decorate the door slopes with your own hands? You just need to choose one of the options for decorative finishes, prepare yourself essential tool and material, and devote some free time to this activity.

After installing a metal door, its front side looks perfect: the finished look of the structure is provided by platbands, but inside the room there is something to work on. We will have to eliminate all the consequences of the installation work: hide the fasteners, close up the exposed material of the opening, in other words, make slopes for the entrance doors. You can do this in one of three ways:
- level with cement mortar and plaster;
- glue the finishing material;
- execute frame structure and sheathe it with sheet material.
To decide which way is better to make door slopes with your own hands, let's take a closer look at each of these options.
Slope plaster
If you set out to make the most durable slopes on front door with your own hands, then you should choose this option. This is not the fastest, but the most reliable way. A layer of mortar and plaster will become an additional barrier against heat loss, and at the same time improve sound insulation. In addition, the frozen layer cement mortar provides additional strength to the door structure. The downside is that plastering is the most time-consuming process of sealing slopes for doors. In addition, it is not the final stage of design: you will still have to paint the slopes or choose another way of finishing.
Bonding finishing material
For this method, you can use various materials, but for them to hold well, the surface of the slopes must be flat. If the geometry of the opening was violated during installation on the front door, it may be necessary to pre-align the walls with mortar.
Fabrication and sheathing of the frame
Decorating the door slope with a frame structure is the fastest and “cleanest” option. Various materials can be used as sheathing: drywall (with subsequent finishing), MDF panels, PVC, laminate. To insulate and improve the soundproofing properties of the door, a heater is laid inside the frame.
Preparation for installation of slopes

Before proceeding with the design of slopes for the front door, it is necessary to carry out preparatory work:
- First, we protect the door leaf and frame from dust, dirt and accidental damage. To do this, you will need masking tape and plastic wrap.
- Next, you need to level the base of the opening. We cut off strongly protruding irregularities, remove fragile loose materials.
- We very carefully clean the surface of dust using a brush with a hard bristle or a broom. Cleaning is especially important if cement mortar and plaster are to be used - dust and debris greatly reduce the adhesion of the material.
- The next step is priming the surface. If the walls are made of porous material, like foam concrete, you can use a regular primer. In other cases - the composition of deep penetration.
- At this stage, it will be a good idea to provide for the possibility of laying a cable so that you do not have to drill through the wall later. For a through hole, you can use aluminum tube, the diameter of which exceeds the thickness of the cable. The tube is fixed at the bottom, next to the plinth. If the slope of the front door is framed, then the cable pipe is laid after the assembly of the structure.
The process of plastering slopes

Let's consider step by step how to make slopes on the doors using a plaster mixture.
- To get a flat surface, first install the beacons. To fix them as quickly as possible, we use a gypsum mortar for this, which hardens literally within one to two hours. Along the length of the slope, it is necessary to place 2-3 heaps of the solution, diluted in accordance with the instructions, put the beacons, use the level to check their position and adjust so that they are in the same plane.
- When the mortar, in which the beacons are installed, firmly grasped, we proceed to the preparation of the cement-sand plaster mixture. We take the amount of cement and sand in a ratio of 1: 4. To thoroughly mix the solution, you should use a mixer nozzle for a drill. We run the tool at low speeds. If you add a small amount of gypsum to the batch, the finished mixture will set faster.
- To apply the solution, we use a trowel and a spatula. We spread the mixture on the slope area and align it with the installed beacons.
TO finishing You can proceed only after the plaster has completely dried. The period of complete hardening depends on the thickness of the layer. It is better not to rush to apply putty, and wait a day. When finishing putty dry, the surface of the wall is prepared for painting or other finishing option as desired.
Adhesive slopes

Now let's look at a way to make slopes of the front door using sheet material and adhesive backing. For this option, you will also have to direct the cement-sand mixture, since the surface of the wall must be pre-leveled. We adhere to the following procedure:
- We screw self-tapping screws into the cleaned and primed wall surface. Our task is to get an emphasis from the caps of the self-tapping screws, on which the sheathing material will lie. Hats should be in the same plane. When deepening self-tapping screws, it is necessary to take into account the thickness of the sheathing material.
- When we have prepared a kind of "landing area", we begin to fill the entire space of the slope with a cement-sand mortar. We impose a thickness such that the caps of the self-tapping screws rise slightly. We wait a day until the plaster dries.
- We measure the slopes on the door and cut out the panels of the appropriate size. For this we use any suitable material: drywall, plastic, MDF.
- We select the adhesive composition that suits the material. Glue the plastered slope and the back of the material with glue. We firmly press the sheets to the slope so that they rest against the caps of the self-tapping screws. Level check the position of the sheets.
- Cracks and voids that may remain along the perimeter of the slope are sealed with gypsum mortar or hidden with a corner.
- We carry out decorative trim slope.
Installation of slopes on the frame

In order to install the slopes of the front door on the frame structure with your own hands, you will need wooden bars or metallic profile, as well as facing material to your taste: drywall, MDF, plastic or laminate. It would be nice to prepare a heater at the same time in order to improve the heat saving of the door structure and its soundproofing properties. We will lay the insulation in the cavity of the frame base.
To attach the frame to the wall surface, we will use self-tapping screws or dowel nails. On the finished structure, we install the material, which we pre-cut to the size of the slope. We decorate the joints with a decorative corner.
Features of the choice of material for slopes
MDF Laminate Plastic
Plastered and then painted slopes are considered the most durable and durable. If you are going to decorate the slopes of the entrance doors with your own hands in a different way, you should take into account the peculiarity of the materials: their compliance with the conditions of service and stability.
If the slopes are installed on the front door of the apartment, which is not subject to changes in humidity and temperature, then any material can be used. For cottages, you should opt for materials that are not subject to drying out and damage from moisture. As an option - purchase moisture resistant panels.
For finishing slopes it is customary to use:
- Drywall - inexpensive material. Installation is made on glue or self-tapping screws. Corner elements made of this material must be reinforced with special corners. Needs further finishing.
- MDF is a durable, wear-resistant material with decorative design front surface. It has many shades and textures. Fastened with clamps or self-tapping screws.
- Laminate is a material, after installation of which the slope acquires an aesthetically finished look. Installation of lamellas is carried out both in the longitudinal and in the transverse direction. Thanks to the lock fastening, it is quickly and easily joined to each other. The first and last element of the vertical slope must be attached to the wall. The horizontal slope is fixed to the wall surface along the entire edge.
- Plastic has less strength than all of the listed materials. The installation process is similar to laminate slopes. To protect the plastic from impact loads, the skin is attached every 10–15 cm. The advantages of plastic panels are easy hygiene care and many decorative options.
From the presented design options for door slopes, it will not be difficult to choose the most suitable method and material. At the end of the work, remove the protective film from the door leaf and door frame.
The slopes on the doors are not only an insulating element of the door trim, but also perform an aesthetic function. The process of mounting slopes on the door requires special attention, because there are different ways and finishing technologies. In the provided article, we will consider issues related to the installation of slopes in various ways.
Slope design methods
Exist different variants for the installation of door slopes, which are determined by the type of material, work technology, etc. When installing with your own hands, it is important to follow the recommendations of specialists and detailed installation instructions. It is important to ensure that the materials used are practical and durable, while they must perform insulating functions, especially when finishing the slopes of the front door.

The installation of door slopes must correspond to some tasks, which are to securely fix the fasteners, as well as to perform a decorative function. Determining the variations in the finishing of the slopes, experts distinguish the surface cladding with different materials, which are attached to the base with the assistance of mortar, plaster. Some elements can be attached to the frame base using a drill or other devices.
As finishing objects, you can veneer slopes on doors made of laminate, drywall, plastic or wood panels, MDF and the like. All materials are perfect for finishing, as well as for interior doors, as well as for the input. In the latter option, it is necessary to provide reliable sound insulation and complete sealing, which provides for a thorough sealing of the slopes.
Slopes for the front door should not have any voids, which increases the strength and reliability of the cladding. Can be applied over putty or mortar different materials for finishing. The main thing is that they are combined with interior design apartments or houses. If a huge amount of mortar is needed for finishing, for example, to align the corners, then a frame can be installed on the slopes. Its basis may be wooden slats or a metal profile on which facing materials are installed.

It is worth noting that finishing the slopes under the frame will create a more even surface than plastering. Moreover, finishing with wooden or plastic panels looks more attractive than painting the surface and so on. In particular, it is much easier to carry out telephone, electrical and other communications through frame slopes.
It is important that the opening in the door has a maximum service life, is durable and practically does not succumb to mechanical and other damage. To do this, you need to know the rules and technologies for installing slopes on the door yourself. Equally important is the choice facing material, which distinguish:
1. Finishing with drywall. Such material will hide all the irregularities of the slopes. Using this option, you will get rid of unnecessary waste for the purchase of putty and other solutions designed to level a certain area. In this case, the possibility of installing a frame base will disappear.
2. Plastering slopes on the door. This method is considered the most economical and practical, while all the work can be done independently. To do this, it is important to cover the work surface with plaster, after which you can start finishing.
3. Plastic panels. Very often used for decoration window openings. They are rarely used in doorways, because plastic materials will stand out against the background of a wooden product. Moreover, this option is not reliable and durable.
4. Wooden slopes. This type of finish is the most popular. Wood is a durable and reliable material that will last a long time. This finish is perfect for different interior rooms.

Gypsum board door frames
Drywall is not used for finishing, but is the basis for slopes. This option is used to save money on the purchase of different mixtures for leveling walls. Installation work should begin with preliminary surface preparation, which includes cleaning the walls, as well as a primer:
1. After the surface has dried, it is necessary to take all measurements and prepare materials for finishing the slopes on the front door with your own hands. When cutting material, make sure that some parts are cut at an angle. This is necessary for fastening parts to a deviated surface.
2. After cutting the sheets, check if all the elements fit under the doorway.
3. Next, you should wait for the complete drying of the primer layer, after which you can install the panels. As fasteners, special glue or dowels can be used. It is recommended to apply the first option, which will allow you to fasten drywall sheets more evenly.
4. The installation process should begin with the installation of the side parts of the opening, and in the end, the upper area lends itself to finishing.
5. Glue can be applied in a continuous strip or in separate points, for example, every 15 centimeters.
6. After securely fixing the drywall sheets, it is necessary to finish the surface by fixing the perforated corners by applying putty.

Finishing door slopes with plaster
This type of work does not present certain difficulties and requires minimum costs. The process of finishing slopes with plaster has the following sequence:
1. First, the work surface must be cleaned and primed.
2. After the primer layer has dried, it is advised to start applying the solution to the surface of the slopes. For work it is recommended to use a spatula.
3. In order for the corners of the opening to be even, it is important to use perforated metal corners. They are attached to the surface using a plaster layer and carefully smeared.
4. After the plaster has dried, the surface of the slopes should be cleaned with sandpaper.
5. The last step is the treatment of walls using paints and varnishes that will add aesthetics.

Finishing slopes with plastic panels
Do-it-yourself door slopes can be made from plastic panels. The execution of work has the following sequence:
1. First, you need to make measurements of the door slopes and cut plastic panels that would correspond to these parameters.
2. The work should use an electric jigsaw, not a regular knife. This is necessary so that all the details in the cut points are even.
3. After trimming, all panels must be checked against the doorway.
4. First, set the slopes on the sides. For this, a special profile is fixed to the opening with the assistance of self-tapping screws.
5. Wooden slats must be attached to the edge of the wall. It is important to check the evenness of the installation elements with the assistance of the building level. Plastic panels will be attached to such rails using staples.
6. In the lower area, a plug is installed on the plastic panels, and the trim is inserted into the slopes on the sides and into the initial profile. The same procedure has work on finishing the slopes above the doors.
7. The last step is the processing and sealing of the seams using silicone. For installation plastic slopes it is recommended to choose PVC sheets, as well as special sandwich panels.
Finishing slopes with wood
Wood trim is perfect, as well as for the slopes of a metal door, and a wooden one. Of course, in the works you can use materials made from natural wood, or you can use laminated or MDF panels. If you want to prefer a material that would have excellent insulating properties, then it is recommended to use MDF boards. If their parameters do not fit the dimensions of the slopes, then a laminate can be an excellent alternative.
Initially, installation work begins by carefully sealing the seams between door frame and wall surface. After that, the remaining foam must be removed, cleaned and carefully primed. Slopes can be made at right angles or with a slight slope. After determining the shape of the slopes, it is necessary to fix all the panels. Care must be taken at work the right choice wooden planks. It is important that they have the same thickness and dimensions on both sides.
The slats or frame must be attached to the wall with the assistance of dowels, which refers to the fixation of all parts. Slopes can be attached using glue or self-tapping screws. All gaps must be sealed with silicone sealant. Slopes made of wooden panels look very aesthetically pleasing in any interior space.

Detailed instructions for installing slopes for entrance doors
Finishing work must be carried out, taking into account the size of the doorway and the materials used. If during the installation of slopes in interior openings there is no need to make insulation, then for entrance doors such a procedure is an important element. To the question: how to make slopes on the front door, it is necessary to pay special attention to sealing the openings from drafts and sounds that come from the landing.
Slopes must be strong and reliable. In this case, experts suggest finishing with plaster or using different combinations. For example, you can plaster the walls on top of which MDF panels are attached. Everyone uses items for decoration from their own preferences. To carry out the work, it is necessary to prepare such materials and devices:
- mounting foam;
- lime, cement;
- putty, primer;
- sand;
- glue, dowels, if necessary, "liquid nails";
- electric jigsaw;
- building level;
- brushes, spatula;
- perforated corners.

To open the question: how to make the slopes on the doors even? - we recommend to study detailed instructions performance of work.
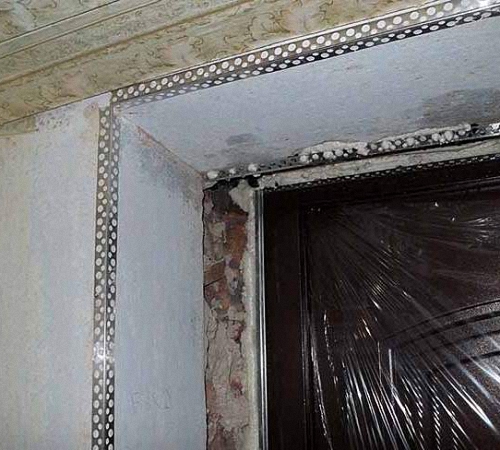
1. First of all, it is important to close up all the cracks. After installing the door, it is important to carefully fill all the gaps between the frame and the wall. mounting foam. Next, you need to wait until the foam hardens. All residues must be cut with a regular knife and carefully smooth the cracks.
2. Surface preparation is important for further plastering of the wall. All work takes a long time, so it is recommended to process the surface in several layers. First, a layer of primer is applied to the wall, which will better strengthen the plaster mortar. To achieve a perfectly flat surface, it is necessary to use a beacon profile, which is fixed with dowels.

3. Next, we carry out the plastering of the slopes. For the manufacture of the solution, it is necessary to use cement, sand, lime mortar. The technology of applying the mixture to the surface must be started from the upper slope area. First, putty is applied in a thick layer, after which the excess amount is removed by leveling the wall. To ensure that the slope angles are even, it is recommended to use a perforated profile. They are fixed on the surface of the applied plaster mixture. Next, a finishing layer of plaster is applied, which should be thin. This process will remove all bumps and roughness.
4. The final step is to fix the MDF panels. The base for such panels must be made of lime-cement mortar. After it dries, a layer of primer is applied to the surface. The panels must be divided into three parts, each of which must correspond door slopes. A layer of glue must be applied to the surface of the wall, after which the panels are applied to the wall. Such work must be done with all the details.

To understand the scheme of work, we recommend watching the video about finishing slopes for doors, presented at the end of the article. When finishing, due attention should be paid to cutting the slab. To do this, all angles are carefully measured, and it is important to cut the panels at a certain angle. After cutting a plastic or wood panel, all the pieces need to be joined to check if they fit the door slopes. The perfect combination finishing the slopes will be the use of wooden panels and a door made of such material.


