Warming the doors of the house. Do-it-yourself insulation and upholstery of entrance wooden doors. Frame and panel structures of doors
There are many factors that determine the heat performance for a private home. High-quality and reliable heaters are just one of them that matters. Windows, roofs and front doors are most involved in the process of keeping warm. However, if quality plastic windows, and the room is still cold, so the main problem lies in the door leaf. In this article, you will learn how to insulate a wooden door in a private house, and what materials are best to use for this.
When do you need to insulate wooden doors?
Input door structures- this is a kind of shield that helps protect against a large number of external influences. Therefore, the products themselves must have maximum strength, reliability. Special characteristics are also important, guaranteeing protection from frost and heat, extraneous odors and noise.
According to advice from experts, insulation is relevant under the following circumstances:
- The design was originally purchased without insulation, just as free-standing doors.
- The old insulation of the selected type was mounted poorly or it was worn out during operation.
- The wooden door has lost its attractive appearance, even if it was installed correctly.
Old heaters are advised to be replaced when more modern materials with improved characteristics appear. Implementation of work with my own hands allows you to save the most money.
What is the best insulation for the front door?
There are many materials that allow you to solve the problem of insulation, here are just a few of the most common:
- Inside this material there are many micropores with air, due to which the thermal insulation characteristics of the door leaf remain high. The upholstery base does not play a role in this.
Step-by-step instructions for warming
The sources of heat loss can be both the doors themselves and the presence of gaps between the door leaf and the frame. Therefore, it is necessary to take care of improving the properties in two directions at once, then the insulation is most effective. Let's analyze a specific technology that can be used to insulate door structures.
Tools and materials
Before proceeding with the process of warming the front door, you need to carefully prepare. First of all, you need to acquire the tools and materials that may be required to complete the task.
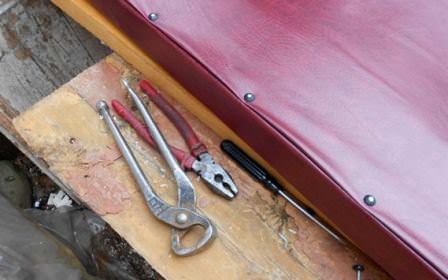
It is impossible to insulate doors without the following devices:
- nail puller or montage;
- flat rail, meter with a metal base;
- screwdriver;
- hammer;
- hacksaw;
- stationery knife;
- tape measure with a pencil;
- construction stapler.

This set of devices can be expanded if necessary. But such tools are enough for most cases. An electric jigsaw can be a great alternative to a hacksaw - the work will be done with the same quality, but it will take much less time. A simple drill is suitable when a screwdriver could not be found in the house, the main requirement is the presence of a reverse, then any nail or screw will be removed without any problems.
You also need to decide on the lining material. Wooden doors after insulation are usually sheathed with dermantine.

Preparatory work
Each step must be carefully followed to achieve the desired result. Only this approach will allow you to properly distribute forces and in the future to do without additional repairs.
Cutting and laying insulation
At this stage, heat-insulating material should be prepared:
1. Initially, you should measure the voids in the door leaf that need to be filled, and make marks on the insulation.
2. The selected heat insulator is cut along the marked lines with a clerical knife both in length and in width.

3. If the door has the form of a frame with voids, then the latter are completely filled. To do this, between the bars it is necessary to insert all the pieces of insulation as tightly as possible.

4. If the supply of material is too large, it will interfere with the final sheathing. Excess parts are simply cut off with your own hands if necessary.
5. The insulation is fastened with brackets. Thanks to the construction stapler, the work is accelerated and facilitated.
New door trim
New upholstery wooden doors- next stage. Soft-type materials like dermantin, a leather substitute, are excellent. The upholstery fabric must be cut off, creating some margin of at least 10 centimeters. Then the material will easily bend and have some thickening around the entire perimeter.
It is best to use special nails when fixing dermantine. They are supplied with decorative hats, giving the design a more pleasant appearance.

On the video: do-it-yourself upholstery of a wooden door.
Install hinges with fittings
Removed fittings are installed in place as soon as door leaf acquires a suitable appearance with the correct thickness. The main thing is that the loops fit correctly in their nests. A seat for the lock is carefully cut out. There must be no damage around, otherwise you will not be able to complete the work.

Mounting the seal
Even when the front wooden door is closed, a small gap still remains. Therefore, the next step is to eliminate the existing defects. The main thing is to choose a sealant with the appropriate characteristics. Manufacturers today offer rubber, silicone and foam options.

Foam rubber quickly and easily solves the issue associated with drafts. Perfect option even for cottages where there is no operation with serious intensity. Silicone and rubber protect against drafts for a longer time. Products have such a shape, due to which they adjoin to the base as tightly as possible.

After the seal option has been selected, it remains only to complete the installation. For this, an adhesive strip or a harpoon in a groove is usually used. Self-adhesive products provide the maximum speed of the process, but the harpoon version wins in terms of durability.
In this case, the fastening is carried out in the very corner of the quarter. Therefore, the canvas easily falls into place without difficulty.

Of course the best option- do most of the work yourself. Then there will be no need to invite additional specialists. Usage quality materials for this it is not so expensive, but the proper level of protection from the cold will be provided.
Budget ways to insulate doors (2 videos)
Insulation and upholstery options (40 photos)


How to insulate front door in a private house every owner should know Our home is, of course, our castle. And it starts at the front door. There are many tips on how to purchase a front door. But, I would like it to be not only reliable, but also warm. It's no secret that the main heat loss occurs through the cracks of the doorway.
How to insulate a wooden door in a private house
During operation, the canvas settles. The withered tree is deformed, and cracks are formed. If possible, the position of the door must be adjusted. It is better to replace the dilapidated door in a private house. But if you have no complaints about the strength of the door, then consider the possibility of its insulation.
Rubber adhesive tape can be used as a seal for a wooden door
First you need to decide what causes heat leakage.:
- If frost forms on the door in winter, or it cries due to condensation, then it is necessary to insulate the door itself tightly.
- If cold air flows from the door, then the sealing may be broken, and heat leakage occurs due to poor adhesion of the door leaf to the door opening. You can detect the presence of cracks with a known school years way. Bring a lit candle to a closed door, in the direction of the flame you can easily determine in which places you need to put a seal.
Rubber adhesive tape works well as a sealant. It is attached to the box in the place of its contact with the door leaf. Due to constant friction, such a seal lasts one season. With the onset of the next cold weather, it may have to be replaced.
Insulation of a wooden door in the house
Modern industry offers a wide range of materials to prevent heat loss. The classic way to insulate a door is with foam rubber lining. A very convenient and inexpensive material, it has long established itself in private homes.
Its only drawback is a relatively short service life. Over time, it crumbles and loses its useful qualities.
Mineral wool is more durable. Using it as a heater has other disadvantages. It gets wet easily and loses its properties. It cannot be used to insulate iron doors, which are particularly susceptible to condensation. And also you should not use it on wooden doors that are open to water during rain and snow.
Mineral wool is one of the options for insulating a wooden door in a house.
Styrofoam insulation has its own characteristics. It doesn't rot or get wet. A very light material, the disadvantage of which is its thickness, which is not always convenient for wooden doors. But due to its water-repellent properties, it is most often used to insulate iron doors that are prone to moisture accumulation on the surface.
Izolon - enough modern material. Thin, durable, it has practically no flaws. Resists moisture well and is often used as outer insulation. Does not highlight harmful substances and doesn't rot. Its only drawback is the rather high cost compared to other options. When choosing this insulation, you should remember the need to maintain the integrity of the aluminum layer. And also about observing the necessary rules when laying it. You just have to choose the material based on the conditions of its operation and your financial capabilities.
Instructions: how to insulate the entrance wooden door with your own hands
You can insulate the entrance wooden door in a rural house with your own hands.
To complete these tasks, you will need:
- Selected insulation;
- Material for door trim, usually leatherette or more presentable leatherette;
- Nails with a decorative cap;
- Tools for work, depending on the type of insulation.
So, we insulate the opening and the door itself. It will be more convenient to trim the door if it is in a horizontal position. To do this job carefully, the door leaf must be removed from the hinges and freed from the fittings. Treat with an antiseptic if necessary. Fix the insulation on the door. Close it with the selected upholstery material and secure it around the perimeter with nails.
You can insulate the entrance wooden door yourself
Attach insulation rolls around the perimeter of the door, after wrapping them in sheathing fabric.
The diameter of the rolls must be sufficient to cover the gaps. As a rule, they do not exceed five centimeters from the edge of the canvas. It is better to fix the rolls with nails with decorative caps. Punch with decorative nails in the center of the canvas to firmly fix the upholstery. Install the hardware and put the door on the hinges.
Benefits of wooden insulated doors
If you do not want to insulate the door yourself, you can purchase a ready-made insulated entrance structure. The variety of entrance doors from manufacturers will confuse any buyer. What criteria should a modern front door in a house meet?
First of all, it must be:
- Sturdy and reliable, in order to fulfill its main function. Today, durable doors meet all the necessary standards. Shockproof, armored, mounted on several door hinges, with a complex system of locks - will satisfy the highest requirements for security and protection from uninvited guests.
- Insulated and airtight doors prevent the loss of warm air and provide insulation from noise.
- Of course, the door is the face of the house, so we must not forget about its beauty and aesthetics.
The iron entrance structure is considered very reliable. Today, metal is the most durable material. Therefore, to ensure safety, metal entrance structures are often chosen. If the perimeter of your site is well enough protected from random visitors and intruders, then you can opt for an aesthetic wooden front door.
Entrance insulated door prevents the loss of warm air
Long gone are the days when a wooden door in a rural house was easy to crack. The designs of entrance doors made of solid wood today are not inferior in strength to conventional iron doors, but significantly benefit in design and external design. Doors made of solid oak or larch meet all safety requirements. They are often installed in cottages and at the entrance to public institutions, sometimes they amaze the eye with their nobility and status. You can choose a paneled door.
Insulated wooden doors consist of several layers:
- The entrance panel of the door can be made of any material.
- The next layer is insulation. Ask the seller what type of insulating material was used in the manufacture of the structure. Give preference modern heaters with long service life and low thermal conductivity.
- There must be an air cushion in the middle of the door. This is a prerequisite that prevents freezing of the door leaf.
- Again there is a layer of insulation.
- The final layer is the inner door panel.
How to insulate doors in a private house (video)
When choosing an insulated door, it is important to remember that, on the one hand, it should not be too thin. On the other hand, an excessively thick input canvas does not yet speak of quality. When choosing entrance doors, give preference to well-known manufacturers and firms that have gained a good reputation in the market. This will protect your home from the penetration of cold air and uninvited guests.
Similar content


The front door is a kind of barrier between the street and the house. It protects us from uninvited guests and unnecessary noise. It can also serve as excellent thermal insulation. But this function may not be fully performed if the door is not insulated in a timely manner.

What is it for?
In order for you to feel warm and cozy at home on cold evenings, it is necessary to insulate your home for the winter. But it is not enough to replace the windows with double-glazed windows and seal the walls. Still, the main heat loss occurs through the door. That's what needs to be warmed up first. Only you need to do this in advance, and not with the advent of the first frost.


Insulation of the door unit is not only a great way to keep warm and protect against drafts, but also good noise insulation, as well as protection from condensation and odors.

Necessary materials
The range of insulating materials is quite diverse. All of them differ from each other in density and durability. Currently, the following door heaters are used:
- Cardboard- the cheapest material. Possesses low heat-insulating property. And even its euphonious name "corrugated cardboard" does not save him, although the folded structure should be the best way to do this;
- Foam rubber- a pioneer among heaters. Flexible, holds its shape well and resists stress. It is easy to work with him. The only negative is that it absorbs moisture, gets wet and decomposes, which is why it is considered a short-lived material;
- Izolon- an analogue of the previous substance, but has higher water-repellent properties. There are a large number of species that differ in thickness and density. You should pay attention to its appearance, covered with foil. It has high thermal insulation, durable and elastic;
- Styrofoam- a good option for warming the door leaf. It has good sound insulation, perfectly retains heat. It is easy to use - for its installation does not require specialized assistance, everything can be done by hand. In addition, he will delight you with his price. The disadvantage is its rapid flammability and the release of toxins during combustion;


- Cotton wool is mineral and basalt. This is the most environmentally friendly material, but, unfortunately, not the most suitable for door insulation. Cotton wool has an increased hygroscopicity, that is, it quickly absorbs water, gets wet and clumps, and because of this loses its properties. If, nevertheless, you decide to use this particular material as a heater, you need to make protection for it from a plastic film. It will provide breathability, but hold back water and steam;
- Rubber gaskets used as a sealant for gaps up to 12 mm in diameter. They are resistant to high and low (up to -40°) temperatures;
- Dermantine used as a decor, which is applied on top of the insulation;
- Batting- natural material. Eco-friendly, does not cause allergies, airy in its structure. Evaporates moisture well, has air permeability. By insulating the door with batting, you will provide yourself with heat and sound insulation.


As you can see, there are really a lot of options for insulating the door leaf. But don't get lost. By classifying them according to several criteria, you will immediately eliminate most of them and there will be no question which one is better to use.

To begin with, decide on the pricing policy: will the material be more expensive for you or is it your priority to insulate your house on a budget. An important role is played by the place of residence: an apartment or a private house. If you live in an apartment, then between your housing and the street there is, so to speak, a dead space - an entrance. He is the first to take on a frosty and windy blow. At the same time, an already “weakened” version of the cold enters the apartment. Therefore, here it is possible to use a simpler material, and therefore cheaper. Living in a private or rural house, you are left alone with the weather conditions. Therefore, it is more reliable to insulate, not forgetting about the attic.

And yet, the type of door plays a decisive role in the choice of insulation fiber. Most often, a metal door is used as an entrance canvas. Almost all of the above materials are suitable for its insulation. But special attention should be paid to such a product as polyurethane foam or polyurethane foam. It is a synthetic product that has good thermal insulation, fire resistance, and is easy to use. It is important to note that foam is produced in liquid form, due to which it fills the entire surface, including hard-to-reach places.


To enhance the thermal insulation of a wooden door, foam rubber, isolon, polystyrene, batting, mineral wool are used. Particularly well suited for this purpose are heat-reflecting materials based on polyethylene foam with foil. It is able to save up to 70% of the outgoing heat.


If you are looking for a way to insulate plastic door, first you need to understand the reason for the transmission of cold:
- perhaps the mechanism has become loose, then it is enough just to adjust it;
- if the cold comes from under the bottom of the door, this is a flaw in the installers. To fix this problem, lay the foam on the bottom and fill it with mounting foam;
- foam rubber, mineral wool, polystyrene foam are suitable for warming the entire canvas.

Applied methods
Before you provide thermal protection to your door, determine its weakest point in this regard. This may be insufficient tightness or insufficient density of the web itself. Based on this, use one of the methods of thermal insulation of the door.


Along the perimeter of the opening
To do this, use a sealant. This is a tape material that is glued to the base with a sealant or adhesive layer. Sealing material is used as a means for sealing gaps door frame.
There are several types of it:
- based on foam rubber are the least durable. They are enough for one season;
- rubber glued to the rubber layer. Sufficiently reliable material;
- rubber reinforced with fiberglass. There are various colors of this material. It is elastic and frost-resistant;
- polyvinyl chloride withstands both high and low temperatures. Happens different shapes depending on the slot width. To mount the PVC tape in the doorway, it is necessary to make a groove in it and push the sealant into it with a screwdriver.


It should be noted that the more elastic the seal, the more densely it will fill the space and ensure the door is not blown through. Before purchasing a seal, measure the doorway around the perimeter, going from corner to corner. Do not forget to take into account the width of the slots and the porch. To find out its required width, you need to take plasticine, put it in a bag and lay it in one of the slots that need to be sealed. After that, close the door. The entire configuration of the gap will be printed on the plasticine and it will become clear what width the seal should be chosen.


Now let's figure out how to stick the tape correctly:
- if you are using a self-adhesive product, be sure to degrease the door frame before work. After that, remove the protective film from the adhesive layer and apply the sealant, starting from the bottom;
- non-adhesive material should be applied with silicone or liquid nails.

Upholstery
Another way to insulate a street door is to insulate the door leaf itself. This is especially true for metal doors, as they are able to form cold bridges through which air enters the apartment.
To insulate a metal door leaf, you must:
- Remove the door from the hinges, release it from the lock and handles.
- If it consists of 2 sheets, separate them.
- Lay the insulation between the sheets. Fill the cracks with mounting foam.
- Fasten the canvas.
- Put the door back.


If the door is wooden or metal, but non-separable, the insulation is fixed on top of the canvas.
It is produced in this way:
- Remove the door, free it from removable parts.
- Next, you need to decide on which side to attach the insulating material - from the outside or from the inside. It depends on the location of the hinges and the way the door block is opened.
- Fix the heat-insulating material with a furniture stapler every 15 cm.
- You can use another method. Nail to the door leaf around the edges wooden slats, lay foam between them. From above, this design is closed with plastic or fiberboard.
- Let's move on to decorating. To do this, the door leaf is covered with upholstery using decorative nails. The upholstery can be made of leather, vinyl leather, plastic - foam, bologna. You can also cover the front door with leatherette. The upholstery is fixed, starting from the upper corners. Stretch so that no waves form. It is necessary to leave 5 cm for the hem over the entire area.


for thresholds
The threshold is an important component of the front door. It can be made from various materials: wood, metal, plastic, concrete. In addition to sound-absorbing and supporting functions, the threshold ledge also provides disposal of condensate and thermal insulation and closes the gaps in the lower part of the door unit. Therefore, it is so important to insulate him for the winter.
For its thermal tightness, you can resort to several methods:
- Plastic can be insulated with a sealant such as polyurethane foam. To do this, it is removed, the assembly seam is freed from debris and filled with several layers of foam. After that, the threshold is returned to its place.
- Another option is a thermal damper. Here you will also need to dismantle the threshold. Then a heating cable is laid in its place. Between its loops is a temperature sensor that reads information about its temperature. A thermostat is brought out, which turns the mechanism off and on. At the end of the work, do not forget to return the threshold to its place.


Installation of the second canvas
This is a very reliable method of keeping the heat in the apartment. An air cushion is formed between the two doors, which resists the penetration of cold air from the street. You can mount an additional canvas in several ways:
- On the box of the first door. This option is good if you put both doors at the same time or if both sheets are made of the same materials. Thanks to this technique, the work of insulating the doorway is facilitated, reliability is increased and installation time is saved.
- Apart. It is used if it is necessary to add a leaf to an existing one or the doors are made of different materials. In order to mount the second entrance door in this way, it is necessary to assemble the box, hang the canvas on it and insert this structure into the doorway according to the level, seal it. Required condition– door canvases must be the same size.

We looked at insulation country house in several ways and touched on the main points that can improve energy savings. But today we would like to talk in more detail about how the entrance to the house is insulated, which provides additional heat retention.
Naturally, for high-quality energy saving of a building, it is necessary to properly insulate windows and doors in order to create tightness and prevent heat from escaping into the street and being replaced by autumn and winter cold. It is easy to deal with windows, but doors are a more complicated issue, since it will not be enough just to paste over them with paper or process them with foam rubber, more extensive work needs to be done.
Insulation of wooden doors
For a long time, such structures have been insulated in the same way - by stuffing on both sides of a special material, under which foam rubber, cotton wool, synthetic winterizer, and other heaters are laid.
First of all, you will need to purchase a door insulation kit, just try to choose a quality one with all the necessary elements. A reliable and practical kit combines material for sheathing on both sides of the door, insulation, rollers or tapes for fixing the upholstery around the perimeter, a special set of foam rubber tapes or rubber bands for laying in the doorway, fasteners in the form of decorative nails.

Insulation of the entrance wooden door in country house begins with the fact that the door leaf must be removed and carefully laid on the floor. Next, deploy the insulation kit you purchased and follow the instructions. If there is no instruction, we present you the simplest algorithm.
- Lay the door leaf on the floor, preferably on several bars, so as not to spoil the side adjacent to the floor with scratches and chips.
- Take measurements and compare the doors with the canvas, make a fitting.
- If the upholstery is slightly larger than the door, it should not be cut, it will be enough to pull it from the corner, that is, for example, from above and to the left, and when tolerances remain at the bottom right, they can be bent inwards.
- Before starting upholstery, insulation is laid out on the door leaf. You can also put it on glue, even on the simplest PVA, the main thing is that during the upholstery the insulation does not slip and does not stray into lumps.
- After that, we start upholstery, for example, from the top of the door or from the corner, carefully monitoring the progress of the material so that it does not move to the side and does not lie obliquely on the canvas. The upholstery takes place with the help of decorative nails in the central parts of the door. Along the perimeter, it is necessary to fasten the upholstery to nails, but through a special roller, which will not allow the edges of the upholstery to tear.
- Then you can go to the other side, and then install the lock and handles.
If a lock and handles have already been installed in the door, they will need to be removed before upholstery, and reinstalled after upholstery. In order not to invent unnecessary problems, do not lay insulation under the upholstery in that part of the door where you will install the lock and do not pre-cut a “window” for the lock.
Insulation of metal doors
The insulation of the entrance metal door is a little different, and most often it is insulated only from the inside, but with a much larger layer of insulation. The process is quite simple.

- Doors for insulation can not be removed from the hinges and the door frame, but insulated on the spot. But, if you are uncomfortable working in this way, the canvas can be removed and laid on the floor.
- First of all, it is necessary to mark the crate, on which the insulation and sheathing material will be attached.
- Usually, it is done horizontally, parallel to the floor, every 50-60 cm, depending on the insulation, but since the insulation does not take much, the crate can always be done exactly as it is convenient for you.
- After marking, we install a crate made of a wooden beam or a mounting plate, depending on the thickness of the insulation, the door and your requirements for the quality of insulation.
- After the crate, we lubricate the canvas with glue, it can be partially or pointwise, only so that the insulation material is fixed.
- The laying of the material takes place sequentially, from top to bottom, whether it is polystyrene foam, polystyrene foam, mineral wool or other materials.
- Do not forget about installing a lock, for which it will be necessary to make a dimensional slot in the insulation. If the lock is already installed on the door, it will simply need to be “hugged” with a heater.
- After finishing the process of lathing and insulation, it is necessary to sheathe the doors decorative trim. It can be plastic, lining, plywood, OSB and other materials that you consider more worthy.
- Sheathing can occur on nails, self-tapping screws, bolts and nuts, or special fasteners for the material to be installed.

Do-it-yourself insulation of the front door should be well thought out, because if you leave the “cold” box, as well as gaps for drafts, upholstery and insulation of the door leaf itself will simply be pointless.
Insulation of a metal door frame
Insulation can become an empty undertaking if you do not think about the most important thing - the door frame and the gaps between its base and the door leaf.

The work is as follows:
- Initially, you need to remove the door panels and insulate them, but do not hang them back on the hinges, but work well with the box.
- Evaluate initially how the box is installed, perhaps it needs to be strengthened to the wall, ceiling and floor, to give rigidity and reliability.
- After, metal box it is worth blowing it well with mounting foam, but only professional, which will not open the base of the box and will not distort it.
- After the foam has dried, it will need to be carefully cut off and puttied several times, giving each layer the opportunity to dry. It is advisable to lay a reinforcing mesh between the putty, otherwise in a year all your work may be on the floor.
- After, wait for the putty to dry completely, wipe it to a smooth state, prime and paint.

At this stage, it can be stated that the iron entrance door is insulated and should not let heat through, but you should also think about drafts that will carry it away.
Using the methods described above, you can also insulate the doors of the garage, barn, summer kitchen and other buildings on the dacha.
Do-it-yourself door insulation (video)
Proper insulation cottage doors and windows, installing infrared heating or even an oil cooler can provide you with heat for the whole winter period. We wish you not to freeze!!!
Korovin Sergey Dmitrievich
Master of Architecture, graduated from the Samara State University of Architecture and Civil Engineering. 11 years of experience in design and construction.
Warmth and comfort in the house are the main tasks facing every owner of their own living space. Particular attention is paid to the front door, as it is in direct contact with the street. And in the cold season, heat is able to leave the room through the doorway. To avoid unpleasant consequences, the front door should be insulated. You can do this work yourself. But before insulating a wooden door in a private house, you should prepare everything you need for this.
The guarantee of future comfort depends on the chosen material, for the sake of which the insulation was started. And if a few decades ago only felt, foam rubber and dermantin were available, today the choice is much greater. And here is what the manufacturers offer:
- mineral wool;
- Styrofoam;
- Izolon;
- Styrofoam.
Mineral wool, like polystyrene, is most often taken as the basis for insulation for metal door panels.. Both materials perfectly retain heat indoors and are not affected by microorganisms. Mineral wool is also worth noting because no rodents will spoil this insulation.
 Mineral wool absorbs moisture
But these materials have some restrictions on their use.
Styrofoam belongs to the category of combustible insulation, so its use for working with wood is possible only when processing special formulations. And "disease" mineral wool is subsidence. Over time, the skin may be at the bottom of the canvas and stop retaining heat. In addition, mineral wool accumulates moisture inside itself, which adds weight to the entire structure. Therefore, such material should not be used for warming a bath or sauna.
The use of isolon is more justified to achieve the goal of retaining heat. This material is made on the basis of foamed polyethylene, which gives it a minimum thermal conductivity. The advantages of the material include the fact that a canvas with a thickness of 10 - 15 mm will be enough for work. This allows you to maintain an attractive appearance of the door leaf, without thickening it and not making it bulky.
 Izolon has low thermal conductivity
Expanded polystyrene has excellent performance. The door insulated in this way will become a reliable and safe barrier between warm home and cold street. Among the advantages of expanded polystyrene, its incombustibility should be highlighted. When a flame occurs, it will gradually disappear on the surface of this material.
For inexpensive insulation, you can always use foam rubber.. The material is comfortable in all respects and for a beginner home master will be a real find. Foam rubber will forgive the mistakes made and allow them to be painlessly corrected.
Tool
It is impossible to get the job done without the right set of tools. To create insulated wooden entrance doors you will need:
- Roulette and pencil;
- Stationery knife;
- Hacksaw;
- Hammer;
- Screwdriver;
- Smooth rail or metal meter;
- Mounter or nail puller;
- Construction stapler.
If necessary, this set can be expanded, but for most operations it will be enough. It should be noted that the hacksaw is easily replaced by an electric jigsaw. This tool allows you to complete the work with the same quality, but much faster. And if the house does not have a screwdriver, then you can take a simple drill. The main thing is that it has a reverse, which will allow, if necessary, to unscrew any self-tapping screw or screw.
In addition to the tool, it is necessary to prepare the sheathing material. For most door panels, it will be enough to use a leatherette that has an attractive appearance. This material has good performance and wear resistance, so the canvas does not need to be repaired for a long time.
And if you like to do everything with your own hands, then we recommend you instructions on how to make an entrance wooden door.
All pieces must be tightly inserted between the bars to prevent the formation of cold bridges. At the same time, the material should not bubble, which will indicate an excessively large stock. In this case, it is worth cutting off the excess material a little. Once everything is adjusted, you need to fix the insulation with staples. Quickly and efficiently, this allows you to make a construction stapler.
New door trim
The next step will be the upholstery of the prepared wooden doors.. For this purpose, you can use soft materials such as leather substitute or leatherette. The upholstery fabric is cut off with a margin of length and width of at least 10 cm. This is necessary for bending the material, which should have some thickening around the entire perimeter of the door leaf.
It is best to fasten dermantin on special nails. They have a large decorative cap, which gives the skin a more attractive look. You can also run copper wire over the nails. If you pull it, you get an additional mount for both insulation and exterior decoration.
MDF is an analogue of soft materials. This type of finish is used for frame canvases. In this case, each panel is attached to the kleimer, and nailed along the perimeter.
Installation of hinges and fittings
When the canvas gets a new look, it is necessary to install the removed fittings in place. The hinges must take their nests exactly as they were installed before work began. The seat for the lock must be carefully cut out so that there is no damage to the upholstery of the door leaf around it.
If necessary, insulation can be combined with the replacement of the lock on the front door.
 The insulated door is mounted back
Mounting the seal
Installing frost-resistant insulation on the door leaf is only half the battle to eliminate the penetration of cold air into the living space. Even with the door closed, there is a small gap between it and the box, through which the cold will penetrate. Eliminating drafts is the next task for the home master.
To perform this work, you should choose the optimal type of seal. Today, manufacturers can offer the following types of this material:
- foam seals;
- Silicone seals;
- Rubber seals.
The first type of seal allows you to quickly and inexpensively solve the problem of drafts. It is ideal for doorway such a structure as a summer house, where there is no great intensity of opening and closing doors.
 Foam seal - inexpensive, but also short-lived
The use of a silicone door seal will allow you to get rid of a draft for a longer time than a foam analog can do. The shape of the product guarantees a tight pressing of the canvas to the box, which will not allow air masses to move inside the room.
The best option is a rubber seal. Due to its characteristics, it allows you to get a warm opening for a long time even with the most intensive use. In addition, the variety of forms of this product makes it possible to install it on all types of door blocks.
Having chosen the desired version of the seal, it remains only to install it in place. There are two main mounting options:
- With adhesive strip.
- With a harpoon in the groove.
The fastest way to install a new seal on the door is when using self-adhesive products. But this type cannot please with durability, so many experts recommend a harpoon mount in a groove.
It will be quite difficult to choose a small groove in a quarter without disassembling the boxes. Therefore, it is allowed to carefully nail the sealant with small carnations. Fastening must be done in the very corner of the quarter. This will allow the canvas to take its position in door block without difficulty and will provide reliable protection against drafts.
Source: domzastroika.ru
With the onset of cold weather, many homeowners are faced with the task of how to insulate the front wooden door. Usually old products are not tight enough. Modern designs are sold with a heater that retains heat in the room.
When do you need to insulate wooden doors?
Wooden products react to fluctuations in temperature and humidity. The canvas dries up, freezes, swells.
Experts advise to perform insulation in cases where:
- There are gaps between the box and the doors. The reason may be poor-quality installation, poor wood, a long period of use.
- The product has lost its appeal.
- The insulation has worn out during use or was initially of poor quality.
How to insulate the front door
Today there are many materials that allow you to carry out work on the insulation of the front wooden door with your own hands. Each has pros and cons.
What heater to choose?
From the right material depends on the quality of the work done. The most famous are the following types:
- Mineral wool. A well-known type of insulation. The main disadvantage is that it does not tolerate moisture well. Not recommended for use in private homes where the outer part of the canvas goes outside. The advantage of mineral wool is environmental friendliness. Subject to the operating conditions, mineral wool provides sufficient heat retention.
- Foam insulation. Lightweight material that holds its shape well. Refers to combustible heaters. For wooden structures can only be used after impregnation with a special composition.
- Izolon. This is polyethylene foam with a layer of foil applied on one side. On the other - self-adhesive film. Good for wooden canvases. The presence of the foil together with the porous structure provides the effect of a thermos.
- Styrofoam. Lightweight, shape-holding plates. They have thermal insulation properties. The advantage of the material is incombustibility. When a flame appears, a gradual extinction occurs.
- Foam rubber. Simple, comfortable insulation. A novice master can easily cope with the work. Mistakes made can always be corrected. The advantages include: low price, availability, ease of use. It is better to take foam rubber up to 30 mm thick.
Do-it-yourself wooden door - an economical solution for reliable protection from the cold of suburban housing, apartments or cottages.
Sealant for insulation
Sealing tape not only protects the room from drafts. It also performs other functions:
- soundproofing;
- depreciation;
- protection against foreign odors;
- sealing.
When choosing, pay attention to the following properties:
- durable material - the life of the product depends on it;
- tight fit to the surface;
- resistance to mechanical stress;
- flexibility, softness, elasticity.
Are issued in the form of a tape of different length, width, thickness, color. High-quality insulation when compressed is not damaged.
Depending on the form, there are such types:
- Sealing tape. The most popular product type. Represents foam rubber with a self-adhesive film. Fastens to the door frame with wallpaper nails. The downside is the fragility.
- The tubular seal is a dense bundle with an internal cavity. Usually self-adhesive, so it is easy to mount.
- The contour seal is attached around the perimeter of the door leaf. Made from rubber, foam rubber.
- TEP - a new generation of seals. Synthetic polymer that combines the properties of rubber and thermoplastic. Withstands the lowest temperatures, can serve up to 20 years. As a disadvantage, they note the high price, the complexity of installation. However, when correct installation justifies the investment.
Step-by-step instructions for warming
A solid door leaf reliably protects the room from the loss of warm air. We offer instructions on how to easily insulate the front wooden door with your own hands.
Necessary tools and materials
For work, you will need the following tools:
- screwdriver;
- roulette;
- mounting gun;
- stapler, staples;
- hammer;
- decorative and construction nails;
- scissors, pencil;
- milling cutter or grinder with a cutter.
Materials that will be required:
- insulation - better foam, polystyrene;
- sealant;
- upholstery material (leatherette).
Preparatory work
Before starting work, check the door for existing gaps. To do this, you can use a lighter. Where there are cracks, the light will tremble from the draft. In this place you need to put labels.
The door leaf is best laid on the floor. Remove old upholstery. Remove handles. Next, measure the height, width of the product.
The outside of the canvas is measured edge to edge. When measuring the inside, it is recommended to deviate from the edges by 2-3 cm.
Leatherette door upholstery
The basis of leatherette consists of cotton fabric. The top is nitrocellulose coated. With this material, you can transform any door leaf.
- long service life - up to 15 years;
- moisture resistance;
- resistance to temperature fluctuations.
For the upholstery of the structure, you will need a piece of leatherette, which exceeds the total area by 15 cm on all sides. Nailed with upholstery nails on top of pre-positioned foam. The excess is removed, from which the rollers are subsequently formed. You can decorate the surface with wire, nails.
Styrofoam or polystyrene insulation
These materials are the most successful, because they retain heat well. Consider how to insulate a wooden door with polystyrene foam or polystyrene.
The prepared sheets are cut with a knife, based on the size of the area between the bars, which are laid on the corners. Gaps, joints are filled with mounting foam. When the foam hardens, it is cut with a knife along the height of the bars.
Mounting the seal
The installation procedure looks like this:
- determine the size of the existing slots;
- cut the seal;
- if the tape is self-adhesive, then it is attached along the borders of the door frame;
- silicone mounted with a stapler.
At the same time, it is worth paying attention to the thickness - if it is lacking, cold air will pass. Too much thickness prevents the sash from closing.
Roller door insulation
To close the joint between the door jamb and the sash, use dense leatherette rollers. Make them like this:
- After measuring, cut out 4 segments 10 cm wide. The length will be equal to the parameters of the sash.
- Fasten the strip with a stapler or nails with the wrong side out.
- Form a roller from a heater. Invest in a prepared strip of leatherette.
- Wrapped, fixed - a reliable hermetic gap is obtained.
It is not difficult to insulate the door yourself. At the same time, it is important to follow the recommendations. Then the room will be warm, cozy, quiet.
Source: vseodveri.ru
Effective ways to independently insulate a wooden door
In autumn and winter, some people even with heating in the apartment are cold and uncomfortable. In most cases, savings is not to do with it. If the heating is running at full capacity, and you are all wearing a warm sweater in different ways, then this means that the reason for the low temperature lies elsewhere: most likely you have cracks somewhere that let the cold through. Most often, such places should be looked for near windows and doors - there may be holes, cracks that you did not pay attention to. If the windows are metal-plastic, then there should be no problems. In this case, the input structure should be examined more carefully. Next, consider how to insulate the front wooden door.
Wooden entrance doors: features
Such designs are always beautiful and elegant. As a rule, they are made from an array, they can differ in different colors, shapes, and designs. In private homes, such structures are installed most often. The great popularity is due to the special characteristics of the material.

Advantages of wooden doors:
- beauty, elegance;
- durability;
- ecological purity of the material;
- good
- good sound insulation;
- affordability.
Despite such a large number of advantages, wooden doors have one drawback - they can let in cold and wind. And, if such a problem arises, it can be solved by resorting to various methods of insulating the front wooden door, which we will discuss below.
Main problems and ways to solve them
Very often they are interested in how to insulate a wooden door in a private house. There are several reasons why the entrance structure does not retain heat in the room.

Consider the cases in which products can pass cold:
- The reason may be the presence of gaps. In this case, the sealant will help, which should fill the gap. In addition to the silicone composition, you can also take wood putty.
- The reason may also be a rotten threshold. In this case, before you insulate the wooden door in the house, you need to dismantle it and install a new one, or replace the structure with an insulating roller, nailing it to the outer surface of the canvas. You can also install a strip brush.
- The door structure, due to deformation, may not fit snugly against the box. Adjusting the hinges will help, in extreme cases - replacing them.
- If the door leaf is warped, the problem can be corrected with a planer. Surfaces are being polished.
- If it is not clear where the cold comes from, it would be right to insulate the entire wooden door. To do this, the surface is upholstered with a special material, and a heat-insulating layer is also sewn inside.
- If the reason for the penetration of cold lies in the gaps between the box and the canvas, the entire perimeter of the structure should be sheathed with a sealant.
Insulation of a wooden structure
 The most common cause of cold getting into the house is the gap between the canvas and the box. In this case, a self-adhesive rubber seal will help. But, before sealing a wooden door, you need to correctly calculate the thickness of the product so that it fits clearly. There are many options for such material on sale today, but it will be most economical to make it yourself.
Step-by-step warming of a wooden door:
- Before sealing the entrance wooden door, we take foam rubber of the required thickness and measure its size based on the perimeter of the structure.
- Now the foam must be tightly wrapped with leatherette, the color of which must match the color of the canvas. After all, you need to create an aesthetic appearance of the door.
- Having received such a roller, you need to nail it around the perimeter of the box with furniture nails.
- Such a simple work will help get rid of the problem with heat loss in the house.
We warm the threshold

Warming a wooden door with your own hands also involves repairing the threshold. Therefore, having compacted the structure, we proceed to the bottom of the box. If the threshold has already outlived its age and is rotten, it should be completely dismantled. Now you need to install a new one: first select wooden beam, cut to size and mounted in place of the old element.
The standard threshold can be replaced with a leatherette roller. IN modern interiors such products are used very often. The roller for the threshold, as in the case of the insulation of the perimeter of the box, is made of foam rubber. It is necessary to create a structure, the width, length and height of which will make it possible to insulate the lower part of the box. The foam rubber is wrapped in leatherette and mounted in place of the threshold. It can be fixed with construction nails. In the video you can see how to insulate the threshold of a wooden door with your own hands.
door upholstery with insulation

Before you insulate an old wooden door, you should prepare in advance heat-insulating raw materials and material for finishing upholstery, which is most often used as leatherette.
The whole process consists of several stages:
- Before insulating doors in wooden house with your own hands, it is necessary to cut a layer of heat insulator to size.
- From each end you need to retreat 1 cm and measure the sides, while the door must be closed.
- Next, cut out the material according to these dimensions.
- When everything is ready, you should unscrew the canvas, lay it on the floor or a solid table, remove all accessories.
- Thermal insulation is applied to the surface and fixed with glue.
- Also, to insulate a wooden door with your own hands, you can use staples or nails.
- Now a layer of leatherette should be attached to the insulation. A construction stapler is best suited for these purposes. Make sure that the leatherette is stretched and that wrinkles and irregularities do not form.
- When performing these works, do not forget about the holes in the upholstery for fittings.
- When the insulation process is completed, the fittings are installed in place, and the canvas is returned to the hinges in the door frame.
Styrofoam door insulation

Styrofoam is often used as a material for insulating a wooden door from the inside. Working with him is easy.
The whole process does not take much time:
- Before sheathing a wooden door with insulation, as in the previous case, it should be cut according to pre-made measurements. You need to measure the foam strictly according to the size of the canvas.
- The material must be wrapped with dermatin.
- Further, this design should be attached to the door leaf with liquid nails or glue. This way you get a good insulated system.
There is another method of insulating a wooden door in a private house with foam. The canvas must be removed from the hinges, the fittings must be dismantled. Along the perimeter, slats should be filled, the thickness of which should be equal to the thickness of the foam. Between the planks, you need to lay out elements of foam, after which decorative trim is made. For it, you can use lining, fiberboard and other materials.
Another way to insulate a house is to install a second door. If your entrance system is not in the same plane with the wall, but is slightly recessed into it, you have the opportunity to install a second canvas and significantly reduce heat loss. In this case, the most important nuance will be the following: it is necessary that there is space for fittings between the canvases. That is, the gap between them should be at least 20 cm.
Whichever method you choose, it will still make your home more comfortable. Do-it-yourself insulation of an entrance wooden door is a simple process if you are familiar with the materials and know how to carry out the main work. In any case, you can always watch the video on how to insulate a wooden front door.
Source: dveri365.house
Ways to insulate the front wooden door
This article will help you figure out how to insulate your front wooden door. On my own, on my own, and without resorting to the help of professionals.

How to insulate a wooden front door
The main ways to insulate a wooden door
Doors made of wood are very popular today. And it is not surprising, because these products, coated with varnish, through which the pattern of natural wood is visible, look impressive. Moreover, wood retains heat energy more efficiently and, unlike metal, is not cold to the touch. Be that as it may, even the most modern doors, for the manufacture of which noble breeds were used, dry out over time and begin to let in cold air currents.

Attention! If the dwelling is new (or it is still under construction), then we advise you to purchase insulated doors made of wood, in which there is already insulation on the panels (polystyrene foam or mineral wool). But if the door is already there and does not fulfill its functions, then you will have to deal with its insulation.
Table of thermal insulation properties of materials
| Material | Density in kg/m3 | Minimum layer, cm | Thermal conductivity | Hygyroscopicity | |
| rolled | glass wool | 75-175 | 10-15 | G | B |
| mineral wool | 35-125 | 10-15 | G | B | |
| Mats stitched | 75-150 | 10-15 | G | B | |
| plastic | 50-60 | 2 | G | D | |
| Izover, URSA | 35-125 | 10-15 | G | B | |
| Penofol | 60-70 | 5 | G | IN | |
| Styrofoam | 30-40 | 10 | D | IN | |
| polyurethane foam | 30-60 | 10 | D | IN | |
| Plate-sheet | Styrofoam | 35-50 | 10 | D | IN |
| Mypora | 25-40 | 10 | D | IN | |
| From mineral wool and glass wool | 75-250 | 10-15 | G | B | |
| Woody fibrous | 250 | 1.5-3 | B | A |
- A - Very high.
- B - High.
- B - Medium.
- G - Low.
- D - Very low.
Today, several methods of warming are possible at once. You can:
- fix the seal on the box;
- upholster the fabric with insulation;
- seal the opening using rollers for this.
Let's get acquainted with each of the options in more detail.

Where and how to apply a heater with a foil?!
Previously, we have already told you about how to properly apply this insulation, you can learn more about this here.
Option number 1. Warming a wooden door with your own hands
Another effective method, which we will consider step by step. But first, let's figure out what materials can be used for this.
Attention! In Soviet times, doors were often insulated with cotton wool, since this material has excellent thermal insulation characteristics. But wool also has a number of disadvantages.
So, the main disadvantage is that cotton wool perfectly absorbs moisture, and therefore harmful microorganisms quickly multiply in it (cotton wool). And the operational life of this material is not too long - no more than two to three years. But today the range is already wider, and for warming you can resort to one of the options below.

- Foam rubber. It's good and practical material, which is easy to install. Although it also absorbs moisture, which is why it soon crumbles and has to be changed.
- Izolon. Insulation of synthetic origin, which, despite its small thickness, has excellent thermal insulation performance.
- Minvata. For its manufacture, synthetics or basalt are often used, therefore, this material does not rot. But it does not provide visual volume, moreover, it quickly sags under the upholstery.
- Styrofoam. Light weight material that holds its shape well. It is characteristic that the algorithm of actions for foam insulation is somewhat different than when using the materials mentioned above, therefore it will be considered separately.
We also note that in addition to the most insulating material for work, you will need decorative upholstery, which can be used as leather (natural / artificial origin) or leatherette.
Step-by-step instruction
And now consider how to insulate the front wooden door. The sequence of actions is given below.
Step one. First you must determine the dimensions of the door leaf. To this end, step back from all its ends by 10 millimeters, and then determine the height and width. It is characteristic that if it is planned to insulate the side adjacent to the box, then you should retreat from the walls of the box and only when the door is closed.
step two. After that, you need to remove the canvas from the hinges, put it on a flat surface (preferably on a goat or a large table) and dismantle all the accessories that will interfere with further work.


- nail it with carnations;
- glue;
- secure with building brackets.


The insulation is covered with upholstery material, and the dimensions of the latter should slightly exceed the dimensions of the canvas itself.
Step Four. Leatherette can be attached both from the middle and from one side. If a stapler is used (this option is preferable), then this should be done where the canvas is free from insulating material (for this purpose, an edge of 10 millimeters is deliberately left). It is characteristic that this procedure requires an assistant - he will stretch the upholstery and align it. So the material will lie flat, there will be no folds or wrinkles.


Step Five. Next, a roller should be filled along the perimeter of the canvas - so the design will not only retain heat more efficiently, but also look more presentable. As a roller, strips of wrapped insulating material are used. Having rolled up such rollers, they are nailed around the entire perimeter of the door with the help of furniture nails. In the process it is important that:
- from the narthex and in the upper part the roller went out by about 0.5 centimeters;
- in the lower part, as close as possible to the threshold;
- from the loops located strictly along the edge.

Decorative component
If you want to somehow decorate an already insulated door, then use chalk to draw arbitrary patterns on the upholstery material. geometric figures, then hammer furniture nails in the corners.


Previously, we considered the main characteristics of penofol, which is well suited as a heater. More details about this can be found here.
Video - Door upholstery
Attention! After all work is completed, put in place all additional fittings.
The use of foam at work
As promised earlier, we are considering how to insulate the front wooden door, using foam as a heater. It is quite simple to do this - you just need to cut out a piece of material whose dimensions would be equal to the dimensions of the canvas (or the box, if insulation is planned from the inside), cover it with upholstery material and fix it on the doors with liquid nails.

Although there is another option. You can nail thin rails along the perimeter, the thickness of which would be equal to the thickness of the insulation, and fix the insulation material between them. Further, all this is sheathed with fiberboard or clapboard.
Attention! In the second method, the entire structure will become heavier, which may necessitate the installation of additional loops.
Option number 2. How to seal a door frame
In this case, the insulation consists in a tighter fit of the canvas to the box. Due to a loose fit, gaps can form in the strapping, through which, in fact, cold air currents penetrate the housing. And to get rid of these gaps, you will need a sealing material, which can be either “store-bought” or handmade.
- Industrial sealant is a hollow rubber profile, sticky on one side, which is glued around the entire perimeter of the contact between the web and the box, as a result of which all gaps are eliminated

So, the tape should be nailed to the box in such a way that it touches the canvas when it is closed. So how to insulate the entrance wooden door using this technology? Very simple. First, determine the thickness of the slots, the perimeter of the door frame itself, and also the width of the folds - the areas in which the canvas touches the structure and where, in fact, you will stick the tape. This is necessary to find out the required volumes of materials.
As already noted, the length of the sealing tape must correspond to the perimeter of the box. The width should correspond to that of the folds, while the thickness should correspond to the gap between the structure and the canvas.

Attention! In this case, you must take into account the thickness of the material in the compressed state!
Regarding the procedure for gluing the tape itself, everything is quite simple here: first, pieces of the required length are cut, after which the sealant is gradually pressed against the folds, and the paper on the back of the material is still gradually removed.
Option number 3. We seal the doorway with rollers
It may happen that there will be no opportunity to remove the door leaf from the hinges. In such cases, for warming (if, for example, cold weather has already set in), you can use the same roller. To significantly increase the thermal insulation properties of the structure, nail it directly to the door frame.

This must be done in the same way as discussed above. It is only important that the location of the roller is calculated as accurately as possible so that the door leaf adjoins it in the closed position.
As a conclusion
So we looked at the main ways to insulate the front wooden door. Of course, not all of the described methods give a 100% effect, and each of them has its own drawbacks. However, if you have not previously purchased already insulated doors, then this is the only way to spend cold winter in warmth and comfort. Now you know how everything needs to be done, so get to work. Good luck!


