How to paint a ceiling with textured paint. Textured ceiling plaster: features and methods of use Textured stretch ceiling in the interior
/ What materials are embossed ceilings made of?
What materials are embossed ceilings made of?
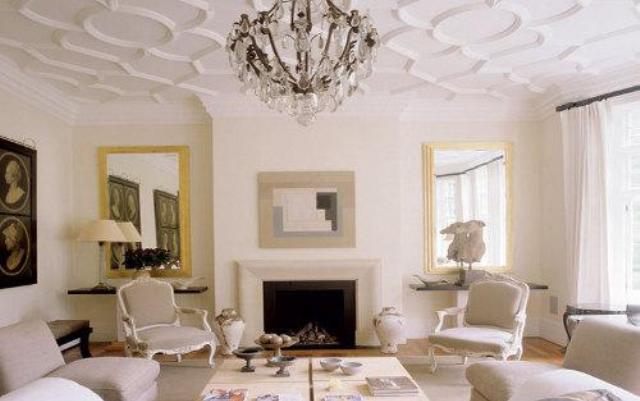
The usual smooth ceiling looks very attractive, but you always want to somehow diversify the interior. This can be done by assembling a relief ceiling. Such surfaces can be various materials and all the main types of such finishes will be discussed in this material.
Where to begin
The first thing to do is to decide on the appearance of the future coating and the material that will be used for this. There are a lot of options and it is important to choose the most suitable in each case. Below are the main materials used for such decoration and important features which are worth paying attention to.
Drywall surface
One of the most common materials for creating relief surfaces has become drywall. You can make a variety of three-dimensional figures from it or give relief to the surface by collecting several planes located at different levels. A typical embossed plasterboard ceiling looks like the one in the photo below.

It is not necessary to be limited to traditional forms. You can collect several intersecting volumetric figures or create a surface consisting of occupying the entire area of \u200b\u200bthe ceiling.

Sometimes, relief can be given in an atypical way. You can make a smooth main plane with a lot of openings and a second level that will be visible through them. This design looks especially impressive with backlighting.

Plaster or paint
Another common way to give the plane a relief. There are already ready-made plaster mixtures on sale, which you just need to dilute with water and they will be ready for use. They're called " ". Applying them is very simple, and the created pattern depends only on your imagination.

All that is required to create a beautiful surface is fantasy and a few improvised tools. At the same time, the toolkit is not limited to the usual fixtures, but may even include a simple crumpled film, a dishwashing sponge or paint brushes with hard bristles.

Particularly well suited homemade fixture in cases where relief paint is used to decorate the ceiling. Its peculiarity is that after application a very plastic surface is formed, which can be modeled as desired. It is also applied quite unusually - with a spatula. You can also use traditional rollers, but a spatula allows you to apply a thicker layer and immediately give it the desired relief.

To give the plane the desired pattern or to model some small volume on it, you will need a spatula or embossed construction rollers, which are perfect for decorating such an unusual ceiling. Instead, you can use a crumpled film or sponge, which is applied to the still wet surface of the paint, forming an intricate pattern of prints. The drawing can be applied in general, with anything, as long as the result obtained meets the expectations.

Tension coatings
And without any volume they look just great. However, in some cases, variety does not hurt. The canvas can be stretched in such a way that a three-dimensional composition is formed. The photo below shows a few examples of what embossed stretch ceilings might look like.
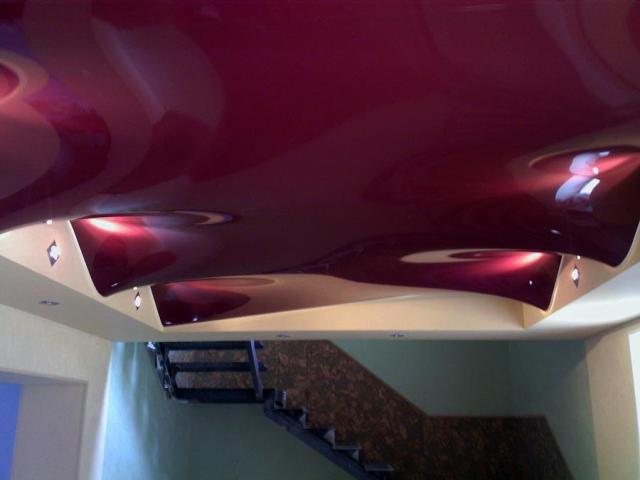


Embossed stretch ceilings look very unusual and beautiful. In addition, such ceilings will hide quite significant defects in the ceilings. Only the height of the premises limits the use of such design. For such a decor, a lot of space is needed and not every room can be decorated in this way.
However, if the height of the ceilings allows the use of such decoration techniques, the effect will be very strong. The coating looks quite unusual and allows you to create completely unique interior solutions.
Decorative panels
One of the popular varieties of such finishes will be either panels that can be glued directly to the surface of the base floor. It is very simple to do this and this option is suitable even for a person who does not have experience.
A relief panel glued to the ceiling can occupy both its entire area and decorate some separate area. Very beautifully, such elements are combined with decoration with other materials.

An important feature of this type of finish will be the ability to create a relief ceiling with your own hands. This does not require complex tools or specific knowledge. All you need is a few decorative figures from polystyrene foam and liquid nails. There are also special types of foam boards that imitate various architectural elements, like caissons.

Installation of such a finish is easy with my own hands without outside help. In the selected place, all the acquired elements are glued to the ceiling and after the adhesive has dried, they are covered with paint, having previously covered all the cracks and gaps with putty. The putty mixture can also be used as an adhesive.
Another option for creating a relief surface is gypsum panels. The stores offer a fairly wide range of similar products. The installation of such panels is not difficult - in most cases they are either mounted on a pre-prepared frame or glued directly to the floor plane.
How to make a ceiling, from what and in what way? Everyone who has conceived the repair of his apartment reflects on these questions. It will be easier to make a decision if you know all the main points of the ceiling installation different kind.
Which ceiling to choose
There are not so many options for the ceiling device that you can’t figure them out. and today they are considered in extreme cases, but these methods of finishing the ceiling are still relevant. Although for the improvement of residential premises they are preferred less and less.

The point is not the unpretentiousness of such a finish, but the fact that it requires a whole range of labor-intensive and lengthy work, including:
- removal of the old facing layer;
- preparation of the base ceiling;
- its alignment.

Each of these stages includes a whole range of actions, most of which can be performed only by professionals. Therefore, they are very popular modern ways ceiling devices from modern materials.

In particular, ceilings today are made from:
- drywall;
- stretch films;
- plastic panels, rails, lining;
- aluminum rails;
- textured wallpaper;
- decorative plaster;
- flat and embossed glass.
Important! Lighting plays an important role in the design of ceilings. The widest selection of overhead and recessed spotlights allows you to create surfaces of masterpiece beauty. And all this charm is not as expensive as it might seem at first glance.

In any kind of finishing materials and lighting fixtures There are more and less expensive options. All of them are reliable in operation and aesthetically attractive. Therefore, you can choose the material and device in accordance with financial capabilities.
Design features of modern ceilings
Modern trends in the device and design of ceilings are aimed at minimizing labor costs and obtaining the maximum aesthetic effect. Therefore, almost all beautiful ceilings are suspended structures, behind which you can hide the flaws of the base surface, wiring and communications. Thus, the repair time is significantly reduced and it becomes possible to save money, since there is no need to purchase materials for puttying and leveling the base floor.

Of the suspended, the following types of structures are most popular:
- tension;
- drywall;
- rack;
- glass.
The principles of the frame device are the same for each of these types of ceilings.

The main requirements for retaining structures are as follows:
- strength;
- the ability to withstand the calculated weight loads;
- environmental Safety;
- fire safety;
- moisture resistance.
In accordance with these criteria for the device of scaffolds suspended structures choose the most reliable materials - aluminum, high-strength plastic, wood, well-dried and treated with fire-retardant compounds, metal. For device plastic ceilings there are their own frame systems, the elements of which are made of more durable plastic.
Stretch ceiling prices

In order to understand how to make a ceiling, you need to know that there are two main stages in the work of this plan: rough (pre-finishing) finishing and finishing. The first is necessary if the surface is being prepared for whitewashing, painting or wallpapering. When erecting suspended structures, the pre-finishing stage of work is ignored. But instead of it, they are engaged in the device of the frame (battens).


How to stick wallpaper on the ceiling
The range of ceiling wallpapers is wide. The choice of the best material in a particular case is complicated by a misunderstanding of the features of different types of products.

In any store of finishing materials you can see the following wallpapers:
- vinyl;
- non-woven;
- paper;
- cullet;
- textile;
- wallpaper.
There are no difficulties with paper and photo wallpapers, because everyone knows how to stick paper and what it is. But if you liked non-woven, glass, vinyl or textile, several questions immediately arise: what is their peculiarity, how to stick, how to care, how long will they last? Some of these questions can be answered in the instructions of the manufacturers of adhesive mixtures intended for gluing this type of wallpaper. But there is no information about the features and rules of care.
Wallpaper prices
photo wallpaper

In fact, everything is not so difficult. Before you go to the store, you need to remember a few points.
Table. Features and Specifications various types wallpaper.
| Type of wallpaper | Features and Specifications |
|---|---|
| The composition of non-woven wallpaper includes cellulose fibers (more than 70% of the total volume of components), which is a natural and environmentally friendly material. Thanks to her, the canvases are strong and thick enough to hide significant surface flaws and reinforce small cracks. Therefore, such wallpapers are the best choice for those who do not have the desire to carry out the entire range of work on the pre-finishing of the ceiling. The base that holds the cellulose is non-woven. This is an elastic and sufficiently moisture resistant material, which determines the main properties of these wallpapers. |
| Vinyl wallpapers got their name because of the features of the top (front) layer. It is made of vinyl - a durable and ductile material that allows you to get a structured surface with a pronounced relief. The basis of such wallpaper (substrate) can be paper or non-woven. Vinyl provides a wide range of design options. Therefore, in this type of wallpaper there are products with embossing, silk-screen printing, interspersed with various sparkles and crystals. |
| Glass fiber is based on sand, soda, dolomite and lime. These fabrics are woven on equipment designed for this purpose from yarn obtained using a special technology. Glass fiber is an environmentally friendly and absolutely non-combustible material. They are easy to clean and stick even on difficult surfaces. The textured front side allows you to mask small flaws in the base ceiling. |
| For textile wallpapers, only the top, front layer is fabric. The bottom can be made of paper or non-woven. This parameter determines which glue you need to buy for finishing the ceiling with fabric sheets. Textile wallpaper - one of the most spectacular and stylish. The front layer can be made of velor, jute, cotton, linen, synthetic fibers. This type of wallpaper has good sound absorption, vapor permeability and thermal conductivity. |


The technique of gluing different types of wallpaper on the ceiling
When pasting the ceiling with wallpaper, one rule that is unchanged for all types of this material is taken into account: if the base surface is sufficiently loose and unstable (for example, crumbling lime or plaster), it must be cleaned, strengthened (puttied) and primed.

The next step is the choice of glue. For reliable fixation of the wallpaper, you need a composition that takes into account the features of the lower layer of the canvas. There is no difficulty in choosing an adhesive: each manufacturer indicates on the packaging for which type of product its product is intended.


Choose any method of applying glue: using a paint brush or a roller on a long or short handle. If you decide to use the latter, you will need a tray or a piece of thick cardboard on which the roller will be rolled, squeezing it and removing excess glue. Otherwise, drops from the ceiling are inevitable.

In most cases, applying adhesive to the base surface is sufficient. But when sticking dense and thick canvases (non-woven, glass, textured vinyl), it is recommended to apply glue to the wrong side of the canvases.
While working, you need to follow a few rules:
- stick wallpaper at a positive air temperature;
- prevent drafts in the room;
- carefully remove excess glue and air bubbles that form under the wallpaper during gluing to the ceiling.


How to make a ceiling in a private house
Making the ceiling in a private house is no different from a similar process in an apartment. But the underlying foundations often have significant differences. IN apartment buildings the floors are concrete, which determines the features of the pre-finishing finish. For example, if you want to remove old paint, you can use the method of firing it.
In a private house, floors are mostly wooden. They are much more difficult, for example, to plaster. Many experts consider this idea meaningless and unreasonable for finishing natural surfaces. But with a strong desire, you can strengthen a special plaster mesh on the ceiling and apply a layer of finish on it. This is exactly what most owners of private houses did not so long ago.

But modern realities dictate their own conditions - the plastered ceiling in a private house is no longer so attractive and presentable. Interior design trends emphasize naturalness and naturalness. Therefore, ceilings in modern wooden houses decorate with tinted beams, while zoning the premises.

Ideal for decorating the upper floors of such buildings wooden lining. This material can be coated with any paint and varnish. This finish will be in perfect harmony with the material of the walls and ceiling, which will create an environmentally friendly atmosphere in the house.
Important! In private houses, you can mount any type of suspended structures: rack, plasterboard, tension. The choice of materials for decorating the ceiling depends on the purpose of the room and the style solution of its interior.

Features of installation of suspended plasterboard structures
For the device of the frame on which the finishing material will be fixed, you can choose wooden bars or a metal profile. Since drywall is heavy, the frame planks should be spaced 50-60 cm apart. This will ensure the strength and stability of the structure.

Before starting work, you need to draw up a diagram false ceiling, which must contain the dimensions of each line and each figure (for multi-tiered structures). The ceiling is called suspended because it is located at some distance from the base surface and is held at a certain height with the help of special devices- hangers. The fastening of these frame elements should be given special attention, since it is they who take on the main load.


Drywall sheathing is a simple but time-consuming process. You need to know that between the canvases of this material there should be a distance of 2-3 mm. This is a damper gap, the function of which is to compensate for the movement of drywall.
Drywall prices
drywall

The next stage after sheathing is puttying. On the seams between the sheets of GKL and the ends of the tiers, a fiberglass mesh "sickle" is glued, after which they begin to apply putty and its subsequent grinding.


Facing plasterboard ceiling may be different. Most often choose coloring and wallpapering. But you can apply liquid wallpaper or decorative plaster.
Drywall (gypsum plasterboard) and metal profiles are the main materials that are used when finishing the ceiling in the manner described in the article. They have a number of varieties, their choice depends on the specific needs of the owner of the house and the characteristics of the room. Read more.
Video - Do-it-yourself plasterboard ceiling
Features of installation of suspended plastic ceilings
Since plastic is a lightweight material, a solid frame is not required for its installation. As planks, you can use wooden blocks or metal profiles. But it is possible to construct a frame from U-shaped strips and stringers included in the package of rack ceilings. These are lightweight and strong enough profiles that are great for rooms with high humidity.

U-shaped profiles are installed along the walls of the room at the level of the new ceiling. Stringers perform the function of longitudinal and transverse beams held by suspensions attached to the base ceiling. That is, the principle of the frame structure is the same as in the case of plasterboard suspended structures.

The method of fastening plastic panels depends on the material of the profiles. If these are plastic stringers, the facing rails are inserted into the openings intended for this purpose. If these are wooden blocks or a metal profile, the panels are fixed with self-tapping screws.
Polyvinyl chloride is a material widely used in various fields of activity, it also finds its application in construction. Installation here does not require high qualifications and expensive equipment, you just need to familiarize yourself with.

Ceiling decoration with decorative plaster
Applying plaster to the ceiling not an easy task. And the process of decorating the surface significantly increases the complexity of the work. But all these difficulties are quickly forgotten when the desired result is achieved. The ceiling made of decorative plaster looks very impressive and presentable. Therefore, it is worth working on creating such an aesthetically attractive surface.

What kind of plaster to choose for decorating the ceiling?
The market of finishing materials offers two types of decorative plaster:
- structural;
- textured.
Both of these materials are suitable for ceiling decoration in residential premises. But for more easy choice you need to know about the features of each of them. Structural decorative plaster only white, therefore, it needs to be tinted with any compositions suitable for this purpose - dyes, water-soluble pigments, tinting agents.
Prices for decorative plaster
decorative plaster

Textured plaster is a ready-to-use material with a specific color. The composition of the mixtures includes all the components necessary to obtain a decorative layer. Therefore, it is easier to work with textured plaster for those who do not have experience in applying it to the ceiling.

You can choose any mixture:
- coarse grain with a grain diameter of 3-5 mm;
- with an average filler value (1.5-2 mm);
- with a fine texture (grain diameter is not more than 0.5-1 mm);
- fine-textured (filler diameter less than 0.5 mm).
The technology for applying any of the above compositions is the same.

According to the type of filler, the following types of plaster mixtures are distinguished:
- polymeric;
- silicone;
- silicate;
- mineral.
The former are most convenient for decorating a marble or leather surface. Silicone have a wide range colors and have excellent vapor permeability. Silicate is known for its resistance to the formation of pollution, therefore it is optimal for decorating ceilings in kitchens and hallways. Mineral plasters are universal and can be used in any type of premises.

Silicate decorative plaster "bark beetle"
Preparatory work
Before applying the decorative composition, the surface of the ceiling must be prepared. If significant differences in heights and large flaws are found, the surface is leveled. For this purpose, special mixtures are used (Rotband, Fugenfüller) and metal beacons (perforated narrow strips). The method of leveling ceilings using plaster mixtures is called "wet".

There is also a "dry" method. It consists in mounting drywall sheets on the ceiling. In this case, you will need to build a wooden or metal carcass. Ultimately it should work. Plaster is applied to this surface from GKL sheets.

It is possible to level the base surface using finishing material- decorative plaster. But in this case, the consumption of the mixture increases significantly. If the surface flaws are significant, a fiberglass mesh will be required, which will act as a reinforcing material.

Primer selection
Before proceeding with the finishing work, they select and buy a primer. It will provide good adhesion. You can use the same tools as when puttying GKL.
There are 4 types of primers:
- alkyd;
- acrylic;
- polyurethane;
- silicone.
Important! Any of them is suitable for preparing the ceiling for applying decorative plaster. When choosing, it is important to pay attention to the properties of the composition. It is optimal if it has the ability to protect the surface from moisture and the formation of mold and mildew.
Among the universal primers include most of the products of the companies "Knauf", "Perfecta", "Prospectors". Forbo Eurocol, Ceresit C17, ALC-PRIMER primers are popular. Cover the ceiling with a solution using a paint brush, roller or spray gun. The choice of tool depends on the scope of work and ease of use in a particular case.


The technology of applying decorative plaster on the ceiling
Step 1. Preparatory stage. Before applying a new finishing layer, remove the old one. Dusting the ceiling.

Step 2 Application of primer. Depending on the complexity of the base surface, the ceiling is covered in 1 or 2 layers. Wait for the primer to dry completely, focusing on the time interval specified by the manufacturer. On average, the interval between applying each next layer of primer is 3-4 hours.

Step 3 Mixture preparation. The dry mixture is diluted with water in the proportion indicated by the manufacturer on the product packaging.

Step 4 Laying decorative plaster. To perform the work, rubber, plastic, metal spatulas are used. The first base layer may be the only one. It depends on the complexity of the ceiling surface and the need to level it.

The plaster is collected on a spatula with a wide blade and applied to the ceiling, evenly distributing the composition over its surface. The same tool is used to level and smooth the layer.
Step 5 Ceiling decoration. The plasticity and relatively long curing period of decorative plasters makes it possible to create different type textures on the surface of the ceiling - from relatively flat to embossed with protrusions up to 7-10 mm high. The latter will help hide all the irregularities of the base surface.
Decoration of the plaster layer is carried out within 15-20 minutes after its application. If compositions with coarse or medium-grained filler are selected, this stage of work can be skipped. Such mixtures themselves form a surface with a pronounced texture.

In other cases, various techniques, objects and tools are used to finish the ceiling. A spectacular texture can be obtained using a regular plastic bag rolled into a ball. With this device, they touch wet plaster, leaving randomly located grooves and dents on it. After that, the ceiling is lightly smoothed with a grater or spatula.

Demonstration of obtaining the effect of "bark beetle" textured plaster
Important! Instead of a plastic bag, you can use paper, foam sponge, stencil, textured roller. The choice depends on the desired effect.


Video - Venetian decorative plaster on the ceiling
How to make a glass ceiling
Glass ceilings are an infrequent choice when decorating apartments and private houses. The relatively low popularity of this finishing method is explained by the apparent complexity of working with glass. In fact, everything is different: today you can buy special frames for installing glass panels. These designs are easy to install and are almost a complete analogue of the well-known Armstrong ceilings.
Glass ceiling with decorative inserts
Glass panels can be different:
- stained glass type;
- plain;
- matte;
- tinted;
- mirror;
- with photo printing
- embossed.
Since the weight of the stele is quite large, the optimal dimensions of the panels are within 29.5x29.5 cm and 59.5x59.5 cm. Such panels will not create a significant load on the frame. Evenly distributed weight can withstand not only metal, but also plastic crate.

Glass ceilings are good because they do not require preliminary preparation of the base surface. In addition, they have another advantage - the ability to arrange a spectacular backlight.
Ready-made glass ceiling structures are offered by Albes (Russia) and Geipel (Germany). Manufacturers produce two types of frames - rack and cassette. The suspension system can be of open and closed type. In the first case, the load-bearing profiles are visible, in the second, they are hidden behind the cladding panels. Using T-24 or T-25 suspension systems, you can quickly mount and dismantle the glass ceiling.


Table. Characteristics of suspension systems "Albes" and Geipel.
- metal bearing profile;
- lock type - solidly carved;
- type of connection of guide rails with bearing profiles - overlap;
- the cross section of the cells is a square;
- dimensions of glass plates - 60x60 cm.
Glass ceiling installation technology
Mounting cassette and largely identical. Having dealt with one, it will not be difficult to install a frame of another type. Consider the technology of mounting a glass ceiling using the example of the Albes suspended cassette system.


Step 1. Preparing to mount guides. If there are any network engineering all these communications need to be strengthened.
Step 2 Determining the level of the Albes cassette ceiling. It is necessary to determine and beat off the level at which the cassette ceiling frame will be installed. This can be done in several ways: using a bubble level and a hydro level, a plumb line and a chalk line. Any tool that allows you to get smooth horizontal lines along the walls of the room.

Step 3 Installation along the perimeter of the room (along the marking lines) of the guide profile PL 19/24.
- Before attaching the profile, holes are drilled in the walls using a drill (perforator) and a drill with a victorious solder.
- After that, the recess is dedusted and a dowel-nail of the corresponding section is driven into it.
- Next, apply the profile to the wall and mark the installation points for the dowels on it.
- Holes are drilled in the marked places in the profile.
- Attach the guides to the walls with self-tapping screws.

Step 4 Snap axes marking. Between the guides, from one wall to another, pull the laces (strong threads, thin ropes, twine) so that they repeat the scheme of the hanging cassette system with square section cells.
Step 5 The intersection points of the stretched threads are projected onto the ceiling and these places are marked with a marker.
Step 6 Hanger installation. In places of marks, hangers are attached so that the indents from the walls are no more than 60 cm. This requirement applies to panels weighing up to 4 kg / m 2. If the mass of glass plates exceeds this value, the maximum distance from the walls should not exceed 45 cm.


Step 7 Installation of T-profiles. The guide profiles of the Albes suspension systems have special locks that ensure the strength of the frame and prevent it from sagging. Optimal choice– profiles with solid-cut locks.


Step 8 Laying glass panels. Glass plates are alternately led inside the mounted suspension system and laid on guide T-profiles. Additional fixing of plates is not required.

If the illumination of the glass ceiling is provided, the wiring is carried out at the stage of preparing the base surface and fixing the communications.

Video - Installation instructions for false ceiling type "Armstrong"
In order to start finishing work on the ceiling, it is necessary to have a fairly flat surface. But few people like the idea of plastering work in several stages. In this case, textured plaster for the ceiling can help. This material is well applied even to the ceiling, which has minor defects. Defects will not be noticeable on a textured, uneven surface. One of the main advantages of such coatings is their durability. A variety of species and types will help in creating original interior by hand without outside help.
The advantage of textured plaster in the durability of the coating.
Selection of decorative plaster
Having decided to replace the traditional ceiling covering with textured plaster, the average consumer is faced with a choice. In building stores and supermarkets, labels are confusing with their names: textured, decorative, structural plaster, stuko, plaster. In fact, the same thing is often hidden under different names. It's just that different manufacturers call their product in their own way. To determine what exactly is in the bucket, you just need to carefully examine the label. The consumer should be interested in information about appearance plaster, methods of its application, materials acting as binders, filler fraction, minimum thickness of the textured layer.
Back to index
Types of textured plaster for the ceiling
Textured plaster can be of several types:

The formation of the structural surface can occur due to the coarse filler in the composition of the plaster.
- relief on the surface is obtained by processing the layer with various tools. The layer thickness can be 2-7 mm and depends on the desired texture and tool;
- the formation of the structural surface occurs due to the coarse filler in the composition of the plaster. The layer thickness varies within 1-6 mm and depends on the fraction of the filler;
- texture creation is achieved by multi-layer application required material, visually and to the touch such a surface is smooth. Such coatings have a thickness of not more than 1.5 mm.
Variation plaster can be noted as a separate item. In this case, the acquisition of the base and filler occurs separately. As a filler, marble and quartz chips, chips and flops are used.
Back to index
Classification by binder type
The cheapest option is plaster, which is based on a mineral binder. The role of the binder is performed by gypsum, cement or lime. Representatives of this type of plaster have good vapor permeability and adhesion. Cement plasters easily tolerate moisture. As a result, they are used for exterior decoration and for finishing ceilings in wet rooms. However, cement plasters are characterized by a rough texture and are not appropriate for every interior.

Polyurethane and epoxy plasters are the most resistant and durable.
Polyurethane and epoxy plasters show the greatest resistance. They are not afraid of fire or chemical substances. Polyurethane-based plasters are used for indoor and outdoor finishing works. They can be used under any conditions, but their chemical origin is their main disadvantage. Such plasters have a specific smell, and when heated, they release toxic substances. Their cost is quite high.
Experts consider water-based plasters to be the most acceptable option. In their composition, acrylic, styrene-acrylic or polyvinyl acetate act as a binder. Their advantages include good plasticity, vapor permeability, resistance to ultraviolet and moisture.
All old coatings are pre-cleaned from the ceiling: wallpaper, ceiling tiles, whitewash, putty, etc. Then the surface is primed.
Do-it-yourself textured plaster requires the following tools:
- mixer or drill equipped with a mixing nozzle;
- capacious containers (for example, 18 l) in order to spread plaster;
- a set of spatulas;
- rule;
- Master OK;
- grater or trowel;
- primer brush;
- roller
Back to index
"Bark beetle" as a method of applying plaster
Do-it-yourself work on applying textured plaster of the “bark beetle” type is almost no different from the process of working with any other plaster that has a large filler.
- First, the ceiling surface is cleaned of wallpaper, whitewash, ceiling tiles, putties, etc., and then primed. To achieve a uniform distribution of the filler in the composition of the plaster, it should be mixed. In order to avoid damage to the filler, mixing is best done by hand.
- Finished plaster is applied to the ceiling with a trowel or metal spatula. The optimal layer thickness should not be more than 5 - 6 mm. The surface covered at a time is chosen by everyone at their own discretion. However, do not forget that rubbing the plaster to give the surface a finished look must be started before the moment it begins to set. For the production of such work with your own hands, it is desirable to have a partner. The first one applies a layer of plaster, and the other one creates “labyrinths” on the ceiling with a trowel.
Tip: In the course of work on applying and leveling putty, tools are inevitably contaminated with plaster residues. All dirt must be removed in a timely manner with a wrung out damp cloth.

The finished textured surface does not require paint. Unless, of course, the color matches the intended. It is best to immediately give it the desired color after buying the plaster. This service is provided by all major manufacturers and distributors of plaster.
Back to index
Textured plaster as an artist's canvas

A special roller for working with textured plaster allows you to create a relief ceiling.
Decorative plaster, which does not have large aggregates, is a material that can open up unlimited spaces for the flight of imagination of decorators, architects and artists. With the help of such plaster create real works of art, wall panels, modern frescoes, etc.
To create a relief (texture) with your own hands, you can use all kinds of materials at hand, for example:
- washcloth;
- rag;
- plastic bag;
- comb.
Special tools for creating textured plaster can also be purchased at the store. For example, various spatulas with curly edges that allow you to make patterns in the form of waves and grooves, or special rollers for working with textured plaster. Such rollers have a carved pattern that remains on the ceiling when rolling over a coating that has not yet hardened. They can imitate the texture of wood or grass.
The effect of crumpled paper on the surface of the ceiling can be achieved by placing a regular roller in a fabric cover.
Back to index
Do-it-yourself patterns on plaster

Using the selected tool, a relief texture is formed and, pressing the relief spatula, it is carried out along the putty layer along a predetermined trajectory.
The first stage of creating a three-dimensional pattern on the ceiling includes surface preparation (filling cracks, priming, cleaning from dust).
The next step is the application of plaster. A layer of plaster equal to 3-5 mm is applied to the wall, and then leveled. All work must be carried out taking into account the fact that drying will occur fairly quickly.
And then the most interesting and fascinating begins - the creation of a textured pattern with your own hands. Using the selected tool, they begin to form a relief texture. By pressing a relief spatula, roller or other tool, they are carried out along the putty layer along a predetermined trajectory (horizontal, vertical, wavy, arcuate, etc.). The force of pressure on the tool affects the depth of the relief. If there are doubts about how the pattern will look in a particular place, you should practice in advance on a small area of \u200b\u200bthe surface and finally decide on a suitable texture. Then the already drying textured surface must be smoothed. Large protrusions are smoothed with a metal trowel. It is first dipped in water, and then, slightly touching the ceiling, the surface is slightly leveled.

After the plaster layer has completely dried, the ceiling is sanded with fine-grained sandpaper, and poorly adhering particles are removed with a spatula.
At the last stage, the surface is refined. Painting a ceiling with textured plaster with your own hands is a very exciting experience. You can make the ceiling monophonic, or you can connect your imagination and use several colors. To do this, the ceiling is first covered with a darker paint, and then the paint is removed from the protruding areas with a rag or sponge and a lighter color is applied. Such painting will enhance the effect of the relief of the ceiling.
Stretch ceilings have long occupied their niche in the field of ceiling decoration. Such success is associated with ease of installation and operation, as well as with the price of canvases. In addition to the above, it should be noted the breadth of the choice of colors and textures in which canvases can be executed. It is worth dwelling on the latter in more detail: the texture of PVC film can create a fairly believable imitation of various materials at a minimum cost!
To create a unique style, you need to think through every detail in the interior of the room. The ceiling is no exception in this case. Textured stretch ceilings can support a wide range of styles: from minimalism with low-key ceiling ornaments to art deco and boho with bright patterned surfaces on the ceiling.
Stretch ceiling with an organic pattern has a number of undeniable advantages:
- Variety of choice. It can be an imitation of the fabric structure, sagging patterns and drawings of your choice, or an ornament in the form of cells or honeycombs. In general, such a ceiling resembles complex structural wallpaper, looks luxurious and rich.
- It is the patterns and ornament on the ceiling that are classics among textured surfaces. The choice of patterns is so wide that you can perfectly match the ornament on the ceiling to the main decision in the design of the room.
- It is also important to note the high quality of such ceilings. Moisture, ceiling leaks, installation of lighting fixtures - all this will leave the ceiling surface without deformation.

For your interior it will be a great acquisition to install a textured ceiling. Consider this option if you want to get a comfortable and beautiful coating that will attract attention, create a favorable atmosphere of luxury and comfort.
In addition to these advantages, you can also note the almost endless choice of colors. You can go for a modest pastel single color ceiling, or you can combine multiple colors in ceiling patterns.
What can be the texture of the ceilings
Embossed ceiling can be made of different materials, the breadth of imitated surfaces is striking in its scope: a stretch ceiling can resemble marble, fabric or wood. Unlike those indicated PVC materials or a vinyl ceiling is unpretentious in installation and use, it can be placed in almost any room, and care comes down to a rare cleaning of dust and small particles of dirt.

Among the most popular textures of stretch ceilings are:
- Matte texture. This option is a classic. Such a ceiling will not attract much attention, however, it will serve as a good addition to the design of the room. The matte ceiling can be one-color, or it can combine different colors, forming a pattern.
- Satin is a more accent surface. The difference from the matte surface lies in the reflective properties.
- Gloss is considered the most reflective material for a stretch ceiling. Its ability to reflect light can be compared to a real mirror. Such a ceiling will be a very bright detail in the interior. Gloss is interesting to combine with less accent materials for the ceiling.
- A very original ceiling texture is metallic. Such a ceiling covering gives the room a characteristic severity and originality. This texture will look most organically in the style of minimalism, hi-tech, as well as in some modern industries.
- Silk texture is perfect for bedrooms and children's rooms. Such a ceiling looks gentle, its luster is muffled and pleasant. By playing with color, you can create either a romantic or light airy atmosphere in the room.
- The ceiling with a velvety-suede texture will look luxurious and cozy.
- Marble texture is striking in its naturalness. Such a canvas looks very unusual and even exotic. Suitable for large rooms.
- The pearly sheen of the mother-of-pearl texture of stretch ceilings will give the room a special tenderness. A light sparkling ceiling will visually expand the room.
A unique feeling creates a combination of a matte texture with any of the reflective fabrics. Come up with your own combination of textures and get an original and comfortable ceiling that emphasizes the individuality of your space.
Stretch ceilings: textured white canvases
Light textured stretch ceilings deserve special attention. White color and its shades - the most common option for color solution ceiling. However, texture adds originality even to the classic white ceiling.

To do something more interesting than classic white frosted ceiling, To you the following light ceiling options are suitable:
- classic matte ceiling with a pattern or ornament;
- classic matte ceiling with an interesting lighting system of spots, light tape, chandeliers, etc.;
- glossy white ceiling;
- two-level diversified ceiling;
- translucent ceiling;
- white ceiling with photo printing.
Do not be afraid to experiment with the texture of the white ceiling. White is a classic color that will look modest and organic in different ways.
How to make a textured ceiling with your own hands
Despite the apparent complexity, the textured ceiling is not so difficult to do with your own hands. Allows you to create such beauty with special textured paints for stretch ceilings.

Not every surface can be painted with textured paints. Only the fabric base allows you to create a relief on ceiling surface with your own hands.
Textured paint has a special structure: it is very thick, so it is applied with a spatula.
When using textured paint, you can make the following drawings:
- natural unevenness created by a spatula;
- careless stripes applied with a rare comb;
- relief from a hard washcloth or sponge;
- neat, even ornaments, for which special artistic relief rollers for the ceiling are used.
Master class on applying textured paint (video)
Texture is an unusual characteristic for a ceiling. Therefore, ideas related to giving unusual shapes to the ceiling will look original and fresh. Try not to overload the composition and combine bright elements ceiling decor with room interior.
Textured stretch ceiling in the interior (photo)


