How to install a pallet in the bathroom with your own hands. How to properly install a shower tray? Acrylic pallet installation
Do you want to save space in the bathroom by installing a shower cabin? The bathroom is a place of relaxation that should be practical and have a pleasing aesthetic, right? Are you planning to carry out all the installation work yourself, but are you confused about installing a shower tray and connecting plumbing?
We will show you how to cope with this task - the article discusses important points encountered during installation. And also we paid attention to the features of pallets made of various materials, describing in detail the installation process of each of the options.
To help the novice plumber, we have selected photographs that demonstrate important nuances, and a video describing in detail the assembly and installation of a compact shower cabin.
Manufacturers are ready to surprise the most sophisticated owner, offering many shapes, sizes and options.
One of the first classifications is the division of models by shape. It can be square, oval, round, triangular, rectangular products.
It is worth choosing the shape and size of the pallet, which will most ergonomically distribute the space in the bathroom with an appropriate level of convenience.
Image Gallery
No. 4 - installation of ceramic and marble models
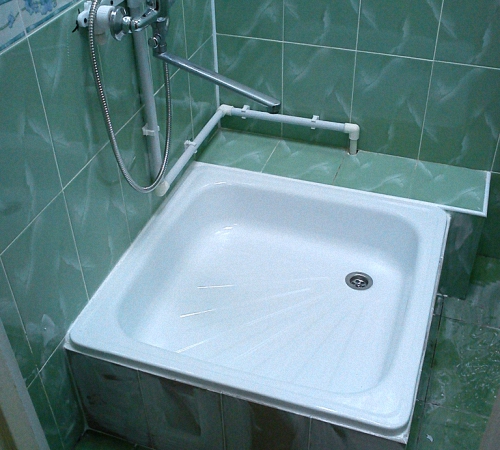
Today, ceramic and marble plumbing is in trend. Shower trays are no exception. Such products are durable and massive, so they do not require the use of legs or reinforcing elements.
The installation method is selected depending on the design of the pallet.
Two options are possible:
- Niche design. In many ceramic models, a niche is provided in the cavity of the pallet for mounting the siphon and draining the sewer system. It is enough to connect such a pallet to the sewerage system and install it directly on the bathroom floor without any additional steps. It remains only to attach the walls of the shower cabin.
- Monolithic option. In this case, to connect the drain hole to the siphon, you will need to erect a pedestal. Inside it will be a space for connecting to the sewer.
The erection of the pedestal occurs as follows. We apply a layer of waterproofing to the area where the pedestal will be built.
For this you can use liquid rubber, roofing material, polyurea or other composition. It is necessary to wait for complete polymerization if you used a liquid product.

Any type of waterproofing can be used modern version liquid formulations that, after application, polymerize and create a waterproof layer
Inside the contour of the pallet we do brickwork with a height that would be enough for the normal location of the siphon. It is necessary to provide a cavity for the drainage sewer.
We connect the drain hole, the opposite end of which we connect to the outlet tube. We apply a layer of cement mortar over the masonry.
Do-it-yourself pallet construction
The process begins with the preparation of the future place for the shower.
Step 1. To begin with, the installation area is waterproofed, as in the previous paragraph. This will help protect walls and floors from mold, mildew and moisture.
The process of a hand-made pallet device includes the following steps:
Image Gallery
The drain hole is immediately connected to the sewer system. The installation must be very tight, so you can use glue and sealants on all threaded connections.

Buying a drain for a homemade pallet, you can not save. Choose a quality product that fits in size and will last as long as possible.
Step 3. Now you need to lay out the base (use brickwork or rough screed) after the waterproofing composition has dried.
We make laying of walls with the help of silicate or ordinary bricks. Before that, you need to put on the base metal mesh for the monolithic structure.
We process the entire base of the pallet waterproofing material. After it dries, we make a layer of screed over the entire surface of the pallet to hide all the brickwork behind it.
It is important that the screed has minimum slope towards the drain so that water does not accumulate after using the shower. After drying, apply the penultimate layer of waterproofing.
Step 4. Leveling the surface of the pallet. To do this, you can use a self-leveling compound. We apply the final layer of waterproofing and tile the pallet. It can be a mosaic or any other tile.
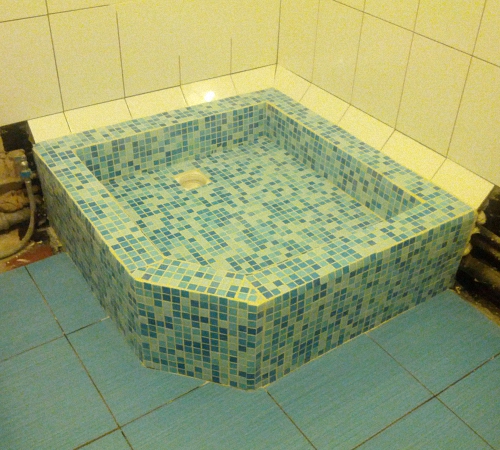
Cladding with tiles or mosaics
In many cases side cladding is required to hide the mounting bases. One of the most convenient options for solving the problem is to use mosaic tiles on a plastic or glass base.
A layer of adhesive is applied to the base using a notched trowel. After pressing the tiles, excess adhesive must be removed immediately.
With the help of a mosaic, you can veneer any uneven surfaces, as it is easily cut with scissors or a knife due to the paper base.
It doesn't matter if you use tiles or mosaics, all seams must be sealed. This especially makes sense when you decide.

The space between the pallet and the floor can be covered with mosaic or tile lining. Mosaic fragments are flexible and allow you to quickly and efficiently clad the sides or the entire pallet if you build it yourself
When forming seams, use crosses. After facing, you need to wipe the seams with a waterproof grout and rubber spatula. Then the remnants of the grout are removed and everything is wiped with a piece of cloth. After everything dries, you need to wash the tile.
Strengthening a steel or acrylic product
These solutions, especially acrylic ones, have an insufficiently strong structure. Measures to increase strength are reduced to the installation of supporting elements, which can be bricks.

It is important that the pallet presses on all supports with the same force, otherwise one of them may simply push through the bottom
In this case, all supports at the points of contact with the bottom must repeat its shape. For this, you can also use gaskets made of paronite or rubber.
Some complete units have high railing and tray heights that may not be high enough to fit in the ceiling. In this case, you need to make a recess in the floor in order to install the pallet and connect to the drain.
Conclusions and useful video on the topic
How to properly install a shower cabin:
Installing a shower tray with the right approach does not take much effort and does not require special training. If you follow the instructions, you will have a first-class installation of a monolithic pallet with the highest possible reliability.
Have something to add or have questions about the installation topic shower tray? Share your opinion and leave comments on the publication. The contact form is in the bottom block.
For long-term operation of the shower cabin, it is necessary to properly install the shower tray. The technology for performing work must be accompanied by a competent installation of all structural details. In this article, we will describe the features of installing a shower tray in accordance with the rules and recommendations of experts.
Types of pallets
The shower is a great addition to the bathroom, which saves free space in room. The installation method of the shower tray must be installed in a safe manner. Installation options depend on the type of pallets and the technology of fastening to a certain material. However, it is important to remember that not all pallets can be installed independently, and in some cases, you need to seek help from specialists.

Shower trays are distinguished by the type of material from which they are made. So, the following types of structures are distinguished:
- cast iron products;
- pallets made of marble and ceramics;
- steel products;
- acrylic trays.
Marble products are considered the most durable and reliable, however, their cost is quite high, so not everyone can afford such an acquisition. Ceramic pallets are also expensive and have excellent decorative properties, but are too sensitive to various damages.
An affordable option is to install a shower tray made of acrylic materials. To mount the structure, it is necessary to build a special frame that would support the pallet, because such products tend to sag under weight. Special fixing legs are added to the kit, as well as reinforcing parts, which ensure the strength and reliability of the future installation. For example, cast iron pallets are the cheapest among other types of products. The peculiarity of such pallets is durability and reliability, which is indicated by the material used.

Pallet Installation Aspects
The cost of a shower cabin depends on the variety of functionality of the product. For example, a shower room with hydromassage, telephone, lighting and other effects will have a high cost. At the same time, it is important to take into account the payment to workers for the installation of the entire structure. With your own hands, it is easiest to install acrylic or steel products.
During the do-it-yourself installation process, it is important to remember to level the surface under the shower for the vertical position of the legs. The assembly technology of the structure can be seen in the instructions for the product. They indicate the features of installing a product made of plastic or metal, and also describe tips for connecting the sewer system to the shower. Pallets can be installed on plastic support elements, which can be replaced with bricks.
It is important to know! To insulate the shower tray, as well as to seal all voids, it is necessary to use mounting foam in the work. However, this method can complicate the dismantling or repair work. For check correct installation shower trays, you need to get into it with extreme caution, after which you will determine the stability and reliability of the structure.
Do-it-yourself installation of an acrylic pallet: features of work
The main disadvantage of acrylic products is the lack of support under the central part of the pallet. Thus, the surface may be damaged by careless movement. This will cause the installation to break down and damage the human body as a result of the fragment.
Therefore, when installing an acrylic pallet, it is important to follow the sequence.
Preparatory work
During repair work in the bathroom, special attention is paid to connecting the sewer system and water supply. The shower cabin must be connected to several systems, which are the supply and removal of water, as well as the wiring of electricity. At the same time, the last part must have a high resistance to moisture and water.
To install a shower tray for showers, you need to purchase high-quality pipes and other products in order to avoid leakage in the future. After installing all communication systems for the bathroom, it is important to carefully check everything, especially the water supply and the operation of the sewer. All pipe openings are closed with temporary plugs at the time of installation work.
Installation process
During installation, it is important to align all pallets strictly vertically. This is due to the need for proper flow into the sewer, only if the product is perfectly level in a horizontal position. This will prevent the formation of puddles in the shower. To install the pallet, it is important to make a flat base of tiles or ceramics.
To properly mount the pallet, you need to fix the central part of the product, while the horizontal structure should not be disturbed. To simplify the work, draw a contour around the entire perimeter of the pallet to establish the exact position of the product. After that, you can start connecting sewer pipes and other elements.
Strengthening the shower tray
For the strength of the installation of shower trays, it is necessary to measure the distance between the product and the floor. At the beginning, it is important to leave space for the sewer so that the sewers can be cleaned or replaced later. Bricks or steel pipes can become additional parts of the support, depending on the design parameters.
Rubber is laid on top of pipes or bricks, after which the supports must be firmly pushed under the base of the acrylic pallet. After that, you can connect the communication systems.

Detailed instructions for installing shower trays
Before proceeding to installation work need to prepare essential tool. For installation you will need the following materials:
- FUM tape;
- sealant or special glue;
- twin to the sewer network;
- if there is no siphon in the kit, then you need to buy it at any plumbing store.
1. The pallet with legs must be leveled in a horizontal position. To do this, the legs are separately unscrewed and fixed in special locking screws. If you purchased a booth without supports, then you need to fill the floor cement mortar. The level of the base must correspond to the position of the floor in the bathroom. After that, they proceed to the installation work and do the finishing, using ceramic tiles or other products.
2. It is important to fix the pallet from the side of the wall using adhesives. Joints and fastening points must be additionally sealed with sealant. All work must be carried out carefully to avoid further leakage of water between the wall and the structure. A double is attached to the sewer system, in the presence of other types of connection, a tee is installed.
3. All parts and connections of the pallet must be carefully sealed to avoid water leakage and destruction of the pallet.

4. It is important to install the pallet above the level of the sewer pipes. This is necessary for further access to communication items for their repair or dismantling in case of breakage or damage.
5. In conclusion, it is necessary to check all attachment points. Also check the supply and drainage of water. If there is a leak in some areas, then it is important to tighten all connections more carefully. If necessary, carry out additional insulation.
Features of installing other types of pallets
Pallet for cheap cab can be installed different ways, for example, on a brick base, on plastic supports or a metal frame. The technology of work depends on the characteristics of the product and the materials from which it is made.
For a ceramic pallet, you do not need to install supports or other racks, because the structure is mounted directly on a flat floor. In this case, there will be no mounting clearance, therefore it is important to lay all communication systems with high quality and professionalism. To carry out repairs or to replace sewer parts, you will need to dismantle the pan. Answering the question: how to install a shower tray without ceramic legs, you need to attach the product with glue or cement mixture for tiles. Lastly, install the drain hole.

For the installation of steel or cast iron products, it is necessary to use more reliable support elements, which are bricks. Initially, the boundaries of the pallet installation are set on the floor. After that, a cement mortar is prepared and masonry is made of bricks. The height of the masonry must correspond to the parameters of the pallet and have the same shape. The pallet must not come into contact with the floor in order to be able to install the communication system.
Three days later, after the cement mortar has dried, a pallet must be installed. A layer of cement must be applied over the masonry, after which the product must be applied and leveled in a horizontal position. A hose must be attached to the drain system. As facing materials tiles are used decorative panels, mosaic and other finishes. This is necessary to give completeness to the installed structure.
Unlike installing a low shower tray, for other products you need to use a metal or plastic frame, which makes the DIY installation process simple. The process of performing work consists in aligning the legs, installing the pallet and fixing the drain hole.
At the end of the installation, it is necessary to check the stability of the structure. If the pallet staggers or fastens, then additional support elements must be made as a brick laying or attaching steel pipes.

The process of making a pallet with your own hands
It is quite possible to install a pallet with your own hands without buying such products in plumbing stores. The main thing is to follow the rules and detailed instructions for performing work. The shape of the base for the shower cabin can be different, you can also use different materials for decoration, creating your own design design. The work process has the following sequence:
1. First, we designate the place of drainage and installation of the drain system. We cover the surface of the base under the shower tray with a waterproofing layer, and the height of the wall covering should be 30 cm.
2. A barrier of bricks is installed along the perimeter of the structure, the height of which should be more than 5 cm above the position of the drain hole. Next, the screed is poured, which should be 6 cm below the drain point.
3. After the screed and brickwork have hardened, the barrier is covered with a layer of insulation. The pouring of adhesives or cement mortar is carried out with a slight slope towards the drain system. The technology for applying the mixture starts from the edge and moves towards the center. It is important that there are no steep angles of inclination, as this creates significant and sloppy transitions.
4. At the end of the work, the surface is finished with different materials, for example, ceramic tiles, mosaics and other products at the discretion of the owners.

Features of installing shower tray bumpers
After determining the installation features of the shower tray, the video of which is presented at the end of the article, you can proceed with the construction of the sides. If the pallet has a large height, then it is necessary to build one or more steps for the shower cabin. Masonry can be made of bricks with the installation of formwork, however, the type of material used does not matter, because the surface will be tiled.
After laying the steps and removing the formwork, it is important to cover the surface of the sides with a primer and a layer of waterproofing. After that, the processed and correctly erected structure can be covered finishing materials. It is important that the shade and type of finish match the look of the shower enclosure and the style of the bathroom. It is important to tile the walls behind the pallet if they are not treated with waterproof materials. As a tile adhesive, you need to choose waterproof products without the addition of silicone, as it darkens and spoils over time appearance shower cabin.

To equip a shower cabin in an apartment, it is better to seek help from specialists. This will allow you to properly distribute the load on the base, as well as lay all communication systems. It is easier to install such a structure in a private house or in a country house, where there is no danger of flooding the lower floors of the house. In the process of performing work, it is important to fasten all parts and elements firmly and securely in order to extend the life of the shower tray.
Dimensions of a typical bathroom in panel house allow you to install only a strictly defined set of plumbing devices. Often, apartment owners refuse a bath in favor of a shower cabin, while getting some free space. The current SNiPs do not prohibit replacing bathtubs with showers, so no problems with supervisory authorities are expected in this case. The purchase of a finished shower cabin is an expensive undertaking, and besides, its dimensions do not always fit the existing room. The issue is resolved by installing a pallet and light curtains, screens or doors that prevent water from splashing. It is much cheaper and makes it possible to use more efficiently certain place in room. The main element is a pallet, the purchase of which is much cheaper than buying a finished shower cabin. Many people prefer to make a shower tray with their own hands, getting a booth of the desired shape and area. The task is not the most difficult, but requires some knowledge and skills.
Is it necessary to make a tray in the shower
How to make a pallet with your own hands
Making a bowl is not particularly difficult. It is necessary to make a platform equipped with a hole for draining water and surrounded by a side along the edges. At the same time, the use different materials to some extent changes the installation technology. Consider the procedure for making a do-it-yourself shower tray:
From tiles
Ceramic tiles are laid on the finished base. To do this, you need to have a ready-made pallet made of brick or concrete, with an equipped drain system and sides. Tile is top coat, allowing you to get an attractive and water-tight pallet. The most common option is a small tile on a grid - a mosaic. It allows you to trim semicircular sides, form a small slope of the base to the outlet for better water flow.
The technology for installing tiles is no different from the generally accepted one. A standard tile adhesive is used, which is applied to the surface of the base, after which the tiles are laid. You should start from the bottom of the pallet, after which the sides are finished, starting from the inside. When laying, it is necessary to take into account the specifics of the use of the pallet and do not leave open edges of the material. After laying, all seams are rubbed with a special waterproof compound, of which there are many on sale.
from brick
The manufacture of a brick pallet is carried out in stages:
- A water drain system is installed - a drain to the sewer pipe and a drain headset (outlet) connection. This is necessary so as not to make a mistake with the height of the pallet.
- The sides are being built. Their height is chosen in such a way that a sufficient elevation is obtained relative to the bottom of the pallet.
- An inspection hole is made on one side of the side near the wall so that it is possible to access the exhaust headset if necessary.
- A waterproofing sheet is laid inside the sides. Can be used different variants, from roofing material to more modern rolled materials. It is necessary to ensure the tightness of the web, laying is carried out with an overlap on the sides.
- Brick posts are installed. Alternatively, the entire internal cavity is filled with bricks. It is necessary to monitor the position of the drain pipe so as not to violate its integrity.
- A reinforcing mesh is laid on top of the brick layer and a screed layer is poured. The drain hole is plugged with a wooden plug or in another way so that concrete does not get into it.
- Finishing is being done.
Over time, the diverter for the mixer begins to act up. The procedure for replacing this device is studied in detail in the following material:
Video: installation of a brick and concrete shower tray
A brick pallet is made in 1 day and requires the most minimal cost for manufacturing, so this method is the most common among users.
How to pour from concrete
The concrete version of the design requires the creation of formwork. For it, you can use boards, pieces of plywood or chipboard, etc. sheet materials. It is necessary to connect a branch to the sewer pipe and install an outlet headset on it. Then they are fixed in a stationary state between the planks of the supporting structure, which is easiest to make from wood. The main task is to ensure the position of the outlet and the drain hole is slightly higher than the sewer pipe, otherwise it will either turn out too high pallet or water will not drain from the pan. The slope of the outlet in relation to the sewer is about 3 ° or slightly more. It is recommended to lay a water heated floor in the thickness of the bottom screed, which will increase comfort and prevent colds. The best option- connect it to the shower hose, so you can save water and ensure best temperature grounds.
Procedure:
- A drain for sewerage and an outlet is installed.
- The formwork for the sides is mounted. Their height should be done taking into account the position of the drain hole. The thickness should not be too large to save space in the bathroom, but not too thin to ensure the strength and reliability of the pallet. A reinforcing mesh is laid inside the sides, which increases the strength of the structure.
- The sides are poured and aged for complete solidification.
- The formwork is dismantled, the waterproofing is laid inside the pallet.
- Underfloor heating pipes are laid and connected to the mixer (regulator).
- The bottom of the product is poured. The layer thickness must correspond to the position of the outlet, taking into account the finish.
- After solidification of the bottom, the casting is finished with tiles or other materials at the request of the owner.
There is an option in which the entire structure is poured at one time. It saves time, but has a lot of complexity and a high possibility of making mistakes. It is recommended to spend one or two days more, but to ensure the quality and reliability of the work.
Video: installation of a concrete pallet
Acrylic pallet installation
Acrylic products are usually completed with support structures that provide strength and stability of the structure to mechanical stress. Before starting work, you must carefully study the installation instructions, which detail the procedure. This will help you avoid mistakes and perform all actions in the correct sequence. If the device is not equipped with a supporting structure, as is the case with some cheap models, you will have to make it yourself, which will take time and skills.
- For assembly, the bowl is turned upside down. A frame is installed to which the legs are attached. Usually there are 3 to 5 of them.
- The drain system is connected. The outlet pipe is installed through an adapter, which must be smeared with glue to eliminate the possibility of leaks.
- The pallet is installed on the floor, the height of the legs is adjusted. A building level is placed on the side, the position of the product is adjusted according to it, rotating the legs in one direction or another. As a result, full stability, a horizontal position must be ensured.
- The position is checked on all sides.
- To increase reliability, as well as sealing all elements, it is recommended to fill the space under the product with mounting foam.
- Operation can be started after 6-10 hours, necessary for the crystallization of the foam or adhesives used in the assembly.
Video: installation of an acrylic pallet
https://www.youtube.com/embed/vnz7AiSyQUo https://www.youtube.com/embed/LakJGgOdi3g
The shower tray helps save a lot of money, bathroom space. Do-it-yourself installation of the product will allow you to get the most suitable result for the owner, to ensure optimal dimensions, configuration. All work can be done at a convenient time for yourself or family members, without adjusting your regimen to the schedule of invited specialists. The quality or performance parameters depend on the thoroughness of the work, the accuracy of the owner.
- Materials and tools
- Mounting order
- Helpful Hints
A modern shower cabin is a wonderful addition to the usual bath, making pleasant and healthy water treatments as diverse as possible. Here you can place both a hydromassage system and an exotic shower, connect light music and create light and sound effects.
Scheme of the device floor with a pallet.
However, without a quality pallet - the basis of any shower - all this is simply impossible. Therefore, you should know how to install a metal shower tray with your own hands.
Why is it better to choose, for example, not a ceramic shower tray, but a metal shower tray, and why is it better to install it yourself, and not with the help of qualified installers? A metal shower tray is an excellent choice and installation is not particularly difficult. Plus, you can save money.
Materials and tools
Shower tray layout.
In order to quickly and correctly install a metal pallet, you need to stock up on the following materials, tools and fixtures:
- finished shower tray;
- downpipe;
- mixer with siphon;
- cement;
- sand;
- waterproofing mixture (silicone sealant);
- stock of bricks;
- sheet rubber;
- FUM tape;
- trowel for stone work;
- plastering spatula;
- paint brush;
- hammer;
- building level.
Back to index
Stages of installation of a metal pallet.
There are many ways to quickly and efficiently install a metal tray in a shower room (chamber). Consider one of the simplest and most common options for mounting a waste tray.
Before you start the installation process of this design with your own hands, you must definitely study the technical instructions that are usually attached to it when selling. It is worth noting that experts recommend doing this, regardless of what material the shower tray is made of.
First of all, the shower cabin must have dimensions that generally correspond to the dimensions of the metal base. In this case, the dimensions and finish should be adjusted in such a way that the facing ceramic tiles, if not the entire wall of the room is lined with it, descend with their lower edge slightly below the level of the pallet attached to the wall. If there is a gap between the wall and the base of the cabin, it must be sealed with a waterproofing compound (sealant).
Starting to set the pallet according to all the rules, it is recommended to immediately monitor the clear horizontal position of its upper plane with the building level.
This situation should not interfere in the future effective removal water, as modern drain products are made with ready-made cone-shaped funnels.
To fix the structure in a certain position and to ensure its horizontalness, the legs attached to the pallet are used. Usually they are adjustable so that they can be used to quickly and easily set the base in a given position. Upon completion of the adjustment, the legs are rigidly fixed with locking mounting bolts.
In some cases, instead of legs, special plastic supports are used, which are supplied with the pallet. At the same time, very often builders mount these products, resting them not on legs, but on specially constructed stands made of bricks or mounting cinder blocks.
Installation diagram of a shower tray with a wall-mounted faucet.
The specified stand (or, as it is also called, the well) is built in accordance with such dimensions that the future bottom of the shower cabin freely fits on it, resting its sides on the edge of the brick (cinder block) masonry. To fix the pallet, its sides are either glued to the masonry with a special adhesive mixture, or planted on a cement mortar.
When installing the base of the shower chamber on a stone well-support, one cannot but take into account the fact that a siphon must be connected from below to the drain mouth of the tray. The fact that the height of the well is sufficient for it (the sewer outlet must be above the floor at a height of 12-15 cm) must be taken care of in advance when designing a bathroom. By the time the entire structure is finally fixed on a brick support, the mixer must be assembled, and its components must be tightly screwed to each other according to the diagram.
For better stability of the pallet, the space between it and the floor can be filled with ordinary sand. This will create additional support for him. If there is no sand at hand, polyurethane foam can partly replace it.
It should be borne in mind that a shower is a place where, by definition, there should be a lot of water. Therefore, all the smallest seams, cracks and junctions are between the sides and the brick on which they rest, between the edges of the pallet and tiles on the walls, between the tightly twisted elements of the mixer and the pallet - should be thoroughly lubricated with silicone sealant and laid with FUM tape.
Each time, having completed one or another stage of the installation procedure, it is recommended to immediately check the quality of what has been done. In particular, after installing the bath on the support well (but without its final fixation), it is proposed to verify its stability. To do this, it is enough, with the utmost care, to just stand on the pallet, and, most likely, the balancing flaws will immediately manifest themselves.
It is also necessary to make sure that the junction of the pipe with the neck of the pallet and the siphon with the sewer pipe is well sealed. For this purpose, water is supplied to the pallet with a small pressure. If there is no liquid leakage, the shower can be used for its intended purpose. If water leakage is detected, additional sealing of the connected components will have to be done.
Back to index
Trays of various configurations for shower cabins: a - square, b - radial, c - rectangular, d - pentagonal.
Even before buying a set of shower systems, the main renovation in the bathroom should be completed. First of all, we are talking about the installation of water and sewer pipes and a safe device electrical wiring.
Before starting to install an iron shower tray, it is necessary not only to study the assembly and installation manual in detail, but also to check the completeness of the delivery.
The presence of sharp corners in the brickwork of the supporting well is unacceptable. The indicated defect is carefully smoothed out with cement mortar.
If a product with high sides is used, then as a result of a shower device, a rather high base can be obtained. In this case, it will be useful to build an additional step.
When marking the position of the future base, it is necessary to ensure that during installation the pallet with its drain hole clearly coincides with the drain sewer pipe. Otherwise, all the work will have to be done again.
But if you think over all your steps and actions in advance, calculate all possible deviations and surprises, such work will not seem impossible.
vseovannoi.ru
Steel shower tray: advantages and disadvantages, varieties and do-it-yourself installation
Are you going to buy an expensive shower cabin for a summer residence? Don't rush - you can always find a cheaper option! The low cost of a product does not mean its poor quality, one can say more - almost always it is just a simplified and minimized design. In this article, together with the site vannaja.net, we will study a steel shower tray that will help to build a primitive, but rather pretty shower cabin.

Rectangular shower tray
Steel shower tray: advantages and disadvantages
It is generally accepted that steel enameled shower trays do not have any advantages and that the most attractive thing about them is the price. But this is not so, in addition to low cost, this type of plumbing fixtures has other positive traits about which for some reason everyone tries to forget. Yes, they have a less attractive appearance than similar products made of acrylic, the enamel on them can peel off from careless handling, they are a little colder than all the other brothers, but, you see, it will not be very correct to focus on the shortcomings alone. Especially when you consider that they are fixable.
In addition to low cost, metal shower trays have the following positive aspects.
- Durability that no acrylic can match. If you are a massive person, then it is the steel pallet that can transfer your weight without additional supports.
- Very easy installation, which, if desired, can be mastered by any person - there are no subtleties and nuances that can affect the service life of this product.
- Versatility. Such a pallet can be used as a separate plumbing fixture, or complete with shower curtains. And what is most interesting, it will not be difficult to pick up a factory sliding shower screen for such a pallet.
And the shortcomings mentioned above, by and large, are not shortcomings at all - only the appearance cannot be corrected. But even here, if you think carefully, you can come up with something - products of this type, as a rule, are built either into the floor or into a pedestal made specifically for it. In general, the appearance of such a shower tray fully depends on the quality of the lining surrounding it.
Metal pallet: varieties and their differences
Another point that repels most people from the enameled shower tray is the small variety of shapes and sizes. design solutions. The product is simple, no frills and designed to fulfill the only purpose - to collect water and drain it into the sewer system. In general, the conversation about the types of metal pallets will be short - classify metal pallets possible in two ways.

A visual aid for installing a shower tray can be viewed in the following video.
Rectangular steel shower tray: installation technology
As mentioned above, one of the advantages of steel shower trays is its easy installation, which will be discussed later. For ease of perception of information, we will present it in detail and point by point.

Basically, that's all. After the mounting foam or sealant has hardened, all that remains is to tidy up the parapet itself (if it exists, of course). Usually, the supporting brick is faced with tiles, which are matched to match the floor or wall decoration of the room. When the decoration is finished, all that remains is to take care of the curtain, and a simple shower cabin will be ready.
As you can see, a steel shower tray is not a difficult device to install - everything is elementary simple and clear. And the lack of appearance, which is usually attributed to him, rather depends on the inept hands of the master, who lays out the pedestal and tile it.
www.vannaja.net
How to install a pallet in the shower with your own hands
For water procedures it is necessary to create all conditions, the necessary prerequisite for which is the installation of a bath or shower cabin. Compared to a bathtub, a shower cabin is a more convenient, multifunctional device that allows you to significantly save space and at the same time decorate the bathroom. Choosing a cabin is a simple matter, but installation will require certain knowledge and skills. In this article, we will figure out how to install a shower tray and at the same time not involve specialists, but work on it yourself.
The specifics of the work
Installation of the pallet in some cases requires certain specific knowledge that specialists possess. It is undeniable that such a familiar procedure will take them little time, especially since you will receive a guarantee for the installation. But, after all, it is much more pleasant when everything is done by hand.
Before installation, you should read the product instructions, determine the dimensions of the structure, its convenient location. The instructions will necessarily indicate the number and set of components that are necessary for installing pallets with your own hands.
 Types of shower trays
 During installation, it is necessary to correctly adjust the horizontal surface of the pallet. This is due to the fact that insufficiently high-quality level marking can affect the operation of the sewage drain into the sewer. Therefore, it is necessary to control this process so as not to disturb the waste regime.
Depending on which shower cabin you have purchased: with a deep or shallow frame, the complexity of installation will depend. To install a flat pallet, you will not have any difficulties, but installation will require additional dexterity.
You can use bricks or foam blocks. And additional rigidity of the pallet can be given using a metal frame. This greatly simplifies DIY installation.
If the model you have chosen has a rather high base, then you should think about installing a step. To make sure that the pallet will be installed correctly, you should carefully stand on it.
 Acrylic pallet on a prefabricated frame
  Steel pallet on a metal frame
  The cast-iron pallet almost does not need installation
 Preparatory work
Before starting work, check the availability of all components and elements. Pay attention to the condition of the floor. To properly install the pallet, you need to prepare the floor - its surface must be perfectly flat. The sewer pipe must be led to the very center of the surface where the pallet will be installed. Good quality pipes must be used for the waste drain. Water supply pipes must be installed and electrical wiring is securely hidden under the tile. The outlets of the pipes must be accessible for connecting the shower cabin.
Before you start installing the shower tray, you must have the following materials and tools with you:
- metal carcass;
- drainpipe, flexible hoses and siphon;
- level, assembly knife;
- screwdrivers and keys;
- silicone sealant, FUM tape;
- spatula, trowel;
- brush and gloves.
 Shower tray installation tools
 Getting Started
Do-it-yourself installation of a structure with sides requires the use of metal frame. This requires beginners to know some process technology, since their absence can cause difficulties for home craftsmen.
In order to properly level the pallet, you must begin with the assembly of the metal frame. For this you should:
- turn the pallet upside down to attach to its bottom with self-tapping screws bearing beams, dimensions square section which are 0.1x0.1 cm. If the design provides for a place for bolts in the right places, then we assemble the frame using fasteners;
 Metal carcass
 - depending on the shape of the sanitary ware and in order to achieve its maximum strength, we fasten the pipes with our own hands crosswise or in parallel;
- at the end of the carrier tubes there are special holes where the studs are mounted, which serve as legs to support the entire structure. Each hairpin has thrust bearings resting against the base. On the other hand, the studs are fixed with washers or nuts;
 Frame fixing
 - the frame is assembled, now you need to turn it over, install it in the right place. Before fixing the pallet, using its dimensions and holes, we mark the walls and floor. If preference is given to the corner option, then with the help of special brackets the structure is attached to the walls, the joints between which are ultimately processed with a sealant;
- when all fasteners are screwed to the base, it is necessary to adjust the pallet relative to the horizon line using a level. High-quality installation will ensure unimpeded drainage of water into the sewer pipe. We carry out the final touches by adjusting the thrust bearings or tightening the studs, which must be tightened with locknuts;
 Adjusting the feet of the shower tray
 - now you should install the siphon. It is desirable that he flexible tube, which allows you to adjust the dimensions along the length and height of the structure. First, a mesh lubricated with sealant is installed in the drain, then a gasket is applied and the tee is fixed with a screw. We insert a branch into the sewer, which is pre-sealed with additional gaskets, and as a result is fixed with a coupling. We connect the other side of the siphon tube to the connecting node, which must be lubricated with sealant and sealed with a gasket;
 Sewer connection
 After installing the siphon with your own hands and checking all its connections, you must connect the cold and hot water supply. To prevent leakage, all joints are treated with sealants or FUM tape.
Other ways to install pallets
Installing a shallow sump is a simpler procedure. The peculiarity of this installation is correct installation siphon, which should be located below the floor level.
In this case, you should carefully select the drain hole, which must have sufficient throughput. So, for a pallet with a layer of water of 12 cm, siphons are used, the dimensions of the through hole of which are 0.52-0.62 cm. If the maximum layer of water exceeds 15 cm, then the diameter of the hole must be at least 0.9 cm.
 Drainer
 The installation of flat and shallow pallets after the drain hole is carried out by gluing to the base, the joints are treated with mounting foam and the structure is loaded for a day. After that, all joints are treated with sealant.
In addition to the above method of installing a shower tray using a metal frame, there are other ways. So, brickwork or foam blocks can be used as a rigid base for enamelled pallets. This makes it possible to eliminate the presence of space between the floor and the pallet and ensures maximum structural strength.
 Installing a shower tray on bricks
 Homemade pallet
If you have the opportunity and time allows you, then you can make a pallet in the bathroom with your own hands. At the same time, there is no need to buy an acrylic pallet, since a moisture-resistant brick will be used as the basis.
The first step is the installation of sewerage and water supply and carry out waterproofing and floor preparation. It is best if you install the pallet in place of the old bathroom. However, the floor should be treated with mastic and covered with a film.
 Cement strainer
  Floor waterproofing
 Now you can move on to the stage of building brick sides, which lies on a moisture-resistant solution. Their height should be greater than the ledge of the drain, from which the height of the homemade pallet begins.
Now the base is ready and you need to give it time to dry. Then pour the inside of the pallet with a self-leveling concrete mixture 6-8 cm thick. At this stage, it is necessary to create a slight angle of inclination towards the sewer hole so that the water drains quickly.
After the pallet has dried up again, it is treated on all sides first with a primer, and then with mastic or any other waterproofing compound in several layers. Ultimately, the entire surface of the pallet is treated with a mixture of cement and tile adhesive. When this mixture has dried, the pallet is rubbed with sandpaper.
Now you can start decorating your product. To choose from, it can be a mosaic, a tile made of ceramic material or decorative rock. Preference should be given to moisture resistant brands.
Installation steps for a homemade shower tray
For laying materials, it is necessary to use a special glue that does not contain chemicals and does not deteriorate when exposed to water. With a notched trowel, glue is applied to the surface of the pallet. It is best to start work from the corner. When laying out the mosaic, you need to lightly press it, if you use tiles, then a rubber mallet will help you.
It can also be considered combined options when the inside of the pallet is tiled and the outside is tiled. But, and this is at the request of each master.
www.vannayasovety.ru
Shower Tray Installation: 3 Best Ways + Step by Step Installation Instructions
High performance indicators have made shower cabins in demand not only for small bathrooms, but today they are also installed in prestigious houses or apartments as an alternative to bathtubs. Shower trays are considered one of the main elements of the cabin, the correct installation of them affects the convenience and duration of use. The pallet installation algorithm depends on its design features and material of manufacture.

Shower tray installation

Bathroom design with installed shower tray
Before buying a particular pallet, it is advisable to familiarize yourself with the advantages and disadvantages various options. What are pallets?
Pallet classification
Depending on the material of manufacture, linear dimensions and geometric shapes, the cost of pallets varies over a fairly wide range. These characteristics also affect the installation methods of pallets. Professionals conditionally classify products into the following categories.
 Production material | Available in ductile iron, sheet steel, ceramic and plastic. Metal ones are distinguished by increased strength indicators, inner surface covered with durable enamel. Cast iron is much more expensive than steel. The disadvantage is that the cast-iron pan remains cold for a long time, which negatively affects the comfort of water procedures. Ceramic are not widely used, they occupy an average position in terms of performance and price. Plastic is currently the most commonly used. In all respects they meet modern requirements, they have a large number of different modifications. Available at a cost absolute majority users. |
 Installation location | Can be mounted in wall corners or frontally. Depending on the installation site, they differ in size and methods of water drainage. |
 Drain hole location | The hole can be located in the center or in one of the corners of the pallet. From the point of view of installation, the differences do not have much difference, but during the selection, one should take into account the scheme of existing engineering networks In bathroom. |
 Side height | The height of the sides varies between 6-10 cm for super-flat, 10-18 cm for flat and 25-35 cm for deep trays. |
 geometric shape | Square, rectangle or sector. Sectoral are installed only in the corner of the room, the rest are universal, can be mounted anywhere. |

Shower trays
Trays are best purchased complete with showers. If for some reason this option does not suit you, then a separate installation of the pallet is also allowed, and you will have to do the protective fences yourself. When choosing a specific model, it is recommended to pay attention to the following features.

Video - Which tray to choose for your shower
After a decision has been made on a specific type, installation can begin. Installation depends on the design features of the pallet, this should be taken into account when buying and soberly assess your capabilities and skills. Choose such pallets, the installation of which would be within your power. We will consider three examples of the installation of pallets, the rest have no fundamental difference.
Step-by-step instructions for installing a pallet on foam concrete
Construction and installation works are among the simplest in terms of complexity, but increased care is required when connecting drains. For example, take a universal square plastic pallet.
Step 1. Decide on a specific installation location. We have already mentioned that you should pay attention to the existing scheme of engineering networks. The outlet of the drain pipe must be under the plane of the pan. Making sewers visible is allowed only in extreme cases. And then in the future it is recommended to take a set of measures to hide the pipelines.
Step 2. Purchase materials and prepare tools. In addition to the pan itself, you will need a siphon, a corrugated drain hose, a tape measure, a level, silicone caulk, foam concrete, tile adhesive, a caulk gun, a saw, a trowel, a tray, and a pencil or marker.

Necessary materials and tool
Step 3. Preparing for installation. The floor must be clean and level, the outlet of the pipe for draining water under the plane of the pallet. Put the pallet in the intended place and circle the outer contours with a pencil.

It is necessary to circle the contours of the pallet with a pencil
Step 4. If your pallet model does not have factory legs, then you need to put it on four stands cut from foam concrete at all angles. The height of the stands is within 10 cm.

Pallet block
Step 5. According to the instructions, prepare a tile lay. Pay attention that there are no dry lumps in the mass.

Step 6. Apply glue to the back of the four coasters, set them in place and place the pallet on top.

Glue application

Block stacking

Blocks are pressed into the glue

Pallet stacking for 4 blocks
Using a level, align its position, check all four directions, they must be strictly horizontal. To do this, with gentle blows of a construction hammer or a trowel handle, tilt the blocks in the right direction.
Step 7. Wait a little while the glue hardens. These four corner blocks will be beacons in height for the foundation for the pallet. From the same foam blocks with a hacksaw, cut out pieces to equip the entire structure. As a result, you should get a square under the entire perimeter of the pallet.
Practical recommendation. Do the masonry in the usual way, apply glue on the bottom and on the sides of the blocks. Constantly check the position of each element with a level, if deviations are detected, correct them. Further work can be continued only after a day.
While the foundation is maturing, install the shower and faucet. Place them at a convenient height, make sure that there are no leaks in the places of threaded connections.
Step 8. Place the pallet on the foam blocks and draw the location of the drain hole on the floor.

Marking the location of the siphon
Get a plum. If necessary, tighten the inlet of the drain sewer pipe to the drain hole. In our case, special accuracy is not needed; the finishing connection is made with a flexible corrugated hose.

Siphon connection
Step 9 Assemble and replace the siphon. Very important works. Keep in mind that dismantling the plastic pallet on the foundation is not possible without damaging it. Such manipulations can be done with pallets with legs, but we will talk about their features below.
Make every effort to completely eliminate the risk of drain leakage. What should be done for this?
- Read the assembly instructions for the siphon, check the technical condition of all its elements. Pay special attention to the condition of the rubber gaskets and seals.
- During assembly, do not apply excessive force, install the rubber seals in the correct position. To facilitate the entry of plastic pipes into the seals, smear them with special lubricants, soapy or ordinary water. Never try to connect dry and with great effort. The fact is that the thin edges of the rubber seals are very easily damaged, as a result, a leak will definitely appear. It is impossible to notice it under the pallet in time; to eliminate the problems that have arisen due to the long-term effect of water on building structures, it will take not only a lot of time and effort, but also financial resources.
Step 10. Spread the upper perimeter of the block stand with glue, the thickness of the solution is about a centimeter.

The basis for installation of the pallet. Glue application
Put the pan back in place, screw on the siphon, connect the flexible hose to the inlet of the drain pipe.
Step 11 Using a level, level the pallet in a horizontal position.

Pallet installation, leveling
Take your time, lower the edges very carefully. If you make a mistake and one edge of the pallet is tilted too much, then to eliminate the problem, you will have to disconnect the siphon, remove the pallet and start all installation operations from the beginning.
Step 12. Seal the joints of the pallet to the walls. Be sure to degrease the surfaces, clean them from dirt and dust. There is a wide variety of sealants, but we recommend that you use special plumbing silicone. They have a slight elasticity, due to which the fluctuation of the edges of the tray is compensated while taking a shower. In addition, the composition includes antiseptics that prevent the growth of microflora and pathogenic bacteria.
Pay attention to how ugly shower stalls look with black mold stripes around the perimeter of the pallet. This is a consequence of a violation of the rules for installing pallets. The disadvantage of silicone sealants is that after a few months it is necessary to revise the tightness of the seam. The fact is that the material begins to flake off in some places. 
Mold in the shower
The sealant is applied using a special gun. Cut the tip of the tube at a 45° angle and carefully extrude the material into the slot. Do not leave gaps, irregularities can be removed with a finger or any object at hand of the appropriate width and length can be adapted. To prevent silicone from sticking to it, wet the item in soapy water.

Cut the tip of the nozzle to desired diameter

Application of sealant
Step 13. Proceed with facing the visible surfaces of the block foundation of the pallet with ceramic tiles. If the tile had to be cut, then it is better to place the cut at the bottom, and to improve design performance, use special plastic or aluminum corners. They are sold in the store along with tiles.

Pallet after lining
This completes the installation of the pallet on the foundation, the final installation can be done only after the adhesive has completely cured. This will take at least two days.
Installing a shower tray with legs
This pallet is installed much faster, often a special plastic screen is included in the package, which allows installation without masonry work. If the screen is not included, then final stage the perimeter pallet must be finished with blocks or bricks of appropriate parameters and covered with ceramic tiles. Before starting work, check the presence of all elements for mounting the pallet and carefully read the manufacturer's instructions.

There are instructions for each pallet.
Step 1. Lean the pallet against the wall or lay it on the desktop. Find the places where the legs are fixed, they are factory marked or have an increased thickness due to the cast mounting inserts.
Step 2. Screw the legs. Pre-adjust their height with a tape measure. The exact height setting must be done on the floor.

Screwing the leg

Decorative screen assembly

Leveling the legs
Important. Please note that each leg has a locknut to secure the element in the selected position. Make sure that all the locknuts are in place, otherwise you will have to remove the legs again to install the nuts.
Step 3 Install the pallet in the right place and decide on the way to connect the water outlet. Depending on the location of the inlet pipe of the sewer pipe, additional connections will have to be made to connect the siphon. The siphon should be sold with the pallet, if not, then buy it separately. At the same time, pay attention that the dimensions of the equipment allow it to be installed under the pallet. If your own experience is not enough, consult with the shop assistant.
Step 4. Assemble the siphon, pay great attention to the quality of all connections, do not allow leaks. Remember that it will always take much more time to eliminate them than to build a quality one. Not to mention the financial side of the issue and possible negative consequences.

Step 5 Put the tray back in place and use a level to set it to a horizontal position. Control all the sides, do not allow a bias in any direction. Be sure to tighten the locknuts after adjustment.

Pallet alignment
Step 6. If included metal profiles to stop the side surfaces against the wall - install them. Mark a specific location, use a level to check the horizontal position. Metal profiles are fixed to the wall with dowels, drill holes for them in the right places.

Marking for drilling holes for fixing the stop

Hole drilling

Screwing the retainer

Fastening the pallet to the clamps
Important. If the walls are already finished with ceramic tiles, then all measures should be taken to prevent them from cracking during drilling.
How to avoid unpleasant situations?
- Never drill a hole at a tile joint. During the installation of metal profiles, it is always possible to shift them slightly in one direction or another and thus choose a safe place for drilling holes. At the same time, such manipulations will in no way affect the strength of the fixation of the pallet.
- Always work only with serviceable tools and sharp drills. Don't use too much force while drilling.
- It is strictly forbidden to work with a drill in the hammer mode, ceramic tiles do not tolerate shock loads. The puncher turns on only after the thickness of the tile has been passed.
Step 7. Connect the drain.

Siphon assembly, grate installation
Never assemble rubber seals with great effort, lubricate them with mastics or at least moisten them with plain water. It is very easy to damage the seals, but they cannot be repaired, they must be completely replaced. The problem may arise when looking for an identical replacement. Especially often such troubles arise during the search for spare parts for imported pallets. It is not recommended to use silicone as a sealant during the assembly of water drainage, it will definitely peel off after a certain amount of time and leak.

Installing the pallet on factory plastic stands
Some manufacturers complete pallets with blanks of stands made of durable extruded polystyrene foam. Such structures are very low in height and require a different installation algorithm.
Step 1. Unpack the pallet, take out the stand blanks.

shower tray kit
Step 2. Try on their length around the perimeter of the pallet, measure the necessary parameters. To facilitate breaking polystyrene boards have vertical slots, it is enough to bend the material in this place a little and the extra piece will break off.

Assembling the frame from plates
Step 3 plastic stand, put it on the pallet and mark the location of the stiffeners. Here you need to cut recesses along the height and width of the ribs. At the same time, make a hole for the drain pipe.

Marking for drain
Step 4. Screw the legs into the seats, adjust their height so that the pallet is in a horizontal position.

Screwing in the legs
Step 5 Assemble and attach the siphon to the drain. It should be located exactly in the center of the pallet. Try to make the adjustment in such a way that the gap between the floor and the stand is minimal. If the floor slopes towards the wall, then you will have to remove the stand several times, unscrew / twist the legs and re-check the horizontal position.

Leg adjustment
Step 6 Place the tray on the floor so that the siphon is in the right place. Check position. Circle the perimeter of the stand on both sides with a pencil or marker.

The master circles the frame with a marker
Step 7 Clean surfaces from dust, degrease, moisten with water.

In the center of the drawn outline, apply a little polyurethane foam. Apply foam to the top surface of the stand as well.

Foam application
Step 8. Carefully put the stand in place, put the pallet on it, check the location of the siphon again. It must be located exactly under the drain hole, otherwise there will be problems during its fixation to the pan. Screw onto the drain grid. At the same time, she presses the siphon against the tray.

Frame installation

Installing the pallet on the frame
Step 9. With great effort, press the pallet and leave it in this position until the foam hardens. In order to exclude the possibility of lifting the pallet with foam, it is recommended to press it inside with heavy objects.

Pallet installed
Step 10. After the foam has firmly glued the pallet to the floor, start finishing the perimeter of the stand ceramic tiles. On the second day, you can start sealing the joints. The algorithm for sealing work is no different from the options described above.
Practical advice. Even before installing the pallet, estimate its approximate height. Today in stores there is a large selection of tiles various sizes chances are you will be able to find the right one. And for an accurate fit, use the legs. Due to such manipulations, it will be possible to avoid trimming the tiles, and this not only speeds up the process of laying it, but also greatly improves the appearance of the bathroom.
If you do not plan to buy a complete shower cabin, then draw a diagram of the places where the brackets are attached, on which the protective plastic film will be hung. This is a very economical solution, but this option for arranging a shower room has more disadvantages than advantages.

Shower tray in the interior of the bathroom
Video - Pallet Installation Rules


