Stand for the soldering iron with your own hands - a sign of a good work style. How to make a stand for soldering iron homemade coasters for the soldering iron
Small prehistory. I have long wanted to do Normal stand for soldering iron but did not know where to start. I recently got into my hands the lid (I don't remember exactly), which lied for a long time in the box.

She snapped me on the idea of \u200b\u200bconstruction.
For the manufacture of the stand I used:
- "Unknown" cover (stand);
- Phaneur;
- Wooden Staff;
- self-tapping screw;
- nails;
Work description
For a start, I removed everything too much from the lid.

 On the sides were left »Tags," which will play the role of attachment.


Then it was drinking from plywood 3 planks. Since the bottom cover is not even, for convenient mounting to the base, the substrate was revealed. 
 Of the three dug dusts:
- the largest - the foundation of the whole design;
- two others, the same. One will be installed for the soldering iron, in the other I made holes in which jars with fluxes for soldering will be placed. Also in the substrate, I made holes on the shape of the bottom of the lid.

In the "tongues" I drilled holes. After them, screwed two identical planks to the screws.

In order for jars with fluxes do not fail, a small planker was cut out of the plywood, two small staps were cut to the ski.

I nailed this smell on the carnations to the ground, putting the podlocks under it.

The septum into the lid was cut out of the tin. From tin, which was cut off from the lid, I bent a stand on a soldering iron. The partition was screwed to the screw to the base through the holes in the lid. The stand screwed to the plank without holes.


 Under the apartment on which the soldering iron will fall, I drank 2 strokes and nailed them on the carnations.

In a part of the lid with the partition, I placed a sponge. Cellulosic sponge for washing dishes. Sponges that sell specially for cleaning the soldier sting, no difference from cellulose sponges for washing dishes, only in size and price. Sponges for dishes are much larger, and cheaper at the price. This sponge was bought in a household store for 30 rubles.
From the sponge was removed the lower part. I also cut it in the size of the lid.

Initially, I wanted to do something simple, namely the holder for the soldering iron with the temperature regulator, since the soldering iron overheated, but starting - I could not stop. All necessary devices did gradually, and therefore each time new and new ideas have arisen.
So, we will need:
Material:
Chipboard board;
Bolts of different diameters;
Screws, screws;
Nut-lamb (10 pcs.);
Crocodiles (3 pcs.);
Door loop (1 pc.);
Unnecessary flashlight;
3 Motors (2 of the printer, 1 Looking out of the machine);
4 LEDs (3.5 volts);
5 switches;
Collet;
Small sharpening nozzle (from engraver set);
Helium paste (adapter for nozzle);
Wires;
Soldering iron;
3 corrugated tubes (made of gas lighter);
Cigarette case;
Coil with tin;
Socket;
Doorhandle;
4 meters of cable;
2 power supplies (from bodies of 5 volts, and a router for 9 volts);
Self-adhesive film, edge;
Black paint;
Tool:
Soldering iron;
Glue pistol;
Chisel;
Scissors for metal.
So, let's begin
We take the chipboard board, placing and cutting the g-shaped shape, the sizes are attached.
At a specially selected place, placing and cut the holes for push-button switches (4 pcs.).

In order to conveniently place our devices, and they were able to regulate, double g-shaped levers, carved from tin, for each individual.
The cheapest stand for the soldering iron was purchased.

And now we will refine her!
It was decided to make 2 crocodile holder, for this on the sides drill 2 holes, we take a steel wire, and go through the bottom.
Next, we remove the ends to the top, how long it is flush with each other, bend, so that it looked solid? We take 2 corrugated tubes taken from a gas lighter, wear a wire, and further freamed the crocodile on each side, as well as drill a hole in the saucer, in order to fasten to the surface of the board, as a result we obtain.

We make the third vertical crocodile, thus strifting.

It is attached under the bottom of the stand.

It was decided to make a mini drill, as well as sharpened for small details. For this, 2 unnecessary motors from the printer were taken.

A sharpening nozzle was attached to the motor, with the adapter from helium handle. The motor itself was fixed on the metallic form found, here in this way so that it could stand vertically.
In order to work at night, we make lighting from an unnecessary flashlight, in my case of this type.

We remove too much, and we leave only a part with the LED.

In order for the lamp to move the top-down, the adapter (cover) is taken, the through hole is drilled, a long bolt is inserted, holders are cut, and everything is clamped with a nut "lamb", so.


Sometimes you have to work in hot weather, so I wanted to add such a pleasant little thing as a fan. We take the most common motor and make a housing for him. Optimally, a broken charging from Nokia approached the size. Cut the plug, remove the core and cut out the place for the motor.

Were soldiers, assembly it looks like this.

In order to be able to solder small elements, we take a magnifying glass, we remove the unnecessary and taking the backlight using 4 LEDs of 5 volts, and secure the adhesive gun.

Cut the two plates, bend in the form of a slingshot, drill, and we have done a long bolt, that's how it looks like it.

Fixed to the body of our mini drill, so here.

In order for the stand you can use anywhere, add 4 meters of cable and ordinary door handle, for his warehouse.

Drive 2 holes for the plug.
 |
|


Drilling 4 holes for fastening, we make partitions.

We form everything you need.

We make the main holder for the soldering iron, handles and sting.
Cut 2 plates, bend, fastened to door loop, and below to the board itself.
The door loop is needed so that when unwinding the cable we can remove the soldering iron to the side, and it did not interfere with us.
|
|
|


Since the soldering iron strongly overheated, and it was almost impossible to solder, it was decided to make a temperature regulator, looking at the schemes, etc., I decided that it would be easier to buy an inexpensive dimmer (light regulator) of such a type.

After breaking it, and cutting the place under the board in the board, brought 2 wires under the bottom left, left one half of the case, and drilled in the middle a hole under the wheel knob.
 |
|

Fastened to the chalkboard on 2 self-proof.

The connection circuit lay down just below.
In order to work in one place, as well as for convenience, we put a socket, which makes it possible to connect a glue gun, charging the phone, etc. things.

We make such a godset, where you can put a jar of flux, or something else. Carved from the housing from old hours.

When all the fixtures are ready and painted in a black color glue, self-adhesive film on the surface of the board. A light color was chosen, since all parts were well distinguishable on such a surface, the side faces are placed edge.
The main tool of the home radio amateur is a soldering iron. Unlike other devices, it is impossible to just put on the table (workbench) during operation. Why? Right! He is hot. Therefore, you will need a special stand.
There is a lot of diverse tools on sale, from a simple holder to a whole complex called the soldering station.
In most cases, the soldering iron is needed to perform urgent repair work. If you are not a professional "self-relocine" - the tool is usually dust in the box on the balcony, appearing on the world once or twice a year. In such cases, many use the first item as a stand.
However, if you make a very little effort, the stand for the soldering iron, made with your own hands will look no worse factory. Especially if you regularly seize electrical stakes.
Required minimum for stand
- Sustainable base. It is performed from the material, poorly conductive, or equipped with legs
- Power Supports
- Capacity for rosin (flux).
Additional options"
- Site for tinning
- Capacity for solder
- Fixture for cleaning sting
- power controller (maybe two types: smooth adjustment, or a step limit on the break time in operation).
Listful old logs
In old radio magazines, you can find drawings, how to make a stand with an economical load switch.

- As a basis (1), a board with a selected middle, or a P-shaped structure of plywood strips and two bars for long edges
- Under the surface, there is a 220 volt relay contact group (2,4,5) with large current-piece pads. Connection diagram moves power or directly or through a diode. The radio element "cuts" the half of the 20 volt alternating voltage semidiment, reducing it to the value of 110
- Through the thrust (6), spring-loaded (7) button (8) clicks on the contacts when the soldering iron lies on the stand. Electricity is spent twice as smaller, while the soldering iron is almost instantly heated to full power. The thrust is attached for the console (9)
- The tool itself is located on the brackets (3) and (10)
- In the back there is a rosette for the soldering iron, connected to the output contacts of the relay. Power wire is connected to the input
- Between racks, they usually nailed a tin jar from a shoe cream or vaseline, to storing rosin
The design is simple, but convenient and efficient. If you do not want trouble with contacts - we make a simple functional stand. Again from the experience of Soviet radio amateurs.
- Take a piece of plywood or chipboard from old furniture. Cut the rectangle, process
- From a piece of galvanizing, cut out the workpiece with the size of the palm, for support type "Lastochka Tail"
- Bend the plate, get the finished element. By the way - such a detail can already be used as a primitive stand
- To hold the coil with the solder, screw in the base of the steel heel
- The third element is a universal brother. You can use as a table for a mezzani or storage for rosin. On this design is ready.
Third hand - work with comfort
During the soldering on the weight, the need arises to hold two parts and a soldering iron at the same time. Hence the term "third hand" appeared. In the next review, the homemade stand with such a device. Materials and tools that will be needed for manufacture depicted in the photo:
Details of the factory execution are "crocodile" clamps, decorative candles (more precisely cups from them), a flexible leg from an old mini lamp and a spring holder. The donor served as a Chinese soldering iron stand with a magnifying glass.

Although you can make such a spiral with your own hands, winding the steel wire on the pipe or the screwdriver handle. The rest of the workpieces are also replaceable, homemade is conditionally free, from a girlish trash. Crown for drywall milling removal for cups from candles. Two niches for rosin and solder, and one niche for cleaning cloth.
IN comfortable spot (not centered) Mount the spiral holder for the soldering iron. Practice has shown that such a scheme is more convenient than the classic rooded stand for a soldering iron. The electrical appliance is inserted with one movement, without fears, that it will fall on the table.
We install aluminum cups in the prepared niches, cut the edge to the closure with a board. The use of thin-walled tanks justifies itself when working with low-power solders. The smaller the metal - the lower the heat capacity. The thick walls of the cup with a solder can cool the small sting of the soldering iron when touched. And the thin aluminum foil, surrounded by a tree, on the contrary, the heat saves.
Crush the "crocodiles" on a flexible bar, and fix the "third hand" on the stand. There are designs with magnifying glass. Work experience shows that the soldering iron stand on which clips and magnifier are installed, inconvenient in work.
Optimal options
- mupa unites with the "third hand", soldering iron separately
- "Third hand" on a stand with a soldering iron, a magnifying glass on a separate pedestal (our option).
Missing only the ability to change temperature modes Work. This is especially true when installing LEDs.
Stand and power supply regulator
The easiest and most relaxed option is the acquisition of the Chinese kit. soldering station. You will collect similar kit on your own, so we will take it to homemade.

It can be collected in the support housing or as a separate device. The convenience of this design is indisputable, but we consider the least costly options. The soldering iron on 220 volts is almost in every home, it remains to assemble the power regulator.
Important! Dimmers for incandescent lamps can be used, taking into account the power of the soldering iron.
But they will again have to buy them. Consider a simple scheme of the self-made regulator with a capacity of up to 200 W.
You can use the autotransformer, but it is a cumbersome device with low efficiency. Let us leave similar "devices" for the Museum of Radio Engineering. Our scheme on the simistors of miniature and economical.

The following elements will be needed
- variable resistor (voltage regulator) R1 with a nominal value up to 500 ohms
- the second part of the divider is a constant resistor R2 with a nominal value of 4.7 com
- C1 - alternating current condenser 0.1 μF
- VD1 - Diode type 1N4148
- LED element VD-2 for power indication
- distor Series DB3 (in Scheme - VD3)
- the main element is the BTA06-600 Simistor, indicated as VD4.
The scheme provides long-term work with a load of 200-300 W. A short-term load is allowed to 500 W.
Drawing of the circuit board for self-etching:

Gently collect the fee, carefully pecking the legs of the parts. When contacting the contact, you can get uncontrolled voltage jumps at the output.
The circuit is compact, it can be easily fit on the soldering iron stand. With power up to 100 W, the cooling of the simistor is not required. Brighter load - a small radiator is fastened to the housing.

After reading the material, you yourself will decide what stand to make it. Or see a visual video lesson for making a stand of your own hands.
Stand for the soldering iron do it yourself - a sign good style Works Link to the main publication
obinstrumente.ru.
Homemade soldering iron stand with their own hands
Many offline and online stores sell good and fairly comfortable stands for the soldering iron, and inexpensive. But if you wish, you can make them and do it yourself.
It turns out cheaper, plus you can adapt the stand under your own needs.
There are a lot of ideas for making, so we decided not to be limited to one, but make a selection of the most interesting in our opinion homemade stands for a soldering iron made by your own hands.

Stand for a soldering iron from a wire.
Let's start with the budget, simple and widespread option. In it, the soldering iron mount is made of thick metal wire in the form of a cone spring and is attached to a wooden or other base.
Instead of wire, you can use thin metal hangers for clothes that are practically in every home.


A similar stand can be made more convenient if you install additional buns, for example, a metal sponge for cleaning the soldering iron, a tin box and a rosin or a soldering holder.


From the wire you can make another self-made support for the soldering iron, slightly less convenient (although this is a matter of taste) and as simple in the manufacture.


Stand for soldering iron from fuses.
Another option is very simple in the manufacture and not requiring cash costs stand. The base is made from a wooden bar or textolite, on top of the fuse sponge of the desired size.


Mobile stand.
The self-made mobile stand for a soldering iron, made of sheet metal obtained from the burned power supply unit from the computer. The stand is designed primarily for people who are often soldered out at home. It is quite comfortable and functional, while easily placed in a bag or even in the pocket of the jacket.

Having such a stand, you do not have to wear separately tin, rosin and clamp for soldering small parts. Where and what is stored well shown on the video, we recommend to see.
Well, with the instructions for the manufacture, you can find here.
Complex coasters for soldering iron do it yourself.
Complex multifunctional stands are a matter of taste. Some of them really like, others prefer simple designsthat we showed above. In any case, complex supports deserve attention, as they are made cool.
We will show only a few of them most interesting in our opinion.
The first stand has everything you need for a comfortable work, namely, a place for tin and rosin, a clamp for soldering small parts, a sponge for cleaning the sting, a built-in regulator, well, and actually fasteners for fast, but reliable soldering iron fixation.

See the manufacturing process here.
Well, two more and no less interesting ideas in the video format.
The simplest stand.
If it urgently needed a stand for a soldering iron, then it is not difficult to make something complicated best ideaSince the hurry always leads to a hack. It is better to temporarily make a simple design, and after changing it to something more worthy.
Most best optionThis is done literally in a couple of minutes - it is a wooden bar with four long screws. The soldering iron on it is good to bed, easily pulls out, but at the same time it does not fall out.

samodelki.org.
Stand for the soldering iron do it yourself
In contact with
 Good day to all lovers of homemade. Each radio amateur or just a beginner in this business knows how to work with a soldering iron, and for its convenient use you need a stand. It is in this article that I will tell you how to make a self-made budget support for the soldering iron.
 In order to assemble our stand you will need:
* List chipboard, thickness 18 mm, it is possible and thickening, but it seems to me that the thickness is the most optimal. * 4 Self-press 20 mm and 4 bolts in bed. * Sanding paper coarse. * A couple of rubber stoppers from chemical tubes. * Hoven for metal. * Cross A screwdriver or screwdriver. * Thin screwdriver, also fitted. * Pliers. * Iron record. * Metal fastening From the antenna. * Tver from the old receiver, which closes the board. * Spring from a fountain pen. * Soldering calorie for checking. The first step will be grinding already a duplicate chipboard. We grind carefully, and give the edges a rounded look. We bring the workpiece to the stand to this type. The photo shows what the workpiece was before grinding, and what after. 


 Thinking that many purchased stands are so simple that there are no legs, it was undertaken to make legs from rubber for their stand.
  We saw rubber jams taken from chemical tubes with a metal with a thickness of the metal, we make their thickness the same with the help of sandwich, if you cut off exactly.
 After that, we screw in each leg 20 mm-ohk.
  And in, pre-harvested hole twist the leg with a screw.
  We screw the first leg. Analogically fastened the second, third and fourth. Stretched with legs, now the stand is not going anywhere and does not scratch the table.


 The next thing I did it bent the iron plate in the shape of a hook, as in the photo.

 Using a screwdriver for small parts, a hole has done a hole for two bolts that will keep this hook.
 Spin the bolts as you can see the hook keeps well.

 We try on how the soldering iron will sit.
  With the help of pliers, withdrawn one edge of the hook, it should look like this.
  So, the heating part of the soldering iron is now not going anywhere, so we go to the back of the soldering iron, or rather to the handle. For a long time, I decided to make this holder for a long fastening on the antenna, the holes there are already there.
  There is also a notch where the handle of the soldering iron is placed.
 We screw this fastening on two screws.
 And now the soldering place, since the tin from somewhere is needed, then for the convenience, we will take it closer to the suggestion of the soldering iron. I pierced in the record that I got out of the radio, a hole and twisted the bolt in it, he reliably pressed it to the stand.


 Of ball knob, which just already ended, I took off the spring and decided to put on our hook, first there was one of her end, then I did a hole with a screwdriver in the stand board and launched this end of the spring, and upstairs soldered it to the hook.


 The stand is almost ready, the following that I did, it melted tin on the site of the soldering, now, if necessary, you can hear this place and lead there wires.
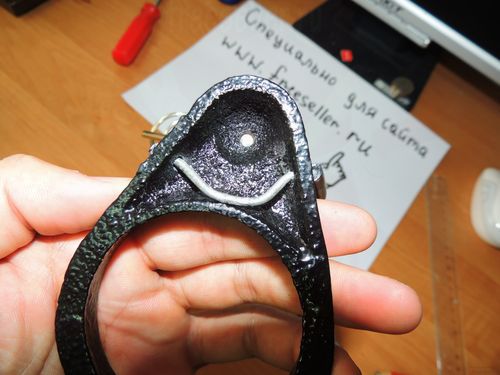
 The final stage was the decor, I glued to the stand old signboard from the electric shaver.
  On this self-made stand for the soldering iron is ready, to solder with its help is more convenient and more comfortable, and the rubber legs will not let you jump with a slippery surface and do not scratch the table.
  All interesting I. unusual ideas For new homemade. Become an author of the site, publish your own articles, descriptions of homemade with payment for text. Read more here.
In contact with
Rate self-made:
7 To write a comment you need to log in to the site through the social. Networks (or register): Regular registration
Information
Visitors who are in the Guest Group cannot post comments on this publication.
uSAMODELKINA.RU.
Budget stand for the soldering iron with their own hands.
 This article, I suppose will, first of all, is useful for those who make only the first steps in the world of electronics, but I do not exclude that it is found in it, and something for radio amateurs with extensive experience.
 And so start with a brief background. As it, I went to our local radio market once again for the purchase of components, and I did not have eyes there a soldering iron Epsn "Rexant" with a capacity of 25 watts. He immediately attracted my attention. Herself an idea to update your tool. It passed, more than half the year of its operation from the date of purchase and so far I have no complaints. Then the seller suggested both the stand for him. But I politely refused, referring to the lack of funds. Actually, it is a cast-iron casting in the form of a stand. Of the advantages, this is the massiveness and relatively comfortable position of the tool on the table, there is a small tray of arbitrary shape (for which it is not clear). Of the minuses are too heavy (in my opinion), the unprocessed surface of the sole is easily scratching the table (you can successfully use instead of the Rashpil).
Previously came across to my eyes very decent stands, but the cost of them was several times higher. I must notice that this soldering iron is quite easy. Easy so much that the power cord is lying to drag him somewhere aside. Actually the thought of manufacture comfortable stand I visited me repeatedly, but here I still ripe. First of all, set itself the task, the device must be as cheap, easy to manufacture and convenient, do not take a lot of space on the table and be as functional. Shut off the Internet, having familiarized himself, with the fact that it offers trade today in terms of models, forms and technical solutions. At the same time, the suitable and suitable schemes for adjusting the temperature of the soldering iron began. Actually, for such a low-power soldering iron, the temperature adjustment of the sting and is not particularly obligatory. But in the future I am going to acquire more powerful soldering tanks on this firm. Began manufacture, first of all from the electronic part, since it would be necessary to dance and with the size of the case. Attracted the scheme on the basis of chip K1182PM1. The diagram is taken from the dataset. The microcircuit is intended mainly to control the voltage of incandescent lamps, although the range of use is much wider.


True management scheme somewhat modified due to certain causes and destination. With this microcircuit, I ranked for the first time, and it is difficult to say how much the scheme from the dataset with the control on Simistor is correct. But in this version, the work of the scheme did not suit me, and after some experiments, she gained the following appearance.

Simistor added to the scheme for greater reliability of the device, although they write, the chip confidently can "pull" the load up to 150 watts. The R2 resistor establishes the required minimum tag of the soldering iron. The R3 resistor sets the temperature of the sting in the "waiting" mode. Well, R4, R5 had to put a paired with a nominal value of 2 × 20 com, including them sequentially. It simply not turned out to be a potentiometer of a suitable design with the desired rating. As the practice has shown, the maximum resistance of the potentiometer should be 33 to 35 com. The board drew in DipTrace 2.4. I have been using this program for many years, I started from version 1.4. The interface of this program is quite simple and convenient. I tried other tracers, but this one came up with the soul. But here, as they taste and color ... This time I decided to make a fee on the old technique (drawing from hand), since it is not great. Actually, I did not want to be very fooling with a mold or a photoresist on a glass of fiberglass. Bilateral fee and simple, because the drawing of the tracks took about 20 minutes. To do this, I always have markers and a self-made pattern of transparent plastic with a "ruler" of holes.

Markers I use Scholz and are very pleased. Once, bought a bunch of markers of different firms, and spent the etching test on them, this showed the best result. Edding and Centropen behave somewhat worse. By the way, he dries almost instantly. Because of this, it is necessary to store them in the refrigerator in the vertical position of the pen down. This secret was shared by the seller.
Etching lately I spend in a solution of citric acid, hydrogen peroxide and a cook salt. This recipe, in my opinion, is slightly inferior at the etching rate with chlorine gland and persulfates. But the most affordable, cheap and safe. It's all safe, relatively, as it gets into the body is undesirable. There is a risk of copper curtain poisoning. The truth is there and minus, a solution of one-time and long-term storage is not subject to. This is how the electronic part of the device looks like.

The correctly collected scheme works without problems. Before the first inclusion, in order to avoid electric smoke and fireworks it is desirable to check the correctness of the installation. When configuring, it is better to use the incandescent lamp for visual control of the device.
All elements of the device are under the influence of network voltage, therefore it is necessary to comply with all precautions. Special attention is paid to the isolation of all electrical chains.
When the electronic part dealt with the electronic part, took up the manufacture of the stand. The body under the electronic part made from a square tube with a size of 60 × 60 mm and the thickness of the wall 2mm. The top and bottom of the body sold the threaded sleeves for fastening to the base and fastening the upper cover and with everything that is on it. Soldered by the PC60, a mixture of a solution of zinc chloride and ammonium chloride (ammonia) was used as a flux. Soldering iron 100 watt and additionally to help a small gas burner to speed up the process.

After soldering, such a flux must necessarily wash all soldered parts with water with detergent And it's good to dry in order to avoid corrosion of parts in the future.
If it is very sorry for his health, the soldering with the use of active fluxes should be carried out in the ventilated room or outdoors.


As a "boiler", used a thin-walled pipe with an outer Ø 34 mm and a wall thickness of 1 mm. Along the pipe from four sides drilled ventilation holes. At the bottom of the pipe solder tube for attachment on the axis. It is also attached to the pipe attached, which through the rod of the pusher presses to the terminal when installing the soldering iron into the "boys". The pipe itself is taken from the loss of the shock absorber a passenger car. Inside the pipe, installed a conical spiral, which Silica from galvanized wire Ø 3mm. At the end of the pipe pasted a "stockullet" of a bicycle chamber outside and from the inside. Now the soldering iron is fixed tight, but not a tight without fear of being accidentally rolled out of the stand. The shelf for replaceable blinds, too, from a square pipe, carved in the form of the letter "P" and solder to the lid of the device. To her, the solder feed knot is attached. For steel marking, it is very convenient to use a solution copper Kaper. A tampon or brush solution is applied to the purified surface of the metal, and after drying, you can proceed to markup. At the same time there is no need to make deep risks. For high-quality markup of the centers of future holes, it is convenient to use kerner with a lens, for example, this is.

Trays made from an aluminum thin-walled pipe, but for saving the place gave them a rectangular shape. Made it very simple, the circumference length was counted into the necessary rectangular perimeter. Next, cut the beech bar of approximately 25 cm long and gave it a lightweight wedge-shaped form with roundings. Light blows of a hammer in a bar, a blank, leaning in the sponge of the vice, sat down on the bar and the necessary form is attached. It is necessary to alternately in passion and sides. I took the whole process for 10 minutes for each item. Next trays Okaril and polished.
As a base, a MDF plate was used with a thickness of 10 mm. This material is easily processed and very cheap, (when reducing the design, it is possible to use waterproof laminate for outdoor coatings). Cut two plates with dimensions of 130 × 60 and 190 × 60 mm. In a smaller plate, the windows were cut under the trays and after fitting, it cleaned them with Kleiberit 300 glue. This glue is something similar to PVA, but in its characteristics it exceeds, mainly used in carpentry production. The glue seam is transparent and very durable, the time of complete drying 5 is 6 hours. After the surface, the car was covered with putty and after drying, carefully squeak. He painted all the details of acrylic authemal with the addition of varnish and hardener.


For convenience, the work made a simple solder supply unit, which was seen on the Internet. But later, the operation showed its disadvantage. He was in the fact that it was necessary to periodically pull the solder from the tube. It is quite uncomfortable to do it with one hand, then I had to invent something. Ordinary standard feed mechanisms did not suit me, it turned out too cumbersome. And I wanted simplicity and compactness! I learn on the Internet on this topic, but also there is a complete bummer, nothing new and interesting. This is really the right folk wisdom that morning the evening is wiser! As it, in the morning, leisurely going to work and once again, thinking about this problem, I painted my thought. I almost disrupted from surprise and surprise that, why did not think before that before. An hour for experiments and the next day I took up the improvement of the node. It turned out simply and compact, and most importantly, you can use a wire solder with a diameter of 0.4 to 1.5 mm, without any adjustment of the node.

The slider of the feeder is made of steel tube with an external Ø 4 mm and inner Ø 1.6 mm. The pipe is soldered with a steel plate with a thickness of 2mm. The plate bent twice, then divorced the edges in opposite sides and a file gave the desired shape. Details laughed in themselves by PSR with Bura. Solder is a thin tube filled with powder borants. The soldering spent over the flame of the gas stove and additionally places soldering warmed with a mini burner. In the flame of the soldering lamp, it would be preferable and faster as I understood later, but for some reason it was too lazy. The places of future compounds pre-crossed the same shift. After the solder item began to risen about 30 minutes in the water, to remove the residues of the borants and sucked well. The supervisors removed the extra solder and did the cut in the tube as shown in the photo. The drop of solder fixed in the cutlery plate, from the spring contact carved in the form of a wedge and curved crescent.


The thickness of the spring plate is chosen experimentally and should be in the range of 0.25 mm. In the backside of the tube made deep acute inner chamfer. A similar section of a 6 mm long tube with a chamfer is inserted into the copper tube at the bottom of the roundabout. The chamfer is needed to better pass the solder wire while refueling the node. Also in the rounded part of the copper tube inserted a segment from a plastic tube. Between the plug and the slider return spring with an external Ø 3.8 mm. In the tip there is a rubber gasket with a thickness of 4 mm with a hole, the task is to stop the wire at the reverse course of the slider. In general, the mechanism works like ratchet, and at a time submits 2 cm solder. Now the stand has become a lot more convenient. According to the final, in the financial plan for the manufacture of the device, nothing was spent at all (the cost of the chip, simistor and potentiometer) and a lot of spent with pleasure for this time. In addition to beginner self-delices, I can recommend the following literature: N.I. Makienko "Flooring" and "Handbook of Solder" A.V. Lacceedamevsky. Editions any, but the latter is still preferable. In the first a lot of entertaining and useful information at work S. measuring instrument, markup, processing of metals and other materials by various methods and many other plumbing operations. In the second, there will also be much interesting for beginners and professionals.
And in conclusion for beginners, not everything is immediately obtained. Therefore, do not disappoint if something does not work immediately. Over time, hands become smooth, and movements of exact. Experience and knowledge come over the years.
we.Easyelectronics.ru.
The stand for the soldering iron is an indispensable attribute of the soldering installation. It can be purchased at any construction store or on the market. However, its cost is large enough. In order to save own funds, a stand is manufactured for except financial issues, its functionality is considered. That is, it can be used for various needs in the farm or in the manufacturing workshop. Many products have enough options. All of them are distinguished by the complexity of the design and the amount of time spent.
General
As mentioned earlier, the stand for the soldering iron, with his own hands made, - a convenient device that performs many functions. First of all, it is a protective surface that prevents damage to property.
Before working with a soldering installation, it must be warm up. In this case, the metal body heats up to high temperatures.
Stand for the soldering iron - what is it needed for?
The quality item is necessary for those people who perform many works with soldering. For the manufacture of such a device, like a soldering iron stand, no special skills and skills are required. In the process applied simple and affordable materials and tools. The finished device is easy to handle. The self-made stand for the soldering iron should consist of individual elements. First of all, special containers for rosin, flux and department for mixing them are provided. Some models are equipped with a box where small details are stored. Soldering stand is suitable for any device, regardless of its power and heating degree. In the manufacture of the design, the location of these containers should be taken into account. Everything should be so that the master it is convenient to solder.
How to make a coach for the soldering iron?
Buying finished stands are unprofitable, as they have high cost and small overall dimensions that are not suitable for all types of devices. Therefore, many users are asked as a question: "How to make a stand for the soldering iron with your own hands?".

Before the start of manufacture, you need to prepare materials. To do this, purchase the following components:
- duraluminum sheets whose thickness is 1.5-2 mm;
- small wooden bar (you can use different kinds wood);
- capacity from under varnish;
- two metal boxes.
When all these details are purchased, you can start making a stand.

So, there are several holes in the plate. They will consolidate the tanks for rosin and alcohol. Installation of cans is performed easily. Capacities should be easily inserted into the design, as well as tightly lay down to each other. After these procedures, it is necessary to make support. It is made by bending the base.
If necessary, each person can make special racks that raise the design to a certain distance. This is done for convenience in the process. Preparatory work End on the processing of a duraluminum sheet with a file with a file or emery paper. Corners should not have acute ends.
Build construction
So, proceed to the assembly of the coach for the soldering iron. Prepared support must be consolidated to a wooden bruster.

This can be done with screws. Next, the addition of harvested small containers is performed. They are attached to the base using special glue or epoxy resin. Many masters are also installed between the racks a small container. It can store small details that will be needed in the process.
From wire
Stand for the soldering iron from the wire was gained great popularity from many masters and lovers. It can be made from the usual canning cans. Simple details are applied during the installation process:
- tin;
- big diameter pencil;
- washers and bolts;
- wire.
First you need to make a spring. The first thing to do is to buy a wire in the store. Some people remove it from other indoor devices. It should have a sufficiently large thickness so that the soldering iron warmed up to large temperatures does not destroy it. In addition, only high strength material will go into operation. The finished product should spring.
Cut off the required wire length and thoroughly align. To create a spring, a large diameter pencil is used. Holding the wire, carefully screw it on a pencil. As a result, a dense spiral should be. At its end, a special attachment in the form of an ear is made. For these purposes, pliers are used.
The next step is to prepare canning can. In its day, the hole of small sizes is drilled.

This can be done with a nail or drill. Next is going to the soldering iron stand. The prepared spring is inserted into the jar and with the help of a bolt and nuts fasten the design. To ensure a more durable mount, the washers are used. This method is quite simple. Stand for the soldering iron can make every person. It does not require much time for its manufacture, as well as special tools.
Soldering Stand with Power Controller
More and more people prefer to use this type of stand. Its essence is that it is equipped with a special device that independently adjusts the degree of heating of the soldering iron. Therefore, the device does not overheat and does not fail. The stand is different from other species in that it is necessary to connect to the power supply. For the manufacture of an option with a power regulator, you must take such items:
- copper wire;
- a small piece of plywood;
- transformer;
- lEDs;
- parts for fastening;
- resistor;
- wires;
- outlet for connecting to the network.
After all the necessary details were purchased, proceed directly to the assembly of the stand.

To begin with, the size of the installation is selected. Based on these information from the plywood sheet, the base is cut. Next, the transformer and other details will be attached to it.
Stand from fuses
The manufacture of this option does not take much time, forces, and also does not require large financial investments. As a base, a wooden bar is served on which the fuse sponges are attached. They can be different sizes. It all depends on the personal preferences of the masters.
Benefits of Stands
First of all, the main advantage is mobility. Homemade stands Use people who are quite often engaged in soldering working within a few workshops. Not always at hand there is such a design. However, it is easy to make it. In addition, it is not necessary to separately wear rosin and tin in different tanks, since now they are stored in special jars on the stand. Therefore, homemade installations are successful not only among lovers, but also from professionals.
How to make a simple model?
It happens that it urgently needs to use the soldering iron, and there are no supports for it.

In this case, there is no time to look for the necessary details, and run on shopping. Therefore, it is better to make a simple, but also reliable design. There are many options, but there is the fastest. Stand can be made in a few minutes. As a base, there will be a conventional wooden bar, and the supports are screws or nails. They are driven into the cross cross-cross. Thus, the stand is formed, which solder the soldering iron and keeps firmly.
Conclusion
When soldering elements, a stand under the device must be present. This accessory is expensive, so it is better to make it yourself. Such a process will not take much time, forces, as well as save funds.
In the process of working with the soldering iron requires a special stand. The soldering iron can not be just left on the table or some other surface. In this capacity, as a rule, any object suitable in the house. If you try a little, you can make a solderingler stand alone. Such a device will cost cheaper and will be adapted for the needs of the wizard.
How to make a support for the soldering iron with your own hands? To make it, first of all it is necessary to make a stable base from a material that is poorly conductive. The following tools and materials are needed for work:

 From the sheet chipboard cut the rectangular billet, sandpaper sandpaper, spinning the corners. Next make four rubber legs that can be cut out of a piece of rubber or tubes from chemical tubes. The legs are fastened with self-tapping screws.
From the long iron strip pliers fuse hook, employee for installing the heating part of the soldering iron. From one edge of the stand iron strip with crochet fasten the bolts. To securely fix the structural elements, you need to pre-drill holes in the harvesting from the chipboard.
 The holder for the handle of the soldering iron can be made from any part with a suitable gauge . It is screwed up with bolts with the edge edge. Closer to the heating element, the holder for soldering is installed in the same way. To do this, use a metal plate from old radio components or other consumables.
At the site of the soldering, you can melt a piece of tin that warms up in the process of work. Thus, it turns out a convenient and universal device. Rubber legs give the design stability and do not give damage the surface of the table.
 The simplest device can be made of thick wire. It is a cone spring, which is fixed to a sustainable base. A piece of wire, about 30 cm long, screw to the tool. At the end, there is an eye for fastening to the stand. For spring, you can use a thin hanger from underwear.
The base is collected from any suitable object - canning can, unnecessary parts from household appliances or a piece of plywood, etc. Pre-in the workpiece drilled a hole where the spring is fixed using a bolt.
In another embodiment, rectangular holders with recesses for the soldering iron are made from the wire with pliers. They are fixed on both sides to the base of the chipboard or wooden bar. Soldering installation can be equipped with tanks for tin or rosin, a box for storing small parts, which is glued with special glue.
Stand for the soldering iron with a magnifying glass. To make it easier to work with small details, a special rack with a flexible holder is installed on the stand ("third hand"). With it, you can fix various equipment: a magnifying glass, a backlight lamp and other tools. The holder is fixed with hinges, which allows the device to rotate in different directions. All parts of the holder are made from metal elements to ensure the stability of the design.
You will need a cover from a computer power supply and the following tools:
- scissors for metal;
- line or caliper;
- fire or sandpaper;
- marker.
 We place the marker approximate size of the workpiece on the parts from the computer (width 60 mm, the height is 35 mm). At the applied marks, the stand is cut, then the sides are made of excavations, where the tool is installed. For safe operation, sharp edges of the product are treated with a file or sandpaper. Thus, a self-made stand for a soldering iron can be made in 15 minutes.
From the power supply of the computer can be a mobile device. Such a device is a box or case, inside of which the separations for soldering, rosin, clamp for schemes and other small parts are located. The holder of the wire is fastened outside, it easily folds over the foam cover.
 The product is characterized by ease of manufacture and does not require special materials. For holders used fuse sponges that are attached to the base of a wooden bar or textolite. The distance between the holders is installed according to the size of the soldering tool. The fuses are spinning with self-drilled holes in pre-drilled holes.
If you urgently needed a soldering iron, you can quickly make a coach of screws or nails. IN wooden base Cross-crossing driven nails. This design is quite stable and well holds the tool.
To make a self-made support for the soldering iron, do not need special knowledge or skills. For work, programs are often used, which can be found in any house. The devices made by their own hands are characterized by simplicity and ease of operation.