DIY floor ideas. DIY glass floor How to make a transparent floor from improvised materials
Self-leveling 3d floors are one of the hottest trends in design. Moreover, if earlier they were used exclusively in public buildings, now they are also conquering apartment spaces.
The secret of this popularity, first of all, in operational qualities - durability, ease of maintenance, environmental friendliness. But designers fell in love with this technique also because it allows you to create exclusive, embody the most daring decisions, give standard layouts a unique chic. And the owner of the apartment will be sure of the uniqueness of his interior, especially since it is made.
The technology of 3D floors is very complex and is a full-fledged art object. The drawing is applied to the base base, then covered with a special transparent polymer coating, the thickness of which determines the depth of the image. It is possible to use photographs, natural materials, specially designed three-dimensional images, even just wallpaper. This allows you to visually expand small rooms, realize any fantasy of the customer, use it as an advertisement, gallery, etc.
If you decide to repair and as floor covering choose self-leveling 3d floors, you should carefully study the technology of this process and comprehensively soberly assess your capabilities. And it is extremely thoughtful to choose a drawing - because it will remain with you for very many years. For many interiors, such a floor generally becomes a central component.

Modern materials have made it possible to make the production of 3d floors more affordable. But the installation process itself is very laborious and requires certain skills. Therefore, it is still better to entrust the work to professionals. And if, nevertheless, a creative itch pushes you on an adventure, you should punctually follow the advice of experts.
Now you can start actually creating a masterpiece
. It is somewhat reminiscent of a multi-layer cake, and the final ideal result depends on the quality of each layer.

Installation begins with pouring the base . Since most of the floors in the houses are concrete, a screed is made. Before this, the overlap is leveled with a grinder, cracks and chips are repaired, then the surface is thoroughly cleaned of dust and debris and the surface is degreased.

The leveling mortar is evenly distributed over the entire surface and treated with a special spiked roller to release air bubbles.
After drying, the screed is sanded and even the slightest dust is carefully removed. Then they are coated with a special primer that has a very deep penetration. The quality of the primer directly affects the quality of the pattern, its durability.

Base coat . A properly executed screed can already serve as the basis for drawing a picture. But it is better to add a special polymer composition, which is laid according to the level and rule, completely squeezing out air bubbles. To give a certain roughness, quartz sand is added. The layer should completely harden, this is at least a day.
Applying a paint layer
. This is where your imagination and craving for creativity can unfold in full force. There are three types of execution of this stage: working with natural materials, painting with paints and sticker of the finished image.
Artistic painting is very expensive and increases the cost of the floor at times. Using the finished image simplifies and reduces the cost of the process. But just printing a photo in a larger format is not enough, the drawing will turn out flat and inexpressive. Remember that there is a special technique for volumetric large images. The art workshops will help you choose such an image and transfer it to vinyl film.

The size of the image should be larger than the floor area so as not to join the individual parts, which can also move during the pouring process. The drawing is glued with special glue, carefully aligned, pressed, additionally primed.
But if you yourself are a good artist, you can try to paint the floor yourself by hand. This will not only save you a lot of money, but also give scope to your creativity. High-tech lovers especially like this method, because it allows you to realize any ideas. And you can also use multi-colored decorative sand, river and sea pebbles, shells, leaves, buttons ... In a word, create and express yourself!
Finishing layer . All components of the transparent layer are thoroughly mixed and poured onto the drawing, maintaining an equal layer thickness over the entire surface. To give an artistic effect, glitter, coins, grains can be added to the mixture.
The mixture is leveled using the rule. Use a spiked roller (or spiked shoes) to remove air bubbles. The depth of the picture and its perception depends on the thickness of this layer. After initial hardening (15-30 min), the surface is covered with plastic wrap for several days. Time may vary depending on indoor humidity and temperature.
After final drying, the surface of the transparent layer is polished and coated with a protective varnish. This will protect the floor surface from mechanical damage, from direct impact. sun rays from high humidity. You can give the floor and anti-slip properties. The surface covered with such a varnish requires the most ordinary care, including the use of detergents.
The whole process of making 3d floors takes from a week to two . To his undeniable technical merit we attribute durability, immunity to moisture, lack of dust emission, ease of cleaning. And, of course, originality and individuality that makes your home unique.
However, some disadvantages of self-leveling artistic floors should also be mentioned. This high cost in the first place . And the difficulties that you will encounter during possible dismantling: the polymer composition adheres so strongly to the base that it is extremely difficult to remove it.
collapseToday it is difficult to imagine the repair of one's own home without a high-quality design of the sexual base. To date, 3D floors are very popular - a transparent self-leveling floor.
Self-leveling transparent structures differ from standard ones in that the floor surface is a three-dimensional image. In this case, in addition to the base layer, a decorative one is created that forms a certain pattern. Floors of this design are perfect for the kitchen, hall. 3D floors are also covered with a special finishing layer, which protects the image from wear and contributes to the formation of a three-dimensional look. Such a floor looks most organically, of course, in the kitchen.
Benefits of flooring

3D floors will look great in offices, residential buildings, country cottages, shopping centers. Decorative floor structures can be decorated with your own hands, using any range of colors, images, photos. This technology of finishing the sexual base allows you to make any human fantasies explicit.
- In the child's room, you can organize images of his favorite cartoon characters on the floor.
- In your own bedroom, the floor surface can depict any painting by a famous artist.
- In the guest room, you can create a large meadow of flowers with your own hands.
- For an office space, an excellent marketing solution is the image of a brand name, a company logo on the floor surface.
There are many interesting design solutions that can be applied to do-it-yourself flooring.
Do-it-yourself installation technology
Many people prefer to use the services to create such a floor. experienced craftsmen, not suspecting that such a finish can be easily done with your own hands. To do this, you just need to correctly distribute the work steps, have certain tools, follow the installation technology, listen to the recommendations of specialists.
Required Tools
- grinding unit.
- Vacuum cleaner.
- Construction mixer (drill with mixing nozzle).
- Roller, brushes, spatula.
- Solvent, varnish.
- Mixture for pouring the base base.
- transparent mixture.
The listed finishing materials, construction tools today can be easily bought both in special shopping centers for building goods and through online stores.
Preliminary work: leveling the base
 Any Finishing work always start with the preparation of the foundation. So before fine finish floor, leveling, preparation of the base should be carried out - the first stage of repair work.
- Surface leveling is carried out using special grinding equipment, but if this is not available, you can use a grinder (special nozzles are sold for grinding, stripping).
- Further, all defects formed on the surface of the base are removed. This problem can be solved by any henchmen construction tools. After that, all the bulky debris is removed, the small one is collected with a vacuum cleaner.
- It is recommended to remove greasy stains from the concrete surface, to allow the cement screed to harden. Then a primer layer is applied to the surface (it is recommended to use a deeply penetrating mixture). The primer should get into everything, even the smallest cracks in the base.
- The primer mixture can be applied with a roller, in hard-to-reach places brush. But, one primer layer will not be enough.
- Before laying the next layer of primer, be sure to let the first one harden. Only then can you be sure that the transparent self-leveling floor will be organized with your own hands at a high-quality level. When the surface is thoroughly dry, you can perform further tasks.
Laying the main layer of mortar
 The reliability of the entire floor structure will subsequently depend on the quality of construction work at this stage.
- A damper tape is fixed along the walls, beacons are set according to the level.
- The filling solution is prepared according to the instructions that can be found on the package. It should turn out to be a homogeneous fluid mass, not completely liquid, otherwise the hardened concrete will lose its strength characteristics, which will lead to the destruction of the base.
- The prepared mixture is evenly distributed over the base of the floor, leveled with a spiked roller (it helps to remove air from the solution).
- With the help of a flat rail, the final alignment of the base layer is carried out. It may take about a day for it to fully harden.
Drawing an image
A variety of methods can be used to apply images to the floor. For example, they are used various types paints, and after their application and drying, the surface is varnished. You can use the finished image, photo on dense material.
Necessarily! Before applying the image, the base surface is primed, dries up during the day.
Finish coat
 With this technology for finishing only transparent materials are used, allowing you to clearly see the 3D image later. The layer thickness is not less than three millimeters.
All components of the transparent coating are mixed. To do this, you will need a separate clean container, a construction mixer (a drill with a mixing nozzle). The solution is poured immediately evenly so as not to disturb the features of the image.
Be sure to remove air bubbles from the finish layer with a spiked roller.
To make the floor as strong as possible, it is recommended to cover it with a polypropylene film. The final layer hardens in full in about two days. Then the surface is opened with a specialized varnish. It is not necessary to lay it, but the varnish will give the surface additional strength. The thickness of the lacquered layer should be approximately three millimeters. This is enough for the strength of the coating, protection of the entire floor structure from mechanical damage.
After varnishing the transparent floor structure, the finishing work can be considered finished. And after it is completely dry, enjoy the work of art organized with your own hands on the floor.
Production of a glass floor, its types, properties, materials used and step technology installation.
The content of the article:
Glass floor is non-standard design solution, which allows you to make an ordinary interior original. Behind such a surface, you can place a variety of decorative elements, equip the backlight and translate into reality many of the most fantastic ideas. You will learn how to make a glass floor at home by reading this article.
The main types of glass floors

Transparent products used in construction are made from two types of glass that are different in origin and composition:
- silicate glass. This is a familiar material, the raw material for which is quartz sand in a molten state. Products made from such glass are hard and brittle, but with increasing thickness they gain strength.
- . It is made from acrylic polymers. Such glass is much lighter and stronger than silicate glass, but is not resistant to chemicals.
There are several main types of glass floors:
- Glass floor throughout the room. This is an expensive and bold decision. It can be implemented in almost any room, whether it be a kitchen, hall, hallway or bathroom. At the same time, the inside of the floor can be filled with any decorative or natural material, as long as it is in harmony with the design and style of the interior.
- Niches glass. They are free-form recesses in the floor, filled with decorative elements and covered with glass slabs. These original floor windows can add sophistication to any room, allowing you to create compositions of dried plants, sparkles, rose petals behind glass, imitate an aquarium, a stretch of beach from sand or sea pebbles, or make a real exhibition of minerals, coins or souvenirs.
- Glass tapes. They are placed on the floor along the perimeter of the walls. One of the advantages of this design is its ability to divide the space of the room into functional zones. Glass ribbons, for example, are created to illuminate racks with clothes or mannequins in reputable boutiques, and in apartments or houses they are decorative lighting. Particularly good are glass floors with illumination in the form of ribbons in small rooms, as they have the ability to visually increase their volume.
- Aquarium arranged in the floor. The cost of such glass construction with live swimming fish just rolls over. The most popular solution in this case is the combination of wood flooring with glass flooring.
- Floor glass podium. It is located 150 mm above the level of a conventional floor. Elevated glass construction has long been popular in residential buildings and entertainment centers.
- glass ceilings. These include decorative stairs and bridges. To date, they are quite often in demand when finishing high-rise buildings.
Advantages and disadvantages of glass floors

A glass floor can radically change the interior of a room and make it easier to perceive, especially if it contains large furniture. In addition, the transparent design visually enlarges the room and has hygienic properties, eliminating the growth of bacteria on its smooth surface.
The undoubted advantage of the glass floor is its attractive and bewitching effect, which is greatly enhanced by the backlight. Creating a transparent coating is of interest to designers and decorators. Creative people in the field of glass floor construction can realize their every fantasy.
As for the practicality of such structures, it is safe to say that if someone accidentally drops a plate, cup or even a crystal vase on the glass floor, absolutely nothing will happen to him, that is, to the floor. When falling heavier objects, such as a metal dumbbell, the glass will also not break, although it may crack, but without the formation of sharp edges. All this points to the significant strength of the glass floor and its ability to withstand shock loads.
The disadvantage of this floor can be called an overly smooth surface. Many do not dare to buy it for their home, for fear of slipping on it, which is especially true for the glass floor in the bathroom. Another reason for doubt is the vulnerability of glass to scratches. However, these are all solvable problems.
practical and simple solution elimination of slip is the application of patterns on the surface of the glass floor. And if such a plate, along with the drawings, is skillfully illuminated, then the decor will turn out to be stunning.
Scratches on the glass can be avoided by using a special protective film, the properties of which allow it to easily transmit light. In addition, there is a cover glass, which can be replaced if necessary.
The cost of a glass floor averages from 15,000 to 50,000 rubles per 1 m 2, it depends on the materials used and the method of work.
Glass floor installation technology
The most popular and affordable type of glass floor is the window in the floor. Its price and installation technology quite allow you to make it yourself at home. Consider the phased creation of such a floor.
The choice of material for the glass floor

First of all, you need to choose glass panels for the floor. They are made of heavy-duty glass, which can withstand a load of about 400 kg / m 2.
Triplex is most suitable for this purpose - this material will be the main structural element of the glass floor. It is a three-layer glass, the thickness of each layer in which is at least 8 mm. The triplex layers are interconnected by means of a polymer film or by hot pressing.
In addition to it, you can use laminated tempered glass coated with a polymer layer, which includes glass hollow microspheres. Laminated glass is not cut, so its adjustment at the installation site is excluded. This is the reason for accurately measuring the floor area before installing it.
In addition to the glass panel, other materials will be required for the floor: a metal profile for the manufacture of the frame and a decorative profile for adjoining adjacent floor coverings. The profile must be selected in such a way that during installation it is able to hide the border of the glass attachment and the connecting sections of the LED strip.
To design the interior space of a niche, you will need finishing material. It can be wood, ceramic tiles or laminated panels.
Depending on the method of installation of the finish, it is worth taking care of its fasteners. For example, when choosing a tile for finishing a niche, you need to buy glue, grout, sealing materials, seals and hardware.
In addition, you will need tools: a grinder, grinder, spatulas and a screwdriver.
Preparing the base for the glass floor

This is a very important stage, since the reliability of the glass floor structure depends on it. The base can be wood, concrete or steel. In any case, it should be remembered that its surface must be strong and even.
The base for such a design can have any flat shape, but if the glass floor is made for the first time with your own hands, it is recommended to make a recess for a niche of the correct shape in the form of a rectangle or square. This will make your work easier and make fewer mistakes.
The recess in the floor under the niche is 15-20 cm. If a glass podium is needed, the base must be raised by 20 cm.
Metal frame for glass floor

After making the recess, it is necessary to make a metal frame from stainless or structural steel around the perimeter of the future glass niche. Anchor bolts that are used to fasten the frame must have an anti-corrosion coating on their surface.
The fastening of the frame must be reliable, since one panel with a glass thickness of up to 25 mm can weigh about 150 kg. The shape and size of the metal frame must correspond to the dimensions of the base for the glass niche. The frame should be below the floor at a distance equal to the thickness of the glass and the seal.
The metal profiles of the frame are interconnected with self-tapping screws, and fixed on the base base with bolts. Assembled structure must be static and reliable in order to avoid deformations of the glass coating.
If a backlight is planned in the floor, it is necessary to make a strobe at the base for laying wires that will run from the backlight to the switch or the nearest electricity distributor.
Then you should fix the backlight on the frame. If applicable LED Strip Light, it can simply be glued with double-sided tape from below to the protruding part of the frame.
Tiling the base of the niche

After mounting the frame, you can begin lining the base of the niche ceramic tiles. Its color is recommended to choose so that it matches the overall tone of the interior.
Tiles should be laid on a special adhesive, which must be applied in a thin layer on the back side piece materials and the selected area of the base with a spatula. To give it the required size, you can use a grinder.
After finishing the lining, the joints between the tiles must be filled with a grout mixture, and after it has partially dried, wipe the coating with a damp sponge to remove traces of grout and adhesive mass residues from the outer surface of the niche base.
Decorating a glass niche-showcase
When the glue under the lining of the base is completely dry, you can decorate the niche. Various items mentioned above can be used as material for this. In this case, the specifics of the room should be taken into account. For example, dried flowers or cereals are suitable for the glass floor of the kitchen, shells, pebbles, etc. for the bathroom. The chosen decor needs to be beautifully laid out inside the future floor showcase.
In addition, glass can be applied ceramic paint any drawing using a stencil. It is also possible to tint under a mirror or create a floor with a frost effect. A special film placed under the glass can provide any color to the surface of the showcase.
Installation of lighting for the glass floor

Illumination is the most important element of a glass floor. However, you should be aware that not all lamps are suitable for it. It is strongly not recommended to use halogen light sources, as they will heat the glass. To illuminate the floor glass niche, you can install neon tubes and fluorescent lamps, a luminous cord or spot LED devices. When arranging a glass floor for the entire area of \u200b\u200bthe room, spotlights can be placed under it.
After choosing the light sources, you need to determine the order in which they should be placed. Lamps can be set arbitrarily for highlighting individual elements decor, as well as around the perimeter of the niche.
The most preferred among all types of lighting is lighting, consisting of neon lamps. Their light is always even and soft, without creating visible shadows. The use of such lighting allows you to emphasize the geometric shapes of niches, as it can be mounted in the most inaccessible places.
By using modern technologies it is possible to organize the automatic switching on of the backlight with the onset of the dark time of the day, using a special control unit, to change its intensity and color. With the help of the flashing frequency and the special colors of the lamps, it is possible to organize the effect of light and music in the interior, which will give the room with a glass floor the appropriate atmosphere.
Fixing glass panels

After completing the design of the niche, you can proceed with the installation of a glass floor on it. Panels must be installed on a special seal, previously fixed on metal frame. In this case, glass should never come into contact with metal parts and fasteners.
For a more secure fixation of glass panels, a thin layer of sealing paste should be applied to their reverse side before installation. The same composition should be used to process the seams between the products after they are fastened to the frame with metal bolts.
Completes the installation of a decorative profile. It also needs to be installed on a seal, which excludes the contact of the finishing frame with the floor glass.
How to make a glass floor - look at the video:
Before installing a glass floor, you need to remember some of its shortcomings. Even with careful use, scuffs and scratches can appear on such a coating over time. To minimize their number, it is recommended to use high quality material. The top layer of such panels is made of tempered glass. To reduce slippage on a glass floor, stripes or patterns can be applied to the surface using sandblaster through a stencil. Good luck!
Do-it-yourself furniture from improvised materials will surely become the highlight of your home: it is original, it gives the interior irresistibility and special, unlike anything else beauty.
Pieces of furniture that our parents would not understand, would call them strange and suitable only for a garage or shed, are increasingly gaining space in modern apartments. And they don’t just conquer, but harmonize with the interior one hundred percent, although outside the apartment they can look ridiculous. These items are pouffes from old books and old rugs, armchairs and sofas from cast iron bathtubs, coffee tables from wooden boxes.
Pieces of furniture that our parents would not understand, would call them strange and suitable only for a garage or shed, are increasingly conquering the space of modern apartments.
All this extraordinary beauty is called the author's vision, the author's idea, exclusive products, and designers ask for solid money for it. But why? Why pay more if you can build the same, or even much more interesting, yourself?
The most necessary of the interior items is the table. Those tables that are offered to the consumer by retail outlets often do not differ in either quality or unique design. Expensive stamped tables can be found everywhere.

The most necessary of the interior items - a table
We invite you not to follow the Soviet habit of turning your house into a typical living space, but to dream up a little and create unusual furniture from improvised materials with their own hands.

We invite you not to follow the Soviet habit of turning your house into a typical living space, but to dream up a little and create unusual furniture from improvised materials with your own hands.
To create a unique table (coffee table, coffee table or dining table), you need a strong stump or round timber of a sawn tree of the appropriate size, a can of paint and several hours of free time.

To create a unique table (coffee table, coffee table or dinner table), you need a strong stump or round timber of a sawn tree of the appropriate size, a can of paint and several hours of free time.
The stump must be washed from dust and dirt or dry cleaned and painted. Choose a color in accordance with the main range of the room. According to our observations, white stump tables are very popular, but the color can be changed at any time.
On a note! Painting can be the final chord of making your amazing table, or you can decorate furniture with decoupage technique or metal elements.
An old large (or small) suitcase is an excellent material for creating a unique table for a laptop, for periodicals, and desk ik from it will look great and stand firmly on its legs.
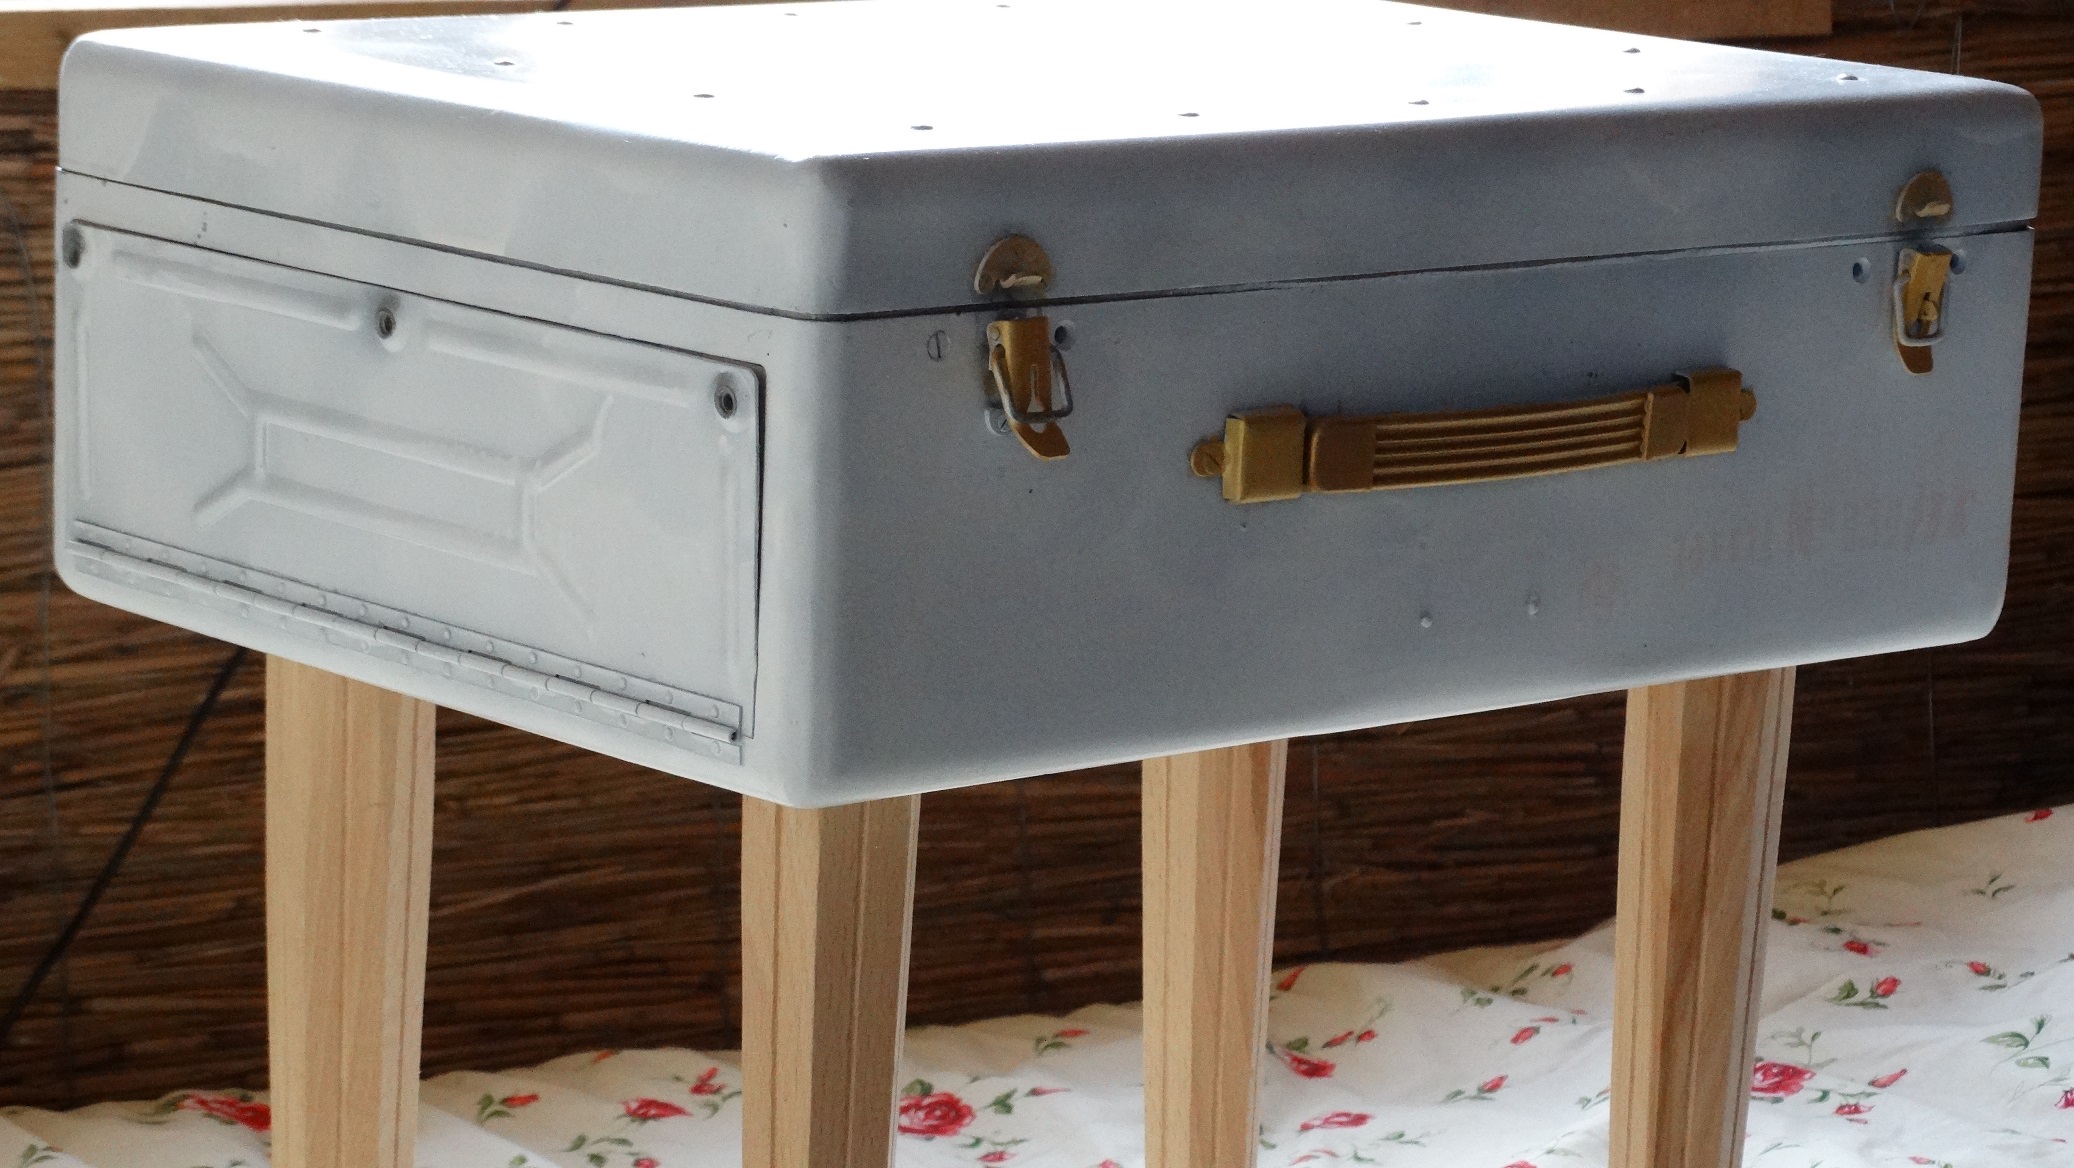
The main secret of such a product: the more vintage the suitcase, the more original table
The main secret of such a product: the more vintage the suitcase, the more original the table. If you look at a photo of furniture made from improvised materials with your own hands, namely tables from suitcases, you can see how much richer and more interesting objects look if the main material for them is decorated with forging, corners, or original carnations.
Important! In order to build a desk, you will need a suitcase, legs (you can take from an old table, or you can make it yourself) and a strong, rigid board for the tabletop.
Open the suitcase by locking it in open form using straps or leather straps, attach a pre-finished tabletop, use the suitcase lid as an organizer by attaching pockets, shelves and drawers. When making a table, be guided by a pirate style - attach "crab legs" or planks crosswise to ensure the stability of the furniture.
Second option: place the suitcase-chest in closed on strong legs. It is unlikely that you will be able to write letters and drink tea at such a table, but you can keep cute trinkets on it and fold periodicals.
An excellent dining table can be built if you have an old unnecessary door at your disposal - it will serve as a countertop. We propose to decorate the center of the tabletop with even rectangles (squares) made of colored durable glass. Take different shades, the brighter the table, the better it looks. You need to fix the glass in wooden frames made of durable slats.
An excellent dining table can be built if you have an old unnecessary door at your disposal - it will serve as a countertop
Before you equip the countertop, the edges and internal strips must be painted and allowed to dry completely. The legs must also be attached before the glazing stage.
This type of furniture will appeal to fans of natural materials. That is, completely natural: you don’t need to paint or process the bars, except to sand the surface a little to get rid of roughness. It’s great if the bars turn out to be slightly cracked - this will give the product originality.
table from wooden beam will appeal to fans of natural materials
The process of making a table is as follows: at the bottom of each beam, on both sides, notches are made for the legs (the legs are also beams, but smaller and treated with paint and varnish), large beams in the amount of 3-4 pieces are placed on smaller ones, stability is checked - and an unusual table is used long and happy.
The table turns out to be quite bulky, clumsy, suitable only for spacious rooms, but its plus is that it surprisingly harmoniously combines with leather upholstered furniture and fits perfectly into ultramodern interiors.
Shelves and cabinets
This is not a typo: not FOR books, but FROM books - everything is correct. A few useless, uninteresting, slightly shabby books in strong bindings can be found in the library, right? Of those that are already ready for waste paper? That's wonderful. Give them a second life - let them keep other, more interesting and popular books.
It is very easy to make such furniture from improvised materials with your own hands - even a housewife can handle it
It is very easy to make such furniture from improvised materials with your own hands - even a housewife can handle it: you need to choose several books of approximately the same thickness, size and texture of the binding (with colors you can experiment) and place them on fasteners (belts, bars, corners) with the back to the viewer - fresh, non-standard, cute.
Make a cylinder out of a durable plywood sheet, securely connecting the edges, and attach it to the wall: you can do it in its original form, or you can treat the plywood with paint or varnish.
Make a cylinder out of a durable plywood sheet, securely connecting the edges, and attach it to the wall: it can be in its original form, or you can treat the plywood with paint or varnish
In two or three hours, you can equip even the entire surface of the wall with such shelves - they are easy to make, they are original and functional.
One of the simplest methods to build kitchen or book shelves- attach to the wall a few boxes from the old kitchen table. You can not process them with anything, and even emphasize the “age” even more by rubbing the already existing scuffs with emery.
One of the easiest methods to build kitchen or book shelves is to attach some drawers from an old kitchen table to the wall.
Built-in wardrobe with transparent door
As a transparent door, take an old, but solid window frame with glasses.
Leave a recess in the wall in which narrow shelves would fit. Rough boards will serve as shelves in this case. Attach some shelves and hang the door.
It is convenient to keep kitchen utensils in the closet, and if you build one in the office, then books.
As a transparent door, take an old but solid window frame with glass
Variety of poufs
The record for the number on the Internet is beaten by photos of do-it-yourself furniture made from improvised materials such as a soft pouf. Pouffes can be made from everything in any quantity and any shape.


The amount of garbage that each person "produces" is growing year by year. The problem is becoming global, as flying plastic bags and plastic bottles lying everywhere have already pricked everyone's eyes. I am burning, it turns out, you can help, and even for the benefit of yourself. In any case, this applies to plastic bottles. You will be surprised how diverse and, importantly, useful crafts from plastic bottles can be done in just minutes. Well, or hours ... Depends on the scale.
The buildings
PET (polyethylene terephthalate) is a thermoplastic from which bottles are made. It will be useful to know its physical properties:
- density - 1.38-1.4 g / cm³,
- softening temperature (t dim.) - 245 ° C,
- melting point (t pl.) - 260 ° C,
- glass transition temperature (t st.) - 70 ° C,
- decomposition temperature - 350 °C.
Plastic bottles are very convenient to use, but harmful to the environment, since the polyethylene from which they are made decomposes for more than 200 years. The same property makes it possible to use almost waste raw materials as construction material. Craftsmen are already building houses from plastic bottles, as well as sheds, dachas, greenhouses, greenhouses, fences. Various technologies have been worked out - the approach is quite serious.
How to build a house out of plastic bottles
The main idea is to pour bulk material into bottles, screw them with caps and use them like bricks. Fill the bottles with sand, soil. Sand is preferable, as there is too much plant debris in the soil that can rot. It must be sifted, dried, bottled, well compacted, topped up even to the very top. Get kind of bricks.

To build a house from plastic bottles, you will need a solution that fills the gaps between the "bricks". There are options here too. It can be an ordinary mortar, which is used when laying brick walls, or clay mortar can be made. To keep the “bricks” in the wall until the mortar sets, they are tied with twine from the side of the covers. Later, these "grids" will come in handy when you plaster the walls. They turn out uneven, so alignment is indispensable.
We make a greenhouse, barn, greenhouse
From plastic bottles you can build a greenhouse or greenhouse. In this case, only transparent plastic is used, since it is necessary that the light passes in sufficient quantities. For the construction of a barn, on the contrary, it makes sense to choose darker plastic - it will be less visible what is inside.

The first technology - one to one
The second requirement for bottles as a building material is an even shape. This, you know, without recesses. Otherwise, it will not work to fold the walls so that they retain heat - it will “siphon” into curly cutouts. Remove labels from bottles and dry. It is also necessary to prepare pins or rods - bottles are strung on them. Their diameter is small so that the neck passes freely. Now you can start building a greenhouse / barn from plastic bottles.
For the construction of a greenhouse or a barn, poles are dug in at the corners. Frames are assembled from timber according to the size of the walls. These frames will be the base for the bottle walls. We collect them (frames) on the ground and fasten them to dug-in poles in a ready-made form. When making the frames, don't forget the doorway and windows.

We build a frame, cut off the bottom of the bottles, string them on a pin. From such "columns" we assemble walls, a roof
The construction process begins with cutting the bottom. We string the cut bottles on the pins, directing the necks in one direction. We insert the bottles with force so that they become very tight. Having collected a row of the desired height, we attach it to the frame. You can fasten with clamps, strips cut from metal, nails ... In any way available to you. We press the second row to the first so that there is a slight deformation. We fasten in this position. So, row after row, we collect all the walls, then the roof.

Using the same technology, you can make a gazebo. But there is already no need for tightness, so you can collect figured and colored containers. So it will turn out even more interesting (an example is in the photo).
The second technology - we sew plastic
Bottles will also need to be smooth, transparent or yellow. The central part is cut out of them, getting a piece of plastic square shape. Pieces are sewn together in long strips. In the strip, the pieces are arranged so that they are twisted in one direction. Then the strips are sewn into canvases. To make the canvas even, the strips are arranged so that they are twisted in different directions. As a result, they equalize each other. Finished canvases are nailed to the frame. On this, the construction of the greenhouse of their plastic bottles is over.
Such a plan "sheathing" for greenhouses perfectly tolerates winters, it does not need to be removed. Due to the firmware (many small holes), there is no absolute tightness, which allows you to adjust the humidity. You won’t be able to heat such a greenhouse, but it will push autumn back to you, and it will speed up the arrival of spring.
You can sew plastic for the greenhouse manually, but it's not easy. It will be easier for those who have non-capricious Sewing machines. The old Podolsk cars cope with this task. Others may have problems.
Fence and fence
There are many ways to make a fence out of plastic bottles. If you need a serious monolithic fence, you can use the bottles as bricks. The technology is the same as when building a house. To avoid plaster (after all, there is a high risk that it will collapse) - select the color of the plastic to obtain the necessary rust. But in this case, you will have to look for "building material" of the same diameter or from different sizes lay out patterns. In general, the creative process, no matter how you look at it.

You can also make filling for the fence from plastic bottles. Make a frame, say, from wood, and come up with a beautiful filling from curly containers and their parts.
Furniture from improvised materials: recycle plastic bottles
From plastic bottles you can make not only a house and a fence, they are also used as the basis for upholstered furniture. The idea is to use plastic containers instead of wood for the frame. With tightly screwed lids, they have a high bearing capacity, and assembled in blocks, it is quite able to withstand a load of up to 100 kg or more.

A bed made of plastic bottles ... needed good mattress, and the base is not too difficult to make
Although the furniture is made differently, the general algorithm of actions is the same:
- Select "building material" of the same height, tighten the covers well.
- Assemble the blocks of the desired size, fastening them with tape.
- Having collected the base of the required shape, sew the cover. For softness, adding furniture foam rubber.
The whole trick is that the bottles fit one to the other very tightly and do not move. The slightest play can lead to the destruction of the structure. Therefore, collect the blocks slowly, carefully fixing. You can fold the bottles in layers, securing each layer in several places. For inner layers, it is better to use double sided tape- fixation will be more reliable.
Ottomans / banquettes
The easiest way is to make an ottoman or a bench out of plastic bottles. We act in the order described above. It is necessary to find bottles of the same height. It is better if they are of the same shape - it is easier to collect. From plastic containers with tightly screwed lids, we assemble the base in the form of a cylinder. It is desirable that the radius of the base be greater than the height of the bottles - so the bench will not turn over.

Next, you need to cut out two circles from fiberboard, which will be slightly larger than the resulting base radius - this is the “bottom” and the base of the seat. We fix them with tape. We take furniture foam rubber and, according to the dimensions obtained, cut out the necessary spare parts. We sew a cover from furniture fabric, a color that matches the interior.

Such a bench can be not only round. It is quite possible to make a square. And so that this furniture is not too light, it can be weighted by pouring water. But water is not a very reliable business. It is better to pour sand. Heavier and more reliable.
Sofas, chairs, armchairs
If you need furniture of greater height than one bottle, proceed as when creating walls for a house. Find "material" of the same shape and height. The first bottle is left intact, the cork is screwed tightly (you can pour sand so that it does not turn over). The bottom of the other is cut off, put one on top of the other. The bottle goes a certain distance and does not move any further, no matter how hard you try. If the resulting height is enough - great, if not - put on the next one. In this way, collect the rows of the desired height, then fasten them into blocks.
There is another way. It is more reliable in the sense that the bottles are held not by compressed air, but by a mechanical stop. And the walls in them are double, which is also important. Minus - more work, more raw materials needed. The whole process in a step by step illustration.

- We take a bottle, cut it approximately in the middle of the height (the upper part with the neck is smaller).
- The upper part of the neck (the lid is screwed on) is inserted all the way into the bottom.
- We take a whole one, of the same size and shape, insert it upside down into the prepared structure.
- We cut the third one in about half and put the lower part on top (with a lid).
From such modules we assemble blocks of the desired configuration, fastening them with adhesive tape. Don't feel sorry for the scotch. You can first fasten two bottles, then assemble large blocks from double ones.
As you understand, with this technology, there are a lot of tops from bottles (half of the third bottle). They can be used to make other crafts from plastic bottles: flowers, more practical household items.
Flower making methods
The most common plastic bottle crafts are garden figurines and flowers. Read about garden figurines There are others interesting ideas, but many interesting little animals and insects have been collected. And we will tell about flowers from plastic bottles below - these are probably those crafts from plastic bottles that give the most pleasure. The process is simple, the possibilities are many, the result is amazing.
You have probably noticed that the bottom of a PET bottle looks like a flower. All you have to do is find a bottle beautiful color, cut off her bottom. Now you already have a pretty flower. In the middle, you can add petals cut from the central part, a core from a plastic strip cut with noodles, or glue beads inside, but a little more about everything.

Using the power of fire
To work, you will need a marker, a lighter or a candle (it is more convenient with a candle). If available, take pliers, tweezers or pliers - hold the workpiece during processing. You will also need acrylic paints, you may need glue and beads. The whole manufacturing process comes down to several steps:

There are a lot of options here. Just start doing. Right away, it may not work out perfectly, but you will understand what and how can be corrected. See more pictures from step by step photos the process of making flowers from plastic bottles.
The simplest
For beginner needleworkers, you can try making flowers from plastic bottles of simple shapes to decorate the garden. In this case, milk containers can also be used. In order not to paint plastic, look for colored ones. It doesn't matter if they are transparent or not. They can be combined, getting flowers of different shapes.

To create such flowers, use the part near the neck. It is cut to form petals. Next - warm up a little, giving the desired bend to the petals, a little paint, a core of a melted piece with a thread (a bottle of a smaller diameter, a pharmacy will do). Here is the buttercup.
Another option is to cut from the neck into strips of equal width - 1-1.5 cm, bend them (warming up a little at the base). Make the middle whisk from the side of a milk bottle or paint the transparent plastic with acrylic paint.

The middle is any bright. Here is a piece of cork, but you can cut it into thin noodles, twist it into a roll and then heat it. Get a fluffy core.
It's all about the shape ... Despite the imperfection, they decorate the site
The topic is really inexhaustible. Flowers from plastic bottles are made in a variety of ways. From simple and uncomplicated to very realistic. It's not so much about skill, but about different tastes and desires.
Useful ideas for the home
PET containers turned out to be so good material that they do a lot of useful things. In this section, we have collected useful crafts from plastic bottles that can be used on the farm.
For the kitchen and beyond
If you cut off the bottom of a bottle with a capacity of 2-3 liters, you get a bowl or a bowl, and so that its edges are even, they can be melted on a heated iron. But so that the sole does not have to be cleaned later, use a special silicone pad. If not, you can do it through a sheet of parchment for baking.

Product container. Plastic is food grade...
From the same bottle we cut off the threaded part. 1-2 cm of plastic should remain around the thread (the edges are melted using already known technology). Now it will not be difficult to hermetically close any package: we pass it through the cut off neck, wrap it outward, twist the lid.

From the bottom of the bottles attached to the bar, you get a great newspaper shelf (photo on the right). You can also store umbrellas.
From cut into strips of plastic can be woven different shapes containers. Bottles need an even shape, with thick walls. They are cut into strips of a certain thickness. It is necessary to cut in a spiral - as a result, rather long strips are obtained. If their length is not enough, they sew perfectly.

Lampshades
You can even make a lampshade, but on one condition: you will use similar crafts from plastic bottles in co lamps - only they almost do not heat up. Plastic is incompatible with other lamps. We will describe three ways to make a lampshade from a plastic bottle.
First. You need a large bottle. We draw it into strips of the same width. At the beginning and at the end of each strip, we make holes with a heated soldering iron or a nail heated on fire. We insert scissors into this hole, cut. Get even stripes.

When the strips are cut, we also make a hole in the bottom, pass a thick fishing line through the neck, bring it out through the hole in the bottom, and fasten the decor on the reverse side. You can - a button, you can - a pebble of a suitable color. Now, pulling the fishing line, we get an interesting shape of a lampshade. You can put a light bulb in it.
Another lampshade was made using a similar technology. But then they cut a part of the bottle with a neck into strips, wrapped the strips and fixed them on the neck. To give the desired shape, the place of the fold can be warmed up a little over the flame of a candle or lighter. The resulting "flowers" are attached to the base. Here we get an unusual design.

They also make lampshades from bottoms. You need to find a sufficient number of identical bottles, cut off their bottom, glue them together using universal glue (choose transparent). The main thing is that it glues plastic and quickly hardens.
flower vases
Making a vase from a plastic bottle - what could be easier ... Just cut off the neck and you're done. But there is a technique that allows you to get patterned walls. You will need a soldering iron with the thinnest tip. Its power should not be too high. Then everything is simple: with the help of a heated sting, you burn out the patterns.

Magically! To make the picture appear brighter, we take acrylic paint and paint the resulting beauty. The paint can be in an ordinary can, but it is faster and more convenient to work with a spray can.

Here are the options...
Photo Ideas
Crafts from plastic bottles are such a vast topic that it is impossible to talk about everything. What is nice, knowing a few tricks, you can easily find out how and what to do by looking only at the photos. So here we put together a few ideas that we found interesting.


You can even make a boat ....

And it's just a decoration ....


