Do-it-yourself bath restoration: preparation and step-by-step bathroom restoration. Restoration of an old cast-iron bath: pros and cons Do-it-yourself cast-iron bath restoration
Due to the intense load, spots, cracks and chips form on the surface of the bath. When defects appear, it is not at all necessary to run to the store for a new bathroom, because it is much cheaper to restore the damaged coating with acrylic, enamel or liner. We will tell you how to restore the bath with your own hands, eliminate minor defects and how much such repairs will cost from specialists.
There are three main ways to restore the surface of the bath:

- Application of a new layer of acrylic (glass).

- Applying a new layer of enamel.

- Bonding acrylic liner.
Regardless of the method of restoration you choose, it is necessary to prepare the bathtub for repair.
Preparatory stage
The process of preparing the bath for repair:
- Free the bathroom from unnecessary interior items that may interfere with the work process.
- Dismantle the drain and overflow of the bathroom, to do this, unscrew the external grilles and clamping rings on the pipes. Depending on the condition of the removed pipes and parts, buy new parts in advance to replace the old ones.
- Remove the baseboard between the tub and the wall.
- Using coarse-grained sandpaper or a drill with a special nozzle, grind the surface of the bath until the gloss is removed. In the process of grinding, try to remove all the bumps and loose pieces of the old coating. If the bath has been previously restored, then in this case, it is necessary to remove the entire layer of the old coating.
- Putty all the chips and pits, after the putty dries, re-grinding.
- Pick up all debris and dust using a vacuum cleaner or a damp cloth.
- Cover the outside of the tub and the floor with polyethylene.
- Wash the tub thoroughly with a good quality detergent.
- Degrease the bathtub surface with a solvent.

Below is a list of tools and Supplies that you will need at the preparatory stage:
- Adjustable wrench.
- Screwdriver.
- Hammer.
- Putty knife.
- Putty for metal
- Chisel or chisel.
- Drill with a sanding attachment or coarse sandpaper.
- Vacuum cleaner or rag.
- Masking tape.
- Polyethylene film.
- Detergent.
- Solvent.
When you have finished preparing the bath, proceed to the restoration option of your choice.
Surface restoration with acrylic
When restoring a bathtub with an acrylic mixture, a very important factor is right choice acrylic manufacturer. After all, the quality of restoration largely depends not on the skill of the worker, but on the behavior of the mixture during pouring. Very often, the use of low-quality acrylic or hardener leads to the formation of air bubbles, smudges and delamination of the coating during further operation. Therefore, when buying, do not save and buy acrylic European production.
To restore a bathtub with acrylic, follow the following workflow:
- Prepare the bath for restoration (see above).
- Read the mixing instructions on the acrylic jar.
- Mix acrylic and hardener according to instructions. For mixing, use a drill with a nozzle. Stir the mixture at low speed drill. Mix for at least 10 minutes.
- Take a plastic cup and plug the drain hole with it.
- Pour the finished mixture into the container that you will fill.
- Start pouring the mixture from the top edges of the tub, slowly pouring the acrylic from the container onto the surface.
- Pour the mixture around the entire perimeter of the tub, allowing it to flow freely to the bottom.
- Fill the walls of the bath.
- Take a rubber or wooden spatula and with it, spread the mixture evenly over the edges of the tub.
- The mixture accumulated at the bottom of the bath, with a spatula, re-drive it onto the walls and let the acrylic drain again.
- Using a spatula, spread the mixture evenly over the bottom of the tub, then remove the plastic cup from the drain hole and let the excess acrylic drain into a pre-placed container.
- Follow the formation of smudges. If a smudge is found, smooth it out with a rubber spatula.
- If hair or specks get on the flooded surface, remove them in a timely manner using the tip of a knife or a needle.
- If air bubbles are found, lightly blow the surface with a building hair dryer.
- After pouring is complete, allow the tub to dry for 48 hours.
- After the tub has dried, install the drain, overflow and baseboard.
- Paint the outside of the tub with metal paint or cover it with a decorative rim.

Acrylic bathtub restoration completed!
List of tools and materials for acrylic restoration:
- Drill with a nozzle.
- Plastic glass and container for pouring.
- Rubber or wooden spatula.
- Knife or needle.
- Building hair dryer.
- Wrench.
- Screwdriver.
- Brushes or spray gun.
- Sealant.
- Acrylic.
- Hardener.
- Paint for metal.
- Plinth.
- Decorative board.
With detailed instructions for the restoration of the bathtub with acrylic, you can also find in the video:
Surface restoration with enamel
Restoring a bathtub with enamel is much cheaper than other options, but it has its drawbacks. Firstly, this is the service life of the restored surface, which is much less than that of acrylic coatings. Secondly, in order for the enamel layer not to be inferior to the acrylic coating, high professionalism is required when applying enamel. Thirdly, enamel is more susceptible to mechanical damage than acrylic. 
If you, despite all the shortcomings, decide to restore the bathtub with enamel, then do the following:
- Prepare the bathtub for repair (see above).
- Read the instructions on the packaging of the purchased enamel. Enamel is of two types, ready for use and requiring the addition of a hardener.
- Mix the hardener and enamel, in the proportions indicated in the instructions.
- Please note that the enameled surface is applied to the bathtub in two layers, so you will need two cans of enamel. The second can of enamel is opened and mixed with the hardener, only after the first layer has dried.
- Using a wide brush, apply the first coat of enamel to the bath. Try to apply enamel without leaving streaks and smudges. Timely remove motes and hairs from the brush that have fallen on the surface.
- Due to the increased load on the bottom of the bath, it must be painted twice.
- After the first coat has dried, mix the second can of enamel with the hardener.
- Apply a second coat of enamel to the bath.
- The time for complete drying of the enamel, each manufacturer has its own, you can find it in the instructions or on the packaging. After the enamel has completely dried, install the drain, overflow, plinth and decorative border.

Enamel bath completed!
Tools and materials necessary for the restoration of the bath with enamel:
- Drill with a nozzle.
- Wrench.
- Screwdriver.
- Tassels.
- Sealant.
- Enamel.
- Hardener.
- Plinth.
- Decorative board.
How to restore a bath with enamel, you can also watch in the video:
Bathtub restoration with a liner
The main problem with this type of restoration lies in the selection of an insert that exactly matches the shape of your bathtub. This problem is especially acute for owners of antique and non-standard bathtubs. In the event that you have a standard and relatively new bath, you will not have problems finding an insert. 
To install the insert, do the following:
- Prepare the bathtub for restoration as described above.
- Using an electric jigsaw or hacksaw, cut off the safety edge from the edges of the liner.
- Place the liner in the tub and mark out the drain and overflow.
- Pull the liner out of the tub and drill holes according to the markings.
- Sand the edges of the holes with fine sandpaper.
- Apply sealant around the edges of the drain and overflow.
- Over the entire surface of the tub, apply strips of foam with a low expansion coefficient. The strips should be located at a distance of 15-20 centimeters from each other. Never use the normal mounting foam, this may cause deformation of the earmold.
- Install the liner on the bath and install the drain with overflow.
- Fill the bathtub with water, for a tighter pressing of the liner to the bathtub.
- Leave the bath with water for 24 hours until the foam is completely dry.
- Drain the water and remove the protective film from the insert.
- Install a skirting board and a decorative border on the bathtub.

Insert assembly completed!
Tools and materials needed to install the liner:
- Electric jigsaw or hacksaw.
- Drill with a nozzle for large holes.
- Wrench.
- Screwdriver.
- Sandpaper.
- Mounting foam with a low coefficient of subsequent expansion.
- Plinth.
- Decorative board.
- Acrylic insert.
How to install an acrylic liner, you can also watch in the video:
Correction of minor defects on the surface of the bath
When one or two small chips or small cracks appear on the surface of the bath, it is not entirely reasonable to make a complete restoration. In such cases, it is enough to make minor repairs and eliminate defects.
Removing a chip in a cast iron bath
For repairs you will need:
- Automotive putty.
- One color coated enamel.
- Sandpaper.
- Solvent.
- Tassel.
- Putty knife.
Dry the chipped area and clean it with sandpaper. Pry the edges of the chip with a knife and remove the loose pieces of enamel. Degrease the chipped surface with a solvent and cover with automotive putty. After drying, the level of putty should be slightly below the level of the enamel. Treat the puttied place with sandpaper. Using a brush, apply a layer of enamel on the putty. After the enamel has dried, you can use the bath again. 
Removing a chip on an acrylic bath
Sheet acrylic from which it is made acrylic bath, quite resistant to mechanical damage. But there are cases when, due to falling objects with sharp corners into the bath, chips form on the surface and there is a need for repair.
To remove a chip in acrylic bath you will need:
- One color acrylic coated tub.
- Hardener.
- Solvent.
- Rubber spatula.
- Fine-grained sandpaper.
Dry the chipped area and sand it with sandpaper. Remove dust and degrease the chip with a solvent. Mix a small amount of acrylic with a hardener. You need to get a mixture of strong viscosity, otherwise the acrylic will flow out of the damaged area. Apply the mixture to the chip with a spatula and even out the levels of the surface and the damaged area. Let the acrylic dry for 48 hours before using the bath. 
Removing stains and rust
Usually, to remove stubborn stains and rust from the surface of the bath, it is enough to use high-quality detergent. But in especially difficult cases, to eliminate pollution, you can use hydrochloric acid.
Apply acid to the contaminated area for 3-5 minutes. After that, wipe the place with a washcloth until the stain disappears and wash off the acid with water.
Please note that hydrochloric acid emits toxic fumes and can burn the skin, so when working with it, you must use gloves, goggles and a respirator. 
Questions and answers on the restoration of bathtubs
In this section, we will try to answer the most common questions about the restoration of bathtubs.
Question: What is the best material to use for bathtub restoration?
Answer: The choice of material largely depends on financial capabilities. The most economical option for restoration is considered to be enameling the bath, and the most expensive is the use of an acrylic liner. As for the quality of the coating and its service life, the acrylic liner is in the first place, the service life of which is 10-15 years. In second place is an acrylic coating, the service life is from 5 to 15 years, depending on the operating conditions and the quality of the fill. And in last place is the enamel coating, the period of use is up to 5 years.
Question: Is it possible to restore the bath at home?
Answer: Yes, you can. To do this, carefully read the materials and videos presented in our article. Be sure to follow the instructions for use of restoration materials.
Question: How to give the coating your favorite color?
Answer: Of course, it is best to buy enamel or acrylic of the desired shade. But if there is a need to change the color of the mixture, then during the mixing process, you can always add a dye.
Question: How much does it cost to restore a bathtub when contacting specialists?
Answer: The cost of restoration depends on the region and the cost of consumables used. Below, we provide a list of approximate prices for the restoration of bathtubs, depending on the type of coating:
- Restoration liquid acrylic- from 3000 to 6000 rubles.
- Restoration with enamel - from 2000 to 5000 rubles.
- Restoration using an insert - from 5,000 to 12,000 rubles.

We hope that the information provided in our article was useful to you!
Over time, during operation, the bath fails. In particular, this applies to Soviet-made cast-iron bathtubs. But what to do? Buy new or refurbish cast iron bath on one's own? Of course, it is up to you to decide, but it is worth noting that buying a new bathtub is quite expensive, so we recommend doing repairs. But before that, you need to study all its features.
Methods for repairing a cast iron bath
Considering the options for repairing the bath, only two can be distinguished:
- Enamel application. Which, in turn, can be divided into the device of enamel and the application of liquid acrylic.
- Acrylic liner.
Each of these options has features that must be considered when carrying out work. Let's look at each repair method in more detail.
Enameling
The first way is . Note that it is available for use only when the bath itself is intact, and you are only embarrassed by its appearance (which has pretty deteriorated over many years of operation).
Restoration work of this type is divided into several stages:
- Enamel selection.
- Bath surface preparation.
- Coating.
In order to perform all the work qualitatively, it is necessary to study the features of each of the stages.
The choice of enamel for the bath
The first, and very important, is the choice of enamel, which will later be applied to the surface. Accordingly, to choose, you need to know several features:
- The coating can be applied in several ways: with a brush or roller, as well as in the form of an aerosol. Note that aerosol application is not suitable for a full-fledged restoration.
- Also, bath enamel should be presented as a set with all the components necessary for work.
- For two-component formulations, a hardener is required, which is selected in accordance with the shade.
And let's look at the most suitable compositions for such work:
Any of the presented types, which are most popular today, is suitable for work.
Now that the material is selected, you can proceed directly to the execution of work.
Foundation preparation
Before you start directly applying the composition to the surface of the bath, you must carefully prepare it. The preparation itself is carried out as follows:

Upon completion of the preparation, you can proceed directly to the application of enamel, and it will differ depending on the choice made. Namely, different ways regular enamel and liquid acrylic are applied. We will analyze each of them in some more detail.
Enamel application
Upon completion of the preparation, we proceed to repair the bath using enameling, which is performed as follows:
Allow the tub to dry completely when finished. It is recommended to use it no earlier than 2-3 days after applying the composition.
- The process of restoration or repair of a cast-iron bath using this method lasts about 4 hours. It begins after the replacement of the enamel is completed.
- The method is the application of an additional (fourth) layer of enamel on the surface of the bathroom.
- If a new coating has been applied before, then it should dry completely, after which an additional layer is applied.
When performing reinforcement, it is worth considering some features:
- After applying the last layer, the enamel should dry well.
- The bathroom cannot be used for three days.
- Such repair of a cast-iron bath can be carried out independently, taking into account the detailed instructions for the enamel jar.
- You can also use the services of a restoration company. However, there are some nuances here.
- You must take into account the fact that such enamel has a service life of one and a half years.
- Such a bath should be used with care. Since the enamel is scratched, you need to wash it only with soft rags and gels.
- After a year and a half, a new repair will be required.
But nevertheless, although the method is short-term, it is not expensive. In this way, you can maintain an attractive appearance of the bathroom for many years, and prevent it from rusting and completely deteriorating.
liquid acrylic
And the second way to restore cast-iron plumbing is the application of liquid acrylic. The whole process is carried out in accordance with the technology:

Acrylic liner
Another way to repair a cast-iron bath is
- When the base of the bathtub is in poor condition, and it is impossible to do just by replacing the enamel.
- In cases where there is a desire to give the new kind your old plumbing.
- In addition, it is actively used for the "reconstruction" of the bath. As you know, metal transmits and absorbs heat very well. And usually in any metal and cast iron products, the water cools down very quickly, preventing you from enjoying it. That's when the acrylic liner comes to the rescue.
In addition, it is worth noting a number of advantages of such a solution:
- The insert is wear resistant.
- Pretty durable.
- During operation does not change color and its properties.
- It has sufficient moisture resistance.
- Easy to maintain and operate.
- In addition, it has a smooth finish that repels dirt.
- Immune to household dyes, as well as household chemicals.
- It heats up fairly quickly and cools down slowly.
But let's take a look directly at how the repair process itself goes:

Important! When buying an acrylic liner, be sure to ask for a quality certificate for it. Also, check its integrity at the place of purchase.
Conclusion
As you may have noticed, there are not so many ways to restore and repair a cast-iron bath, and at the same time they are as simple as possible, therefore it is possible to do all the work yourself (even without someone's help). We also recommend that you watch a few videos that will clearly show all the repair methods, and you will once again see how easy it is to do it yourself.
The main defects in the coating of the bath include cracks, scratches and chips. Damage occurs after inaccurate installation of furniture, plumbing and heavy objects falling into a bathing bowl. Calling a master to fix problems will be expensive, so it would be nice to learn how to repair a cast-iron bath with your own hands, agree?
We will help you resolve this issue. The article contains detailed instructions to remove chips, small and deep scratches, as well as describes effective methods crack restoration. After studying the material, you can restore the attractiveness cast iron bowl and prolong the life of the bath.
The use of multi-component cleaners, cleaning the contaminated surface with a stiff brush, careless handling of metal objects during repairs - all this leads to the formation of shallow scratches.
Such scratches should be immediately eliminated, since the ingress of moisture, caustic chemicals into the resulting gap leads to the formation of rust, the multiplication of moisture-loving microorganisms and an increase in the size of the scratch. Which will lead to further destruction of the surface of the bath.
Minor scratches are damage that does not expose the metal. These minor damages can be repaired even without priming the surface.
Ways to restore cracks
Bathing bowls made of cast iron have become popular due to their high wear resistance and strength. But even such durable products have defects in the form of enamel chips, corrosion or cracks.
The occurrence of a crack as a result of plumbing work or natural changes in water and air temperature becomes one of the reasons for replacing the bath. In some cases, it is possible to close the defect.
Ways to eliminate a crack on a cast-iron base of a bathtub: using cold welding, by applying epoxy resin, soldering with lead-tin solder.
Option #1 - cold welding
At the first stage, the bath is degreased and cleaned with Pemolux or soda. If there is rust around the edges and inside the crack, a harsh abrasive such as Sanox or Chistin Sanitary.
The anti-corrosion agent is applied to the surface of the crack in a thick layer, wetted and left on the damage for 20 minutes. After washing off the cleaning agent along the visible edges of the crack on one or both sides, depending on the location, locking micro-holes with a diameter of 3 mm are drilled.
After degreasing, the surface is ground with a grinder, an electric drill with a grinding wheel or an abrasive. Not only the crack is cleaned, but also the enamel around it 1.5-2 cm wide.
The grinding wheel removes the coating down to the metal. At the site of the crack, a hollow is machined for the entire length of the fault.
After grinding, the tank coating is cleaned of saw cuts and dirt. When the bathroom dries, the crack must be degreased with a solvent, alcohol or cologne.
Hot water is poured into the bowl for half an hour, after draining it, the surface is dried with a hairdryer. Now the processed coating defect can be covered with cold welding.
You can use the bath not earlier than after 24 hours. To even out the tone of the coating, the crack can be painted with a two-component acrylic or epoxy enamel.
Option #2 - Epoxy
The process of preparing a surface for applying epoxy resin is practically the same as the technology for preparing a bath for applying cold welding.
Scheme of work:
- cleansing and degreasing;
- grinding and turning grooves;
- additional degreasing.
After finishing preparatory work it is necessary to prepare an epoxy resin or putty based on epoxy. A layer of epoxy resin is applied to the place of the crack, fiberglass on top and again adhesive mounting material.
After the structure has dried, it is necessary to repeat the procedure: epoxy - fiberglass - epoxy. The result should be a patch above the enamel level, if not, then the procedure is repeated a third time.
Epoxy resin - the best remedy to eliminate cracks in the bath. The liquid texture of the material allows you to penetrate into each microcrack, provides increased adhesion and protection of the metal
Option #3 - soldering the crack
If you have soldering skills, then you can solder a small crack in a cast-iron bath. This requires a thorough cleaning and release of the metal from the enamel.
Soldering is done with a 100-200-watt soldering iron using lead-tin solder and a special flux for steel and aluminum.
This way of solving the problem takes time and skill. The seam will not last long, but it is suitable for temporary elimination of the problem.
To prolong the attractiveness and life of the renovated bath, you need to properly. To clean the surface, do not use hard brushes that can damage the smooth enamel.
Conclusions and useful video on the topic
For reliable adhesion of materials and durability of the coating, it is necessary to follow a clear sequence of preparatory and restoration work:
High-quality repair of a cast-iron bath is a careful restoration of the most important plumbing fixture in an apartment.
Restoration of the damaged surface is possible as a result of the "jewelry" work of the master. The result of painstaking work and many hours of waiting will be a bath without visible chips, scratches and cracks, which will last another ten years.
Share with readers your experience in restoring damaged cast-iron bathtub enamel and carrying out restoration work. Please leave comments, ask questions on the topic of the article and participate in discussions - the feedback form is located below.
Over time, the bath loses its attractive appearance. Smudges and traces of rust appear, gloss disappears, it becomes rough to the touch. Everything says it's time old bath change. And these are not small expenses. In addition, when replacing a bathtub, you cannot do without renovating the entire bathroom, and small expenses will turn into medium, or even large ones. But there is an alternative - do-it-yourself bath restoration. There are a large number of materials on the market with which you can independently update your bath with proper quality.
Bath restoration methods
Now there are three methods for restoring old bathtubs:
1. Restoration of the enameled surface of the bath.
2. Restoration with liquid acrylic.
3. Restoration by insertion.
Method 1: ordinary enameling
Cast iron and steel enameled bathtubs are the most common types of bathtubs in our apartments. They are produced in accordance with GOST 18297-96, which has been in force since 1997. According to this GOST, the guarantee for bathtubs is 2 years. But as practice shows, the enamel on them lasts no more than 10 years of use.
Enamel on baths in the factory is applied quite simply. First, the outer surface is heated red-hot, then inner surface the enamel powder is sieved and kept for some time to sinter the powder with the metal. Heat the outer surface again until the powder is melted. The result is a smooth, glossy enamel finish. It is clear that at home this method of restoring a cast-iron bath, as well as a steel one, is not suitable.
Why does enamel usually wear out?
The wear of the enameled surface occurs as a result of two factors:
- The use of cleaning products containing abrasive powders or substances with chlorine inclusions.
- The use of chemical reagents in the cleaning of water supply networks.
As a result of many years of exposure to these factors, the enameled surface of the bath becomes thinner, rougher and begins to rust.

Restoration of the enameled surface
Do-it-yourself enamel restoration is a fairly simple process. It consists of two stages: surface preparation and application of a new layer of enamel.
What will be needed for work?
You will need the following tools and materials:
- electric drill with a nozzle in the form of a grinding wheel;
- abrasive powder;
- sandpaper;
- rust converter (for example, "Tsinkar");
- degreaser (for example, "Nefras");
- lint-free napkin;
- natural bristle brushes or spray;
- respirator and gloves;
- enamel, preferably two-component (enamel plus hardener).
Preliminary step: surface preparation
A very important step. The more thoroughly the surface of the bathtub is cleaned, the better the new enamel layer will be.
- sprinkle the old enamel with abrasive powder and clean it off with sandpaper or a grinding wheel mounted on an electric drill;
- treat areas affected by corrosion with a rust converter, hold for half an hour, then clean with sandpaper;
- wash off the enamel and crumbs with water;
- thoroughly treat the bath with a degreaser using a lint-free cloth;
- fill the bath hot water and let it warm up for 10 minutes;
- drain the water and wipe dry with a lint-free cloth; make sure that there are no lint or other foreign elements on the surface.
The main stage: applying enamel
- according to the manufacturer's instructions, mix enamel and hardener in a certain proportion and mix thoroughly;
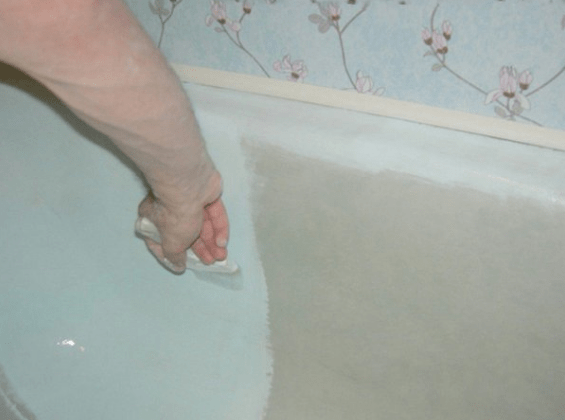
- apply the first layer of enamel with a brush or spray;
- withstand a certain period of time according to the instructions;
- apply a second layer of enamel.
This completes the process of restoring an enamelled bath with your own hands. It is advisable to withstand at least a week before the start of the operation of the bath. This is how long it takes for the enamel to fully polymerize.
The service life of the new enamel will be about 6-8 years.
Method 2: bathtub restoration with liquid acrylic
This method of bath restoration appeared relatively recently, thanks to the emergence of a special material - glass.
What do we restore?
Glass acrylic is a two-component acrylic material designed specifically for bathroom renovations. It is acrylic itself and a separately supplied hardener. When acrylic and hardener are combined, the polymerization process begins, and when applied to the surface, the composition turns into a high-quality acrylic film with a thickness of 4 to 6 mm.
Advantages of glass
Stakryl has three remarkable properties that help it quickly and effectively restore the bath:
1. Viscosity
Optimally matched coefficient of viscosity of glass helps to make an acrylic coating with a thickness of 4 mm on the walls of the bath and 6 mm on its bottom without much effort.
2. Fluidity
The fluidity effect allows glass to independently envelop the surface of the bath and lay down in an even layer.
3. Delayed polymerization
Thanks to this quality, you can calmly and relatively comfortably carry out work on the restoration of the bath, without fear that the acrylic will harden too quickly.
After curing, the acrylic surface has mechanical and impact strength far superior to the acrylic liner or enamel layer.

Work performance technology
The technology for restoring bathtubs with liquid acrylic is even simpler than the enameling process and is as follows:
1: Surface preparation
This stage does not differ from the restoration of the enameled surface. Repeat the same steps. Then disconnect the siphon and place a container under the bathtub drain, where excess acrylic will drain.
2: Apply liquid acrylic
- prepare the acrylic mixture according to the manufacturer's instructions;
- slowly pour the finished mixture onto the upper edge of the bath, as soon as the jet reaches the middle, we begin to smoothly move the jet of glass along the perimeter of the bath;
- when the circle closes, repeat the procedure, starting from the middle.
The process of poured restoration must take place continuously, for this you need to take a container for glass right size. It’s not worth saving - it’s better to pour out a little more acrylic than it will be lacking, the excess will go into the container under the drain hole.
Acrylic is polymerized, depending on the type, from one to four days. Choose a glass with a long drying time, in which case the acrylic surface will be of better quality.
The service life of the restored bath will be about 20 years.
Method 3: bathtub restoration with an insert
The simplest, but also the most expensive way of restoration is the installation of an insert. In addition, it is impossible to completely restore the bath with your own hands using this method, since the liner is made in the factory.
There is an option to order the manufacture of an insert for a specific bath at the enterprise, and install it yourself.
Insert installation technology is as follows:
- thoroughly clean and degrease the surface of the bath;
- insert the manufactured liner into the bath;
- check the correctness of the docking of the drain holes;
- cut the liner along the wall tile line;
- apply special glue to the inner surface of the bath and the outer side of the liner and dock them;
- joints are additionally sealed with silicone.
After installing the liner, pour into the bath cold water and last for days. After that, the restored bath is ready for use.
The insert will serve you up to 10 years.
How much will a bathroom renovation cost?
In conclusion, we will comparative analysis the cost of restoring the bath, based on the methods discussed above.
Bathtub enameling
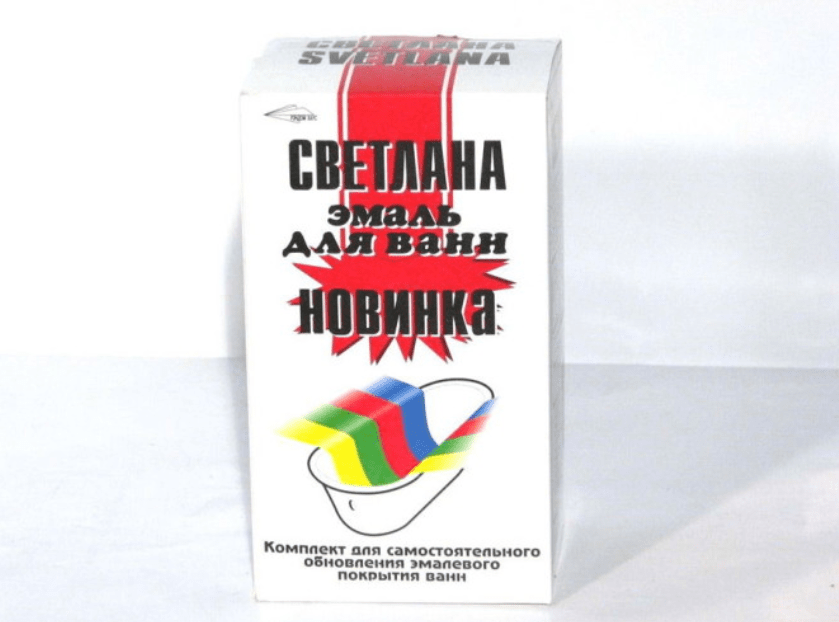
The cost of high-quality enamel "Reaflex 50" produced by the Finnish company "Tikkurila" is 550 rubles per 1 kg. The Russian set for restoration "Svetlana" costs 750 rubles. As a result, you will have to pay 1300 rubles.
Cast restoration
If you buy a set for restoring a bathtub with liquid acrylic, for example Plastall, it will cost about 2000 rubles. By the way, it has everything you need to independent work, even a CD with a video lesson.
Acrylic liner
The cost of the insert itself and polymer glue ranges from 2800 to 3000 rubles.
The best option is the poured restoration method, in which you get a beautiful and durable coating for little money. Moreover, any of these methods is several times cheaper than buying and installing a new bathtub.
During the operation of a cast-iron bath, due to certain circumstances, damage to the enamel may occur due to mechanical action and, as a result, the formation rusty spots. Appearance the bath becomes unaesthetic and the owner faces several ways to solve this problem, one of which is do-it-yourself restoration.
In contact with
Classmates
This procedure, although labor intensive, results in significant savings. financial resources, the decoration of walls and floors is not disturbed during dismantling and the usual reliable, but updated bath remains.Can a bathtub be refurbished?
It should be understood that it is possible to restore the bath only if there are no clearly rotten areas that cannot be repaired. This applies to the bottom near the drain and where water constantly remains. On the front, the enamel may be in good condition, but the rust that has penetrated through the damaged coating may have rusted the cast iron. As a result, the thickness of the metal is not able to provide the same performance characteristics. Maintainability can be assessed by stripping the old enamel, and then by tapping on the surface with a wooden or rubber mallet, identify problem areas.
How do you clean up an old bathtub?
Cleaning of old enamel is best done by applying abrasive powder to the surface and rubbing or grinding wheel. Use abrasive nozzles on an electric drill should be in cases of deep penetration of rust into the metal layer. In this case, it is desirable to perform circular or translational movements of the working part of the tool along the surface so as not to accidentally grind off the extra layer. Restorative formulations that are applied directly to the affected areas are also suitable. When the cleaned dirt accumulates, it is removed. The procedure is carried out until the coating is removed, that is, to a shiny cast-iron surface.
Application of acrylic
Full or partial restoration of enamel?
This issue is considered in each case individually, since it is necessary to take into account the condition of the enamel, the service life and the amount of damage. If small chips were received during the delivery or installation of a new bathtub, then local treatment can be performed. But even in this case, there may be problems with the selection of color tonality and the creation of a certain thickness of the coating. That is, traces of recovery will be, albeit a little, but noticeable. Once the rust spots are removed, the contrast will be more pronounced as the enamel has taken on a yellowish tint. Therefore, under the conditions of taking quick measures to preserve the metal, partial processing and finishing can be done, but to obtain the quality of the coating, a complete restoration is done.
Bath surface preparation for painting
After removing the enamel and removing rust, wash off the remnants of the coating and crumbs with water. Then the surface is degreased by applying special chemical mixtures that are neutral to cast iron, by rubbing with a soft, dry cloth.
Note!
When inspecting the bath, the wall thickness is checked and the possibility of further operation is determined.
Before applying a new coating, warm the bath with a poured hot water within 15 minutes. Then the water is drained, and the inner surface for painting is wiped dry with a soft cloth. As a result, the surface should remain free of lint, dust and other foreign matter.

Application of acrylic coating
One of simple ways creating an ideal bath cover is the method of pouring an acrylic solution onto the surface - glass. It is a two-component mixture of hardener and acrylic. When applied to the surface, the composition polymerizes and forms a thin uniform layer with a thickness of up to 5 mm. It has different degrees of viscosity and fluidity, which allows you to select with high accuracy required option for creating layers of a given thickness. Also, for beginners, delayed polymerization will be convenient, which gives a little time to eliminate minor errors.
How to create an acrylic coating
- Prepare the mixture according to the instructions.
- Take a container and fill it with liquid acrylic.
- The mixture is slowly poured onto the edges of the bath until it reaches about the middle of the wall height, after which the jet is moved further along the perimeter.
- After passing the entire perimeter, the procedure is repeated starting from the middle until a continuous coating is formed.

acrylic coating
Advantages and disadvantages of bulk coating
Acrylic coating has high strength and therefore is able to protect the bath from external mechanical influences and significantly increase the service life. The method of its application is quite simple and even in the absence of experience in carrying out such work, difficulties will not arise. The coating is even and thick enough, due to the ability to fill in irregularities and minor surface defects. When applied, there are no pungent odors and therefore it is not necessary to use protective respiratory equipment. However, the drying time can be at least three days. Restoring an old cast-iron bath in this way will be very expensive.
Types of enamels for painting
This method is classic and successfully used for budgetary restoration of the enamel coating of bathtubs. There are two types of enamels: professional and regular. The first is used by specialists with extensive experience in enamelling. This is due to the fact that the composition of the mixture has a high fluidity and in order to apply a layer of a certain thickness, it will be necessary to paint in several layers. At each stage, a layer of the same thickness is created without streaks and streaks. With experience, it is possible to perform partial restoration of the old coating with high accuracy. Ordinary enamel is thicker and the entire coating is painted at a time, but with minor errors.

Coating
The process of applying enamel to the bath
First you need to prepare the necessary composition of the mixture. To do this, it is poured into two containers for mixing two portions in equal quantities, since the restoration of the cast-iron bathtub with enamel is carried out in two layers. The first part is mixed with the hardener in the amount described in the instructions for use. Then pour it into the sprayer and evenly apply the first layer of enamel to the surface. This procedure can be performed with a brush, but it will take more time to create a layer of a given thickness. After that, wait until it dries and immediately apply a second layer in the same way. The bathroom can be used no earlier than after 7 days.
Using the Bath Liner
The method is a radical solution in cases where the state of the cast-iron bathtub has been brought to a non-operational state: there are rusty holes or significant surface damage, and the owner decided that it is better to restore it than to replace it with a new one. A special liner is an acrylic frame that is inserted into the cast-iron bath and glued to a special adhesive.
Note!
The insert is manufactured at the factory according to individual sizes and therefore very costly.
In place, they are adjusted to the level, smeared with glue, put into the bath, and smeared with sealant on top. A day later, the bath is ready for use.

Conclusion
Restoration of the operational state of the bath requires an analysis economic feasibility such an event. It includes the amount of time spent, the experience of such work and the availability necessary tools. Therefore, before restoring a cast-iron bath, its condition is assessed and a choice is made. possible ways enamel application.
Do-it-yourself cast-iron bath restoration video:
In contact with
See inaccuracies, incomplete or incorrect information? Do you know how to make an article better?
Would you like to suggest photos for publication on a topic?
Please help us make the site better! Leave a message and your contacts in the comments - we will contact you and together we will make the publication better!


