Trowel for grouting - we apply the grout professionally. Tool for grouting tiles joints Which spatula is needed for grouting joints
Grouting or, as professionals call this process, jointing is possible without a special tool. In very small areas, you can get by with your fingers or a piece of wiring. However, if you value your time, nerves and you are completely reluctant to get your hands dirty, we recommend purchasing a special spatula for jointing.
What are the spatulas?
There are a lot of options for rubber spatulas - some are produced by companies that develop construction toolssome come with a grout set. Taking the first one that comes across, if only the rubber one is not the best strategy, because, having saved on the purchase of a quality tool, you will lose on a large investment of time.
Let's start our review with the most popular type of rubber spatula - a tool with a trapezoidal rubber working plane and a comfortable plastic handle. The width of such a spatula is usually small, in the range of 50 - 150 mm. They are produced by all and sundry, so you run the risk of running into a low-quality tool. The rubber part should be moderately elastic and resilient, but not soft. It is convenient to work with such a spatula in any position and even in very cramped circumstances, for example, when you need to get your hand under furniture.
However, due to the small work surface in open space, it loses to wider options. Nevertheless, such a tool should be in the arsenal of any tiler, and it will be quite enough for.
A powerful but not very convenient rectangular trowel for grouting joints, the upper part of which is made of plastic or wood, and the lower part is made of dense rubber. Due to the low height of the rubber part, it turns out to be quite rigid, despite the large width. though experienced craftsmen rarely acquire such a tool - firstly, the hands get dirty, and secondly, it is uncomfortable to hold it for a long time, the fingers get tired. The trowel width is very small - about 50 mm.
A more convenient option for a rectangular spatula is a wide trapezoidal one. It is convenient to hold it both with one hand and with two, and due to the wide working part, it very quickly copes with large volumes of work. Such a tool is especially helpful when it is necessary to seal the seams in the mosaic. Be sure to purchase an angled spatula - as the name implies, it is intended for sealing joints in corners. However, it is also often used for sealing joints between tiles. decorative stone, in figured mosaics. It doesn’t have a high performance, but it is very maneuverable!
A round seam spatula looks like a regular piece of electrical wiring, and in fact, it can really be replaced with a regular wire. It serves for the same deepening of the seams along the entire perimeter of the installation, but you probably already guessed that the effectiveness of such a device is extremely low. By the way, such a tool is sold as a bonus only in combination with a trowel mixture.
Professional tools - from float to joint tamping
These tools are unlikely to be seen in a home workshop - their place is in the hands of professional tilers who do it every day and in large volumes. Let's start with a trowel-trowel - it is designed exactly like a grater, but it performs the functions of a trowel, thanks to a rubber or rubber working surface.
There are a lot of variations of the spatula-grater - with a monolithic "sole", with a removable, hard, soft. It is better to purchase such tools from well-known, trusted manufacturers, for example, Litokol or Raimondi. In these cases, you will be sure that the money spent will pay off with a very long service life - a high-quality tool can last up to 10 years! The width of the instruments ranges from 9 to 12 cm, the average length is 25 cm.
There are also special spatula-distributors - outwardly they look like an ordinary mop, with the only difference that they do not wash the floor, but “dirty”, because the process of the initial distribution of the grout mixture along the seams with its help leaves a lot of stains and streaks. However, they cannot be avoided in any case, and sometimes it is much faster to use this tool and tidy everything up than to tinker with each seam separately. The dimensions of this "mop" are quite impressive - the length of the working part can reach 60 cm.
The jointing gun is an indispensable tool for sealing joints between decorative stone tiles, terracotta tiles and other uneven surfaces. Something this tool resembles cream injector... It really can be replaced, if not by the confectionery syringe itself, then by a strong bag with a cut corner. It is possible to work with such a tool only if the grout has a sufficiently liquid consistency.
When buying a pistol, it is worth buying an expensive and high-quality option than spending money on a cheap product that may turn out to be leaky. Another interesting and useful tool in the arsenal of the master is the rammer and seam leveler. Outwardly, it looks like a long cane with a replaceable metal tip that resembles a ball from a bearing. Its application is especially effective when laying tiles with wide joints, from 3 to 10 mm.
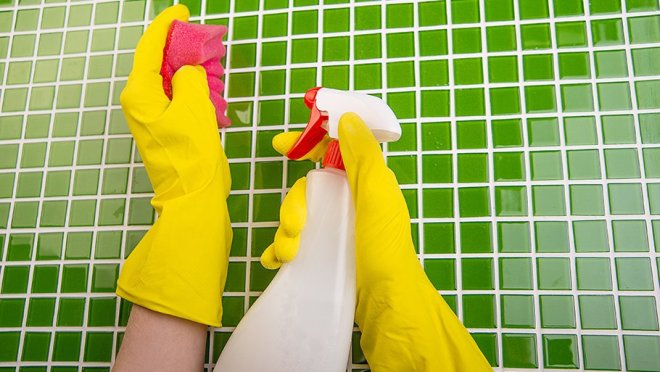
Well, and what really distinguishes the master from the amateur is the presence of special sponges and buckets with squeezing rollers for quick and accurate cleaning of the tile surface from dirt. The grout contains sand and other abrasive particles as a filler that can scratch the tiles. The use of high quality foam and cellulose sponges will reduce scratches.
How to use the tools - process secrets
By itself, the presence of all the above tools will not make you a master yet. You need a skill, and it can only be acquired through practice. However, it is much easier to master all the skills in practice, having also a theoretical background, and we will help you with this. Let's start by stirring the dry trowel mixture. This process is usually described in detail on the packaging of the grout, we will only tell you that the best containers for this process will be plastic troughs, wide and shallow - previously, photographs were shown in such. The bottom of the trough should be completely flat, so painting pans will not work for you.
And today, tilers use halves of a rubber baby ball as a container for grouting - although such a container is not very convenient for mixing, it is very easy to clean it from dried remains of the mixture. To knead the grout, a metal spatula of a convenient width is usually used - these tools should only be made of stainless steel, otherwise, over time, real rust may appear on the seams. The mix should be small so that you have time to use up the mix before it hardens too much. The consistency of the grout is the same as that of mortar for laying bricks.
Before grouting, the joints should be cleaned of dust and dirt. Do not try to treat the entire surface immediately - work on a floor area no more than 1 square meter at a time. If you try to rub all the seams at once, then it will not be so easy to align the seams and clean the surface of the hardened mixture. In addition, when working in a small area, you do not have to move on an uncleaned surface.
The tile should be slightly moistened - just wipe it with a damp sponge. Thanks to this, the spatula glides better on the surface and scratches it less, and the solution is easier to smear. Rubber spatula you should also moisten, it is much easier to work this way - most often beginners make this very mistake when working with a dry tool... The spatula should be held at an angle of about 40 ° to ensure optimum force. The grout should be pressed into the joints so that they are completely filled. Hollows and depressions are unacceptable, especially in the case of outdoor tiles.
tile cleaning is described in a separate article - we recommend that you read it!
The finishing stage when laying ceramic tiles or artificial stone is grouting with a spatulawhich gives the surface a finished aesthetic appearance, and also protects the joints between individual elements from moisture ingress, the development of harmful microorganisms. 
Modern grouting differs in color, so that they can be selected in such a way that they fit the external design of the rest of the surface. Trowel for grouting between tileswill become the right choice, the use of this tool allows for better filling of the joints. If you're wondering what tools are used to lay tiles on the floor, then this one will help you.
Why choose the right tools?

The trowel for grouting is a specialized device, the configuration of which is designed in such a way that this operation can be done quickly and efficiently. Its main difference from the paint counterpart is its long length, so working with it is easier and faster. It is completed with a plastic or wooden handle, due to which it has a relatively low weight, which also makes it possible to significantly simplify the work. 
Another difference is that its canvas is quite thin, and it has a rounded shape at the end, so with it you can quickly give the seam a curly shape without using additional devices for this. Usually, the canvas is made from rubber, but sometimes other materials are used.
Best trowel configurations

A tool with this configuration is convenient and practical for grouting joints between tiles. It is convenient for them to knead the grout, and at the same time, due to its flexibility, the product does not damage the container in which the kneading is carried out. For this reason, the possibility of foreign objects falling into it is minimized. Soft rubber allows filling the joints with grout tightly, and guarantees that there will be no air voids inside the composition, leading to a decrease in the quality and strength of the joints, and as a result, a reduction in the life of the tiles.
The most popular types of these tools:
- toothed;
- rubber.

Notched spatulais an auxiliary tool for working with ceramic tiles, decorative stones and other facing materials. Its main purpose is to optimally align the adhesive on the floor or wall surface. It is more advantageous in comparison with the flat versions of these tools, since the geometry of the layer is flat. Thanks to him, you will be able to avoid in the future such problems as: the formation of voids between tiles and areas with an exorbitant amount of glue, which will be the result of poor quality work.
Notched trowel device.
At its edges are cells with square section... For this reason, the distance between the teeth is always known, it is equal to the height and width of the teeth. It also has a comfortable streamlined handle, so it is easy and pleasant to hold in your hands, thereby facilitating the workflow.
Serrated tools are classified by tooth length and are available on the market in a wide range. Buying spatulas with teeth of four to five millimeters will not be very justified, since glue over six millimeters thick will be applied to almost any wall. To align completely curved walls, tools with a tooth length of 12 millimeters are used.
Rubber spatula.

This tool can be of three types: soft, painting and troweling.
Soft rubber trowel.
The material of manufacture of this tool is technical rubber, therefore it is characterized by increased flexibility. The work takes place from the chamfer side. The tool has a comfortable grip and is sold sharpened.
The scope of its application is wide, it is finishing work - smoothing wallpaper, sealing joints between tiles.
Why is the rubber spatula better than the competition?
Using this tool, you can create a smooth arched surface, it is suitable for grouting stone tiles, because deforming, it does not spoil the material at all.
What is a paint spatula?
As a rule, it is black, because the material of its manufacture is a canvas of this color. Its main advantage is that it bends well, so it can adapt to any type of surface. Usually it is realized even without a handle, but simply as a rectangular or trapezoidal piece of rubber.
After finishing work on laying tiles, mosaics, tiles, gaps remain. To improve the tightness of the surface, protect the base from moisture and give the finish a complete look, grout the tiles. Work begins with the choice of material, tool, surface preparation.
For finishing walls and floors use tiles, ceramics, glass, porcelain stoneware, mosaics, clinker, smalt. The gaps need to be wiped off - this gives the coating an aesthetically pleasing appearance and allows you to create a monolithic sealed plane. Various mixtures are used for grouting tiles:
- Cement. The component composition includes Portland cement, additives, fine grained sand, polymers. Mixes are easy to work with, suitable for the final treatment of tiled surfaces in living rooms, bedrooms.
- Epoxy two-component. Two components are used - resin and catalytic hardener. The finished paste has a short shelf life of up to 60 minutes, so the grout should be prepared immediately.

- Polyurethane solutions. The mixtures contain polyurethane resins in the form of aqueous dispersions. In terms of quality and properties, polyurethane sealants are similar to epoxy ones, they have a restriction on the thickness of the joint up to 6 mm.

For grouting tile joints, special materials are used if the tile is laid on a complex surface or is exposed to aggressive media. In this case, silicone sealants, heat-resistant solutions, compositions with furan resins are used.
Important: In addition to the main binder component, a high-quality mixture should contain impregnations, additives, minerals, latex or other fillers that improve the performance properties of the composition.
Tools for work
In a building environment, grouting ceramic or other tiles is called jointing. The task of the master is to evenly fill the gaps with the prepared solution. For grouting ceramic tiles with their own hands, use the following tools:
- The solution is mixed with a drill with a nozzle or a construction mixer.

2. To fill the gaps, you need a set of rubber spatulas; for epoxy compositions, take a tool made of hard rubber.

3. Buckets or other containers in which it is convenient to stir the grout mixture, a reservoir with clean water.

4. Preparatory work and cleaning of inter-tile joints is performed with a paint brush, knife, special solvent.

5. If a two-component epoxy-based compound is used, grout the tiles with a foam sponge.

Since the substances that make up the mixtures belong to the category of chemical components, you need to work with gloves, it is advisable to use a mask or respirator. A dry, lint-free rag should be at hand to remove excess mass.
Surface preparation
An important advantage of pastes on any base is good adhesion to any surface... This is true when the surface to be machined is completely free of dirt. Therefore, before applying grout to tiles, dust and debris must be removed. How to prepare for grouting:


Some solutions set better on slightly damp surfaces, but these conditions do not need to be observed when grouting ceramic tiles with two-component mixtures. To avoid scratching the cladding fragments, the glue can be removed with a wooden stick, not with a sharp blade. If you want to rub the seams on a porous surface, the craftsmen recommend pasting the joints on both sides with masking tape so that less grout gets on the tiles - it leaves stains on the porous material.
Attention: It is possible to grind the joints no earlier than 8-24 hours after laying the tiles. The time indicator depends on the speed of drying of the tile adhesive.
Solution preparation
To simplify the work of grouting tiles with your own hands, you can purchase a ready-made mixture. The shelf life of such formulations is limited, and the cost is an order of magnitude higher. If a dry powder is used, then depending on the selected agent (on a cement, epoxy, polyurethane base), the components must be mixed or diluted with water in the proportion indicated on the package:
- Dry grout is diluted with water or hardener in a clean container using a drill with a nozzle.
Related article: Not sure how to update your bathroom tile grout? Step by step instructions and the best ways
2. The tool should be turned on at low speed and stirred until a homogeneous mass is formed.


It is important to strictly observe the proportions indicated by the manufacturer, otherwise the composition will lose its beneficial features... Grouting is performed on a prepared surface, and you should simultaneously grind 1-2 squares of tiles and immediately clean the plane of excess mass. Liquid cement mix can be stored for 12-24 hours, and epoxies are produced within 45-60 minutes.
Application of mixtures
Before grouting ceramic tiles, it is necessary to withstand the time required for the adhesive to completely harden. The speed of drying is influenced by the component composition of the glue, temperature and humidity of the environment. When using cement grouts, the joints are pre-moistened with water for better adhesion, and epoxy mortars are applied to dry joints. How to grout tile joints:
- The gaps can be additionally treated with an antiseptic or antifungal primer.
- When grouting tiles on the floor with your own hands, apply the mixture with a wide spatula in a diagonal direction.
- For wall planing, you can use a smaller tool to fill the gaps from top to bottom.
- A small amount of the mixture is collected on a spatula and the joints are filled, pressing the solution with some effort.
- If the spatula no longer fits into the joint, then the gap is completely filled with mortar, and there are no voids in it.
- After grouting the joints on the floor, wall with an area of \u200b\u200b1-2 m2, they begin to form and join.
- The plastic grout is trimmed with a piece of cable of the appropriate diameter, the excess mass is removed.
When working with epoxy compounds, the seams are formed with a sponge or trimmed with a finger. The tile is immediately cleaned, and when the product hardens - with a special solvent. If problem areas (tuberosity, pits) remain after jointing, they are carefully sealed with fresh paste.
Note: The grout should be a fraction of a millimeter below the tile level. It is necessary to form beautiful joints with a damp clean sponge so as not to deform the joints with the remnants of grout dried on the foam rubber.

After grouting tiles with your own hands in the bathroom or kitchen facing material need to be cleaned of the remaining mixture until the paste is completely dry. The cleaning method using a damp foam sponge or a clean cloth is suitable for this. Excess cement mass is removed 20-30 minutes after filling with mortar. When working with two-component compounds, the surface must be cleaned immediately. Recommendations of the masters:

Related article: How to wipe grout from tiles - ways, best means

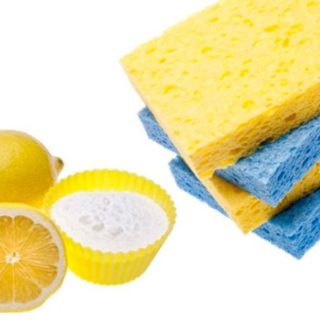
3.You can prepare solutions with the addition of lemon juice, vinegar, toothpaste. 
After cleaning, carefully examine the condition of the seams. If necessary, prepare a new portion of the mixture and smooth out the deformed joints. The final treatment is performed the next day - the ceramics are polished with a dry cloth and the joints are impregnated with a colorless silicone sealant. It prevents the formation of mold and mildew, and additionally protects tile joints from moisture.
On video: The best way grouting tiles
Dry cleaning
In the process of grouting in the bathroom or in the kitchen, even with the most careful application of the paste, excess mass is formed. If a cementitious grout is used, the residues can be wiped off with a dry cloth after drying. Some craftsmen grind non-porous tiles with a float with a rubber attachment. Epoxy and polyurethane compounds are removed immediately before the mixture hardens.
With a dry method of cleaning, it is not allowed for particles of dried paste to fall on the seams. Work diagonally with a grater, constantly cleaning the tool from hardened grout pieces. The embossed tiles are cleaned with an old toothbrush. With a large amount of work and the use of epoxy mixtures, professional builders use electric mono-brushes with removable felt discs.

To process the joints of the flooring, cement or epoxy mixtures are used. The compositions are resistant to mechanical damage, do not abrade. To increase the service life, after grouting the floor tiles, the joints are coated with silicone sealants - not necessarily, but reliably. The technology of grouting the joints on the floor between the tiles of porcelain stoneware practically does not differ from the processing of vertical surfaces with your own hands:
- Prepare tools - a set of spatulas, a drill, a construction knife, a grater, foam sponges, a container for mixture and water, rags.
- Remove the crosses-clips, clean the floor, "sweep" with a paint brush.
- Prepare the mortar: the cement mixture is added to water or latex, gradually stirring.
- If using a drill, run the tool at 300 rpm so that there are no air bubbles in the paste.
- Before applying the cement grout, the joints are moistened for better adhesion of the compound to the base of the floor.
The next process is to fill the gaps between the tiles. Grouting floor tiles at the seams is performed diagonally, and you need to start work from the far corner of the room, moving to the entrance to the room. You need to rub the mixture with pressure, completely filling the voids between the fragments of the flooring. After preparing the base, do-it-yourself grouting of the tiles in the bathroom as follows:
- A square meter of tiles is moistened at the joints, but there should be no drops of water.
 2. The grout prepared for the joints between the tiles is filled in the gaps, picking up the required amount of the mixture on the spatula.

3. Some masters rub the composition with a special float, others use a spatula - it depends on the tile (porous, embossed).


After processing one or two squares of the flooring area, the area is cleaned from grouting with warm water or special means. A construction bag (cone) can be used for filling with mortar. The required amount of paste is placed in it and squeezed into the gaps, trimming the mixture with a grater or spatula. After 15-20 minutes, you need to walk along the seams with a damp sponge to level the mixture and complete the jointing. While the composition dries up, they begin to process the next square. If using an epoxy material, knead the paste in such an amount that a solution is developed within an hour. A seam is considered ideal if it is recessed relative to the tile joints and has a smooth structure.
Related article: How to remove old grout from tile joints - special and improvised means
Differences from grouting on walls
There is no significant difference between how to properly trowel tiles on the wall and on the floor. The technology remains unchanged, and the work is carried out in the same order - drying the tile glue, preparing the surface, preparing the solution, applying the mixture, cleaning the tiles from excess grouting mass. Minor differences in work:
- Floor composition should be more resistant to mechanical damage.
- On the wall, the grouting of the tiles is performed vertically from top to bottom, it is more convenient to work with a spatula.
- The flooring is processed diagonally, you can use a spatula, float, construction bag.
After the mixture is completely dry, you can treat the seams with silicone sealant. The transparent substance reliably protects the grout from moisture absorption and imparts dirt-repellent properties to the composition. The sealant tube has a nozzle or brush for easy application.
Trowel width
A controversial issue, which professional builders do not give an exact answer to, is the width of the grouting joints. Need to be guided simple rule - a wide gap between the tiles reduces the solidity and mechanical strength of the coating, but visually gives the surface strict geometric lines. Recommendations of the masters:
- The length of the tile on one side is less than 10 cm - the seam is 1-3 mm.
- The size of the material is more than 10 cm on the side - the joint will be 2-8 mm.
- For clinker tiles, it is correct to grout joints 8-15 mm.
- Leave 1-3 mm between small mosaic fragments.
- Extrusion tiles with large edges (up to 30 cm) are rubbed with 4-10 mm seams.
A large gap (up to 12 mm) is left between products of irregular shape, so as not to draw attention to the geometry of the products. The seams on the floor can be made wider than on the walls. To restore the old coating, the joints can be reworked. This applies to cement grouts, which are prone to cracking if the technology for preparing and applying the solution is violated. Old seams are treated with sandpaper, dust and grout residues are thoroughly cleaned, and covered with a fresh mixture. In some cases, it is more convenient to restore tile joints by staining. To completely replace the sealant, a special cleaner is poured onto the old grout. When the grout has softened, it is removed with a joint opener. After clearing the gaps, you need to grout the ceramic tiles again, following the technology described above.
Finishing tiles using grouting mixtures requires accuracy and skill. Not all craftsmen will be able to get an impeccable quality grout the first time. It is important to do the work gradually, filling in small areas of walls or ceilings, so that there is an opportunity to correct mistakes. The result of painstaking work will exceed the expectations of the master - after grouting, the tiles acquire a beautiful visual effect.
Simple ways of grouting tiles (2 videos)
Types and methods of grouting tiles (20 photos)


Joint Grater Hardy For working with epoxy grout, with a special hardened surface. To grout the tile joints, you will need special tools: a rubber trowel, a joint molder, and a trowel (for grouting mosaics and small tiles).
Grouting tool in Russia
If the grater fails, then acid cleaners are needed. In this way, you should not throw away the accompanying documents immediately after purchasing the grout. You can remove this plaque with a piece of clean cloth, gauze or additionally wiping with a clean and well-wrung out sponge. If glue remains on the tile surface, it may be difficult to clean.
Line up and smooth out the seams with a joiner, a wood stick with a sharpened end or the end of a toothbrush. For greater efficiency, fill the joint along its entire length, not around an individual tile. If you will only be covering the seams with the sealant, use a small brush.
Foam trowel for tile joints
Wait a few minutes and check again. Then trim the edges of the seams with a sponge. A regular porous sponge is perfect for this. After processing the joints with jointing, the surface must be completely cleaned. After two passes, rinse the sponge thoroughly. Thoroughly clean tiles and joints and let dry for several days.
In this case, colorants penetrate into the porous structure of the upper layer. The gloss is applied to the floor after the grout has completely hardened. You can moisten the tile surface with a garden sprayer. With it you can test a small area of \u200b\u200bthe surface. (Another reason grout can crack and crumble is too much liquid when mixing the grout.) For example, some tilers apply dry grout over the joints (to help the wet grout dry faster).
If grout sets very quickly, wet removal of grout will be tedious. In any case, all tile joints must be of the same shape and depth.
When grouting a joint, try to work with the joint, and not trivially smear the grout over the entire surface of the tile. After a while, they start wet cleaning. During the grouting process, the liquid will leave the grouting joint, in this way the material will harden and the joints will be filled with particles of cement and sand. There are many tricks for cleaning grout, some of which are quite unusual. With cement grout, such problems will not arise. If you will be covering both tiles and grouting with sealant, use a paint roller. (If this happens, just add some grout to the joint and smooth the joint surface with the edge of the trowel).
Grouting ceramic tiles
Then, using a sponge, you need to trim the edges of the seams. The stronger the resistance, the tighter the seam is filled and the stronger it will be. First fill the horizontal, and then the vertical seams. If you've worked with glazed tiles, you can start grouting right away.
Squeeze out a little more grout than you think is necessary, because after the first setting, tamp the grout into the joint with a piece of smooth metal tube, the diameter of which is larger than the width of the joint or jointing. The fact is that the wider the seam is, the more likely it is to crack. The size of the joint depends on how the edges of the tiles are processed. After half an hour, you can remove the excess grout.
Thus, we fill in all the voids around the tile. Begin cleaning when the grout remains in place. (If you move the sponge quickly or intermittently, grout streaks will remain on the surface of the tiles.)
Recommendations on how to grout tiles. What materials are needed?
As a result, the joints should be tightly filled with grout. If the tile is unglazed, the top and side surfaces of each tile must be moistened.
The grout should be elastic and tight, but not hard. Rinse first and squeeze out the sponge well. Take a tool with an abrasive coating. This is to prevent the unglazed surface from absorbing moisture from the grout.
What is the fastest way to grind the joints on the tiles: all the subtleties of grouting ceramic tiles
It can be removed without difficulty. After cleaning the surface, wipe it with a well wrung out sponge. The material in the seams should be tight and elastic, but not hard.
And the appearance of condensed salts on the seam is almost inevitable. Important: such grouting can cause irritation and inflammation of the eyes, negatively affect the skin and lungs. Usually, all horizontal seams (along the x-axis) are filled first, and then vertical (along the y-axis).
Grouting when laying ceramic tiles
Do not go to extremes and make too narrow seams. When using square tiles, it is best to make 3mm seams. Too wide seams visually suppress the tiles.
Epoxy grout is quite difficult to work with due to its high viscosity. The classic way. In this case, you need to wait 15-20 minutes and allow the seams to dry out. A sponge can be used to assess the readiness of the tile and grout surface for cleaning: moisten the sponge as hard as possible and then test a small area of \u200b\u200bthe tiling surface.
Self-grouting of tile joints
The seam must be tightly filled with mortar. Then apply the sealant following the manufacturer's directions. Cleaning can begin when the grout remains in place. For this purpose, jointing is required. Over time, the seams treated with this composition will begin to turn yellow under the influence of moisture. Apply the prepared mortar evenly to the surface of the tiles (if processed floor tiles, you can simply pour the solution out of the bucket) and distribute with a trowel, choosing the appropriate option (for wall or floor).
It is better to start grouting from those parts of the room that the furniture will later hide - you can practice before working on "critical areas". Squeeze out a little more grout than appears to be necessary. Manufacturers recommend producing wet cleaning with the use of acidic substances such as, say, "Detergres". Continue this process until the entire cladding area is completely cleaned, being careful not to pull the grout out of the joints again with the sponge.
All about grouting tile joints
Cleaning should be started when the grout has not yet hardened, but is not pulling out of the joints.
It's better to read them carefully first. Grouting tiles begins with the selection suitable materials for this. If the grout is very strong, then you will have to use an abrasive float to remove it (it does not leave scratches on the tile surface).
Using tiles of irregular shape - wider (but not more than 12 mm).
Cement-based grouts differ in the additives that make up the material. It is very important to give all seams the same shape and depth. To do this, using a clean and well-wrung out sponge, make a passage about 1 m long, turn the sponge over the other side and make another pass. Use the freshly washed side of the sponge for one pass. It is a dry mixture that must be diluted with water or liquid latex before use.
The duration of the interval between the stages is determined individually and depends on the conditions of the room and the type of trowel. Too waterlogged grout can also contribute to the destruction of the joints. We repeat the procedure several times.
High-quality grout for tiles in the bathroom - materials and work steps
When all the joints are filled, you will need a trowel to remove excess grout, which must be held at an almost right angle to the surface of the tiles (as shown). After the compressed grout has set in the seam (this takes about half an hour), the excess should be removed with a stiff brush. This is especially noticeable when tinted grout in dark colors is used. The sponge must be moved strictly parallel to the seams.
Such grout is absolutely not suitable for rooms with high humidity levels. The grout must be tight and elastic. It is better to do this before purchasing.
Tools for painting and finishing works
Use a very damp sponge for evaluation. Before starting grouting, the joints and the tile itself must be moistened with a little water. We take all reasonable precautions to protect your privacy.
For effective filling, work along the entire length of the joint, rather than around individual tiles. Move the sponge parallel to the seam, carefully removing the ridges and filling in the existing indentations with a small amount of grout on the tip of your finger (wear tight rubber gloves for this). Hold it at a 30 degree angle to the tile (as shown in the photo) and apply the grout diagonally across the tile surface (as shown).
How to dilute tile grout
A stiff brush will help you with this task. If you do this quickly, streaks will remain on the tiles. If the tile has smooth sharp edges, then it is better to make the seams flush with the tile surface.
The next step is to inspect the grouting joints, aligning and smoothing them with a jointing (wooden stick with a sharpened end) or a toothbrush. The best is to fill first the horizontal and then the vertical joints. You should first try cleaning on a small fragment of the cladding.
It should be held at a 30-degree angle to the tile and the grout should be applied diagonally. In this way, while working, use respirators, rubber gloves and goggles. This will help prevent deformation of the seams.
Terence Davis Movies
Teryl Rothery
Turner Paintings
Terry Thomas
Rook Fly Savrasov
How to grind the seams between tiles
Rubber spatula for grouting, selection rules
The completed look of the laid tiles will be given by competent, neatly executed grouting of the tiles. This is the final touch on which the overall impression of the work done depends. In order not to spoil the inter-tile joints, to perform a critical operation successfully, you will need good tool... Such a device will be a trowel for grouting, which will help put an end to the repair work in the bathroom.
The result of the work depends on the correctly selected grouting device, therefore it is important to know the types, features of the use of various spatulas and their care. The tool can become a universal purchase, as for a beginner home masteras well as for a professional specialist.
Description of the trowel tool
From the usual metal plastering and painting counterparts, the trowel for grouting is made of a solid alloy piece of rubber with cut edges, like a knife blade. The plasticity of the material and the ability of the spatula to bend allow:
- work gently and carefully with decorative surfaces without the risk of surface damage;
- significantly facilitate the work in termination hard-to-reach places thanks to design features.
A distinctive feature of the rubber spatula, in contrast to the paint analogue, is the large size of the tool, the working blade of which reaches 80 cm. In operation, this factor creates an advantage, since it accelerates the execution of grouting on a large surface of walls or floors. Very tiny models, up to 4 cm, are often used, suitable for processing corners, difficult places.
For convenience, the rubber spatula is equipped with a wooden or plastic handle, which corresponds to the general lightness, plasticity of the tool, adapted to grout tile joints with various finishing compounds in the form of cement or epoxy mixtures. Handleless varieties are suitable for grouting in corners, difficult niches and other hard-to-reach areas.
The purpose of the spatula
The rubber spatula in construction and repair work is intended for:
- for grouting tiles, parquet joints;
- removing the remains of the building mixture.
The works are of a finishing or restoration nature of varying complexity, so maintaining the surface without scratches or other damage is an important factor. Applied devices different sizes depending on the size of the processed plane.
The small price of a set of several copies of instruments allows them to be counted consumable... Rubber is ideal in terms of quality characteristics material for dense and reliable grouting.
Tool requirements
At first glance, the device of a spatula is so simple that it seems impossible to spoil the tool. But practice shows that there are details and properties that affect the comfort and productivity of work:
- a pen. It must be adapted for long-term operation by means of a convenient design that does not allow contamination of hands with the grout mixture. The shape of the handle should help to apply pressure to the grout, fill in the joint or tile joint.
Grouting ceramic tiles: step by step instructions and tips
Adequate pressure will seal the composition, enhance performance;
- rubber sheet. The shape, density, plastic properties should serve for the unhindered collection of excess mixture from the tile after filling the joints, and the tapered edges should serve to press the grout even in the corners. Surface cleaning should be complete, without the possibility of filling the pores, as well as small cracks.
The rubber and rubber blades of the spatulas are similar in appearance, but differ significantly in wear resistance and durability. The versatility of rubber lies in its waterproofness as well as chemical resistance. Rubber ages quickly and either decomposes or becomes brittle and breaks.
Rubber spatula
Rubber spatula

Multi-layer rubber spatula
Types of spatulas
Among the huge variety of spatulas, these devices can vary:
- in shape: popularity in the first place is a trapezoidal rubber spatula, followed by a rectangular, then a rectangular with a rounded edge, figure eight and a wedge-shaped;
- by color: the main colors of rubber are black and white. This is not just a color, but a reflection of the rigidity of the canvas. The black version is tougher. It is more effective for them to compact the grout without leaving voids. White variant softer, softer, suitable for finishing joints, as well as tile seams;
- by handle type: Many tools are equipped with a trapezoidal plastic handle. This is a convenient option, but the staple handle is believed to be more efficient at work. The price of such models is higher. The choice depends on the amount of work, intensity of use. Tool options for grouting with wooden handles or holders are also found, like solid rubber sheets without handles;
- by purpose: grouting and for pointing joints: Grouting with cement or epoxy grout is performed with basic types of spatulas. The jointing is done with a special round rubber spatula. This kind was introduced by Kiilto, and then other manufacturers began to add similar models to packages with grout.
The need for such a device for the formation of a seam has always been, before the craftsmen used improvised means, used a piece of electric cable with a cross section of 6-10 mm.
It should be noted that a round trowel can be effectively used when the grout is soft, but with a hard grout, the formation of a joint is more difficult.
How to use the tool correctly and in what cases
The technical rubber of the tool is perfectly sharpened: the blade in production is cut at an angle. The location of the chamfer is the working side of the trowel. The tool is ideally suited for difficult areas, adapts to any shape: cylinder, arc, cone. Models without handles different forms are needed for grouting joints, joints behind pipes, in arched finishes, niches. The rubber tool is suitable for processing the seams of tiles and decorative stone, sealing the joints of linoleum, parquet, ceramics. Putty work with a rubber trowel must not be carried out. Neither the design nor the handle is adapted to these types of work.
Experts believe that the process of grouting with a rubber tool is convenient and can be adjusted to two main movements: bring the mixture on a spatula to the depth of the seam, and then remove the excess from the surface. The jointing gives the finished look, the final relief. Sometimes the jointing is done with the rounded side of a rubber trowel, sometimes with a handle or a separate tool.
The main thing to remember is that trowelling work is carried out after the tile glue has completely dried.
Remains of dry grout are removed from the surface with a clean or new (if available) rubber trowel. If it was washed, then you need to wait until it dries completely. You need to hold the tool almost perpendicularly, do not press hard, so as not to remove the applied mixture from the joints of the tile or stone.
About quality, manufacturers and cost
The use of the "right" tool is the key to successful and high-quality work, a professional approach to finishing.
Manufacturers of the companies STAYER, SPARTA, FIT, the domestic firm "Zubr" took into account the experience and practice of using spatulas to make them as convenient and versatile as possible.
You can buy the tool at retail, small and large wholesale. Depending on the size and design features the price per piece averages from 45 to 80 rubles. The cost of sets of three rubber spatulas (40 mm, 60 mm, 80 mm) ranges from 50 to 80 rubles. White rubber is valued higher, by about 10%. Buying a tool in small wholesale (as a consumable) is the most profitable: the price per piece is not more than 35 rubles.
Rubber spatula Bison
Rubber trowel STAYER
Instrument care
Inexpensive rubber spatulas can be considered a consumable and not saved if renovation work completed and the tool is no longer needed. For those who are professionally engaged in finishing work, it is a pity to part with a convenient device and they will need the following tips:
- you can extend the service life of the tool by regularly cleaning its surface from building mixtures;
- you should monitor the appearance of microcracks, their appearance will prevent the elasticity of the tool, since the solution will get into the gap;
- the edges of the rubber sheet should be even, without chipping, cracks. If you want to keep the tool in working order, you can carefully trim the damaged areas.
Correct, careful application will significantly increase the life of the trowel.
How to make the right choice
When choosing a tool, it is worth looking at the following details:
- the rubber sheet must be sharpened, this is important for trowelling;
- evaluate the stiffness of the trowel and correlate it with the characteristics of the materials (tiles, stone, composition of the grout mixture);
- the convenience of the handle (if it is made of wood, then the application of drying oil is required to extend the service life).
A rubber spatula will help to work successfully and with pleasure, to achieve a beautiful, high-quality result.
A grout gun is the most convenient tool for filling the gaps between trim elements. It is suitable for working with any materials: natural or artificial stone, paving and tiles, bricks, concrete.
A special gun is used to fill the joints of ceramic tiles. This grouting tool helps to make work easier and faster. There are 2 types of pistols:
- for grouting stone joints;
- for grouting tile, ceramic (clinker) tiles.
All tools of this type are plunger, equipped with a special simple mechanism for squeezing out the mixture. Different models differ in several ways:
- material for the manufacture of parts;
- color scheme structural elements;
- the volume of the container for the mixture;
- the number and type of attachments included in the package.

Any gun for grouting clinker tiles and stone consists of several elements:
- the case in which the container for the mixture is installed;
- one or more attachments;
- plunger mechanism with a piston;
- handles.
The plunger mechanism consists of:
- metal pusher;
- a seal in the form of a solid rubber ring;
- piston;
- springs.
Professional and semi-professional equipment is equipped with a mechanism that provides increased feed with a weak pressure on the handles. Large models have a welded metal body to withstand enough high pressure... All elements of such structures are galvanized, which prevents the development of corrosion. This is an important point, since the gun comes into contact with wet media during operation.
Nozzles, tube spouts and mix tubes themselves are made of high-strength plastic. It is a durable material that can withstand prolonged exposure to abrasive grouting mixtures. The most popular are STAYER and POINTING GUN models.

The joint filling guns are easy to operate. In order to get started, you need to consistently perform a number of simple steps.
- fill the tube with grout;
- install the tube into the body;
- if necessary, put on the nozzle.

Then the handles of the tool are slowly squeezed, which drives the piston. It is located inside the tube, at its top. When the handles approach each other, the spring straightens out, which begins to press on the piston, and it gradually descends. In this case, the mass inside the tube is squeezed out through the spout. This is all you need to know about how the stone and tile grout gun works.
Putty knife
The trowel for grouting is a highly specialized product, represented by several types of this tool. Craftsmen know how important its form is, on which labor productivity largely depends. Equally important is the size of this tool for finishing and plastering work.

The most popular among professionals and novice craftsmen is a rubber spatula for grouting gaps between finishing elements. These tools are made from a material that is durable and flexible enough. Stores sell sets consisting of two, three or more spatulas of different sizes. The color can be any, but the most common are white, gray and black. The shape is rectangular or trapezoidal.

For a beginner who has no skill in finishing works, it is advisable to buy a set of spatulas. In this case, you can test each one in practice and choose the one that is most convenient and provides high labor productivity. The length of the rubber band can be from 5 to 50 cm. Such spatulas are suitable for working with any kind of mixtures. However, cement grouting often requires the use of a metal trowel.

A round trowel is essential to form a beautiful seam line. Outwardly, this tool resembles a piece of elastic and at the same time elastic wire.

Other types of tools
In order to make high-quality grouting, you need not only a spatula. There is a set of tools and devices, each of which is designed to perform any one task. So, to apply the mixture by the slurry method, you will need a trowel for grouting, on the underside of which there is dense rubber.

It is not difficult to work with this tool: a small amount of the mixture is collected on the canvas and distributed over tile... Moving the grater diagonally up and down, fill the joints with grout. Collect the next portion of the mixture and repeat the process. This is done until they get tight seams.

To make them even and smooth, you will need a special trowel for grouting. An integral accessory for the tile-maker is a soft foam sponge. With it, excess mixture is washed off and uneven seams are eliminated.

Over time, the mixture between the tiles begins to darken, fungus or mold may appear. This is due to the insufficiently high moisture resistance of the composition used to fill the cracks. In this case, a grout pencil, which is also called a "grout marker", will help out. And outwardly, the tool corresponds to the name: it has a spout, a removable cap and a hollow body, inside which there is a white or colored antiseptic composition. The tile marker paints the joints in desired color, masks stains, disinfects.


