What do you need to install laminate flooring? We figure out how to lay a laminate yourself. We prepare the necessary materials and tools
Laminate floors are considered one of the most practical, cheap, beautiful and easy to install. And this is true - you can cope with the task of laying them yourself, without even resorting to the help of specialists. The main thing is to have a desire and set aside time for work. But how to lay laminate? Let's analyze this issue in practice.
Laminate is a finishing floor covering, although it is considered easy to install and maintain, it is quite delicate. It is demanding on operating conditions, on the laying process. If you neglect some of the features and rules for working with it, then the coating will not last long.


In the photo - the process of laying the laminate
Therefore, before starting work, it is worthwhile to ensure the following conditions in the room:
- temperature range - 15-30 degrees above zero;
- air humidity - about 40-70%;
- smooth, cleared of debris and dried base;
- the room must be dry. If the humidity is high, then you will have to buy a more expensive moisture-resistant material;
- heaters and other heating devices cannot be switched on while working with laminate;
- windows should be closed to avoid drafts.

Attention! Laying laminate cannot be done on sagging floors, cracked screed. Otherwise, the material will not last long. The locks connecting the coating elements will break when the material deflects, due to which the integrity of the base will eventually be violated.

It is also important to remember that the laying of the laminate can only be done 2 days after the material was brought to the place of work. This time is necessary for him to "get used" to the new operating conditions - the laminate will gain the necessary humidity, adapt to the temperature, so that during operation it will not change its dimensions excessively. It reacts sharply to changes in conditions in the room - the effect of thermal expansion may appear.

It is necessary to leave the purchased laminate in the room where the installation of the floor is planned. This is necessary for acclimatization. This process takes about 48 hours.

Choosing a laminate, you should focus not only on the color, but also on the quality of the material. It is not worth buying low-grade products that are too thin or not suitable for the operating conditions. Such a coating will serve too little, quickly lose appearance. Laminate packages must be sealed, and before installation, it is important to inspect all boards for damage, chips. Damaged laying elements must not be used.

Prices for laminate "Tarkett"
tarkett laminate
The process of laying the material may differ depending on which type of lamella is used. For example, there are three installation methods, each using a different type of material: laminate with joints Click or lock, as well as the type of coating that is mounted using glue.


Installation of laminate flooring with a click-type lock
In the case of using the adhesive method, the laminate is glued to the rough base using special formulations. The technology resembles parquet laying. Also, glue can be applied to the joints between individual planks, which are then tightly joined to each other. But this method is now practically not used, with the exception of the design of rooms with very high traffic or high humidity. To disassemble, if necessary, the laminate will not work.
Installation of cover with type locks lock involves the connection of individual strips by the impact method. That is, during operation, the spike on one side of the lamella is driven into the groove on the other lamella. Such a coating is already losing popularity due to its shortcomings - the laboriousness of work and complex analysis if necessary.

Important! If material with this type of locks is used, then work should be done carefully - control the force of impact and use a special rubber or wooden block, placing it at the site of impact.

Now most often for laying this type of floor, a laminate with joints is used. Click. Here, docking occurs due to a spike and a groove, but of a special shape, in which the elements are securely joined and connected to each other without the use of shock technology. Docking of panels occurs at a certain angle, after which the lamella falls to the floor - at this moment, snapping occurs. This connection allows, if necessary, to easily disassemble the finish and re-lay it.


Ways of locating lamellas
Laminate can be installed different drawings, according to the schemes. Here you can choose any option that you like, the main thing at the same time is to follow the pattern. There are several of the most popular layout options. The material consumption will also depend on the choice of method.
Table. Laminate layout options.
| Layout option | Description |
|---|---|
| This is the most economical option, since the amount of scrap and waste here will be minimal. The first row is laid first, and the remaining trimmings of the last plank can be used to start the second. The main thing is that they are at least 30 cm long. The amount of waste in this case usually does not exceed 5% of the material. |
| If you look at the laminate laid in this way, then the joints will form a special pattern that resembles a chessboard. In this case, a new row always starts with a cut length so that the panel is offset 1/2 from the previously laid one. The amount of waste in this case increases to 15%. |
| Reminiscent of the classic version of laying, only performed at an angle of 45 degrees relative to the walls of the room. It looks impressive, but the amount of waste becomes even greater - more than 15%. |


![]()
To avoid possible mistakes during the creation of a drawing, it is better to design the entire work in advance by sketching a laying pattern on a piece of paper. And keep in mind that the minimum offset of the joints should be 20 cm relative to the lamellas laid in the previously mounted row.

Important! Regardless of which laminate is laid and according to which scheme, there should always be a compensation gap of about 1.5 cm between it and the wall. Otherwise, the material will deform. The area of 1 m 2 of laminate under the influence of humidity and temperature can increase by about 1.5 mm.
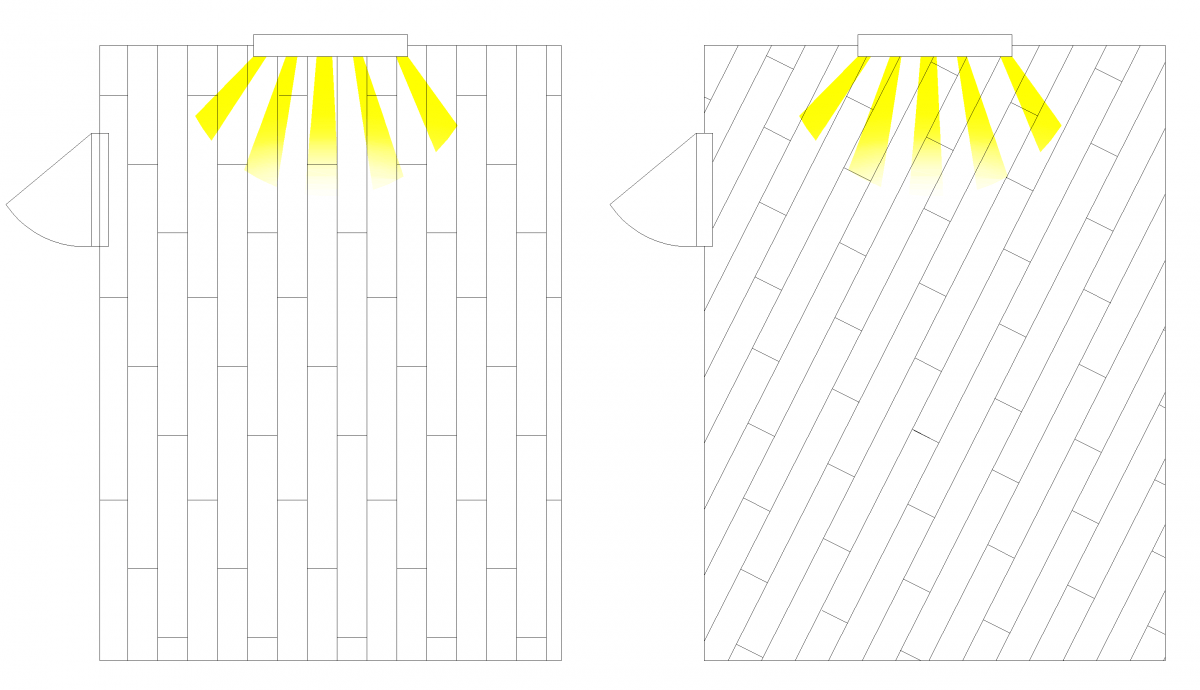
When installing a laminate floor, it is important to take light sources into account so that the gaps between the planks are less noticeable. That is, the laying is done so that they are perpendicular to the light source (for example, a window).

Also, pre-laying planning will make sure that the planks in the last row will have sufficient width (100 mm). If it turns out that they will be smaller, then it is better to narrow the first row a little.
Laminate flooring has become popular due to its beautiful appearance, low price and quick installation. In our article you can get acquainted with the technology of laying laminate flooring and tips for caring for it. Additionally, you can watch a video instruction on how to properly lay the laminate with your own hands.
Before laying laminate flooring, the following conditions must be met:
- Humidity in the room within 40–70%, temperature 15–30°С.
- Laminate flooring is possible only after 48 hours, after its storage in the room where laying will be carried out.
- Using a level, check the base for unevenness and drops.
- The base must be level and solid. It is impossible to lay on an old cracked screed, wooden floors with a creak.
- Cannot be installed as finish coat to electric ones. You can read our article on .
- When choosing a material, pay attention to the integrity of the packages.
- Laying instructions for laminate with locks do not allow it to be rigidly fixed to the floor. No screws, nails or glue! The coating must be floating, so it is important to leave gaps around the perimeter of the room 10–15 mm.
- Laminate floors are not suitable for wet areas. This material is afraid of water, so it is not suitable for the bathroom. There are some moisture resistant models that will be optimal for the hallway and kitchen. To prevent moisture from getting inside through the joints, treat the locks with a special sealant (ClickGuard, ClickProtect, Homax Click, Titan and others).
- Installation takes place only on a special substrate. It increases the heat and sound insulation of the floor (see). To protect against steam and moisture, it is recommended to lay a layer of thin polyethylene film 200 microns thick under the substrate (see article about).
Foundation preparation
Laying laminate requires special conditions for the quality of the substrate compared to other floor coverings. The basis can be:
- concrete screed;
- wooden floor;
- linoleum;
- floor tiles.
Consider the preparation of each base separately:
Concrete floor preparation
On a new concrete screed, laminate flooring can only be laid after it has completely dried, 30 days after it has been poured.
 Smooth concrete screed - a reliable base for laminate
 If you change the coating on the finished screed, make sure it is intact. Small irregularities and cracks need to be filled with self-leveling floor from the leveling mixture. For major damage, a new screed is made.
On a concrete floor from a wet or semi-dry screed, it is imperative to lay a layer of vapor barrier made of polyethylene. The joints are fixed with adhesive tape overlapping and overlapping the walls. It is not necessary to put this layer on a dry screed, as it is already provided.
Wood floor preparation
If the base is made of boards, ensure that they are even and securely fastened to the joists. To do this, you need to further strengthen them with screws, read about this in our article,. If the problem is in poorly laid or rotten logs, then the floor will need to be re-layed.
If the boards themselves have an uneven base, this can be corrected with a planer or scraper. There should be no bumps or protruding nails on the floor. Replace damaged boards with new ones. 
There is also a popular way - using plywood sheets with a thickness of more than 6 mm. Leave a compensation gap of 5 mm between the sheets. It is better to lay two thin layers of plywood offset than one thick one. After laying the first layer, irregularities remain at the joints of the plywood, which are leveled by the second layer. Read more about this in the article about. You can use other sheet materials for leveling (OSB, chipboard, fiberboard), but plywood is the most best option for price and quality.
Be sure to take into account the thickness of plywood, substrate and laminate, otherwise, after installation, there may be problems with opening the door. That is why when repairing an apartment, they are produced last.
Tile floor preparation
As a base for laying a laminate, floors made of ceramic tiles. Therefore, if the tiling was done according to technology, you can leave it. In this case, a vapor barrier layer is not required, it is sufficient to use only the substrate.
Necessary materials and tools
Before proceeding with installation, prepare necessary tools and component materials.
- Marking tools: pencil, square, tape measure.
- Hammer, for tight docking of locks. They need to be used only through the gasket, so as not to damage the locks.
 Clip for tamping laminate
 - To facilitate the task, you can buy a special set, which includes expansion wedges to create a uniform gap around the perimeter, a bracket for convenient laying of the last row and a template so as not to damage the locks when tapping with a hammer.
- Electric jigsaw or hacksaw with small teeth so as not to leave chips. For cutting at an angle with a diagonal laying method, you may need a miter box.
- Do not forget about the necessary component materials: skirting board, skirting board corners, pipe linings, threshold.
Laying methods
There are several ways to connect laminate boards:
- adhesive connection;
- lock connection "Click";
- lock connection "Lock".
Adhesive bonding of panels using the tenon-groove system is similar to the installation of conventional parquet. Glue is applied to the edges, and the two panels are tightly pulled together. This option is chosen for rooms with a high load, when you need to get a strong connection and protection from moisture. This method is rarely used because of the complexity, inability to disassemble the coating, and fragility.
The most popular connection method is done with Click locks. Their fastening also occurs with a spike in the groove, but at an angle of 30 °. After lowering the panel, it is securely fixed with a lock. This modern type fastening and with good quality, the joints will be almost invisible.
 Attachment of Click and Lock locks
 Location methods
Usually the laminate is laid towards the light, but you can arrange it perpendicularly and even diagonally.
 Different ways to install laminate flooring yourself
 In addition, there are several styling schemes:
- Classic - the most economical. Laying the laminate starts from the window towards the light. Trimmings after completion of a row are used to start a new one if they are larger than 30 cm. With this scheme, waste is less than 5% of the material.

- Brick (chess) - reminds brickwork. Each new row starts with an offset of half the panel. With this method, the greatest coating strength is achieved, but the consumption increases up to 15%. Especially beautiful brick laying looks on a laminate with a chamfer at the ends.
- Diagonal - a variation of the classic styling, but at an angle of 45 degrees. This is how the most beautiful result is achieved, it looks especially impressive if there is a corner door in the room. Waste will be approximately 15%, and if the room is narrow and long, then even more.
Regardless of the scheme chosen, it is imperative to lay a new row with an offset of the end locks so that the connection becomes stronger. At least you need to make an offset of 20 centimeters relative to the previous row.
Laminate installation instructions
Thoroughly clean and vacuum the floor before work. The first layer is a polyethylene film, then the substrate. The rows are fastened together with adhesive tape so that the base is sealed and does not diverge. It is advisable not to cover the entire floor with a litter at once, so as not to shake dirt on it, but to do this in the process as needed.
Before work, we recommend that you familiarize yourself with some of the subtleties of how to lay the laminate correctly with your own hands on the video:
For laying the first row, spacer wedges must be inserted between the panel and the wall in order to ensure a uniform gap along the entire length. Maintain clearance around pipes. Owners wooden doors the effect of tree expansion due to the change of seasons is well known, often they stop closing or, conversely, become smaller. Laminate also changes size, depending on the humidity. 
The panels are inserted into each other at an angle, tightly joined and lowered. If necessary, do not forget to coat the locks with sealant. First we fasten the side locks, and then we connect it with a whole row.
The next row of laminate is laid with a shift of 20 centimeters to half the length of the panel.
It is best to start laying from the corner where the pipes and radiator are located. To accurately cut the cut for pipes, you need to drill a hole of a larger diameter and make an incision at the level of the pipe. Further, the panels are simply inserted in the usual way into the previous row, and the gap around the pipe is closed with plastic strokes.
 Slots at the pipes are made using strokes
 To complete the row, the last panel must be adjusted to fit, minus the gap.
To fix the last row, you will need to cut the panels longitudinally from the side of the wall. Usually the walls in the apartments are not even, so measure the distance at the beginning and end so that there is no gap at the baseboard. It is especially important to keep this in mind when using narrow wooden skirting boards. Standard skirting boards cover gaps up to 2 cm. The row is fastened in the same way, but for ease of docking, you can use a special Z-shaped bracket.
The final step will be the installation of plastic skirting boards. The cheapest skirting boards are attached to the wall with dowels, while the more expensive ones have special fasteners that are screwed to the wall and the skirting board is put on them. It is most practical to take skirting boards with a cable channel in which you can hide extra wires.
Even if you lay the floor in several rooms, it is imperative to make a deformation seam between them, which will be hidden by the threshold. 
Video lesson
Instructions on how to properly lay the laminate on the video:
After that, you can immediately use the new floor. If you used an adhesive joint, wait for it to dry completely. Be careful when using it, laminate is easily chipped by falling heavy objects. The seams are the most vulnerable place, it is easy to get a chip on them, and if moisture gets in, the panels will swell.
Laminate floor care
Having laid the laminate, you need to learn how to properly care for it in order to ensure a longer operation of the floor. sticking to simple tips the laminate care instructions in this section, you will be able to maintain an excellent appearance of the floors for a long time.
- Remove dust and dirt from laminate flooring as often as possible. The more you love cleaning your home, the longer laminate floors will retain their original look. Use a vacuum cleaner or a slightly damp soft fiber cloth for cleaning.
 Take care of your floors with special products
 - Be sure to use special laminate care products such as Chistyla, Loba or Laminatclear. They are available in the form of a gel or spray. Regular use of specific laminate care products helps to form a thin layer on the surface, which protects the floor from moisture and prevents stains due to spilled liquids.
- Laminate is protected from water as long as its top layer remains intact. As soon as scratches and damage appear on the surface of the floors, they will immediately begin to absorb moisture and break down, so try not to abuse wet cleaning with plenty of water. It is also not recommended to clean the laminate with a washing vacuum cleaner.
 Removing scratches with wax
 - Try not to drop heavy objects with sharp corners on the laminate floors. Do not walk on laminate flooring in shoes with pointed heels. If damage and scratches appear on the floors, immediately try to remove them with a special wax or putty.
- If grease or shoe cream gets on the laminate, in no case do not remove dirt with a metal brush. Better go to the store and buy a stain remover.
Having done correct installation laminate floors, you will get an inexpensive, beautiful and durable coating, which, when proper care will delight you for years to come!
Since its appearance on the free market, laminate flooring has gained a lot of supporters. Indeed, well-chosen material and properly executed laying immediately gives the floor a very neat look with an imitation of natural wood flooring. And although the laminate also has a lot of shortcomings, and very serious ones, its popularity is high, and, apparently, it has taken its “niche” seriously and for a long time.
The pronounced advantages of laminate include quite affordable cost (compared to the natural coatings imitated by it) and relatively simple, most often intuitive laying technology. So when purchasing such material, it is quite possible to save money by not inviting for installation work specialists, but doing the work yourself. Even the owner of an apartment or house, who is quite far from construction and finishing work, in theory, should be able to cope with the task. Naturally, having received the necessary instruction for this. This is precisely the goal of this publication - laying laminate with your own hands step-by-step instruction.
Of course, the process of laying the coating itself is inextricably linked with other stages - from the choice of material to the comprehensive preparation of the floor for the installation of the laminate. However, in this article, many questions will be omitted. Simply for the reason that separate detailed publications are devoted to them. Therefore, in the course of the presentation, the reader will be offered links to open the corresponding pages of the portal.
Basic requirements for high-quality laying of laminate
In order for the laid laminated floor covering to show the durability expected from it, not to lose its original fresh appearance, not to deform, not to annoy the owners with an unpleasant creak, it is necessary to comply with a number of important requirements. Their implementation, in fact, turns into stages preparatory activities before carrying out, in fact, the installation of the laminate. Let's go through them briefly:
Competent choice of material
Laminate should be selected not only for its decorative qualities. It is mandatory to take into account the features of the room in which it is planned to lay it. The intensity of movement on the surface is taken into account, whether it will experience loads from street shoes (from which the abrasive effect is incomparably higher), or be located exclusively in living rooms.

Attention is drawn to the environmental component of the issue - a laminate for residential premises should give a minimum emission of formaldehyde (E1) or even be completely clean in this respect (E0.5; E0 or ECO).
If the coating is planned for flooring on the “warm floor” system, then a laminate is selected in which such a possibility is specifically stipulated.
There are a number of criteria for choosing a laminated coating that are recommended to be taken into account by the consumer.
But there is an exception to all rules. The flooring market has been enriched with an advanced SPC (Stone Polymer Composite) luxury flooring, ideal for any room.

Refloor Fargo Quartz Laminate combines the strength of stone, the aesthetics of natural wood and has a number of significant advantages over other floor coverings:
- choosing is easy. Without thinking about types, categories, types interlock connections and other characteristics, you can safely purchase a quartz laminate for an apartment and office, kindergarten and medical facility, cafe and warehouse, bathroom and dressing room.

Refloor Fargo is compatible with all types of floor heating systems. The scope is very extensive, it remains only to choose one of the thirty-two fashionable shades for the style of the interior (today, the collection includes 27 options that imitate precious woods, and 5 - a natural stone, and by the end of 2019 it is planned to replenish the assortment);
 Synchronous embossing exactly in the register emphasizes the noble texture of wood, adds realism visually and tactilely
 - safety is the main thing. Quartz laminate does not absorb or exude odors. There is no emission even when heated. The coating is classified as low combustible and flame retardant. In addition, Refloor Fargo is not slippery and has a unique "anti-breaking effect", especially relevant in the kitchen, where the probability of dropping a fragile cup from your hands is quite high. An expensive service will not suffer, and the hostess will not have to remove sharp fragments from the floor.

It is important to pay attention to the antistatic effect of the quartz laminate. Non accumulative static electricity coating - the best solution for both at home and for specialized premises that house electronics (physiotherapy rooms, diagnostic centers, recording studios, server rooms, etc.);
- quartz laminate - a long-term investment in your own comfort and coziness. Equipping a personal space, you always want the repair to remain fresh as long as possible, despite possible force majeure. Thanks to the 100% water resistance of the material and the adhesive laying method, the coating will remain intact if you accidentally spill a bucket of water, and if the hot water pipe breaks through. While conventional laminate will swell and become unrepairable, quartz will only need to be wiped dry.
 Water resistance of quartz laminate is one of the main advantages
 Do not forget about the mechanical stress that the flooring experiences daily. Thin hairpins, furniture legs, pet claws, wheels office chairs- items that significantly reduce the life of a conventional laminate, but not quartz-vinyl. An additional plus to high wear resistance is the sound absorption of impact noise up to twenty decibels (a nice bonus for residents of multi-storey buildings).
 Eco-friendly, waterproof, wear-resistant and beautiful flooring for only 1490 rubles/m²
The quality of Refloor Fargo is confirmed by laboratory test reports, fire certificate KM 2, certificates of conformity.
A laminate is purchased, including quartz-vinyl, immediately for the entire floor area planned for such a coating. The laying technology implies a certain number of trimmings, that is, a certain margin should also be set. The amount of the “reserve” created also depends on the type of laying - it will also be the usual arrangement of boards, parallel-perpendicular to the walls, or there is a desire to mount the coating diagonally (in which case the amount of waste inevitably increases).
The online calculator below will help you calculate the required amount of material. It contained almost all the variety of sizes of laminated boards encountered in practice. The calculation is made immediately, taking into account the required margin, depending on the type of laying.
Greetings, my dear readers.
In this article, we will learn − how to install laminate flooring in an apartment.
Laminate is a type of flooring, the basis of which is high-strength fibreboard, covered with a special wear-resistant film.
Laminate appeared on the market relatively recently, but due to its performance characteristics, it has become one of the leaders in flooring, winning a place from ceramic tiles, carpet and linoleum.
Installation of the laminate can be done by hand, without resorting to the help of craftsmen. To do this work as efficiently as possible, follow the instructions that I will provide you. Required Tool

For the correct and quick laying of the laminate, we need a tool:
- construction tape measure
- building level
- building corner
- jigsaw or hacksaw with fine teeth
- pencil
- hammer
- electric drills and a pen drill - will be required to form holes for pipes
As you can see from the list, no specific tools are required. You can also purchase a laminate laying kit from a hardware store.
Such a set is inexpensive - the price ranges from 250 to 1000 rubles. It all depends on the manufacturer and a cheap Chinese version is quite suitable for a one-time installation :)

Set completeness:
- Metal bracket - necessary for installing laminate adjacent to the walls. Thanks to rubber pads, the bracket can be used as a "tamping" beam for joining panels.
- tamping bar - used for docking. It has several grooves, which greatly simplifies the installation of lamellas.
- expansion wedges - are necessary to create a technological gap between the wall and the laminate. They have a size of 8 to 12 mm.
In fact, you can get by with your own set of tools, but if you still decide to buy, you will greatly simplify your work :)
Laminate classes - which one to choose?

Correctly laying the laminate - video
Even an experienced builder, not to mention those who will have to buy a laminate for the first time, can get their eyes out of a huge assortment.
So which laminate should you choose?
The laminate board is divided into service classes, which will tell us about the service life of the product, depending on the loads that affect them.
Each board must pass 18 tests (European standard EN-13329), thanks to which one or another class is assigned.
This norm divides the laminate into two large categories:
- commercial use laminate
- for home use
Commercial laminate is designed for service in commercial premises (sorry for the taphtalogy). Due to the increased wear-resistant characteristics, the service life of the panels can be 10 years or more. And if you use such a board at home, then the terms increase significantly.
- 31 class - designed for floors in commercial premises with a low load. Service life - no more than 3 years. If you use it at home, then the period increases to 10 years. At the moment - this is one of the most popular laminates in Russia.
- Class 32 is commercial premises with an average load. The average service life is not more than 5 years. At home, such a floor can last from 12 to 15 years. It can be used well in the kitchen. Most optimal choice In my opinion. Price-quality ratio.
- Grade 33 is a very intense load. Such a laminate is used in places common use- bus stations, dance clubs. The service life is more than 15 years, and when used at home, some manufacturers give a lifetime warranty.
Laminate boards for home use cannot boast of such qualities. 5 - 6 years of operation for them is the optimal result. The fact is that they are made of fiberboard or MDF, which significantly reduces their characteristics. Their main advantage is low price.
This laminate is divided into 21, 22, 23 classes. Service life from 2 to 6 years, respectively.
Foundation preparation
So, friends.
The rules for laying laminate on a wooden floor are practically no different from the rules for laying on a concrete floor. The most important point before installation is surface preparation.

Laminate does not tolerate bumps, dirt, warps.
If the rough floors in the apartment are made of concrete, then it is necessary to check their level. Additional leveling with screed or self-leveling floors may be required. Before arranging the screed. If the concrete is even, then it is necessary to caulk all the cracks.
If the installation will be carried out on wooden floors, then we also check their level. The surface must be leveled, either with a planer or scraper. If there are very strong differences, it is better to dismantle the old floors and pour the floors into the level, and if this is not possible, then you can sew plywood or OSB.
After the base is ready, it must be dedusted.
Read more about surface preparation for laminate flooring.
Installation of the insulating layer and substrate
Any floors tend to absorb moisture, and laminate is a wood flooring that does not tolerate its harmful effects.

To prevent this process, it is necessary to separate the floors from the laminate with a special vapor barrier film 200 microns thick.
Most of the film is sold in rolls, and to achieve even better insulation, the film is hermetically glued. A layer is laid between the laminate and the film - the “substrate”. To find out which substrate to use - read this.
For the "substrate" you can use:

- wood pulp
- cork
- foil styrofoam
- foamed polyethylene
Thanks to the “substrate” layer, small differences in the floors are eliminated, and the heat and noise insulation of the floor covering is also increased. In rare cases, old linoleum is used instead of the substrate.
Panel connection methods

- Glue method - at the moment it is practically not used. The point is to pre-treat the lock joints of the lamellas with glue.

- click - locks - the shared (receiving) side of the laminate lock is made with a special lock. Force is required to join the panels.

- lock - locks - special latches are used for connection.
Calculation of the amount of laminate
- First, we find out the area of \u200b\u200bthe room by multiplying its length by its width.
- We find out the area of the laminate using the same formula, and since almost all laminate boards have a length of 1 meter, it is enough to measure the width of the board.
- We divide the area of the room by the area of \u200b\u200bthe laminate - we get the number of boards!
Example:
Room – 16 m²
Laminate - length 1 m, width 0.2 m. Area = 0.2 m²
The required number of boards is 16: 0.2 = 80 boards.
Step-by-step instructions - how to lay a laminate with your own hands
To begin with, consider the locking method of laying.

1. First of all, we spread the "substrate". We glue the joints with tape.

2. We start installation from the first row.
First you need to saw off the protruding "comb" on the board. When laying the panel, we form an expansion joint using wedges. The thickness of the seam should be from 8 to 12 mm.
IT IS IMPORTANT TO KNOW:
A clearance gap is required. It provides a uniform narrowing or expansion of the coating with changes in humidity or temperature in the room.
At the end of the row you have to face the cutting of the last board. Laminate cutting is carried out using a construction corner and a jigsaw.
3. Installation of the second row
If the trimmed part is half the panel or most of it, then we start it at the beginning of the next row. Installation is carried out in a checkerboard pattern. Thanks to this, a uniform load on the seams is achieved. The same principle applies to brickwork.
4. Installation of each panel is carried out as follows:
- put the board to the groove at a slight angle
- gently insert into groove
- if necessary, knock out the panels for a better connection
5. The last row is mounted using a metal bracket, or using improvised means. Don't forget to create a gap.
6. At the end of the work, we remove the spacer wedges and mount the skirting boards.
IT IS IMPORTANT TO KNOW:
In no case should you hit the laminate directly with a hammer - damage the top layer. Use a "tamped" bar or a piece of laminate.
Castle method of laying laminate - video
Adhesive laying laminate

Pretty popular mounting method. Due to its features, it has a number of advantages over the castle:
- when the glue dries, a greater strength of the flooring is achieved than just a groove-to-groove connection.
- durability - subject to all operating parameters, the adhesive joint will outlive the lock much longer
- reliability - thanks to the glue, it is unlikely that moisture or dirt will get into the joints
But there are also disadvantages:
- this installation method is not applicable if the installation is carried out on underfloor heating.
- the use of PVA glue is also unacceptable - you will have to buy special glue for lamellas
- the inability to use the floors immediately - you need to wait for the glue to dry completely
- recycling panels after dismantling is impossible
Glue laying laminate - video
So, let's move on to the installation:
1. Preparing the base, laying the "substrate", maintaining the expansion joint - everything is identical. The only difference is in the method of installation.
3. We get rid of the protruding groove on all panels of the first row.
4. Attach the first panel to the wall, insert the wedges, forming a gap.
5. Apply glue to the protruding end of the groove edge of the next panel.
6. We connect the boards, and immediately remove the remaining glue, preventing solidification.
7. If necessary, knock out the panels.
8. We repeat all operations.
9. At the end of the work, we remove the spacer wedges and mount the skirting boards.
Laying laminate around pipes and near doors
If pipes get in your way while laying, then do not be afraid.

- First you need to cut the laminate, taking into account the entire required length.
- Then we transfer to measure the distance from the wall to the center of the pipe and mark the center line on the board
- We measure the distance from the edge of the board also to the center of the pipe and mark the perpendicular, thereby obtaining the center of the pipe
- we measure the diameter of the pipe, add 8 mm to it for the expansion joint and use a compass to mark the place of the cut
- we make a hole with a pen drill and cut a laminate board along the center line for its subsequent connection
- the joints of the lamellas are smeared with glue and connected
Underlay laminate flooring door frame divided into three ways:

1. In the first case, the laminate is mounted first, and then 🙂
2. If the doors have already been installed, then with a fine-toothed hacksaw, you will have to file the vertical racks of the door to the height of the lamellas so that you can run them under the box.
3. The third method involves flush cutting with a door frame. But I do not advise you to use it, because without the proper skills you are unlikely to be able to cut smoothly.
How to lay out a laminate

- The first way is perpendicular to the window. Thanks to the perpendicular sunlight, the joints of the laminate become barely visible.
- The second way is parallel to the window. This layout is appropriate in rooms with a small area and will help visually expand it.
- Diagonal layout. The panels are placed at an angle of 45° to the walls. In my opinion - the most beautiful layout of the laminate. There is a drawback - this is a significantly higher consumption of panels.
Laminate care

In order for laminate floors to last as long as possible, they need not only competent installation, but also proper care.
The most important thing for laminate flooring is keeping it dry. If water gets on the floor, immediately remove it with a soft cloth.
One of the weak points of a laminate board is its locks. If it is operated in rooms with high humidity, then a special sealant must be used during installation. It does not stick the panels, but perfectly protects them from moisture.
When caring for laminate flooring, do not use aggressive detergents, also do not use parquet care products. Such tools may well destroy the upper wear-resistant layer.
Laminate is also afraid of products with a high content of glycerin, which destroys their edge, getting into the joints.
Conclusion
Well, that's all, friends!
In this article, we learned how how to properly install laminate flooring.
I hope the information will be useful to you and help you avoid serious mistakes! Good luck to all!
Such a practical and beautiful coating is very easy to install. Laying, laminate is quite possible to carry out independently. And detailed step-by-step instructions, recommendations and videos of the main stages of installation will help in this matter.
Today, many homeowners choose laminate as their flooring and decide to do the installation themselves. It is worth saying that such zeal is quite understandable. There is really nothing complicated in installing lamellas, in comparison with - laying a laminate is extremely simple.

Even an unprepared person can handle laying a laminate
Difficulties may arise in preparatory stage when it is required to align the rough base with the highest quality, but you can do it on your own in this matter.
Material calculation
There are several ways to calculate the laminate, but none of them guarantees that there will be no residue at all. In any case, when laying, some part of the board will have to be cut and the trim will remain.
First calculation method.
First you need to know the area of \u200b\u200bthe room, multiply the width by the length. Let's say the length is 6 m, the width is 3.5 m, which means: 6 × 3.5 = 21 m2. The shape of the room is not always standard, for example, there is a niche, it must be considered separately: width - 0.5 m, length - 1.2 m. 0.5 × 1.2 = 0.6 m2. Total area: 21+ 0.6=21.6 m2.

Count carefully required amount material before purchase
The next step is to calculate the area of one laminate panel. The dimensions of the material must be known in advance. Take the panel width - 185 mm, length - 1260 mm. The area of one panel is 0.185×1.260=0.24 m2. Now you can find out how many boards you need in total, for this the area of \u200b\u200bthe room is divided by the area of \u200b\u200bthe panel: 21.6 / 0.24 = 90 pcs.
Advice! To calculate the amount of laminate yourself, you can also use online calculators.
The second way to calculate
The second method is more reliable because it takes into account the amount of waste. If the length of the room is 6 m and the length of the panel is 1.26 m, then 6/1.26=5.23, this number of panels will fit along the long wall. Same for width: 3.5/0, 85=18.9. In total, panels will be required: 5.23 × 18, 9 \u003d 98, 85 pcs, rounding up - 99 panels and 1 stock per hundred.

Measure the exact size of the room
We calculate in a similar way, the existing "appendix": 0.5 / 0.185 \u003d 2.7; 1.2/126=0.95. Total: 2.7 × 0.95 = 2.56. That is 3 panels. For the entire floor area you need: 99 + 1 + 3 = 104 pcs.
Requirements for a rough base for laminate
The laminate is laid on a flat, clean surface. Permissible height difference - no more than 2 mm per 1 m2. If the differences on the floor are higher than the norms specified in SNiP, it is likely that during operation the laminate locks will diverge and even break, dust and dirt will accumulate under the panel, cracks will gradually increase, and a creak will appear.
If the slope of the subfloor still takes place, but within the normal range, it is not recommended to put heavy cabinets or chests of drawers on four legs in these areas. Over time, their doors will not close well due to skew.

In order for the floor covering to serve for a long time, it is laid only on a leveled base.
Subfloor preparation
Regardless of the type of the main floor, it must be properly prepared and leveled. Concrete floors are cleared, cracks are filled with cement-sand mortar, large exfoliated pieces are removed, the recess is sealed.
Often there are foundations that are a dull confirmation of the negligence of the builders or show the unevenness of the slab in all its glory. These are easier to refill with a screed. It can be difficult to level the floor on your own without experience, so at this stage you can turn to specialists.

Most often, the basis for a laminate is a screed
If the differences in the subfloor do not exceed 5 cm, it is primed, Ceresit ST 17; 15 is suitable and poured with a self-leveling screed mixture.
Wooden floors are repaired, damaged parts are changed, and if a little height can be taken away, they are leveled with plywood. The caps of the fasteners are sunk into the flooring, the irregularities are polished with a machine.
Substrate selection and installation
Between the leveled rough base and the laminate flooring, a substrate must be laid. The main task of this layer is moisture absorption, sound insulation and additional smoothing of irregularities. Moisture insulation is needed to protect the panel, which is only covered with laminate on top, and is vulnerable at the base due to its porosity.
- Noise isolation, in turn, muffles the sounds when walking, especially important when laying in a floating way. Some substrates additionally have thermal insulation qualities, it is rational to cover them on the basement floors.
- Cork materials are usually chosen for bedrooms and children's rooms. They do not mold, perfectly cushion the step and have a long service life. Depending on the material, the substrate can be rubber-cork, bitumen-cork, cork chips or cork cloth. For rooms with high humidity, it is better to give preference to a rubber-cork substrate or material impregnated with bitumen.

There must be a special substrate between the laminate and the base
- Expanded polypropylene is moisture resistant, hides small irregularities in the base and has good ventilation, but under the influence of static load, for example, heavy furniture wears out quickly. Under pressure, its thickness becomes uneven, and this reduces the quality characteristics.
- Expanded polystyrene is officially approved by laminate manufacturers. This material is durable, stable, withstands the weight of a serious load, does not allow moisture to pass through and provides thermal insulation. The disadvantages include its sensitivity to all floor irregularities, loss of properties after 6 years.

Cork base for laminate
- Coniferous substrate is sold in the form of tiles, technical parameters resembles natural cork.
- The foil substrate is valued for its thermal effect, it can be one-sided and two-sided. It is more often used if the laminated board is laid on water-heated floors.
- Polyethylene film is used very rarely. Literally after 3-4 years, it loses its properties. On sale, this material is as difficult to find as low-quality laminate of the 21st class. Its main plus in cheapness.
The thickness of the substrate depends on the thickness of the laminate. In residential premises, it is recommended to lay panels at least 9 mm thick, a 3 mm waterproofing substrate is laid under them. For a thicker laminate, a substrate of 4 and 5 mm is selected.

Coniferous substrate under the laminate
The substrate is not attached to the rough base, but lies freely pressed by the weight of the floor, occasionally glued. Strips or tiles are laid in a joint with or without an overlap on the wall. At the joints they are connected with adhesive tape. Only polyethylene is overlapped by 20 cm.
Layout
Before laying the laminate flooring, preliminary layout planning is carried out, following several important rules.
- IN flooring there should be no cross joints. The laying should resemble brickwork, where the butt seam rests on the middle of the panel of the previous row. This option is the most reliable, but requires a lot of trimming, so most craftsmen shift the seam by the length of the segment that remains after laying the last die of the previous row, if its length is at least 30 cm.
- The direction of the panel is longitudinal, transverse or diagonal. The latter method is the most difficult to implement and requires more material.

Laminate installation
- The minimum thickness of trim near the wall along the grain line is 5 cm.
- It is recommended to draw a simple plan by hand on a scale and outline the future layout.
- The simplest and most economical scheme is that the trimming from the last panel of the stacked row is laid as the initial element of the next row. Docking of panels turns out to be chaotic.
- Joints are best placed along the stream of light.
Advice! If there is a small residue in the width, it can be blocked by stepping back from the wall 1-1.5 cm, which will be covered with a plinth.
Panel fixing methods
Panel assembly methods differ slightly depending on the type of factory locks, the quality of which determines the appearance and durability of the entire coating.
- Lock-lock is the most economical and imperfect connection. In fact, this is the good old technology - "thorn-groove". Laying lamellas involves hammering a spike into a groove with a wooden mallet.
- Click-lock is already a new generation of connections, a little more expensive, but more perfect. It allows you to disassemble and assemble the coating several times. Click is a latch lock. One part is inserted into the other at an angle of 45 degrees and snaps into place. No need to score and worry.

Scheme: methods of joining laminate plates
- An aluminum lock is the strongest and most reliable option. Aluminum profiles are inserted into the thickness of the board, which helps to avoid any deformation during installation.
- 2-Lock (5G) combines the principles of Click and Lock locking systems. On the long side, the laminate is laid using the angular method, and on the short side, it lies on top and snaps into place.
Laminate installation instructions
Laying laminate is recommended in a heated room at a temperature of 15-30 ° C, without sudden changes and humidity from 35 to 65%. Before laying, the material is left in the room where it will be laid for two days to get used to the specified conditions. It is better to start laying from the far left corner from the entrance.
Advice! You will have to cut the laminate in any case, so that the joint is beautiful, it is better to use a jigsaw or a miter saw. The hacksaw damages the decorative layer. On the cut line, you can stick adhesive tape.
Marking is carried out on the floor of the room covered with a substrate. The first panel is laid with a comb against the wall with a lock on itself. Spacer wedges are installed along the perimeter of the panel at the junction with the wall, which form a damper gap.

Laminate installation
You can purchase special wedges for laminate, use crosses for or pieces of drywall. Mounting dimensions should be the same, about 1-1.5 cm.
The next panel is connected from the end. After snapping the laminate boards into place, a perfect plane should form, with no protrusions, steps or gaps. If necessary, gently knock to each other. The entire row is laid along the wall, after which they move on to the next one. And so on. Very clearly the installation steps are shown in the video.
Installing laminate flooring in doorways
Laying laminate in doorway, it is recommended to file the jamb a little at floor level, so that the panel enters a few millimeters into the cut made. The gap between the jamb and the lamella is filled with sealant. For the panel that will be installed in the doorway, you will need to make an exact template. Door leaf removed, shortened and hung back on the loops.

Installing laminate flooring in a doorway
How to lay a board under a radiator
There are situations when the edge board needs to be brought under the casing or radiator, but it is not possible to raise it to such a height that it enters the lock. Will have to tweak it a bit. From below, the protruding edge is carefully cut off. Of course, this affects the strength of the joint, so the joint is additionally coated with glue.
How to cut a panel for pipes
Often the pipes from the radiator in apartments go to the floor, and in order to beautifully arrange this passage, you will have to cut the laminate correctly. Taking into account the indentation from the wall, mark the center point of the pipe on the board and draw a circle with a diameter slightly larger than the pipe itself. When the hole is ready, draw a line that, cutting the laminate across, will run along the center of the cut hole. You will get two plates. One is inserted between the wall and the pipe, the other is attached to it and glued.

Scheme: cutting laminate slabs for pipes
Features of laying laminate diagonally
Laying diagonally also starts from the opposite corner to the entrance, in which the line is pulled strictly at 45 ° from opposite walls. On it it will be possible to navigate and lay out the layout. Take the first strip, cut the edges at a 45° angle and lay it on the corner.

Diagonal laminate installation
Be sure to install wedges. The next row will be 2 boards. Their outer edges are cut at 45°, the ends are connected in the middle of the previous panel. The installation of 3 edged boards in the second row should be avoided, otherwise the floor may subsequently walk a little, a run-up at the joints will appear.
Important! It is worth remembering that the laminate is a floating coating that periodically expands or shrinks, so a deformation seam must be left around the entire perimeter of the room.
Features of laying adhesive laminate flooring
The process of laying a laminate with gluing joints is actually no different from a conventional lock joint. The groove and protrusion along the entire length are coated with water-repellent glue and the boards are connected into a lock. The remaining glue is wiped off with a cloth or sponge.

Bonding laminate joints
When the laying of the laminate is completed, the wedges are removed around the entire perimeter, the protruding edges of the substrate are cut off, leaving only 1-2 cm, and the plinth is hung. Paul is ready.
An easy way to lay laminate: video
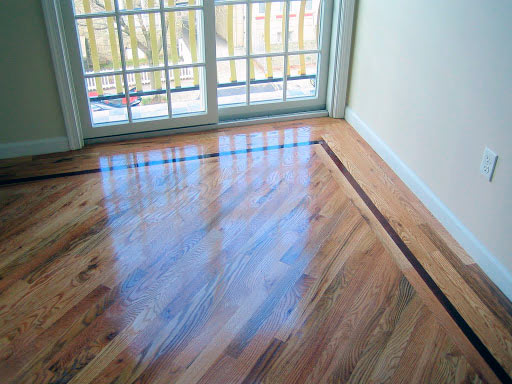
Do-it-yourself laminate laying: photo


