How to make a hanging gate with your own hands. Step-by-step instruction. Hanging gates Hinged sliding gates
Often hanging gate confused with recoil. But some are different from others, even though the principle of their work is the same. Both of them open by rolling back the sash, but only the sliding gate guide is located at the bottom, and the hanging gate guide is at the top.
Advantages and disadvantages of hanging gates
Hinged gates have the following advantages:
First, they save space around the entrance.
Secondly, in winter, before opening them, there is no need to clear snow from a large area.
Thirdly, they are stable and withstand strong gusts of wind well.
But such gates have disadvantages:
First, their height is limited by the guide bar.
Secondly, this beam must always be cleared of snow, otherwise the movement of the flaps will be difficult or completely impossible.
Thirdly, for the device of these gates, free space is required along the fence.
What can the leaves of the suspended gate be made of?
Before starting the manufacture of hinged gates, you need to decide on their size, material and other similar nuances. According to the material from which the sashes are made, hinged gates are divided into several varieties.
One of the most common materials used to make gates is metal. You can just take a profiled sheet and cut a piece of the desired area from it. Often, gates are made of plastic, which can be purchased in the form of separate panels, and then assembled into a single canvas, connecting through the groove-comb system. In the event that it is necessary to preserve heat inside the room into which the gate leads, it is possible to make a canvas from sandwich panels.
Materials and tools required for the installation of suspended gates
In order to make a hinged gate yourself, you need corrugated board, square pipes, a guide beam, a mortise lock and rollers. You can also purchase an automation kit if you need to make the gate automatically opening.
From tools you will need a grinder and a welding machine.
Usually hinged gates have one leaf. If the gate width is less than 3 meters, then there is no need to make a second wing. Usually this width is sufficient for a vehicle to enter. But if, for some reason, it is decided to install wider gates, then it is better to make them double-leaf, otherwise the guide beam may not cope with the load.
The rollers, through which the flaps will move, do not need to be made independently. They can be purchased ready-made, and are usually sold with guides.

Frame installation
The gate frame is made of metal pipes, the cross-section of which is a square. Usually pipes with a width of 4 cm are used. Knowing the height of the gate, you need to cut the pipes to the appropriate length.
After a sufficient number of pipes of the same length have been cut, they must be placed on a horizontal surface, at an equal distance from each other, and connected. Then they are welded by means of spot welding.
In order to check whether the frame is even, it is necessary to measure both of its diagonals. If the values \u200b\u200bare the same, then the frame is flat. If the diagonals differ in length, then to level the frame, you can lightly knock with a hammer in the corners.
Once the pipes are aligned, they can be welded completely. After that, it will be necessary to assemble another frame from pipes with a square section, but only now the width of the pipe should be half as much. This frame will join the previous one from the inside.
After completing all welding work, the frame must be primed, and then, after waiting for the primer coating to dry completely, paint it using a special paint for metal surfaces.
Fabric production
The canvas is cut from the profiled sheet and is attached to the frame either with self-tapping screws or rivets. The area of \u200b\u200bthe canvas should be larger than the opening and overlap each side by about 20 cm, and its upper part should protrude by about 10 cm. At the bottom, on the contrary, there should be a gap of about 5 cm between the canvas and the ground surface.
Immediately you need to determine the place where the mortise lock will be located. And having decided on the place, it is better to install the lock immediately. When installing, you must follow the instructions that are usually found on the packaging.
Frame installation and installation of support posts
The next stage in the installation of hinged gates is the manufacture of the frame. It is made of 12 cm wide square pipes. They are connected by welding. If the gate has one leaf, then the upper beam must have a length equal to the width of this leaf. If double-leaf gates are made, then there must be two beams, and the length of each of them must match the width of the corresponding leaf.
Metal pipes are also used as support posts for hinged gates. They are buried in the soil to a depth of more than 1 m, and then poured with concrete. It is imperative to make sure that the supports are installed vertically. The best assistant in this matter will be a building level or a plumb line.
Installing the rail and rollers
One of the last steps in installing a hinged door is to attach the guide rail. This element is attached by means of special brackets. Of course, the side of the rail along which the sash will ride on the wheels should be located at the bottom. Usually a rail for hinged gates is no more than 6 m long. Therefore, if a longer beam is needed, you will have to use the welding machine again.
To increase the length of the beam, you can simply weld an additional piece to it. Care must be taken that the guide is free from distortion. Otherwise, the sash will get stuck while moving.
You can use the same building level to level the guide beam.
Once the beam is secured in the desired position, you can start installing the rollers. They must be fixed to the sash from both sides - from the back and from the front, it does not matter how the rollers themselves are arranged.
The gate must be installed with the rollers upwards so that they just fit into the guide beam. In order for the sashes to not go too far when opening, special limiters must be installed on the guide beam, which usually come in one set with the rollers themselves.
In the video: Installation of the rail for suspended sliding gates.
Gate automation
The ready-made hinged gates can be equipped with a set of automation, and then they will be opened and closed using the remote control. In this case, you do not have to exert physical effort, you just need to press the button, and the flaps themselves will go along the guide beam in the desired direction.
In the video: Installation of automation for overhead gates.
Do-it-yourself sliding suspended gates, the drawings of which are also often made independently, are installed in hangars, garages, warehouses. Classic iron and wooden homemade double-leaf gates have lost their popularity. They were replaced by new designs that differ from rolling ones in that there is a guide in the suspended ones. It is attached to a beam at the top of the gate. Sliding gates have a rail on which they can move.
Image 1. The design of suspended sliding gates.
Features of sliding gates and tools for installing them
The main features include:
- suspended structures save space, this is very important when the passage width is small (image no. 1);
- there is no need to clear the driveway from snowfall in winter;
- the gate is resistant to wind;
- not very much space is needed to install the structure;
- limiting the gates towards their height;
- the guide will need to be cleaned of snow.
To install such a structure, you need diagrams and drawings, some tools:
- metal pipe, preferably square, its dimensions are 40x40 mm;
- corrugated board or other material for covering the canvas;
- pipe with a section of 120x120x4 mm for the manufacture of a beam;
- a set of accessories for gates;
- automation;
- welding machine;
- mortise lock;
- bulgarian.
We make a gate with our own hands

Picture 2. Scheme of installation of rollers for sliding gates.
Gates are made with a width of no more than 3 m. This is the size adopted for an ordinary passenger car. The size is changed if necessary. The pipes are laid on the ground and all distances are carefully measured, especially the diagonals. They are lightly welded in the corners and checked again. After all dimensions have been reached, the welding is done firmly. The seams must be applied in such a way that water does not get inside the frame. After welding the main size of the sheets, the inner bridges are inserted and welded.
After welding, all joints are processed with a grinder, the structure is painted with a primer for metal, the outer metal sheets are welded. If it is a corrugated board, then it will be necessary to choose it with a wave height of up to 20 mm. Sheets can be attached to the frame with self-tapping screws. The locks must be fastened immediately.
The ends of the vertical supports must be dug into the ground and concreted to a depth of 120 cm. When installing, be sure to use a level. You can fix the canvas on the wall above the opening. The guide is attached to the wall with brackets. Roller supports are attached to the frame. The canvas is suspended, the rollers are inserted into the guide, plugs are installed (image No. 2). Automation and handles are installed if available.
In general, the gate installation process is:
- Manufacturing.
- Choice of installation method.
- Manual installation.
- Monorail.
- Fabrication of the canvas.
- Installing the drive.
Canvases can be made from metal structures by welding. In this case, a welding machine is needed. They can be assembled from plastic, then the device will not be useful.
The installation method depends on whether the gate is operated manually or automatically. The manual method is simpler and much cheaper. For him, you need to purchase a special stainless steel guide, which will act as a monorail. You need to buy stops and metal rollers for it. The monorail is exposed using a level and welded to the embedded parts. The rollers are inserted inside, the ends are closed with plugs. This type of gate can be installed at the entrance to the suburban area.
Homemade products made using our own scheme, and even working as it should, is a reason for the owner's pride.
The main thing here is not to forget about the path that the gate will take during its closing and opening. The road should always be clear for them. Hanging gates, drawings for which are developed independently, is not a very difficult matter. Try it, do it - everything will work out.
Sliding or sliding gates are gaining popularity among private developers, since all the necessary components for their installation at an affordable price have appeared on the market. In terms of cost, swing gates are, of course, cheaper. Sliding structures benefit from aesthetics and ease of use. You can reduce costs by saving on the services of installation companies by installing sliding gates with your own hands. This is not so difficult to do if you understand the diagrams, watch video tutorials, and also consult with experienced home craftsmen. To carry out the work, a ready-made kit for the installation of cantilever-type sliding gates is purchased, which includes two rollers, a carrying beam from a U-shaped profile, several traps and holders. The assembly and installation of the sliding gate structure is carried out in a specific sequence.
This video demonstrates the do-it-yourself installation process. After viewing, all previously raised questions about the installation of sliding gates will disappear by themselves. Each individual operation is clearly and simply shown.
Briefly about the device of sliding gates
Below is a diagram and a list of the main elements of a ready-made set of sliding gates presented on the market by both foreign and domestic manufacturers of this type of equipment.
Legend: 1. Guide U-shaped beam; 2. Roller supports or carts (two pieces); 3. Removable end roller; 4. Lower catcher; 5. Top catcher; 6. Upper clamp with rollers (bracket); 7. Plate for fixing roller bearings
On a foundation specially prepared for the installation of sliding gates, a pair of bearing roller supports is fixed at a certain distance from each other. The guiding U-shaped beam is welded or screwed to the bottom edge of the metal frame of the door leaf. Roller supports not only withstand the load falling on them from the entire structure, but also ensure its free movement. The supports are fastened using embedded bolts or a special plate that is securely fixed to the foundation.

Fastening of roller supports to a steel channel, laid in the foundation together with the reinforcing cage, is carried out using bolts or welding
The gates are installed on roller trolleys so that they are inside the U-shaped bearing beam. This arrangement protects the rollers from contamination, which affects the duration of their trouble-free operation. As a result, the gate easily rolls to the side, both in manual control mode and in automatic mode with the help of an electric motor.
Important! The frame for the door leaf, welded from a profile pipe with dimensions of 60x40x2 mm (main frame) and 20x20x1.5 mm (lintels), must be sufficiently rigid. After all, the gate leaf is under the influence of wind loads, which can be very significant. The canvas should also not undergo any deformation under the pressure of its own weight.
Many manufacturers are engaged in the production of fittings for sliding gates, among which the most famous on the Russian market are ROLTEK (St. Petersburg), CAME and Rolling-Center (Italy), DOORHAN (Moscow).
The sets of accessories required for the installation of sliding gates are subdivided into three standard sizes according to the weight of the structure and the width of the clear opening:
- small (up to 400 kg and up to 4 m);
- medium (up to 600 kg and up to 6 m);
- large (from 600 kg and from 6 m).
When choosing the required set, they are guided by the width of the overlapping opening, the height of the canvas and the total weight of the entire structure.
Preparatory stage - pouring the foundation
Work on the foundation for the sliding gate begins with marking the trench. In this case, from the edge of the opening on the side of the gate rollback, the length of the concrete base is set aside, equal to half the width of the passage. The width of the foundation is 40-50 cm. When calculating the depth of the pit, the level of soil freezing in a given area is taken into account. In the Moscow region, the foundation is laid with a depth of 1.7 m, and in Siberia - 2.5-3 m.
An embedded element is made from the channel 18 and reinforcement (d 12), connecting all parts by welding to each other in accordance with the diagram. The channel must be used to enhance the strength and rigidity of the base being constructed. The low alloy steel used in the production of channels is able to withstand the effects of low temperatures and does not corrode. The length of the channel blank is equal to half the width of the opening. The length of the vertical reinforcing bars is calculated on the basis that they must go below the depth of soil freezing.

The embedded frame is welded from a channel 18 and reinforcing bars, the diameter of which is 12 mm. Reinforcement can be replaced with steel corners
By connecting the vertical rods with steel lintels, a strong reinforcing cage is obtained, which is lowered into a prepared trench for pouring the foundation. Previously, a layer of sand is poured onto the bottom of the trench, which is carefully compacted.
Important! The foundation level must match the road level. The value of the ground clearance must be higher than 5 cm so that there are no problems when operating the gate in winter time.
Before pouring the foundation, check the horizontal position of the reinforcing cage, using a building level for this. During alignment, also make sure that the longitudinal axis of the steel channel is parallel to the fence line.
If you plan to install a drive to automate the control of sliding gates, then at the stage of pouring the foundation, wires are laid, hiding them in special corrugated tubes. The location of the exit of the bundle of wires is selected based on the planned location of the electric drive. Usually the equipment is installed in the middle of the foundation.

A reinforcing cage is lowered into a trench prepared for the foundation. In this case, the plane of the steel channel is aligned to the level of the roadway
To fill the foundation, a concrete solution is mixed from 4-5 bags of M400 cement, crushed stone (0.3 cubic meters) of sand (0.5 cubic meters). The poured foundation is left alone for 3-5 days, during which the concrete will gain the required strength. After the specified time, they begin to install the sliding gates.
Step-by-step instructions for installation work
Mark the door movement line with a cord stretched along the opening, placing it at a height of 200 mm from the road surface and at a distance of 30 mm from the counter post. Along this cord, you will align the position of the supporting profile (beam).
Prepare roller carriages for installation and insert them one after another into the supporting profile beam. Then move the carts towards the center of the gate. Place the gate leaf with roller supports inserted into the profile on the steel channel of the embedded structure. Then place the first and second supports in the marked places, and adjust the gate so that they are parallel to the stretched cord and touch it.
Fastening roller carriages to the channel
Weld the adjusting pad of the second roller support to the channel. Having rolled out the gate into the opening to the very end and checking the horizontal position of the blade, weld the adjusting platform of the first roller support.
- Remove the sliding gate leaf from the roller supports.
- Remove the supports themselves from the adjusting platforms.
- After welding along the contour, weld the adjustment pads to the steel insert.
- Attach the roller blocks to the welded adjuster pads.
- Slide the sliding gate curtain onto the roller supports.
- Place the door in the closed position and adjust the horizontal position of the plane of the supporting profile. To do this, use a wrench to raise or lower the adjusting platforms relative to each other.

The installation of the front bearing roller trolley is carried out 150 mm from the edge of the door opening, so that when they are fully opened, the end roller will rest against the support
Important! It is possible to give the gate a horizontal position only if it is closed.
Freewheel regulation
Adjust the position of the roller bearings inside the support profile. To do this, slightly loosen the upper nuts securing the roller bearings to the adjusting platforms. Close and open the gate by rolling it from edge to edge several times. In this case, the roller supports can take the correct position inside the bearing profile, in which the gate moves easily and freely. After completing the adjustment of the gate's free play, tighten the upper nuts of the roller supports tightly.
Mounting end roller and plugs
Next, the end roller is installed, as well as the cover of the bearing profile. For this, an end roller is inserted into the bearing U-shaped profile, placing it on the front side of the door leaf, and the part is fixed with fastening bolts.
The cover of the supporting profile, supplied in the sliding gate set, is welded on the back of the door leaf. This detail prevents the load-bearing profile from being blocked by snow in winter, which prevents the gate from jamming.

When installing the top bracket, it can be used for fastening, both anchor and welding. Bracket rollers are lubricated after installation for better sliding
To install the upper guide bracket, loosen the fasteners of its rollers. Then the bracket is placed over the door leaf in such a way that the rollers touch the upper edge of the door leaf, and the side with the holes provided for fastening is directed towards the support post. Pressing the bracket to the surface of the support post, fix the part with fasteners.
Sheathing of the door leaf with profiled sheet
After that, they proceed to sheathing the door frame with a profiled sheet, cut in height and width to the desired size. Installation of the profiled sheet begins from the front edge of the gate. The cladding is fastened with screws or rivets. Each subsequent sheathing sheet is superimposed on the previous sheet "on one wave".

The most often used material for covering sliding gates is profiled sheet, which is complemented by forged elements that give the structure an elegant and special look.
Installation of catchers: why and how?
One of the last stages of installing a ready-made set of sliding gates is the installation of catchers. The bottom catcher, installed when the door is fully loaded, allows partially removing the load from the roller supports when the door leaf is closed. To determine the position of the lower catcher, you must close the gate and align it with the end roller.
The upper catcher allows to keep the door leaf, which is in the closed state, from swaying during the action of sailing loads. The installation of the upper catcher is carried out at the level of the protective corners, and in the closed position they (corners) should touch the brackets of the upper catcher.
Rules for self-installation of automation
At the last stage, the automation is installed, if this option was originally planned. In this case, the movement of the sliding gate leaf is carried out using toothed racks, which are sold in meter-long pieces together with fasteners. The slats are attached to the supporting profile. When installing automatic sliding gates with your own hands, you should know that in addition to the toothed racks, you will need an electric drive, a remote control, a beacon lamp and a key. Everything is installed in full accordance with the requirements of the instructions attached to the equipment for automatic gate movement control. If in doubt, consult an experienced electrician.
As you can see, you can cope with the installation of sliding gates on your own. However, this process cannot be called easy. Not only knowledge is required, but also physical effort. Therefore, many private developers prefer to entrust the installation of sliding gates to professionals.
A gate with a sliding or, as it is also called, a sliding system is an integral part of the structure intended for fencing the summer cottage and adjacent areas.
To date, the range of such structures is extensive, but many craftsmen want to make their own gates of this type.
This is due not only to an economic point of view, but also in connection with the use of creative energy. Therefore, many people ask the question, how to make a sliding gate with your own hands and in a short time?
Types of sliding gates
Sliding ones are produced in different forms, which have their own advantages and disadvantages.
Cantilever gates
Cantilever door design allows you not to limit the upper dimensions of the product, and also excludes contact with the lower rail passing near the surface of the earth.
This is one of the most difficult constructions to perform. The basis of such gates is a console or, as it is also called, a channel. These devices hold the sash of the structure when opening and closing the gate.
In modern doors with a similar type of movement, there are no lower and upper guides, which provides the car with free movement into the yard... The canvas is suspended on a special beam, standing on rollers that move the surface of the product.
The roller blocks and the guide bar are usually placed in the lower section of the door. Often there are such recoil mechanisms with the reinforcement of rollers and beams in the upper or even in the middle part.
Such placement is justified in the case when it comes to a wall with capital properties or a sheet with increased strength that can withstand the large-sized weight of the structure.
For home use, it is best to do a lower movement so that you do not have to carry out additional work to strengthen the wall.
This gate last longer than others, because the sliding structure completely fits into the guide grooves that protect the product from the weathering of the external environment.
Cantilever doors are often electrically operated. It is attached between the roller carriages. The drive has a control unit and special devices to ensure safe movement.
Positive sides such gates are obvious:
For console systems there are disadvantages, but there are few of them:
- the design of such a gate is difficult to make with your own hands;
- the installation of the gate involves a free area for a gap, which is one and a half times larger than the opening itself. This is not always feasible;
- the need to create a strong foundation.
Hanging gates
 Sliding gates suspension system popular in warehouses, factories and garage docks. The principle of operation of such a mechanism is almost the same as that of conventional sliding gates, with only one difference - the guide bar is attached to the top of the opening.
When choosing elements for fastening the structure, you need to purchase only high-quality products.
It is recommended to choose a material suitable for this type of door from steel with additional galvanizing and PVC coating for resistance to negative natural factors.
The gates open along the wall, so they do not need additional space on the inside and outside. If desired, this design can be equipped with an electric drive for ease of use.
Advantages of sliding gates on a suspended basis:
- Suspended structures save space significantly.
- The strength of the door allows it to withstand wind loads.
- There is no need for additional cleaning of the entrance in front of the house from snow.
Roller constructions
 Roller gate are more popular for entering the courtyardthan in the garage, because the width of the garage wall does not always allow to place a solid sash and place the entire mechanism to the side when the structure is opened.
For the yard, this is an ideal option because of the space saving and ease of use of the device. When the button is pressed, the roller mechanism is triggered so that the fence moves to the side.
If you equip the device with automatic control, you can act on it using the remote control.
The gate structure consists of a guide profile attached to the bottom of the product, a roller mechanism on a bearing base, a frame sheet and other elements that fasten and hold the structure.
Rail gate
 The principle of operation of rail gates is to slide the protective curtain over the surface of a special rail located on the ground. The movement is due to the rollerwelded to the bottom of the product.
Of all types of doors with a sliding system rail mechanism is the most simple and demanded... It is often used at the entrance to private homes.
Such a mechanism has a number of advantages:
- the sash is supported, so it will never sag;
- the simplicity of the device allows it to be made by a craftsman who does not have much experience;
- the sash does not take up much space and is equal to the width of the entrance opening.
disadvantagessuch devices:
- the operation of the sash can be disrupted by trapped debris or snow;
- the guide rail must be cleaned regularly;
- a rail laid on top of the soil cover slightly protrudes, which makes it difficult for the vehicle to enter.
Sliding gates in two parts
 Sliding gates are sometimes made in two parts. This working principle allows you to save space in the width of the wallas the gate is divided into two parts.
The structure can also be equipped with automation and opened with a remote control. Electric drives are installed in each gate leaf.
Design and device of a gate with a sliding mechanism
One of the most popular gates are cantilever gates, the design of which consists of the following elements:

Making sliding gates with your own hands
Preparation for work start by checking the necessary tools:

All of these tools can be found in every home, with the exception of only a welding machine. You can ask your friends or neighbors for it. If funds allow, it is better to buy it, such a tool will never be superfluous.
You may be interested in how to make a fence gate from corrugated board.
Drawing and diagram creation
If all the necessary tools are available, you can proceed to the calculation of building materials that must be purchased in the construction market and metal warehouse.

The frame is done by welding first pipes 60x40 mm, 6 meters long to the guide. Next, two vertical pipes of 60x40 mm are attached, 2 meters each, the first to the edge, the second - at a distance of 4.4 meters from the edge of the horizontal pipe.
Attached to the upper ends of these pipes is a horizontal one, 4.4 meters long. The free edge of the lower horizontal pipe and the edge of the upper one are connected at an angle with a 2.56 meter pipe.
The fabric of the frame must be filled with vertical pipes 40x20 mm... Next, go to the power frame.
The foundation for the future structure must be prepared by digging a U-shaped pit with a depth of at least one and a half meters.
The section with an opening of four meters should be equal to six meters. Road clearance you need to draw at least seventy-five millimeters.
Power frame is prepared from a channel (2.2 meters long and 20 centimeters wide) and reinforcement, the height of which is 1.5 meters, in mutually perpendicular directions.
This structure is concreted and the drive platform and stand are welded to it. Next, the lower rollers are attached to the stand and the upper roller to the post. The upper and lower traps are attached to the post opposite to the moving gate.
The last element circuit is automation and gear rack.
Material selection
Having drawn a diagram of the proposed design, you need to carefully study the material for the frame and door leaf.
The frame is made of wood or shaped pipe.
The inner part of the gate is created from:

When choosing material from forged elements or wooden components, it is important to remember that reinforced parts of accessories and additional accessories are needed for such a structure.
Screw piles are often used in sliding sliding gates, and such supports are made within three or four days. If you use concrete base, such work is carried out in warm and dry seasons.
For the final drying of the material, a month must pass, and this significantly postpones the installation of sliding gates.
 therefore screw piles are more practical and smarter when installing the gate yourself. Such piles can be moved to different places, and the concrete will remain poured in its original place.
Structures withstand vibrations thanks to their blades, and the cement base will loosen over time and disrupt the entire propulsion system of the structure.
Foundations made using screw piles, is durable, and the installed canvas serves for a long time and without failures. Piles can be installed in weak and water-saturated soil. They cut through the soil to the limit until they find reliable support underground.
Installation of screw piles
The main condition for the high-quality installation of screw piles in such a structure is rigidity. This condition is due to the increased load on the screw piles. Material should not go into the ground even under its own weight.
When installing such a structure, a profile pipe with the selected parameters and a pipe sheathing should be used. The frame is pre-coated with a primer.
The accessories for the gate are selected taking into account the weight and height of the product. The canvas moves to the side along the guide, it is its quality that determines how long the structure will last.
It is important to know that the door rollback must exceed the size of the opening. This distance is considered to be the measurement indicator of the console, which is equal to the width of the opening.
For the effective movement of gates installed on screw piles, an appropriate area is required.

The choice of the site must be approached thoroughly and with the calculation that the width of the gate must be multiplied by a factor of one point five, then the ideal distance will be obtained. This is important for the convenient operation of the product..
Installation of piles produced in several stages:
- Laying the foundation, which includes marking the territory and clearing the pits from the soil. Installation of embedded materials and, if necessary, pouring with concrete.
- If the wizard plans to set up automatic control, wiring electrical cables .
- Sequential installation of poles and the entire gate system.
Estimated movement of the gate system fixed with lacingstretched along the line of the entire opening. The recommended fixing height is two hundred millimeters.
If the pit was poured with a concrete solution, it will take seven days to continue the work until the solution is completely dry.
Frame preparation
Metal product for the frame treated with anti-corrosion coating and give it time for the solution to dry out on the surface.

You can make the frame yourself, but most importantly, so that the welded elements are without holes in the joints... If there are such holes, dirt and snow will get into them.
The base of the frame consists of 60x40 mm pipes, as shown in the photo with the sketch above. The ribs of the structure and the lintels inside can have a cross-section of 20x40 mm.
Rama is assembled in the following order:
- Profile pipes are measured and cut according to the prepared drawing.
- The resulting parts to create a frame product are degreased, painted and treated with a special solvent.
- The prepared elements are laid out on a flat surface.
- The perimeter of the frame is assembled and tacked with a welding machine.
- The corners of the product are checked and, if everything converges, they are finally welded together.
- After welding, stiffeners and internal bridges are installed to the product.
- The lower part of the product is connected to the supporting beam.
- The surface where the welding work was carried out is covered with an anti-corrosion coating and an additional layer of paint.
The manufacture of sliding gates with a wicket significantly complicates the entire design and installation process. It is necessary take into account the location of the gate at the earliest stages of work.
Installation of corrugated board
To trim the gate you will need, screws 19 mm long and a screwdriver.
If the owner does not want to spend additional material for the counterweight triangle, this can be discarded, because it will not be noticeable from the street side.
Automatic gates will look even better if the pillars are sheathed with bricks. With basic knowledge of the masonry process, this is not difficult to do.
Necessary fittings
 The parts needed to create a gate are best purchased from specialized stores. It doesn't make sense to make them yourself.because it is not economically justified.
Before buying a rail mechanism, you need to calculate the required length. It is calculated based on the width of the gate and multiplying the number by 1.5.
Door rolling hardware, is selected based on the weight of the structure... There are parts that can withstand loads of up to four hundred kilograms, and sometimes there are models for forged gates on sale that can withstand up to eight hundred kilograms.
For gates with corrugated sheathing, parts that can withstand up to four hundred kilograms are suitable.
When choosing carriages with a roller mechanism, you need to decide from what material they will be created.
Market building materials offers to choose between metal and polymer materials. It is best to choose a polymer coating, if used correctly, it will last a long time and will create less noise than metal.
Fastening the strips
 In a brick row, three embedded parts are made for the subsequent installation of a cover strip. A piece of reinforcement is welded to the post. A corner is attached to the edge of the reinforcement product in such a way that one part of it is held on the brick, and the other bulges outward.
Top and bottom embedded parts installed at the level of third bricks, and the middle one is in the middle of the product.
A pipe is welded to the protruding corners - a strip with dimensions of 60x30 millimeters.
Guide rail
It is impossible to produce a rail for moving the structure at home, so you will have to spend money to buy such a part.
When choosing a material, you must first of all pay attention to the presence of a mirror surface and correct angles ... Manufacturers usually take care of their reputation and polish products from rust.
Based on the weight and size of the structure, a suitable rail is selected.
Maintenance of the rails is simple: you need to regularly check its surface for dirt and excess debris.
Roller carriages
 Roller carriage movement allows you to move the gate system along the opening... Each carriage of the system consists of eight rollers made of metal or polymer coating.
The process of making the carriage is not difficult: holes are made in the marked metal plates to place the roller mechanism in them.
To create a caret you can use bearings from old car , for example, from the Zhiguli.
If the metal is not strong enough, then the plates are welded. When drilling, it is best to use oil to cool the surface.
The axles and holes are measured and the surface is cut to the desired length. Washers are placed on the axis, then wheels, and the resulting structure is screwed to move. Before welding the base bearings must be tightly packed with grease.
The process of making homemade rollers for sliding gates is shown in the video:
Catchers and plugs
 Metal plates curved in a special way are intended to catch the gate and their commit after closing... With the correct selection and quality of the metal used, it will not be difficult to make such products.
The plugs protect the guide from snow and mud. It is possible to purchase ready-made protective elements made of rubber or plastic material. You can simply weld the ends of the bar material with a welding machine.
Independent production of fittings is allowed, but on the condition that the master already has experience in carrying out such work.
With a lack of experience, it is better to purchase additional items in specialized stores from reliable manufacturers.
Installation of the frame and gate
 After completing the creation and preparation of parts and structural elements, you need to install the frame and gates.
Carriages are placed on the channel installed in the foundation, while trying to push them apart when strengthening.
The frame for sliding gates is attached to the carriages and is set taking into account the level indicators. After that, the carriage platforms are lightly welded to the channel system.
After the performed actions, control measurements are made and the carriage platform is finally welded.
It is important to monitor the level indicators, which will indicate the presence of distortions in the structure.
After that, the traps of the upper and lower sections are welded in, and the end rollers are also installed.
Important to rememberthat the end rollers should go over the lower catcher system so that they completely unload it when the system is closed.
Automatic sliding gate system
 Automatic opening of sliding gates is carried out by a mechanism, equipped with an electric drive... Opening occurs using the remote control button. Any materials from the garage are suitable for assembling such a mechanism, and the fastening will take no more than a day.
The signal is supplied by a roller or chain system using an asynchronous motor.
At the preliminary stage of work, you need to select the appropriate engine for the mechanism.
If a three-phase meter with a star winding is available, it is recommended to stop at this device.
With such a device, system movement problems can be avoided and improve gate efficiency.
If the three-phase meter is not available, you can use single phase with capacitor type... It is important to know that such a device has poor performance, especially at system startup.
If neither the first nor the second option was found, you can use less expensive materials. The reliable connection of the kinematics must not be forgotten. The gear shaft is connected to the motor using a rigid coupling.
The gearbox can be replaced by a belt drive... This method of assembly work has the difficulties of connecting in tripod elements and the additional use of an automobile tensioning mechanism.
The mechanism with an independent shaft is given particular importance when using a belt mechanism. Extreme care must be taken to center the shaft.because it has two transmissions.
Self-made electric drive
 The most basic installation method automation of the sliding gate movement process is a chain or, as it is also called, rack and pinion transmission.
A bicycle chain is fixed on the gear shaft, and on top of it another one is installed, with a diameter in the links similar to that in the sprocket.
The chain is installed in a horizontal plane. Sprocket rotation in one direction or the other, it sets the entire sliding gate mechanism in motion.
The motor and gearbox are fastened with bolts with special nuts. The support for them must be rigid. Elongated holes are made under the base to securely fix the motor mechanism.
The next step in the installation is to attach the chain to the gate. The chain is installed in the lower part of the beam, and a casing is used as additional protection made of rubber material.
In order to finally strengthen the chain, welding is used.
Installation of automation on the gate
To put it all together, you need to do several steps:
- Before installation, you need to choose a place for installation and start installing the rail in such a way so that it is on the surface of the gear.
- At the desired point, the drive is fixed with a welding machine.
- Next you need install the toothed rack... It is welded to the pipe and pulled over the surface of the web.
- All elements are checked and re-welded.
- The next stage is the installation of limit switches. They are mechanical or magnetic.
- The connection of the system must be made according to the instructions given by the manufacturer. Settings for additional functions are carried out using the remote control.
- Further install light elementscapturing photo signals.
- Attachment of a signal type of a lamp that transmits data on approaching objects. This element can be excluded from the installation, but for the safety of the structure it is better to use it.
For installation, you need to make a hole in the pipe and pass the main power supplies through it.
How to make a simple sliding gate with your own hands, see the video below:
In this article, we will consider all the subtleties of installation and construction, as well as all the possible problems that may arise if you decide to install sliding gates with your own hands. Usually the biggest challenge is drawing the sliding gate. Next, we will consider the basic principles of installing sliding gates with our own hands, video instructions and photos of various designs.
Width
This is the most important questionwhich you must answer first of all. The width means the free space between the pillars of the sliding gates when they are completely open... To answer this question, you need to decide on several factors:
- What cars will be calling? Cars? KAMAZ trucks? Tractor? Gazelles?
- At what angle will they drive in, especially cargo?
In practice, the width of the gate is made such that when passing through, there is a gap of at least 35 cm between the car mirrors and the gate posts on all sides.
Practice shows that the optimal width of a sliding gate is approximately 4.5 m, and the ideal width is 5.5 m.
Please note that everything written above refers only to the width of the opening, but not to the width of the canvas. If we consider the canvas, then there is an important nuance that must be taken into account. The width of the canvas must be approximately 25 cm larger than the width of the opening. Otherwise, when the gate is closed, a gap will appear, which can be seen at an angle to the plane.
Height
Some people think that if the height of the canvas adjacent to the fence is 1.8 m, then the height of the canvas must be 1.8 m. In fact, this is not the case. let's let's look at an example:

Now let's see what happens in the end. In these cases, you take into account the same height of corrugated board, but do not take into account the fact that in the version with a fence, the profiled sheet will go straight from the ground and its edge from above is clearly 1.8 m above the ground. But, in the case of a gate, the bottom edge should not touch the ground, it must be raised by about 15 cm.
It should be noted that the distance between the ground and the bottom of the door can be adjusted using the adjustment levers, which are usually included in the set of rollers. Roller supports are put on and fixed on the adjusting platforms using nuts, and with the help of them, the installation height of the supports can be adjusted in the range of 6-10 cm.
Further. Unlike a fence, a profiled door leaf, as a rule, is installed in the profile from which the leaf frame is made, and the profile is most often welded from profiled pipe 40x60 mm... The door height is already obtained: 100 + 40 + 2000 + 40 \u003d 2180 mm. But this is not all, since a guide beam, which has a height of 60 mm, is welded to the canvas at the bottom. That is, taking into account this beam, the distance from the ground to the top will already be 2180 + 60 \u003d 2240 mm. As you can see, according to this scheme, the upper edge of the canvas will be 240 mm higher than the top of the fence.
Diy drawing and diagram of sliding gates
 The design of this type of gate is so simple that you don't need any drawing. Below we will explain the gate operation scheme, then you will easily understand their construction. So, the basis of the design of sliding gates are two rollers and a moving guide beam along them.
The guide, moving along the rollers, is the basis of the entire structure. It is welded to the bottom of the frame and now it moves along the rollers. Since the rollers should not be located in the opening, so as not to get in the way under the feet, they are fixed to the side, outside the opening, and the gate is extended with a "counterweight"... A typical design is one where the length of the counterweight is half the length of the door opening. In other words, for an opening of 5 m, the length of the frame is 5 + 5/2 \u003d 7.5 m. Moreover, 2.5 m in the frame will be a "counterweight" that goes beyond the opening and is on rollers.
All other components of sliding gates, the drawing of which should be drawn up by a professional, bear almost no loads and are required to protect the canvas from swaying.
Let's consider element by element set of accessories, which are required for installing sliding gates with your own hands:
- End cap for inner rail. Her appointment for to a greater extent decorative, and also to prevent snow from stuffing inside when the gate rolls back in winter;
- Support rail with 2 adjustment rollers. It is located on top of the post and simply keeps the canvas in an upright position from tipping and swinging;
- Top catcher. It is mounted on a "receiving" post. The trap's task is to protect the canvas from swaying when they are closed;
- Lower catcher. Almost the same as in the previous paragraph, but with a support platform, where the support roller is rolled if the gate is completely closed. The task is to keep the gate from swinging, as well as to unload the guide and drive rollers;
- Support roller. It is both a plug for the front of the rail and a damper. When the gate is closing, it enters the "lower catcher", dampens the impact of the closing;
- The guide itself, due to which the gates move back and forth along the rollers.
- Support rollers with adjustment stands are elements that ensure the rolling of the gate and bear the main load.
Adjustment stands required for:
- the possibility of replacing the roller bearings if they fail;
- adjusting the height of the gate to the ground;
- precise installation of straight roller bearings.
DIY installation of sliding gates
Mortgage
 For most people, the embedded element raises many questions, since the dimensions and shape of this part are not clear, and everyone is trying to find its design diagram. You don't need a circuit. The task of this element is only to prepare a certain basis on the foundation for further fastening of the rollers and the drive by welding. With this in mind, the shape is absolutely irrelevant, the dimensions may vary. Under the mortgage channel # 10-25 is used... The heavier the gate, the more powerful the channel is needed. The mortgage must stand directly on the line of movement of the door leaf, the platform for the electric motor is shifted from this line into the territory.
Foundation
This is probably the most responsible and important element of the entire structure. To begin with, the foundation is required for a mortgage, where the support rollers will be fixed. Some companies and private builders offer a more economical base option than reinforced concrete, namely, they propose to screw a pair of screw piles, where the mortgage is then welded upward, and now, by and large, almost everything is ready.
Then, next to it, another one is screwed into the bundle of piles slightly obliquely (since there are not many piles exactly next to it), under the post. We will not even consider this method. Probably, it will fit light and small sliding gates, for example, 2.5 meters long with a light frame, but a larger gate will “walk” on this base.
We believe that in this case there is no alternative to a reinforced concrete foundation, but it can also be performed in different ways. So, for example, it is often proposed to fill only one foundation - directly under the mortgage, or two separate ones, one of them - under the mortgage, the other - under the "receiving" post.
This option is much better than the very solution of installing screw piles, but the presence of two separate foundations can end in failure, especially in cases where these foundations are not below the level of freezing of the earth. It's just that as a result of frost heaving, these individual foundations can move independently of each other. In this case, even with small displacements relative to each other, everything can end with the gate not getting into the catchers that are on the receiving post, and you will need to readjust them all the time.
The solution to this problem is very simple (but more expensive than two separate foundations) - both pillars must connect with one foundation... In this case, even if the base is displaced, both pillars will constantly be located parallel to each other, moving in one bundle.
Pillars
 They must be installed before pouring the foundation. In the version with sliding gates, they carry almost no load, in addition to the wind. That is, the canvas, the gate, as a rule, has a large "windage" and in a strong wind, the entire load is transferred from the canvas to the posts. Considering the best option, then for these gates it is enough to use a pipe 65x65x2 mm.
Regarding whether it makes sense to put U-shaped pillars or ordinary - there is no general opinion. The accessories can be installed without problems on single posts. But the U-shaped version is better, this option is preferable in the case when in the future you plan to supply not only a drive, but also a set of gate automation, which includes photocells. To begin with, it is much more convenient to install photocells on the inner poles, and not on the poles outside (taking into account anti-vandal considerations). And also, inside the pillars inside it is quite convenient to lay hidden wiring to the signal lamp and photocells.
Frame construction
 The frame is preferably made of metal. Structurally, it is made of square or rectangular pipes of several standard sizes. Larger pipes are used in the role of a load-bearing frame, internal infill in the form of stiffeners made from smaller pipes.
It is advisable to immediately weld the toothed rack (or threaded cylinders for fastening the toothed rack) to the frame. Gear rack fasteners (threaded cylinders, 3 pieces per meter of rack) are included as standard. Be sure to check this fact at the time of purchase! In order to then install automation without problems. Otherwise, then it will be very inconvenient to weld it evenly to the bottom of the canvas.
Its length must be at least one meter of the length of the opening. This one extra meter (or even more) of the rack goes into "counterweight" to constantly mesh with the cogwheel of the frame drive motor. The toothed rack is versatile and fits 99% of drives (NICE, SAME, Alutech, Dorhan and so on). If you weld threaded cylinders for further fastening of the gear rack, then it is advisable to weld them first to the guide.
Also, do not forget that if you want to install a wicket in a sliding gate (by cutting the wicket directly into the door leaf), then it must be done in that part of the gate that is closest to the supporting rollers on which the leaf is held. If you want to make a wicket at the far end of the curtain from the gate rollers or the middle one, then you can significantly disturb the balance of weight distribution, force, "increase the lever", that is, those indicators that affect the rollers.
Yes, sliding gates can be quite expensive, but with their manufacturability and simplicity of design, they will give a big head start to lifting and swing gates. Installed clearly in compliance with technology, they are less likely to jam and deform.
Sliding gates can be called the most popular type of gate today. Previously, not everyone could purchase such a structure because of the high cost of both the fittings and other elements of such gates. Today their price is much more affordable. The advantages of such gates are practicality and durability. But since this is a complex technical design, it is better to leave the installation of the gate to professionals. If you are confident in your abilities, have some construction skills and tools, then installing a sliding gate with your own hands will not be associated with many difficulties. Moreover, you can save on hiring specialists. The main thing that is needed is taking into account the technical requirements, the selection of components, compliance with the regulatory loads and following the instructions. Let's take a closer look at the installation process.
Elements and components of the gate

In fact, having everything you need to complete the work, it will not be difficult for you to install the gate. You do not need especially deep knowledge in construction, basic knowledge, material and following the recommendations of specialists are enough.
You will need consumables for the work, but the main and important part of the elements is the fittings responsible for the movement of the gate. It consists of:
- roller carriage or carriage (2 pcs.);
- bottom and top catcher;
- guide of the U-shaped beam;
- gear rack;
- removable end roller;
- top lock with rollers;
- plates for fixing the roller carriage.
![]()
When choosing quality fittings, pay attention to trusted manufacturers, taking into account the price and quality of products. You can also ask for help from professionals who will help you choose the best option.
It is much easier to buy a ready-made set of gates with all the necessary elements, which you just need to assemble and install in place. It has special installation instructions, thanks to which you can easily do all the necessary work.
Work plan

- Trench digging and foundation construction. The sliding gates are heavy enough, so for smooth and correct operation you will need to make a foundation.
- Installation of wires, if you want your gate to open independently from the drive, or if you plan to install a video camera on it.
- Installation of roller elements.
- Installation of gates on a rolling mechanism. At this stage, you need to hang the gate without adjustment.
- Fastening fittings that catch the goal leaf.
- Final gate adjustment.
- Connecting automation, if provided.

If you want your gate to serve for a long time and without interruption, you need to strictly adhere to the plan and follow the instructions, carefully following each step.
Digging trenches and preparing the foundation

First of all, you need to complete the preparatory work for the foundation. Start by planning your trench. To do this, follow these tips:
- From the border of the doorway, retreat a distance that is equal to half the width of the entire passage. For example, the width of your driveway is 4 m, then the length of the foundation will be 2 m from the border.
- The width of the trench depends on the width of the gate structure itself. For example, the width of your gate is 20 cm, then you need to dig a trench 10-15 cm wide in both directions, that is, 40-50 cm.
- Depth is a matter of controversy for experts. Some say that it is important to deepen the trench below the freezing level, while others say that this factor does not affect the future foundation at all. In the opinion of the former, the foundation should go 1–1.5 m deep, in the opinion of the latter, 0.5–0.7 m will be sufficient. How deep you choose is purely your decision. We recommend making it no more than 1 m.
After you have decided on the dimensions, use a shovel to dig a trench in the right place. You should end up with the image below.
Preparing the embedded element

In order to make an embedded element, you will need:
- channel with a width of 18–20 cm (it can be replaced with a corner of the same dimensions);
- reinforcement Ø 12–15 mm;

The filling element is a structure made of a channel and reinforcement, which in the future will be installed in a trench and will be concreted. Take a metal channel and cut it to the length of the entire trench. If it is 2 m, then the channel should be 2 m long. After that, the reinforcement must be welded to it to form a metal frame. The length of the reinforcement rods should be 5–10 cm greater than the depth of the trench so that it can be sunk into the ground. How exactly you will weld the reinforcement depends on you, there are no restrictions here, it can be welded in 15 cm increments. The main thing is that the frame is strong, has a vertical base that is connected by jumpers.
Instead of fittings, you can take another type of metal products, for example, corners.
After the frame is ready, it can be installed in the trench. But before that, the bottom of the trench should be covered with sand or fine gravel and tamped down, making foundation cushion 5 cm high.Sink the reinforcement so that the channel surface is flush with road surface... Using a building level, align the frame perfectly level. If there is a strong skew on either side, remove the frame and add sand to that place. If the mortgage is not aligned, this will prevent the gate from moving correctly.

The foundation must be level with the road. The ground clearance can be no more than 5 cm, so that winter period you haven't had any problems using it.
Electricity wiring

If your gate will be equipped with an automatic gate opening and closing system, or you need to install cCTV, you need to take care of the electrical cables. They need to be carried out immediately before pouring the foundation. The cable is placed in a special corrugated hose and laid in the foundation structure. In advance, you need to decide on the place where the drive will be installed, and lead the wires there. The free ends of the wires must be brought out above the level of the foundation by 1–1.5 m. In order to do everything with your own hands, look at the diagrams and drawings of the wiring for the sliding gates.
Pouring the foundation

Once you have laid the wiring, the embedded element can be poured with concrete. For this you will need cement M400 brands, sand and crushed stone. The proportions are as follows: 1 kg of cement requires 3 kg of sand and 4–5 kg of crushed stone. Water should be half the weight of all components. It turns out:
The total is 4 liters of water per 1 kg of cement, 3 kg of sand and 4 kg of crushed stone. Knead the required amount of mortar and fill the trench. It is important that the surface of the channel is not completely concreted, the concrete must be at its level. Now the foundation must be left to dry. It will take 3-5 days, during which it will get stronger and be reliable enough for further work.
Assembling the door leaf

To make a gate frame, you need to have skills in working with welding machine, since all elements must be connected by welding. If you have no experience in welding, you can ask for help from your friends or to a special workshop, where they will make a door frame according to your drawings.

To make a door frame, you need to purchase shaped tubes. Their size will correspond to the desired size of the gate. There are a variety of designs you can make. The main thing is to choose the one that suits you, cut the pipes to the required size and carry out welding work. Professionals advise to weld the frame so that the horizontal cross members are on top of the vertical pipes. Thanks to this, you will prevent corrosion, you only need to plug the horizontal pipes. When the structure is ready, the joints must be cleaned, and the frame must be covered with protective paint.
If your gate is larger than 1.5 m, in order to strengthen the structure and prevent sagging, you need to weld the crossbars in 50 cm increments.
At the same stage, a U-shaped guide beam should be welded to the lower pipe, thanks to which the gate will move. Then the frame is sheathed with a profile sheet.
One of the options for how to make a door frame is presented below.
Installation of roller carriages to the channel

Roller carriages can be called the most important mechanism, since they must withstand the load of the entire structure, therefore, they should be attached to the channel as securely as possible. The plates for fastening the rollers must be welded to the channel. Everything is done as smoothly and in one plane as possible so that the gate moves freely. You can use a laser pointer or a taut cord to align them. Another option is to draw a parallel line on the foundation that will be a tangent line to the edge of the plate. The plates should be welded in the middle of the channel. To do this, step back 15 cm from the edge, closer to the opening and fix the first plate. The second plate is attached 10 cm from the opposite edge.

Now you need to attach the roller carts to the plate. They are usually connected with bolts and nuts. Tighten them securely and install the gate. Check the smoothness of the movement, carry out control measurements and adjust the position of the roller supports to set the gate perfectly level. To do this, you can use a cord, which must be pulled along the gate opening line, at a distance of 20 cm from the surface and 3 cm from the second post. The cord will serve as a guide to help keep the gate perfectly straight.
Installing the top clip

So that when the gate moves, they do not slide out, a lock or guide is installed on top of the post. It will stop the gate and prevent it from swaying in strong winds. To do this, mark the holes for the fasteners on the support post. Measure everything correctly so that the upper frame can go into the retainer without obstruction.
A bracket for attaching the rail must be installed on the post. If you will be fixing it in concrete or brick, use an anchor with a stud diameter of 10 mm. If you attach it to metal, then special screws will do. In the case where welding is used, the rollers must be removed.
After attaching the latch, check it. The gate should move smoothly, maintain verticality, and the rollers should wrap tightly around them.
There are different fasteners, roller or in the form of a regular bracket. Which device to choose is your decision.
End roller and plugs
![]()
From the bottom to the end of the U-shaped guide bar, in its front part, you need to fix the removable end roller, which is inserted into the profile. It is easily attached using a bolted connection. On the opposite side, you need to install a plug (plug) or the same roller.
Such a roller is needed so that when the gate is closed, the guide rolls onto the catcher located below, which will be installed on the post on the other side. This way you can reduce the stress on the base plates that hold the rollers to the foundation. The plugs or plugs keep snow, rain, dirt and debris out of the guide bar. If they are not there, the roller carts can quickly fail, and the gate will not open smoothly and easily.
Attaching the upper and lower catcher

To secure the bottom and top catchers, you need to close the gate all the way. On the post, mark where your gate frame ends. In this place, above and below, you need to fix the mortgages, to which the catchers will be attached. Depending on the mortgages, they can be fastened by welding or bolting.
The catchers will soften the contact of the door frame with the support rollers, and also minimize the loosening of the structure in strong winds. The bottom catcher also serves to reduce the sagging of the frame, which may appear after a long operation of the door. Finally, check that your gate is installed correctly. Open and close them several times, make sure they run smoothly and evenly.
Installation and connection of automation

If you want your gate to automatically close and open, you need to purchase special equipment and install it.
First of all, a mounting plate should be welded to the channel, to which the drive will be connected. Usually such a plate is included in the kit. For welding, you can use profile pipes that are welded to the channel, and then a plate is welded to them. After that, the engine itself is installed on the base and fixed with bolts, which are also included in the kit. It has adjusting screws, thanks to which the motor can be adjusted up-down, left-right.
It remains only to weld the toothed racks to the U-shaped frame. Patience and precision will be needed here, as the slats should be welded so that they are as a whole. Then, when driving, you will not hear any extraneous knocking of the gate. Then adjust the drive so that it can easily operate the gate. It remains only to configure the mechanism according to the manufacturer's instructions.
That's all, after all the manipulations, your gate is ready for use. You can be proud of yourself, because you yourself were able to do such a great job. Correctly installed gates will be quite reliable, and their service life will please you.
Video
See detailed video instructions for installing sliding gates:
Another video instruction:
Sliding gates are a compact and ergonomic solution for a country house. As a rule, they are manufactured and installed by professionals who have a workshop and equipment at their disposal. In this article we will show you how to make and install sliding gates yourself.
Sliding gates are a sliding structure that moves along the fence, completely blocking or freeing the entrance to the territory. There are two types of such gates:
- Monoshirma - consists of one sash. The entire structure rests on an additional foundation through a steel embedded part. Does not require constriction along the tops of the pillars and shifts to one side. It is used with a blade height up to 2 meters. Option for private construction, outdoor parking lots, courtyards.
- Double synchronous design - consists of two identical canvases that move simultaneously in different directions. Supported by two additional foundations. Requires the installation of an upper beam, along which the canvases move on rollers. Withstands heavy weights. It is used at a height of more than 2 meters. Option for tall hangars, strategic and industrial facilities and cargo areas.
The main advantage of sliding gates is that they do not require space inside or outside the site when opening.
Preparatory work
Gate production is not cheap and can be up to 60% of the final cost. Therefore, consider the possibility of making them yourself.
To make a sliding gate leaf, you will need locksmith tools, clamps, a welding machine and the corresponding skills. It is worth considering that the product must be welded without distortions and strains, so you need to choose a flat area and prepare goats or a prefabricated frame workbench of a suitable size (the dimensions of the future canvas plus 1 meter on each side).
- the pillars should be static (not dangling), supporting elements will be attached to them;
- the surface under the moving part of the gate must be horizontal, without a slope;
- "Ground clearance" not less than 50 mm;
- the length of the entire movable stage will be 50% greater than the width of the opening.
Attention! The upper edge of the canvas should be at least 20 cm below the top of the posts.
The sliding gate is based on a set of accessories. This is a set of parts necessary for the normal functioning of the finished product. These kits are produced as standard, all elements are carefully adjusted and presented in three versions:
- Small kit. Opening width up to 4 m, weight up to 400 kg.
- Medium set. Opening width up to 6 m, weight up to 600 kg.
- Great set. The width of the opening is more than 6 m, the weight is more than 600 kg.
Attention! Be sure to take these data into account when choosing the filling of the canvas frame.
The kit includes the following parts:
- main rail (6 m)
- support bar with rollers
- end roller
- top and bottom catchers
- trolley roller carriages
- plastic guide plugs
Manufacturing of sliding gates
Consider the assembly of the frame and the consumption of material using the example of a canvas for an opening with a width of 4 meters, a height of the canvas from the ground 2 meters (ground clearance 75 mm) and light filling from a profile (as the most common option). A distinctive feature of the retractable design is the presence of a counterweight. It is a part of the canvas that does not cover the opening. As a rule, its length is taken as 50% of the opening width.
For the manufacture of the frame, you will need rectangular pipes of the following dimensions:
- 60x30 - 16 lin. m (3x6) - to create a frame. 1 piece - 6 m, 1 piece - 4 m, 2 pieces of 1.85 m each, 1 piece - 2.7 m;
- 40x20 - 20 lin. m (4x6) - to create the inner part of the frame. 3 pcs of 4 m, 4 pcs of 2 m;
- 6 m guide rail from small or medium set.
A 60x30 pipe is welded onto the bus along its entire length with a wide part, while 30 mm should be retreated from the visible edge (a vertical stand will stand there). Welding seams 50 mm long are placed at 400 mm intervals on both sides. Along the width of the gate (4 m), 60x30 pipes with a length of 1.85 m are grasped perpendicular to the tire.We cut the free ends of these pipes (if necessary) and connect with a 60x30 pipe with a length of 4 m.
Attention! At this point, you need to check the diagonals, set the size and eliminate distortions before welding.
 1 - guide rail 6 m; 2 - pipe 60x30 5.97 m; 3.4 - vertical pipes 60x30 1.85 m; 5 - pipe 60x30 4m; 6 - slope 60x30 2.7 m
After eliminating the distortions, mark a 60x30 pipe with a length of 2.7 m in place from the free end of the tire to the upper corner of the frame (in the form of a slope). After trimming, we install it on tacks and scald all pipe joints.
We divide the inner part of the frame into equal rectangles (6 in total), lay out the 20x40 pipes, mark in place and cut. These pipes will be welded with a narrow plane to the frame along its axis, therefore, 20 mm spacers should be prepared in advance, so there will be space for the profiled sheet to the edge of the frame. We grab and weld pipes 20x40.

All welded seams must be cleaned (grinding disc) and polished ("petal" disc) with a grinder.
As with any steel structure, the frame must be painted. First you need to remove metal dust and scale. Then be sure to wipe it with a cloth soaked in solvent. Then prime and paint.
After the paint has dried, fill in the frame. We fasten the cut-to-size profiled sheets to the 20x40 pipe with rivets or self-tapping screws according to the marking. Filling options can be very different - blockhouse, sandwich panels, paneled panels, mesh, polycarbonate, steel rail or grating. This does not affect the design and assembly principle of the frame.

Attention! If the frame is filled with artistic forging, a blockhouse or other massive elements, consider the weight of the product when choosing a standard set for sliding gates.
Installation of sliding gates
To install the gate, you will need a powerful embedded part (ZD), as a rule, from channel No. 20 (width 200 mm), firmly fixed to an additional foundation, which takes all the load from the structure. It will be located on the side of the pillar, towards which the rollback will be performed when opening. The foundation will be made in the form of two piles (1 m each) at the edges, united by a grillage, which acts as a cushion for the SP. For ease of installation and reliability, it is better to weld the frame in advance and make it in the form of a whole structure with a channel. Before placing concrete, make sure that the position of the SP is strictly horizontal in all directions.
 1 - piles 1 m long; 2 - channel 200 mm wide and 2 m long (1/2 of the opening width)
After the concrete has hardened along the edges of the door, we weld on the roller carriages from the set strictly along the axis of the gate movement. We bolt the rollers onto them.

On the support pillars from the side of the gate, we fix vertically pipes 60x80 (false pillars) along the height of the canvas plus 10 cm. canvas between openings. We grab the support bar with rollers to the side post at the required height. To the receiving - upper and lower catchers.


Attention! All welding work until the end of the adjustment is carried out by spot welding ("tacks").
We mount tightly on the seat. The rollers of the lower carriage should go into the tire, the upper tube of the 60x30 frame should fit between the supporting rollers. If you have free hands, the strip with supporting rollers can be installed in place - during the installation of the blade itself. We attach the end roller according to the instructions. We carry out tests, noting the nuances of the gate. Then we make adjustment and final fixation of all welding units.


Sliding gate automation
Like any other type, sliding gates provide for the use of automatic operation and remote control. However, the installation of such devices requires specific knowledge and practical experience.
It is quite possible to make and install the structure itself, but it is better to turn to specialists to connect the automation. The equipment, if desired, can be installed at any time, but if it is known immediately, then it is better to lay the sleeves for the power cables in advance.
You can also make your choice in advance. We recommend the following automation models:
Sliding gate kits:
| Firm | A country | price, rub. | Note | ||
| Small | Average | Large | |||
| Rolling Expert | Ukraine, Kiev) | 4000 | 5000 | 6700 | +600 RUB for 1 running. m of rail * |
| Rolling-HiTech | Ukraine, Zaporozhye) | 4500 | 5500 | 7800 | +730 RUB for 1 running. m of rail * |
| Wesler-Profile | Austria-Ukraine (Dnepropetrovsk) | 4800 | 5900 | 7400 | |
| Alutech | Belarus (Vitebsk) | 6300 | 7000 | 8100 | +660 RUB for 1 running. m of rail * |
| Rolling Center | Italy | 15500 | 27300 | 36500 | +800 RUB for 1 running. m of rail * |
* - Each standard set includes a 6 m rail. The amount of surcharge is indicated for each additional meter of length.
Estimate for the manufacture of sliding gates:
| Name | Unit rev. | Qty | price, rub. | Cost, rub. | Note |
| Pipe 60х30 (1 running m \u003d 3 kg) | run. m | 18 | 90 | 1620 | New * 6 m each |
| Pipe 40x20 | run. m | 24 | 60 | 1440 | New * 6 m each |
| Professional list | m 2 | 8 | 160-270 | 1280-2160 | Depending on thickness and finish |
| Channel | run. m | 2 | 750 | 1500 | New * by r. m |
| Rebar 16 | run. m | 20 | 30 | 600 | New * 6 m each |
| Concrete | m 3 | 1 | 1000 | 1000 | Approximate price of sand + cement + crushed stone |
| Paint, primer | kg | 3 | 100 | 300 | Conventional for metal |
| Other (discs, drills, electrodes) | - | 1000 | About | ||
| Total for material | - | 8740 | Without the cost of automation | ||
| Job | - | 6000 | Without automatic connection ** | ||
| Total | - | 14740 | Fabrication and installation of canvas | ||
* - in the manufacture of the frame, it is allowed to use a used material cleaned from rust. Savings can be up to 60% (for the indicated positions).
** - the approximate cost of work on connecting automation is 3000-5000 rubles.
Sliding gates are not cheap pleasure. However, in the long run, they justify every ruble invested. Successfully combining practicality and compactness, they are the arithmetic mean of swing and lifting-section structures. At the same time, due to the simplicity and manufacturability of the device, correctly installed sliding gates are less prone to distortions and jamming than their counterparts.
Vitaly Dolbinov, rmnt.ru
Sliding or sliding gates are a complex mechanism, but, nevertheless, because of their convenience, they have become widely used both in industrial facilities and in private households. There are many manufacturers who make ready-made gates and accessories for them, a qualified workforce will quickly and competently install, but those who want to save money and use creative energy in business will be interested in the device of sliding gates with their own hands. Moreover, it is quite possible.
Types of sliding gates
Sliding gates come in different designs, each with its own advantages and disadvantages. Let's mark them.
Hanging sliding gates
These gates were most often used at the entrances of enterprises and other protected areas. At a considerable height, in order to be able to enter freight transport, a metal beam was mounted, and no longer note with the help of roller carriages, the door leaf was suspended.
 Hanging gates - reliable, but material intensive
 This design is quite reliable, and such gates, created more than 50 years ago, still work, but now they are not used much for two reasons:
- The upper beam still limits the dimensions of the door opening.
- This design is very material-intensive, and what was allowed during the Soviet era and the then metal prices, is now simply unacceptable.
Sliding gates on the rail
This is the simplest sliding gate design and theoretically the most reliable. The door leaf, standing on rollers, travels along a special rail located on the surface. The gate is still supported at one upper point at the point where the gate leaves when opened. Such gates are best used where the territory is periodically and constantly cleaned, which is often unattainable in Russian conditions. Normal snowfall will easily block the operation of such a gate, and it can be very difficult to get them to work again.

A significant advantage of such gates is that in order to open them, they need to go beyond the fence exactly the width of the opening, and this, given a lack of space, can be a determining factor for making a decision in favor of such a design.
Cantilever sliding gates
In order for the gates to have no size restrictions from above and there was no contact with the ground rail, cantilever sliding (sliding) gates were invented. This is the most complex gate design, but these "sacrifices" are absolutely justified. The leaf of such a gate does not have contact with the surface, but is suspended on cantilever roller blocks using a guide beam. Most often, such a beam and roller blocks are located at the bottom of the gate.

There are times when the guide rail and roller blocks can be located in the middle or even on top of the door leaf. This can be justified when the cantilever units can be hung on the main wall of the building or there are any building structures or structures that can withstand the loads from the door leaf. Otherwise, you will have to specially build a load-bearing structure for the gate, which is far from always beneficial.

That is why, in most cases, cantilever sliding gates with a bottom location are used. load-bearing beam.
Prices for sliding gates
Sliding gates
Description of the construction and operation of cantilever doors
A schematic diagram of a sliding gate with a lower console can be seen in the figure.

The door leaf is mounted on a frame (1) made of profile metal pipe... A bearing beam (2) is welded to the frame, it has a special profile, inside which roller carriages (3) fit tightly. At the same time, the beam can move along with the gate to the left - to the right along the carriages, ensuring the opening and closing of the gate. Obviously, the girder and roller carriages bear the greatest load, especially at the moment of closing or fully opening the gate. In order to unload the gate when fully closed, an end unloading roller (4) is used, which enters and abuts the lower catcher (5). In another part of the gate, to fix the curtain at full opening, an end roller with a catcher stop can also be used, but in this diagram it is not visible.
To prevent lateral rolling at the gate, there is a guide with rollers (7) and an upper catcher (6), which fixes the leaf in the closed state. To avoid the ingress of dirt and foreign objects into the interior of the beam, plugs (8) are used. The entire structure of the door is mounted on three main load-bearing elements: a support post (9), a counter post (10) and a foundation for roller carriages (11). If the site already has sufficiently strong supports for the gate (brick, concrete or metal), then they can be used as support and response pillars, and if not, then they will have to be built separately from a profile metal pipe. The foundation for the console will have to be constructed separately in any case.
In sliding gates, an electric drive is quite easily implemented, which is fixed between the roller carriages. To set the blade in motion, a toothed rack is fixed to its lateral surface. The drive is equipped with a control unit, as well as various safety devices.

Advantages of cantilever sliding gates
Cantilever sliding gates have a number of advantages:
- Such gates do not have detachable leaves and therefore do not reduce the usable area of \u200b\u200bthe territory, and if the gates are accidentally opened, there is no danger of damaging the vehicle in front of them.
- The door opening has no upper and lower size restrictions.
- Abundant ones do not interfere with the operation of the cantilever doors, since the door leaf is hung about 10 cm above the ground.
- All the rolling elements that ensure the door operation are located inside the beam, therefore they are not affected by weather factors. Even a child can move the gate thanks to its well thought-out design and low friction.
- The strong foundation of the console and the well-thought-out system of holding the door leaf in a vertical position allows such doors to withstand high wind loads.
- Sliding gates are easiest to equip with an electric drive and safety elements.
There are still some drawbacks to sliding gates, but they are few:
- Cantilever sliding gates are one of the most complex in design, therefore, their installation is not easy.
- To install them, it is necessary to have a free area of \u200b\u200bthe fence one and a half times larger than the size of the opening, which is not always achievable.
Determination of the possibility of installing sliding gates
Even with a great desire and remarkable financial capabilities of the site owner to install sliding gates, situations may arise when the installation is either impossible or very difficult. What are these situations?
- The space where the gate will roll back along the fence should be free for at least one and a half of the width of the doorway. This is due to the fact that, in addition to the part covering the opening, on the door leaf, there is also a technological part, which takes at least half of the opening width along its length - this way the loads from the gate to the console block will be better distributed.

- Sliding gates move in a straight line, which means that the required section of free fence space must also be straight.
- In the place where the gate will move, there should not be any unevenness in the relief that would interfere with the free movement of the gate.

- There should be no gates on the way of the gate movement; it is better to do them from the opposite side. Sometimes they order sliding gates with built-in wickets, but they will inevitably have high thresholds, which is extremely inconvenient for children and the elderly.
- It happens that the owners intend to use the gate as a wicket - when the canvas moves away at a distance sufficient for the passage of people. This is not necessary, since any gate mechanism is designed for a certain number of cycles and their frequent use will greatly reduce the resource.
- If you enter the territory of the site from a narrow alley, then to facilitate maneuvering it is necessary to increase the opening of the gate, which will affect the dimensions of the canvas.

If there are no such difficult situations on the site, then you can proceed to the device of the sliding gate with your own hands.
In order for the sliding gates to be installed correctly and in the future to have a long service life, it is necessary to divide the technological process into several stages.
Preparatory work
The first and one of the main parts of the preparatory operations is the assessment of the gate installation site. What should you pay attention to?
- If the gate will be installed instead of the old ones with a different design, then the presence and condition of the support pillars is assessed. If they are made of brick, reinforced concrete with a cross section at least 20 per 20 cm, profile metal pipe with a cross section at least 60 per 40 cm, their strict verticality is maintained, and they are securely fixed in the ground, then they may well serve as a support and response column for sliding gates. If not, you will have to rebuild your pillars.
- Near the support pillar, it should be possible to dig a hole for the foundation, which should be located close to the pillar, run parallel to the fence and have dimensions of 500 mm by 2000 mm.
- If there is a new fence on the site, then all the work on its construction and preparation for the installation of sliding gates can be combined, which is most preferable.
- Very often, brick pillars are erected at the entrance to the territory, which is both practical and beautiful. During their construction, it is necessary to make embedded elements in the form of steel plates 100 * 100 mm and 5 mm thick, three on each pillar. The top plate must be placed on the inner side of the post, close to the edge, which is closer to the opening. The distance from the top of the post to the plate is 200 mm. The bottom cover plate is located similarly to the top one, but at a distance of 200 mm from the zero mark. The entry level through the gate is considered to be "zero". The middle plate is placed halfway between the top and bottom. The gate elements will subsequently be attached to them.

- When building a new fence, you can take into account that most often the width of the passage for sliding gates is taken at 4 meters. This standard has long been adopted in European countries. All manufacturers of components and fittings have the necessary sets of elements for this door size. To greatly facilitate your work, it is better to use a ready-made solution.
- It is necessary to decide what the door leaf will be like and what it will be faced with. There are a lot of options, and in each of them the gate will have different mass... This can influence the selection of the required power elements. Most often, corrugated board has been used recently, but there are cladding options wooden clapboard, forged decorative elements or simply leave the steel pipe lattice structure.

- Before purchasing the necessary components, you need to make your own detailed drawing with a specification or use ready-made solutions that are in the albums of gate manufacturers and on the owners' forums country houses in the Internet. In any case, you need to be very clear about the design of how many materials are needed and which ones.
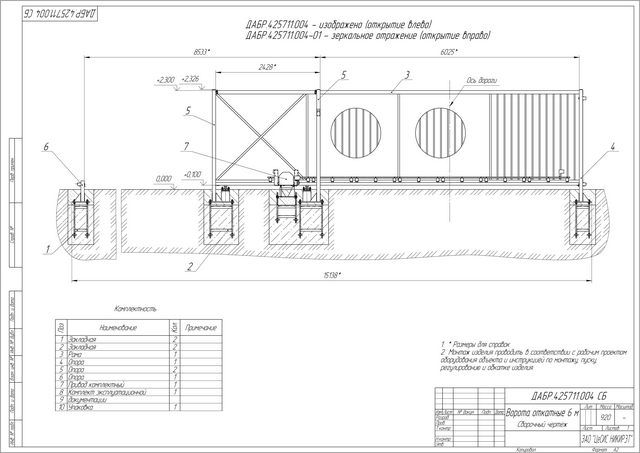
Layout work
When the gate posts are installed, regardless of whether the fence is erected or not, you can already start marking. For this you need:
- Determine the level of the zero mark, for which the surface level is taken exactly at the entrance to the garage opening. Moreover, it is absolutely not necessary that at the start of work, the entrance surface will already be ready. This can be done later. This level should be marked on one pillar, and then transferred to another using a water or laser level.
- At the level of zero marks, the cord is pulled close to the inner surface of the pillars, and the cord must go beyond the support table (where the gate will move when opening) at a distance of at least two meters. The horizontality of the stretched cord is checked.
Foundation device for sliding gates
In order to take the load from the weight of the gate at rest and during its movement, it is necessary to equip the foundation. To do this, as the upper part, on which the roller assemblies and the electric drive will be mounted, you need channel No. 20, 2000 mm long. For the foundation, it is necessary to dig a hole that is adjacent to the support pillar, has a length of 2100 mm and a width of 500 mm. The depth is determined by the level of soil freezing in the winter. In most regions, a depth of 1500mm will be sufficient.

To reinforce the foundation and create a connection between the channel and the foundation, three frames of a square cross-section with a side of 150 mm from reinforcement No. 16 and a length of 1400 mm are welded. For cross ties, you can use reinforcement No. 10-12 with a step of 300-400 mm.
Finished frames are welded to the bottom surface of the channel in the middle of its shelf. The axial lines of the extreme frames are located 400 mm from the edges of the channel, and the third - exactly in the middle. After that, you need to add 10 cm of sand or sand-gravel mixture to the bottom of the pit, tamp it and start installing the finished channel with reinforcing cages. In this case, one should take into account:
- The channel is placed close to the bearing post, strictly parallel to the gate movement line, flush with the zero mark. A previously pulled cord will help to do this.
- In order to prevent cement laitance from leaking from the concrete mixture into the ground, which reduces the strength of the concrete, it is better to cover the bottom and walls of the pit with plastic wrap.
- The surface of the channel should be at the zero mark, therefore, when installing frames with a channel, it is good to use pieces of reinforcement that can be used to fix the structure in the pit. When concrete is supplied, a solid load will act on the frames, therefore, the fixation must be reliable.
- In order to make it easier to level the top of the concrete with a channel, it is very convenient to install edged boards on top with a surface at a zero level.

- If you plan to use an electric drive with an automation unit and a security system, then you should immediately take care of laying the necessary cables. The gasket diagram can be seen in the figure. Cables should be laid either in a corrugated pipe, or better - in a polyethylene pipe with a diameter of 20 mm.

It's time for concrete work. For pouring the foundation of sliding cantilever gates, it is necessary to use concrete of at least M250-M300 grade. For its preparation, you will need components in the following proportions by volume:
- One bucket of M400 cement.
- Two buckets of washed sand.
- Four buckets of rubble or gravel.
- The amount of water depends on the moisture content of the sand and cement and ranges from 0.7 to 1 bucket. The use of plasticizers reduces the amount of water required and increases the fluidity of the mix, which is beneficial for styling.
The amount required for the foundation, of course, will be greater, the main thing is to observe the indicated proportions. To prepare the concrete mix, it is best to use a concrete mixer or a powerful construction mixer. With manual mixing, the quality of the concrete deteriorates.
 The concrete mixer is an irreplaceable assistant for the gate foundation
 First, sand and cement are poured into the concrete mixer. After mixing them, part of the water is added so that the solution is mixed until smooth. Next, crushed stone or gravel is added and water is gradually added until the concrete becomes homogeneous and mobile. When placing concrete in a pit, you must:
- Apply the concrete mixture gradually so as not to move the level structure.
- After laying the next portion of concrete, it is necessary to pierce it in several places with a bar of reinforcement - to remove possible air bubbles.
- After laying and leveling the top layer, wipe the channel surface with a wet rag so that it remains clean for subsequent operations.
Complete maturation of concrete occurs within 28 days, but in a week it will already gain the strength that will allow the installation of the gate. And at this time, you can do other technological operations.
Manufacturing of sliding gates
When making a door leaf, if you do not have sufficient skills in welding metals, it is better to contact the place where specialists in the workshop will make them according to the required dimensions. Sliding gates are a fairly large structure and at home it will be difficult to ensure the location of all parts in one plane, which is extremely necessary. Another advantage of making gates in workshops is that the primer and painting can be done with a compressor, which gives a better finish. But if you still have a desire to do everything yourself, then this is quite within your power.
One of the possible options for the door leaf is shown in the figure. The main frame is made from a profile pipe 60 * 40 mm, and the stiffeners and internal filling are made from a pipe 20 * 40 mm. The supporting beam, which is located at the bottom of the drawing, has a length of 6 meters and it must be welded to the gate, therefore it is time to purchase a set of accessories for sliding cantilever doors and profile pipes for making the door leaf.

A wide range of sliding gate fittings is available in various stores and construction markets. It is both a Russian manufacturer and an imported one. When buying accessories, you need to take into account the weight of the future door leaf and the size of the opening. In our case, the size of the opening is 4000 mm, and the weight of the canvas in case of sheathing with corrugated board will be up to 400 kg, which must be reported to the seller.
The standard gate kit includes:

- Guide bar 71 * 60 * 3.5 mm, 6 meters long.
- Two roller bearings.
- End roller.
- Bottom end roller catcher.
- Upper catcher.
- Guiding device with two rollers.
- Two plugs for the beam.
To weld the gate, you will need to make a mounting table, consisting of three supports of the same height. As supports, there can be stakes driven into the ground at the same level and boards laid on top. The main thing is that all three supports lie in the same horizontal plane.
Another option for an impromptu timeline could be beams or building stones laid on the ground and exposed in one level.

A profile pipe purchased at a metal base rarely has foci of corrosion, therefore, before making a gate, all pipes should be thoroughly cleaned of rust stains and dirt. It is most convenient to do this with a grinder with a special grinding disc.

According to the drawing, profile pipes of 60 * 40 mm are cut for the main frame of the gate. In this case, one should try to do so that during welding there are no holes left for access to the inner cavity of the pipe. The marking should be done with a tape measure and a square, and cutting - with a grinder with a cutting disc, or better - with a cutting machine that allows you to accurately observe all angles.
Pipes are laid out on the mounting surface, guided by a drawing, compliance with dimensions and perpendicularity is checked, and then all seams are sequentially seized. After checking the dimensions and plane, all pipe joints are welded with a continuous seam. All remaining open pipe ends are sealed with plugs. After that, all welding seams are carefully cleaned with a grinder with a grinding disc.

Profile pipes of 40 * 20 mm are cut to size for stiffening ribs, which are then applied to the inner surface of the main frame, tightened with clamps and grasped pointwise. This is how the entire inner frame is assembled. After checking the compliance with the dimensions in the drawing, checking the diagonals of the rectangular part of the gate, the plane of the structure, all seams are scalded. On the joints of the pipes of the inner frame, continuous seams are applied to each other, and to connect the side surfaces of the main frame with the inner one, seams of 10-15 mm are made with an interval of 400-500 mm. Welding must be done in a staggered manner so that the entire structure does not "lead" from excessive overheating in one place.
A guide rail is welded to the bottom surface of the door. To do this, it is fixed with clamps, the correspondence of the axes of the door leaf and the beam is checked, and then it is welded with seams of 30-40 mm through 400-500 mm. After that, all seams are cleaned with a grinder.
For priming and painting, the gate must be set in a position close to vertical. It is best to use an automotive anti-corrosion primer, which should be applied in two coats. It is preferable to do this with a compressor and a spray, but you can also use a brush, but it will take longer and the quality of the coating will be worse. Particular attention should be paid to shedding the gap between the beam and the gate with a primer. It would also be appropriate to cover this gap with "sausages" of acrylic sealant. After that, the entire gate can be painted in two layers. Do not paint the inner surface of the support beam!

After the paint has completely dried on the gate, you can mount cladding, the most preferable of which is corrugated board, since it combines light weight, strength, beautiful appearance and a reasonable price.
Installation of sliding gates
The installation of the cantilever structure on the previously installed channel can be started no earlier than 7 days after concreting. For the installation of roller carriages, it is recommended to purchase a mounting plate with studs, which will allow:
- Adjust the height and horizontal position of the gate.
- Easy to remove gate for repair or replacement of roller blocks.

To install the gate you need:
- Place the roller carriages on the mounting plate, making the height equal and medium on all studs. Do not tighten the upper nuts too much.
- The position of the mounting plates must be marked on the foundation. To do this, 150 mm is measured from the edge of the channel, which is closer to the opening, and a line perpendicular to its length is drawn. This will be tangent to the edge of the first mounting plate.
- To find the position of the second support, measure the total length of the door and subtract 100 mm from it. The resulting distance must be postponed from the beginning of the response post parallel to the goal line to the channel. At this point, a perpendicular is drawn, which will be tangent to the second mounting plate.
- If the bearing capacity of the posts is good and the anchor bolts will be well attached to them, then the use of additional metal posts is not necessary. If not, then a profile pipe is welded vertically along a height equal to the height of the gate plus 200 mm, with a section of 40 * 40 * 2 mm, using previously prepared mortgages. On the support post, it can be welded close to the edge, and on the counter - at a distance of 20-50 mm from the edge of the post.

- At a height of 150-200 mm, at a distance of 20-30 mm from the wind and bearing pillars, a cord is horizontally stretched parallel to the door movement line. It will represent the tangent position to the edge of the structural beam. The cord must be stretched throughout the entire movement of the gate: from the winding table to the position of the edge of the gate when it is fully open.
- Roller carriages are placed in the supporting beam and moved to approximately the middle of the door. Then, with the participation of assistants, the door leaf is placed vertically above the channel. The roller carriages are spread along the previously marked lines, and the tensioned cord must touch the guide bar along its entire length. This position can be fixed using plank stands. After checking the verticality, the roller platforms can be "tacked" by electric welding in several places.
- The movement of the gate, its verticality and horizontalness are checked, which is checked in the closed position. If necessary, the adjusting nuts on the studs of the platforms are corrected. The gate should slide easily along the rail, parallel (slightly touching) the tensioned cord. The gaps between the support and response posts must be the same, and from the zero mark to the bottom edge 80-100 mm. If everything is normal, then the carriage mounting nuts can be tightened, and the platforms themselves can be scalded in a circle.

- A plug is mounted on the rear cantilever part of the support beam. An end roller is mounted at the front of the beam. Each manufacturer has its own installation method, so you must use the instructions.
- A guide device with two rollers is mounted on the support post in its upper part. For this, a bracket is placed on the post for attaching the rail, and the holes are marked. In brick or concrete, anchors with studs with a diameter of 10 mm must be fastened, and in metal - with appropriate self-tapping screws. If welding will be used for fastening, it is better to temporarily remove the plastic rollers. After fastening to the post, the rollers are placed so that they tightly cover the door leaf, maintain its verticality and, at the same time, do not interfere with smooth running.

- The gate rolls out to the fully closed position, and the attachment point for the lower catcher is marked on the response post. The end roller should fit snugly on the catcher shelf, partially relieving the load on the roller blocks. The trap is mounted with the appropriate fasteners and the door travel and ease of fixing in the closed position are checked.

- An upper trap is installed, which prevents the gate from swinging in the wind. In a fully closed state, the position of the trap is outlined and fastened. Very often, the top catcher in the kit also has a protective bracket, put on the door leaf, which saves from damage to the coating. The bracket is mounted in such a way that, when closed, it is precisely it that enters the trap.

- If necessary, a rear stop is mounted to prevent the gate from rolling far when fully open.
After a competently carried out installation, the gate should move very easily and be fixed in extreme positions. The final work will be cleaning all welds, coating them with an anti-corrosion primer and painting. Further on the door leaf, you can fix the handles for opening and closing, as well as install. Each actuator manufacturer has its own installation considerations, which are detailed in the accompanying documentation. But this work will already be much easier, since the main thing has already been done - the device of sliding gates with your own hands.
Video - Installation instructions for sliding gates
Video - Installation of a ready-made set of doors without welding
Video - How to make a sliding gate yourself
Hanging sliding gates made of corrugated board (height 2 m)

Hanging sliding gates made of corrugated board (height 2.2 m)

Features of the layout of suspended gates

Suspended sliding gates have many positive qualities. First of all, these are:
- no restrictions on the width of the passage;
- the ability to completely block a large opening;
- slight sensitivity to the weight of the sash and wind loads;
- the possibility of sealing gaps.
When suspended, the loads on the rollers and on the sash frame are evenly distributed, which reduces the requirements for the strength of all elements. Fixing the door leaf at three or four spaced points minimizes its possible vibrations and allows you to make a high-quality seal of the opening in the closed position. This, in turn, keeps the room warm during cold weather.
It is clear that such an arrangement requires an opening or the installation of sufficiently high supports if suspended street sliding gates are installed. In some cases, this can be considered a disadvantage, but there are many situations when the installation of a hanging rail does not require additional costs or is justified by the size and weight of the door.
Suspended sliding gates manufactured by "Adamis"

We offer design, manufacture and installation of turnkey gates. The high quality of our products is ensured by careful selection of imported components and well-established in-house production of basic structures. At the request of the customer, a wicket can be built into the door leaf for ease of passage.
Our experts will be happy to provide all the technical information and advise on the selection of components and installation of the entire structure.
Possibilities of suspended gates with automation

In terms of use and automation capabilities, suspended gates are similar to other types of sliding structures.
To use the electric drive, a toothed rack is attached to the blade, which serves to transmit the tractive effort from the engine with the drive gear on the shaft. The electric drive is selected taking into account the leaf mass and the required speed and intensity of work.
The intensity of the gate never reaches 100%. Most electric drives are rated 60%. This is sufficient for almost any application.
Electric suspended sliding gates are equipped with a control system that provides a certain level of convenience and safety. This system may include different devices... Typical composition of control automation:
- push-button panel;
- signal lamp;
- obstacle sensor in alignment;
- obstacle sensor in the sash rollback zone;
- drive overload sensor (built into the drive unit).
If desired, this minimum can be expanded and supplemented. For example, a remote control with a code panel or a key button can be added to it. The greatest convenience is provided by the radio module, which allows you to open the gate remotely.
The configuration of the control system is carried out taking into account the specific conditions of use of the gate.