Production of 3d floors. Floors on the new technology fantastic. Stage III. We print the image on banner fabric
Today, a bright and voluminous drawing can be created not only on the walls of the apartment, but even on the floor. Probably, most of the readers of the site have already visited exhibitions of 3D paintings, which are popular today, and even came to galleries of 3D drawings, where you can take unique and interesting photographs. And such works of art can be created even in your apartment. Modern building technologies allow you to create 3D floors with your own hands, step-by-step instruction on the arrangement of which is given below.
DIY 3D floors - step by step instructions
3D paintings on the floor in the apartment are created on the basis of self-leveling floor technology. And before it becomes possible to study the instructions for creating a unique pattern on the floor, you should get acquainted directly with this type of finish and find out its advantages / disadvantages.

So, the self-leveling floor in construction is a special type of screed, for the creation of which special self-leveling building mixtures are used. They are quite fluid, and therefore, in the process of pouring and drying, they manage to evenly distribute themselves over the surface of the subfloor-base and make the final surface almost perfectly even.

On a note! The minimum thickness of the pouring layer is 3.5 mm.
Self-leveling floors can be divided into two types:
- with top coat, which becomes after drying directly the final floor covering;
- fast drying concrete screed which allows you to prepare the subfloor for laying various kinds floor covering.

The article will focus on the first type of floor finish, in which case the finishing layer will be applied. And a full-fledged 3D floor can be called when a pattern is applied to it in a special way, from the outside it seems voluminous. To create such a floor is a special chic and an opportunity to give the premises uniqueness and originality, because on the surface of the floors you can reproduce any drawings, even those created by yourself.

Self-leveling floors can be used not only in residential premises - they can also be created in warehouses, gyms, shopping centers, etc.

3d self-leveling floors
Self-leveling floors
Any self-leveling floor consists of several layers - there can be 3 or 4. As a rule, this is a rough floor, a primer layer, a leveling layer, a finishing layer. In this case, a building mixture is used as a leveling layer, and a special polymer mixture (two-component) is used to create the finishing layer.

The desired pattern is created, by the way, not on the surface of the finished floor - the image is placed between the leveling and finishing layers.

On a note! The thicker the finish layer, the more pronounced the 3D effect will be. This part is in the structure of self-leveling floors and is responsible for the depth / volume of the picture.
By itself, the self-leveling floor, sometimes called "liquid linoleum", has no gaps and crevices. Coating thickness - up to 7 mm. To the touch, this finish may resemble tiles.

Pros and cons of self-leveling floors
One of the main advantages of self-leveling floors is the ability to make the flooring original and unique. , patterns on linoleum, PVC tiles and other materials for decorating floors have already become boring to many, and the self-leveling floor allows you to change the room beyond recognition.

Other advantages of self-leveling floors:
- during pouring between the rooms there will be no gaps and cracks;
- high strength characteristics;
- ease of care - the surface is easy to clean;
- attractiveness and uniqueness appearance- self-leveling floors will give the room a uniqueness;
- high resistance to various chemical substances;
- the opportunity to realize the most daring fantasies;
- compatibility with any style of interior;
- high rates of moisture resistance;
- excellent temperature resistance - compatible with various systems floor heating.


Also, self-leveling 3D floors have disadvantages - yes, this is far from an ideal coating. The disadvantages of this type of finish are as follows:
- the complexity of both installation and dismantling - in both cases, large labor costs will be required;
- The glossy floor is quickly covered with scratches. Based on this, there is another drawback of the self-leveling coating - the need for protective measures in order to keep the surface in good condition for the longest possible time;
- creating a self-leveling floor is not a cheap pleasure, as it will take quite a lot of materials, tools and fixtures.


Attention! When creating a self-leveling 3D floor, it is important to strictly follow the entire technology. Otherwise, there is a risk that the floor will quickly become unusable.

Types of self-leveling floors
There are 4 main types of self-leveling floors - they differ depending on the components that are part of the mixtures used to create them. In general, the technology of their application is similar.
Table. Types of self-leveling floors.
| View | Characteristic |
|---|---|
| This type of self-leveling floor is based on methyl methacrylic resin. The coating performs well indoors and outdoors. It is often used in various objects of various industries. Resistant to high and low temperatures, not afraid of ultraviolet radiation, depending on certain additives, it can somewhat change its properties. Differs in resistance to influence of hostile environment. It polymerizes quickly, and pouring work can be done even at sub-zero temperatures. Disadvantages - the need to work very quickly, as the coating dries quickly. Requires the help of professionals. It has an unpleasant pungent odor. |
| The most commonly used type of coating, characterized by durability, lightness, strength. The coating is not afraid of exposure to water and temperature fluctuations, resistant to shock loads and abrasion. Differs in high rates of hygiene therefore it is recommended for use in medical institutions and rooms of food appointment. The main drawback is the importance of careful preparatory work(preparation of the base), while the installation should be carried out at low humidity. Another disadvantage is the significant cost of building materials. |
| The base is epoxy resin. Such floors can be equipped on wooden, concrete, metal bases. Resistant to abrasive substances, not afraid of chemicals. Often settled in the premises of pharmaceutical and food industries, laboratories. Advantages - ease of maintenance, high resistance to chemical and mechanical stress, environmental friendliness. Disadvantages - inelastic, and therefore easily damaged in the event of strong impacts. |
| The basis of such a floor is cement, a polyacrylate copolymer, a special filler. Previously, such floors were created only in the territory of food production, where various loads often move and the floors are under heavy load, are constantly disinfected, quickly get dirty and are subjected to constant cleaning. Self-leveling cement-acrylic floors are not afraid of water, chemicals, mechanical influences. They do not slip (matte), do not peel off, they cope well with temperature fluctuations. The main disadvantage is that it is difficult to install. |


If we compare all the above types of floors, we can conclude that polyurethane, epoxy floors can be done independently. As for methyl methacrylate, they are not recommended for use on their own. construction works. The most elastic are polyurethane floors, but epoxy ones are not afraid of chemicals. To level the rough coating, cement-acrylic mixtures can be used.

On a note! In addition to the main four types of self-leveling floors, there is also a mass of combined coatings.

DIY 3D floor
Creating a 3D floor in your house yourself is quite difficult, but possible. The process takes place in several stages: making calculations and preparing the base, creating a leveling layer, drawing a picture and then - the finishing layer. It is the latter that will provide the very 3D effect that people like so much.
Attention! To achieve desired effect, as finish coat transparent materials are used.

Materials and tools
In order to create a 3D floor, certain materials and tools are needed:
- primer required for processing the subfloor;
- polymer mixture, due to which a leveling layer will be formed;
- directly the drawing itself, which is usually made on banner fabric;
- transparent two-component polymer, which will act as a top coat;
- adhesive composition, thanks to which the pattern will be fixed on the leveling layer;
- protective varnish, which covers the finish coating;
- masking tape;
- polyethylene film;
- spatulas;
- rule;
- brushes;
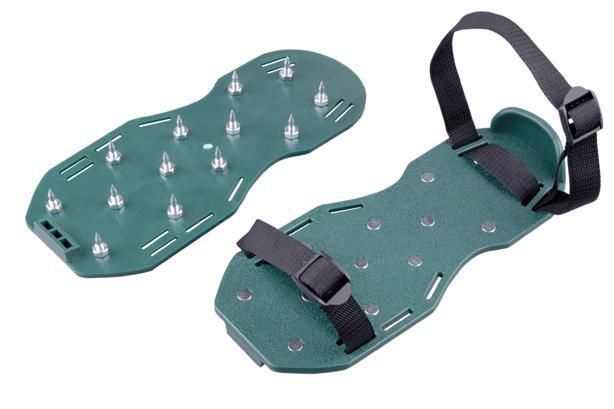
- special shoes.

masking tape
If the drawing is created by hand, then you will need acrylic paints and brushes. Also useful protective compound, which will ensure the safety of the picture.

Preparation and calculation
So one of initial stages is the product of calculating the number of required Supplies. In many ways, the consumption will depend on the condition of the subfloor (base), the thickness of the layer, as well as the material used (information on consumption can be found on the packaging).

To create a self-leveling floor with a thickness of 3 mm, it is necessary to spend about 4 kg of building mixture per 1 m 2. Based on this, you can make the necessary calculations. The average cost of 1 m 2 of self-leveling floor with a 3D pattern will be about 6000 rubles. Costs can be slightly reduced if all the work is done independently. By the way, the most expensive part of the entire self-leveling floor is the picture printed on the banner.

Attention! Self-leveling floors with a 3D pattern will look good only on areas larger than 10 m2. It is not worth creating them in small rooms - the whole drawing will simply be lost and invisible.
How to prepare a drawing
To begin with, you should choose the picture that you would like to see daily. Approaching the choice of an illustration is very responsible, since it will take a long time to coexist with it. It is necessary that it also fits the interior - you should not draw dolphins in the hall, unless, of course, the design of the main room is made in a marine style.
On a note! If you want to create a drawing yourself, then you should not choose a complex image if there are no artist skills. Let the picture be simple, but memorable and pleasant.

The selected image should be printed on banner fabric. This can be done in any agency that deals with outdoor advertising. By the way, they can also help with the choice of pattern. It is very important to check with the company technical specifications final work - the illustration must be printed with a resolution of at least 1440 pixels on matte satin.

Step by step work
After the design was selected and printed, all necessary tools and materials, you can proceed to the work itself.
Step 1. The first stage is the preparation of the foundation. The rough floor is thoroughly cleaned of debris and dust. The surface is degreased if there are stains of oil or paint on it. All cracks, chips are sealed with sealant, irregularities are polished. The surface is thoroughly dried (permissible base moisture content - no more than 4%, air - no more than 50%).

On a note! If the draft floor was poured over a new one, then at least 30 days must pass before the installation of the bulk floor.
Step 2 The surface is primed with a special primer mixture for bulk flooring. The application of the mixture can be done with a roller or spatula. This is necessary so that the base with the leveling layer is very firmly connected.

Step 3 After the primer has dried (about 4 hours), a white epoxy material is poured onto the surface to level the base. Leveling the layer is done with a wide spatula. It is necessary to put on special studded shoes (paint shoes) on your feet, which will allow you to walk on a damp surface.


Step 4 The surface is treated with a special spiked roller. This will remove excess air from the thickness of the material. The surface is dried for at least 24 hours, after which the evenness of the layer is checked.

Step 5 A drawing is being applied (paints, banner fixing, etc.). The base layer is primed, a transparent polymer solution and a solvent mixed in a ratio of 2:1 are applied to it - an adhesive solution for a banner. Also, the adhesive composition can serve as a finishing material. It is applied to the draft surface, and a banner is glued on top. It is very important to expel all the air from under the banner fabric. Work can be done with a clean roller.
On a note! It is very convenient to use a self-adhesive banner for drawing a picture, which works on the principle of translation. A protective film is removed from one of its sides, the pattern is glued to the surface and rolled with a roller.

Step 6 The number is counted polymer mixture finishing layer - it will depend on the required thickness and floor area. On average, the consumption is 4-4.5 kg / m 2. Further, the material is poured onto the surface of the banner, carefully leveled with a rule. Air is expelled by a spiked roller. Next, the floor is covered with plastic wrap until completely dry, and then varnish is applied to the surface, which will protect the surface from mechanical damage.

Video - How 3D floors are made
A few tips will help you create 3D floors as quickly and efficiently as possible:
- during the installation of self-leveling floors, in order to protect them from cracks, it is recommended to lay a damper tape along the walls;
- in the room where work is carried out, there must be good ventilation;
- during work, it is important to use a respirator;
- it is desirable to produce a floor bay at an air temperature of at least +10 degrees;
- it is necessary to level the finishing layer within 30 minutes, as it dries quickly.

Proper surface care
Caring for self-leveling floors is simple, but still it must be regular in order to maintain the beauty of the coating for many years. For example, every 6 months a special mastic should be applied to the surface, and when repair work the floor should be covered with covering material. Also, special protective caps are put on the legs of the furniture or linings are used.
![]()
Floors should be washed with water detergent and then wipe with a clean cloth.
Attention! Do not use substances containing chlorine or acids to clean self-leveling floors.

With some effort and spending a lot of money, you want to immediately get the perfect job. However, creating a self-leveling 3D floor is not an easy task, so you should be prepared for the fact that a beautiful coating will not work the first time. However, over time, you will be able to train, and the drawings on the floors will get better and better.
Self-leveling floors 3d almost immediately became popular after the appearance on the market, despite the rather high price. This is a universal coating, which is used with the same degree of efficiency on objects with different interior and purpose. All work can be done with your own hands, but you need to prepare a drawing, strictly follow the manufacturing technology, and control environmental conditions.
What is a 3d floor?
The coating of this type consists of several layers: base, pattern / texture, finishing. The compositions for this task tend to harden quite quickly, so the option of making a 3D floor with your own hands is difficult to implement, but still possible. The drawing can be sketched directly onto the rough coating, but in domestic conditions it is preferable to use material with a fixed pattern. This is a less time-consuming process, and besides, it will also be cheaper.
Multicomponent compositions (polymer, mineral) are used as the basis of the coating. The 3D effect is provided by the top layer. To obtain a more pronounced volume of the image, you need to increase the thickness of the finish. But in this case, it will be necessary to use materials with a different ratio of components so that changing the parameters of the coating does not affect its strength.
Phased work
The technology of pouring a self-leveling floor includes three main stages: preparation of the base (rough screed); transferring a pattern or pattern / creating a textured surface (pebbles, sand, shells, etc.); finishing. But before starting the work with your own hands, it is recommended to pay special attention to the stage of choosing an image, as well as its preparation.
What to consider when choosing a picture
The first step is to determine your own preferences. It can be a drawing transferred to the screed, photo printing, abstraction and other creations. An important nuance is that the image must be of high quality (at least 1440 dpi). 3D floors will look spectacular on maritime theme, photos of the abyss, descent. For all other cases, it is recommended to equip a thicker finish layer to enhance the perception of volume.
 Popular 3D drawings with depth effect: these are water, abyss, descent. Especially the marine theme, where, thanks to a special airbrushing technique, a truly impressive realism is achieved.
In order not to injure the psyche, it is better to avoid using photographs depicting danger (monsters, predators, creepy motifs). Another direction that should not be used is falling or moving objects (for example, a large wave), since dynamism in the image when arranging a 3D bulk coating is not the best option.
 The most common mistakes in arranging 3D floors, selecting a pattern
Flashy photos with a lot of bright elements are also not suitable. All these images will constantly affect the subconscious in a negative way.
How to change perspective
If you plan to do all the work yourself, you need to understand a graphics program with sufficient functionality to fully change the characteristics of the image. The most popular option is Photoshop.
Detailed instructions for further actions:
- The room where the 3D floor will be poured with your own hands must be photographed, and this should be done from the right angle, for example, standing at the entrance;
- The graphic editor allows you to superimpose a pre-selected picture on the image of the room;
- The photo is cleaned up: nothing superfluous should remain on it, except for the floor with the picture fixed on it;
- Having received the outlines of the flooring in perspective (it resembles a trapezoid in shape), you need to correct the borders of the image with your own hands until you get a rectangle (tools in the Vanishing Point graphics editor, Create plane tool);
- It remains only to save the file (extension.png).
The quality of the image directly depends on how carefully the floor was cut in the photo.
printout
A common option for transferring photos is through banner fabric. The popularity of this material is due to its resistance to moisture, sometimes even with aggressive components (rain, snow). Given the high quality of the future coverage, the cost of banner fabric is quite acceptable - about 20 USD/sq. m. You can contact any organization that offers outdoor printing services to print the file.

It is recommended that you print a test print on a small paper size. This will allow you to evaluate the quality of the image and the product as a whole. It is also quite possible to order a full-size black and white print on paper, then it will be possible to evaluate the pattern on the floor of the room.
Foundation preparation
The concrete surface is cleaned. Moreover, you need to remove with your own hands not only dust, but also greasy stains (oil, grease, etc.). The surface is covered with a primer mixture; without this, the technology of laying materials will be disrupted due to low adhesion. An intermediate layer is formed (rough screed based on mineral or polymer compositions). Next, a decorative design is applied / attached.
How a photo is pasted and transferred
The canvas is spread over the surface with your own hands. Mounting method - adhesive composition. In this case, it is necessary to control that air bubbles do not appear between the canvas and the base. Careful smoothing of the material will avoid such shortcomings. In the case when a 3D drawing is transferred with your own hands directly to the base, the production of the floor will include one more step - applying a primer on top of the picture after the acrylic paint has completely dried.
The nuances of the filling process
The volume of the image is given by a sufficient thickness of the transparent layer of the polymeric material. It is also necessary to apply a protective coating on top, which will ensure long-term operation of the floor without the risk of surface abrasion.
Filling with polymer composition
Material consumption depends on the layer thickness. For example, the production of a 3 mm coating requires material preparation at the rate of 4-4.5 kg/sq. m. You need to work as productively as possible, but at the same time with high quality, since the composition for laying the topcoat quickly sets.
Filling the protective layer
Coating thickness - 0.5 mm. The time of work with the finished mixture is no more than an hour (again, you should focus on a period of 40 minutes). For laying with your own hands, you need to prepare a spatula and a roller with a needle-like surface. A small amount of material is applied with a spatula and spread by means of a roller until the coating begins to slightly stick. The term of complete drying of the finishing layer is up to 7 days.
 Pour the mixture onto the surface. The base is leveled by means of a rule and a spiked roller, the main purpose of which is to remove air bubbles from the thickness of the base.
Difficulties at different stages of work
The main enemies of a high-quality coating are unsuitable environmental conditions and an erroneous dosage of the mixture components. In the first case, the main role is played by humidity. With an increase in this indicator, bubbles appear on the surface of the floor.
You can check whether the working conditions are suitable using a piece of plastic film. It is straightened on the floor, gluing around the perimeter with adhesive tape. After waiting 3 days, you can remove this design.
If the color of the surface under the film changes and in case of condensation on its surface, do not start work until the air parameters are normalized.
Incorrect dosage of the components of the mixture will lead to a decrease in the quality of the floor. The production of a coating includes the step of determining sufficient thickness of the finish layer to provide the required level of surface reliability. The ratio of the number of components in this case may change.
The technology of manufacturing self-leveling floors with the 3D effect, which has become widespread in industrial and civil construction, has made it possible to significantly expand the possibilities for implementing the most daring design ideas. About how 3D floors are made, and why manufacturing technology requires strict adherence to all operations without exception, will be discussed in this material.
The process of manufacturing floors with three-dimensional images includes three main stages, which, in turn, are divided into several intermediate operations:
- Foundation preparation, which begins with the pouring of the concrete screed and continues with drying, priming and final leveling of the surface;
- Application of the actual decorative coating, when various primers, glazing paints and three-dimensional drawings are used on a self-adhesive basis or applied with a special glue;
- Applying a final protective layer which allows to obtain not only a wear-resistant coating, but also visually increase the depth of the applied image.
Self-leveling floor technology

Routing on 3D floors indicates exactly which components are used in the performance of a particular technological operation. It details the drying and polymerization time, the time for applying the compositions and the sequence of work. Most often, polyurethane or epoxy-based materials are used for the manufacture of self-leveling floors with a three-dimensional pattern.
Tip: For a durable, wear-resistant finish, it is highly recommended to use 3D floor materials from a single manufacturer that are technically and chemically balanced and provide a complete system that delivers the best quality finished floor.
Foundation preparation

Bulk polymer floors are arranged on durable concrete the base, which should not have visible and hidden damage, interspersed with separating materials and traces of any contamination, therefore, before making 3d floors, a number of preparatory operations must be carried out:
- Examination concrete base for damage, which is carried out by visual inspection, tapping the floor surface or using special radio frequency or ultrasonic meters. Modern appliances with sufficient accuracy determine the presence of cracks or voids even in a fairly thick layer of concrete;
- Repair of a concrete base with special repair mixtures. In case of significant damage or impossibility of repair, it is necessary to remanufacture concrete screed. To ensure maximum floor strength with a small coating thickness, the old base must be destroyed to the state of crushed stone of the middle fraction and then poured a new coating. If the layer thickness does not exceed 40 mm, a special reinforcing mesh is used when installing the screed;
- After repair, the screed must be dried until moisture is completely removed, and the new base must be kept for 28 days with periodic moistening to gain the necessary strength;
- The base intended for drawing 3D images must be absolutely even, without sinks, subsidence and other possible defects. For final leveling, it is best to apply thin-layer self-levelling floors based on cementitious binders, which are applied to a pre-primed screed.
Video showing surface preparation before pouring
drawing

High-quality drawing on the prepared floor surface provides about half the success in the manufacture of three-dimensional floors. The slightest fold or air bubble instantly distorts the picture and destroys the volume of the image. Therefore, before making 3D floors, one should not neglect some additional operations:
- Cleaning, if necessary, washing the floor with special detergents using industrial vacuum cleaner. Not the slightest grain of debris and not the slightest speck of dirt should remain on the entire surface of the floor;
- Drying the base and applying a special primer that increases adhesion;
- Drawing a picture on a self-adhesive vinyl base or made on special paper and glued to the base with a special glue;
- The final operation after drawing is to control the surface moisture before applying the protective layer. This operation must be approached very carefully. Concrete bases must have a moisture content of no more than 6% to prevent the polymer from peeling off the base.
The video shows the drawing process
Application of a transparent layer of polymer and protective varnish

Protective coatings in the manufacture of floors with three-dimensional images can be based on epoxy or based on polyurethane composites. Moreover, it can be either one or two-component compositions. There are some differences in how 3d self-leveling floors are made on an epoxy or polyurethane basis, but, in general, the technological operations are similar:
- When using any mixture, follow the manufacturer's instructions exactly. When pouring, special attention should be paid to the “survivability” time of the composition, during which it retains the ability to spread;
- When pouring, it is required to prepare the next portions of the composition in a timely manner in order to avoid the appearance of coating heterogeneity and visible steps between the flooded areas of the floor;
- The leveling of the poured mixture is carried out with a special squeegee with an adjustable coating thickness and a needle roller, which serves to improve the spreadability and accelerate the removal of air trapped in the polymer layer;
- To create a shock-resistant wear-resistant coating, depending on the selected polymer, an additional layer of protective varnish can be applied to the floor surface, further increasing the “depth” of the image.
Having completed all the technological operations, it is necessary to withstand the coating for 3-4 days for the final polymerization, after which the floors are ready for use.
You got a rough idea of how 3d self-leveling floors are made. For all the seeming simplicity, the pouring of polymer floors is a rather complicated event that requires well-coordinated actions of the construction team, and precisely adjusted in time. Even after watching a video on how to make 3D floors, you should not take on their device alone, especially with large areas. The slightest inaccuracy can spoil the results of the work done, and it is very difficult to dismantle polymer floors due to their high strength.
Increasingly, in offices, large organizations and even in ordinary apartments can see Self-leveling floors 3D, the prices for which are quite high, but the produced effect and aesthetic characteristics outweigh the scales in favor of choosing just such a floor design. According to the installation technology, such floors do not differ from ordinary self-leveling floors, however, there are some features when choosing and preparing images.
Self-leveling floors and creating a 3D effect
Bulk floors are called seamless polymer coatings, which seem to be “poured” onto the floor surface. Such floors differ in the main component of the poured mixture: there are polyurethane, cement-acrylic, epoxy and methyl methacrylate floors, in addition, there are also various combined mixtures. The most common are epoxy and polyurethane floors.
Having appreciated the wonderful three-dimensional drawings that modern artists place on asphalt and walls, interior designers came to the conclusion that such an effect would also fit into the design of an office or apartment. From that moment on, a kind of “boom” began in three-dimensional images on the floor: positive reviews about self-leveling 3D floors and their many advantages in various construction forums do not dry out.
In addition to the chic aesthetic characteristics, originality and freshness of such design solution, self-leveling floor with 3D effect has a number of advantages:
- strength and long service life,
- resistance to moisture and chemicals,
- ease of care
- environmental friendliness,
- safety of operation (fire resistance, hygiene),
- possibility of installation in any premises.
Stages of installation of a self-leveling floor with a 3D effect
The technology of pouring a floor with a 3D effect is not so complicated as it seems at first glance. The main thing that is important to pay attention to is the processes of preparing and laying materials, since the base for the drawing must be perfectly flat.
The whole process of creating a 3D self-leveling floor consists of several stages:
- Substrate preparation or leveling. Most often this is done using self-leveling floor compounds. When the material dries, the base is polished.
Advice! You can lay such a floor on different surface: both on wood, and on concrete, and on tiles. The differences will consist only in the preparation of the base in order to achieve the most even surface.
- Primer. The base is filled with a primer and the surface is leveled again, preparing it for drawing a picture.
- Application of the base (polymer) layer. First you need to think over its background so that it blends with the picture.
- Applying an image. Depending on the type of material that is used as an image (artist's drawing, banner fabric, satin base, vinyl film), the process of its application will also depend. The artist simply paints on the prepared surface, and the finished image is attached using a self-adhesive backing or thin coating layer used in the following steps.
Advice! In cases where the image is made up of several pieces, care must be taken to ensure that the result is a single canvas, i.e. join the parts of the picture will have to be very careful.
- Finishing coating. Most often, this coating is epoxy resin. Depending on the functions of the room and the required depth of the volumetric image, a layer of 1.5 to 5 mm is applied.
- Final sanding of the floor and its varnishing if necessary.
Average prices
If you order a self-leveling floor in one of the specialized companies, the price per m 2 will be about 5-6 thousand rubles, and usually the larger the renovated room, the lower the price per 1 m 2. The cost of the floor may vary somewhat depending on the region and the materials used.
If you make a 3D self-leveling floor with your own hands, you can gain in terms of price, but you will have to spend a lot of time and purchase necessary equipment which may not be needed in the future. Deciding what to save on: money or time and nerves is the business of the person himself.
A self-leveling floor is a seamless polymer coating that has a number of advantages over other types of floor coverings. His hallmarks are:
Durability;
- strength;
- wear resistance;
- aesthetic appeal;
- resistance to attrition;
- hygiene;
- fire safety;
- waterproof.
In addition, self-leveling floors polymer materials do not slip, do not collapse under the influence of aggressive chemicals and ultraviolet rays, have an antistatic effect. To clean the coating of polymer materials does not require aggressive household chemicals: you can remove dirt from the self-leveling floor by wiping it with a wet cloth.
With the correct pouring of the polymer composition, the finished floors retain their properties for several decades.
Manufacturing technology of self-leveling 3d floor
Self-leveling 3d floors are a coating that consists of a polymer base layer, a decorative middle layer and a transparent top layer. The production of such floors requires time, experience and certain efforts. That is why their cost is significantly higher than the cost of any other floor coverings.
Before applying the polymer coating, it is important to properly prepare the concrete subfloor. It is necessary to carefully dedust it with a vacuum cleaner, and then primed. It is advisable to mix the top layer of the primer with quartz sand. With this measure, it is possible to increase the adhesion of the concrete base and avoid the appearance of defects on the finished flooring.
If the technology of laying the polymer composition is violated, it is likely that the finished self-leveling floor will be covered with bubbles, or even completely peel off.
Upon completion of the preparatory work, it is necessary to apply a polymer base to the concrete coating. Its thickness is usually 1.5-3 mm. When this layer dries, it is necessary to cover it with varnish.
The next step is laying a sheet with a 3d image. It is usually done with computer programs. It can be either a pattern or a picture, or a three-dimensional company logo (in case 3d floors are laid in an office, shopping center or any industrial premises). In addition, the middle layer may include various decorative elements. These can be shells, coins, fragments, sand, wood chips, etc.
At the end of this stage of work, a finishing transparent polymer coating is applied to the image. With good ventilation of the room, after 5-7 days, the self-leveling 3d floor will finally harden and will be ready for use. The price of such coverage is quite high. The cost of one square meter floors made using this technology starts from 3-5 thousand rubles.


