Outdoor ice decorations or ice Christmas outdoor decorations. How to decorate the yard in winter? DIY multicolored ice balls How to make an ice wreath
Ice balls are multifunctional, easy to manufacture, do not require serious material costs and are very beautiful.
The area around a private house can be decorated with whole compositions of such balls, they can decorate the paths to the house, and even ice balls, laid out in random order in the snow, completely transform the yard, giving it a festive look.
Such balls look very nice in the role of candlesticks - small candles-"tablets" during combustion heat the surface of the ball and a natural depression is obtained that does not allow candles to slide.
To decorate the territory of the courtyard of a multi-storey city building, ice balls are suitable as extraordinary beauty pendants on trees.

The creation of ice balls begins with the preparation of a dye - it can be gouache diluted in water, culinary food dyes, pigments for interior paint.
The dye is diluted in water filled in plastic bottles, or poured directly into a mold for making balls.
The most common balloons are used as a form. Using a household funnel, a small amount of dye is poured into the ball or it is poured dry, and then water from the tap is added until the ball is inflated to the desired size.
It is best to carry out the procedure for filling the balls with water over the bathtub - if the "form" breaks, then you do not have to remove it from floor coverings multi-colored puddles.
If you plan to use ice balls as hanging decorations, then it is recommended to put a long strong thread into the mold before tying.
The final step in crafting ice jewelry is freezing. The workpieces are laid out in the snow, trying to avoid contact of the balls, and left to completely freeze the water in the mold.

If possible, after one and a half to two hours, it is recommended to turn the balls to the other side - this way they freeze faster.
If jewelry is made in a city apartment, then the workpieces are placed in the freezer.
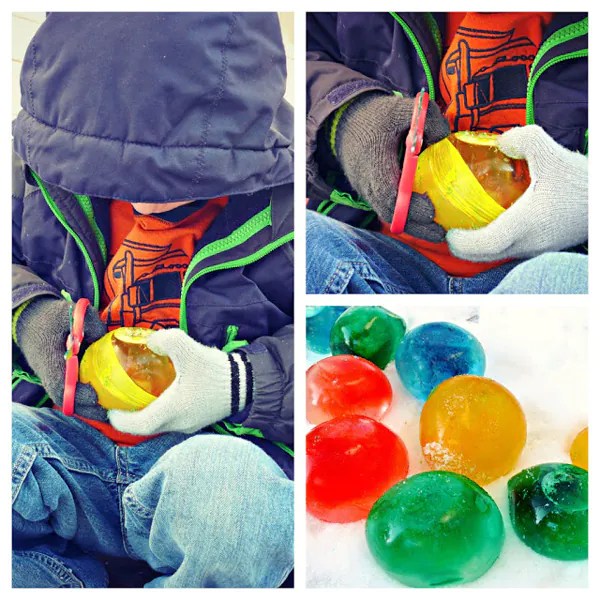
After a day, the rubber shell is slightly cut on the ice balls and the jewelry is completely released from the mold.

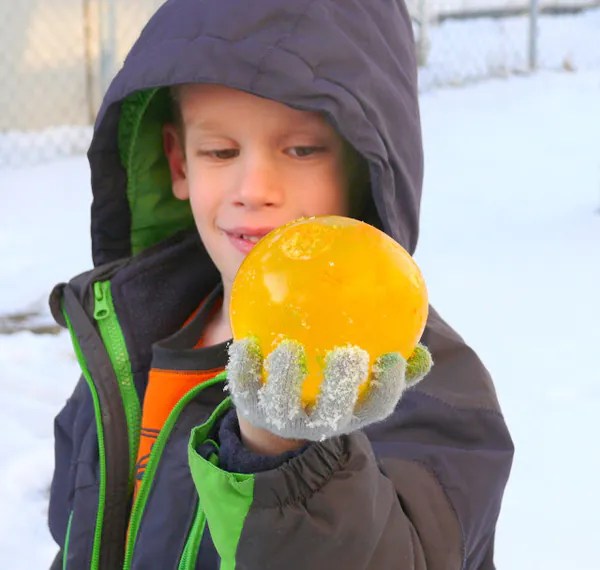
Alternatively, you can use rubber gloves instead of balloons as a form - you get very original and funny ice "palms".

To make square or rectangular colored ice blanks, you can use 5 liter plastic bottles.
If there is no dye at hand, then do not be upset - you can put spruce branches, flower petals, rowan berries or leaves of houseplants in the mold.
Guys, we put our soul into the site. Thank you for
that you discover this beauty. Thanks for the inspiration and the goosebumps.
Join us at Facebook and In contact with
Many people notice that the older they get, the harder it is to re-experience that magical sensation of a fairy tale and miracle that always came to us in childhood on New Year's Eve.
But we are in website sure - the New Year mood will not keep you waiting if with my own hands craft one of these wonderful home and tree decorations. Almost all, with the exception of two or three, do not require a lot of time and some special materials - they can be made in half an hour from what is at hand.
Thread sprockets
A wreath of balls and an old hanger
In just half an hour, you can make a colorful wreath by buying a couple of sets of inexpensive balls. Blogger Jennifer, the author of this article, recommends unbending an old hanger, but if you don't have one, a piece of sturdy wire is perfect.
- You will need: a pair of sets of balls (20-25 balls different colors and sizes), wire hanger or wire, spruce branches, braid or ready-made decoration for decorating a wreath.
Snowflake tablecloth
A delicate and surprisingly festive tablecloth will turn out from snowflakes, on which we have stuffed our hands since childhood. You can sit down and cut snowflakes with the whole family, and then lay them out on the table and fasten them with small pieces of tape. A great solution for receiving guests or just dining with your family during the holidays.
Multi-colored beanies
The cutest colored hats can be made from leftover yarn that can be used to garland a Christmas tree or to decorate a wall. Or hang them on a window or chandelier at different levels. Children over the age of five will do just fine with this simple decoration too. See details.
- You will need: a roll of toilet paper for rings (or ordinary cardboard or thick paper), scissors, colorful yarn and a good mood.
Lamp "Snowy City"
For this charming lamp, you need to measure a piece of paper around the circumference of the can with a small margin (to glue it together), depict and cut out a simple urban or forest landscape. Wrap around the jar, and put a candle inside.
- You will need: a bank, thick paper of any color, you can white, any candle. Alternatively, you can cover the top of the can with "falling snow" using a special "snow" spray that is sold in hobby shops.
Balloons with photos
A great idea for decorating a Christmas tree or as a gift to relatives and friends. The photo must be rolled into a tube so that it passes into the hole in the ball, and then straighten it with a wooden stick or tweezers. Small black-and-white rectangular shots will do, and you can also cut out a photo in the shape of a ball or in silhouette (as is the case with a cat in the snow).
- You will need: plastic or glass balls, photographs, various sundries to fill the ball - tinsel, garlands, coarse salt (for snow).
Christmas lamps
And this miracle is a matter of five minutes. It is enough to collect balls, fir branches, cones and put them in a transparent vase (or a pretty jar) and supplement with luminous garlands.
Smoldering embers
Glowing garlands hidden among cones, branches and pine paws create the effect of embers smoldering in the fireplace or a cozy fire. They even seem to give off a fever. For this purpose, a basket that has been lying on the balcony for a hundred years, a nice bucket or, for example, a wicker container for small things from Ikea, is suitable. Everything else (except for the garland, of course) you will find in the park.
Floating candles
A very simple decoration for the New Year's table or for a cozy evening with friends during the New Year's holidays is a composition with candles floating in a vessel with water, cranberries and pine twigs. You can use cones, orange circles, fresh flowers and leaves from a flower shop - whatever your fantasy tells you. And as a candlestick - deep plates, vases, jars, glasses, as long as they are transparent.
Snowman on the fridge or door
Children will definitely be delighted with this - quickly, fun and very simple, because even a three-year-old can handle cutting out large parts. It is enough to cut the circles, nose and scarf out of self-adhesive paper, brown paper or colored cardboard and attach them to plain or double-sided tape.
Snowflakes on the window
An interesting use for a glue gun lying around. In order to glue these snowflakes to the glass, it is enough to lightly press them to the surface. See details in our video.
- You will need: a stencil with a snowflake drawn with a black marker, tracing paper (parchment, baking paper), a glue gun and a little patience.
Christmas trees-candy
Bright Christmas trees can be built together with the kids for a children's party or to decorate a festive table with them. Cut triangles out of colored paper or cardboard, tape them to a toothpick, and stick the resulting Christmas trees into the candy.
- You will need: Hershey’s Kisses or any other truffle candies, toothpicks, scotch tape, colored paper or cardboard with a picture.
Garland with pictures and drawings
New Year, Christmas - warm, family holidays. And it will come in very handy with photographs, children's drawings, pictures. The easiest way to secure them is with clothespins, which can be decorated with hearts or snowflakes.
Origami star
Painted spoons
Ordinary metal spoons or wooden cooking spoons turn into interesting New Year decorations using acrylic paints. Children will love this idea. If you bend the handle of the metal spoons, you can hang them on the tree. And wooden spoons will look great in the kitchen or in a bouquet with fir branches.
Sock snowman

Colorful ice balls can be a great material for any art object. They can simply be scattered in the garden or in the yard, across the territory kindergarten, or build or decorate some structure, make snowmen (especially if you freeze water with rubber gloves), etc. We stopped at the construction of a multi-colored pyramid of 400 ice balls.
This is the second and I hope not my last post in this community. In the fall, with the volunteers of the city of Glazov (Udmurtia), we added bright colors to the gray city everyday life, now we took up winter street art.
We chose the city park as the location for our winter art object. Firstly, there are more children here, and secondly, next to the Sports House where you can get water for the balls. We talked with the heads of organizations - they gladly agreed to help us.
Where did the idea come from? Surely, many have more than once stumbled upon a guide for making ice balls with the addition of food colors. 
According to the "recipe" everything is easy and simple. In fact, it turned out to be much more difficult. But as always. Firstly, nowhere is it specified how long the ball freezes? How much water should be poured, the better to tint? It turned out, no matter how ridiculous and trite it sounded, but the ball is filled with water only under pressure - it will not work to go out into the street with a funnel and a "poltorashka". There remains only a tap or a hose with water. Well, and a number of subtleties that we encountered in the process.
For example, size - it is impossible to freeze a large-volume ball (3-4 liters). At t -20 per night, only a layer of 5-6 centimeters freezes. Inside is water. It also begins to freeze, but later, and bursts open the ice "shell" - the ball cracks. It was also a mistake to bury the ball under the snow - in such a "house" it almost does not freeze.
Here is an example of a 3-liter ball that has been under the snow all night. In principle, we got very "working" hemispheres - you can use it as a vase for Christmas tree branches, or turn it upside down, and place a lamp under it - it will be beautiful.
Through trial and error, we decided to stick with balls measuring 10 * 10 - 15 * 15 centimeters. They froze overnight in the freezer.
So, let's share our method of making ice balls.
1. The first step was to prepare a gouache concentrate - 1 can of 1.5 liters.
2. Pour the concentrate into a ball "to the brim" through a funnel. You can use food coloring in case there is a good chance that someone decides to taste the giant candy. We took the usual balls. You can freeze balls in the shape of Mickey Mouse, different animals, or rubber gloves (I personally froze a glove from a hair dye package - it turned out to be a funny hand that can be attached to a snowman on wet snow).
3. Then we put on the tap and "inflate". Two are more handy: one squeezes the ball to the tap, the second turns on / off the water. Tied a ball without ropes and other things - with a loop from the neck itself (or whatever it is called)
4. At first we wanted to fill the balls right on the street, connecting to the tap of the Sports House and bringing the hose outside - but the hose was frozen, we steamed it for an hour and a half, then we decided to fill it right in the toilet and take it to the place with a wheelbarrow. So it is more economical in terms of water consumption, well, and more comfortable in the warmth than in the cold at -25.
6. Therefore, they froze right in the park, spreading the balls in the snow. We tried not to deepen it too much and place it so that the balls did not touch each other.
7. Filled the balls for two hours. During this time, the first batch was covered with a crust. They left for another 2 hours. When they came, they found that the balls freeze perfectly from above, but from below, where they come into contact with the snow, there is water. Conclusion - in order for the balls to freeze faster and better, they must be turned over after a couple of hours, or even better, to minimize the area of \u200b\u200bcontact with the snow.
Having turned over all the balls, we decided to leave them for the night, covering them with snow from the kids.
However, this did not save - several young vandals remembered where they saw a multi-colored carpet during the day and, having dug up the balls, began to throw them. Fortunately, the park workers drove them away on time.
8. Most of the balls still survived. The next day, they began to dig them up and, after holding it for a little longer in the cold, took off their "clothes". The rubber is removed very easily - just tear it open with a knife, keys or a stick. Some of the balls did not completely freeze - they just took off their "clothes" as water poured out of them.
9. With the resulting balls, you can do whatever you want. These are both excellent self-sufficient decorations and excellent building materials. Our choice fell on the construction of the pyramid.
We fix the first level with snow - so that it does not leave.
We water each level with water - otherwise the structure disperses due to the unevenness of the balls.
It is a pity that there was no normal camera at hand - they filmed it on the phone. But not every camera, or rather a photographer, will convey the magical play of reflections of lanterns and garlands on the edges of ice balls. And in the afternoon what a beauty.
It was only later that the thought dawned on us that the frame of the pyramid could be made of snow, only by placing the balls outside. So the pyramid would be 5 times larger. Well, this is already next year.
There is still a week before the New Year, followed by the Christmas holidays - we hope you will take into account our experience and our mistakes, adding your ideas!
Happy creativity!
With the onset of a cold and snowy winter, everything around is changing. Leaving the house on the street everything around is admirable, because around there are snowy fluffy drifts that create a fabulous landscape.
If you are the owner country house, then you should definitely be concerned about the question - How to decorate the yard in winter, especially on the eve of New Year and Christmas holidays.
 To make such unusual jewelry, you will need the following materials: water, any color (food coloring or ordinary paints) and balloons.
As you can see, very few materials are required to make such a wonderful piece of jewelry.
To make such unusual jewelry, you will need the following materials: water, any color (food coloring or ordinary paints) and balloons.
As you can see, very few materials are required to make such a wonderful piece of jewelry.
So let's get started ...
In a separate container (this can be a regular three-liter glass jar or bucket) you dilute water with any dye you like. Depending on how much dye you add to the water, the color saturation of future ice balls will depend.
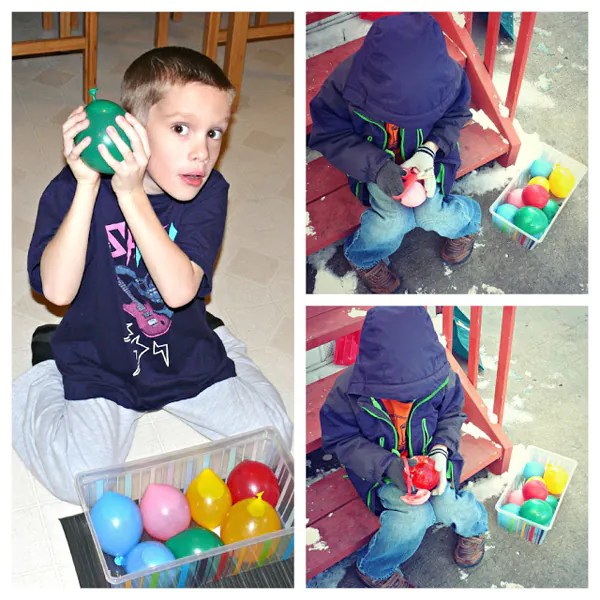 So, the colored water is ready! Now use the help of your relatives, friends or children and fill balloons with colored water using a watering can or a straw. If you plan to make huge colored balls of ice, then it is better to fill balloons right on the spot, as it will be difficult to move a balloon filled to capacity from place to place.
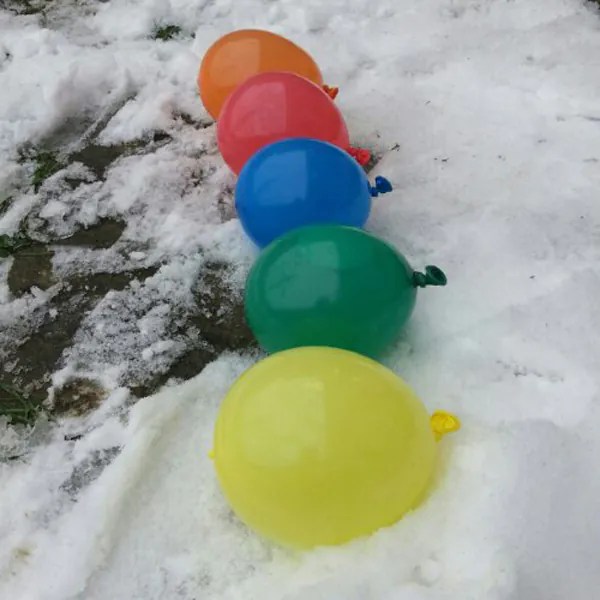 Tie a balloon filled with colored water tightly and leave it outside (in frosty weather, of course) until it freezes completely.
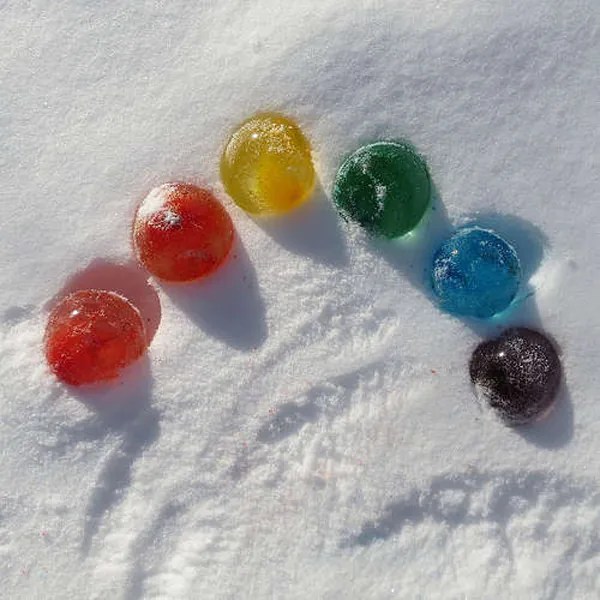
 When colorful water in balloons freezes, you use scissors to free the colored balls from the ice from the rubber shell.
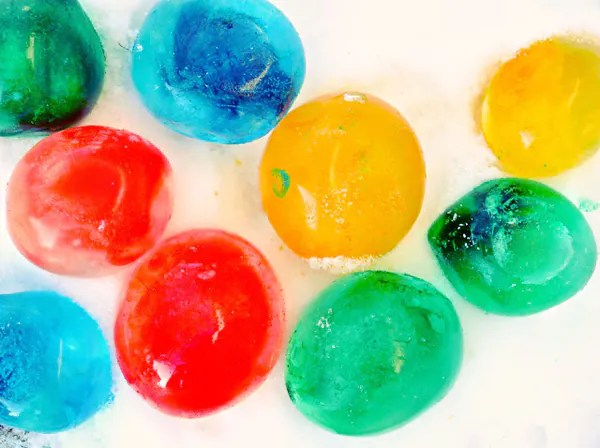 You can decorate paths, playground, railings and steps with such bright unusual ice balls.
DIY colored ice balls - original winter fun!
Winter is still a long way off, but, having accidentally stumbled upon such funny balls, it was difficult to restrain myself \u003d) Often, winter is white and gray, and I really want to add some bright colors. Here you can be helped by bright ice balls, which can be easily made with your own hands together with your child. And the very next day you can head to the park or courtyard, where you will create an interesting composition on the snow-white snow. Or maybe you want to leave them in a snowman \u003d) (exclusively in a snowman!)
To create colored ice balls you will need:
Small balloons
Plastic bags
Food colorings
Something like a metal sheet for baking cookies
Old newspapers or towels
Scissors
Below is the process for creating colored ice balls:
Be prepared for the fact that you and your child can get so carried away by the creative process that they will dirty everything around. To do this, it is advisable to put on old clothes and cover everything with newspaper sheets.
1. Begin to gently fill the balls with tap water (Figure 2).

2. Pour a little food coloring into each ball, 1-2 drops will be enough (Fig. 3).
3. Place all balls in the freezer. You can put them in a large bag to keep the colored droplets out of the freezer (Figure 4).
4. Also, the balls can be frozen in the yard of the house (Fig. 5). In general, they will more or less remain round or slightly oval, which will not affect the effect of the result. You can also dig round holes for them in the snow, so that the desired one will surely come out round form... Removing the ball will be quite simple as its rubber does not freeze.

5. When the balls turn into pieces of ice - poison yourself with them and your baby in the yard, do not forget to wear gloves that you do not mind painting in all sorts of rainbow colors. Connect your imagination - create circles, decorate snowmen with them, decorate the yard with them. Do not forget to take a photo of your creation and send an MMS-ku to your grandmother, let her be happy for you.
Photo sources: trendhunter.com, hurrayic.blogspot.com