How to make a vacuum cleaner from a motor. How to make a vacuum cleaner from a plastic bottle. That's the inventor! What can you take as the basis of a homemade unit
There are different situations in life. If you suddenly need to use a mini vacuum cleaner, you can save on the purchase and do it yourself.
1. Draw the label along the top and bottom lines. Cut out the part of the bottle where the label was.

2. Take the old empty can or a tin can, remove the bottom and top, then cut in the middle to make a rectangular canvas.

3. Measure and cut a circle of tinplate to the diameter of the bottle.

4. Leaving space in the middle for a small motor, draw a tin circle and make cuts to make 8 sectors. Each of them must be slightly bent. Make a small hole in the center.

5. Now attach the motor to the resulting improvised fan.

6. Using a drill and a large drill, make 3 rows of holes in the bottom of the bottle.

7. Glue the cap from another bottle to the motor, after passing the wires from the motor into the hole on the side.

8. Place the fan inside the bottle and glue it to the bottom. Glue the seal to the top of the bottle on the inside.


9. Make a wire ring with a diameter that fits in the bottle and fits snugly on top of the seal. Glue a circle of fine fabric to the ring.

10. Place the ring on the seal in the bottle and close the assembly tightly with the top of the bottle.
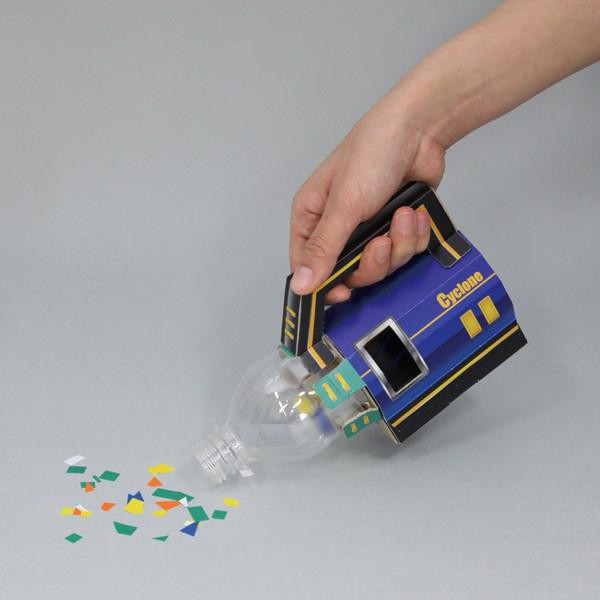
Hello dear friends, today I will show you a great idea on how to make a mini vacuum cleaner for cleaning the keyboard. With such a vacuum cleaner, you can easily clean the keyboard and various circuits. Also, this vacuum cleaner is portable and can be used to remove dust anywhere.
Necessary materials:
- container from soap bubbles
- motor
- bottle neck
- neck from detergent
- crown
- switch
- connector
- thin metal
- a pen
Step 1: The first thing we need to do is make the propeller. Of tin can cut out a circle (the diameter must match the inner diameter of the container). Then we drill five holes: one in the center, and four to the outside, as shown in the photo. Then we make cuts, and bend the blades to make the propeller.

Step 2: Then we take the neck of the bottle and attach the motor to it with glue. Then we attach the propeller to the resulting structure. And we fix it all in a container.


Step 3: Then make small holes on the back of the container. Next, take the neck of the detergent and glue it, as shown in the photo. We glue a small piece from the handle to the neck.


Cut out a small piece of breathable fabric, and paste it as shown in the photo.


That's all! Our mini vacuum cleaner for cleaning the keyboard is ready, insert the crown, and use it.
At the moment, the market is flooded with not only universal, but also special industrial ones. But if you want to save money on buying them, you can try to do it yourself.
Such devices are quite expensive, but they are necessary during renovation worksto quickly clean up after yourself. With the help of an ordinary vacuum cleaner, it will not be possible to achieve a high quality of cleaning, since they are not designed for such debris.
Household models are not able to quickly and efficiently clean surfaces from oil, shavings, plastic fragments, glass, etc.
Before making such a vacuum cleaner, you need to decide with work front, since some models are designed for cleaning liquid or even fine gravel. After the principle of operation has been determined, all other parameters should be considered.
There are many real examples self-creation industrial vacuum cleaners. Let's consider the option of manufacturing from the old model "Rocket".
What will it take to work?
If an old Raketa vacuum cleaner is lying around at home, it will be great consumable to create a building one (for more information about what else you can build - in the article).
In addition, you will need the following tools and materials:
- bulgarian;
- screwdriver;
- bandage;
- branch pipe 200 mm long and 40 mm in diameter;
- scissors for metal;
- plastic bucket with lid and handle;
- glue;
- insulating tape;
- drill.
- scotch;
- self-tapping screws.
Let's start creating a construction vacuum cleaner
Initially you need to do waste bin, which needs some work. Armed with a screwdriver, unscrew the wheels from the base of the vacuum cleaner and tightly glue all the holes obtained with adhesive tape. After the nameplate is removed, its hole must also be sealed with tape.

All clips are removed. Now, with the help of a grinder, you need to free the body from all rivets and put a plug, previously wrapped with insulating tape. Next, make a hole in the bottom with a drill, measuring 43-45 mm. A gasket is taken as a gasket, approximately 3-5 mm in thickness.
In the bin that has been redesigned, you need to fold the gasket, centering pipe and bucket lid. Take a 2 mm drill and use a drill to make holes that will further hold the lid.

Next, holes are made already outside the suction pipe. Before doing this, you need to put down the marks at an angle of 15 degrees. Using metal scissors, make a hole. After that, we attach the pipe using self-tapping screws. For maximum tightness, it is necessary to thoroughly saturate the bandage with glue and wrap it around the pipe.

The nuances of such a device
In order to assemble your construction vacuum cleaner, you need to have on hand power unit, the turnover of which must be at least 6,000. As for the material at hand, it can almost always be found at home. As a donor for the engine, you can use not only an old vacuum cleaner, but also a washing machine.

Some craftsmen use power units from kitchen machines for a homemade vacuum cleaner, but do not forget about their tendency to frequent breakdowns due to their inability to withstand high loads.
If the power unit is found, then you need to take care of it tightness... You will also need a fan. Very often, an ordinary bucket is taken as a housing for a vacuum cleaner, in which a hole is made. Naturally, you need both a garbage container and a filter that you can.
The videos presented show several variations of the assembly of a construction vacuum cleaner. It is recommended to study them if you decide to create a homemade model.
How to make a vacuum cleaner? A self-made unit assumes a 6000 rpm engine. This part can be removed from the juicer. Please note that not all electrical appliance motors are designed for long-term service. Therefore, when choosing an engine, be guided by the rule: the motor must endure a heavy load and have protection against overheating.
What to do if you cannot find anything other than the juicer part?
In this case, it is advisable to equip it with a thermal fuse rated at 126 ° C. The copper cross-section must match the dissipation power, so this temperature may not be suitable for the motor you choose. It should be noted that the 130 ºC limit is the average for which most transformers are designed.
What can you take as the basis of a homemade unit?
Many are interested in how to make a vacuum cleaner with their own hands.

You can take as a basis:
- The exhaust motor with the Axial model will not work, since it is used in models of the cheap segment and does not have the required power.
- Disused vacuum cleaner motor.
- Engine washing machine.
- Refrigeration compressor motor.
Refrigerator Engine Application
How to make a vacuum cleaner from It will be difficult to pick up a part, since the speed of rotation of the shaft is at different models refrigerated trucks varies. If you are assembling a vacuum cleaner, then a strict 6000 rpm will be required. The old rocker type compressors are rated for 3000 rpm.
The crank-connecting rod modifications have a speed half as much, and linear inverter units are not at all suitable for assembly.
There is an electric motor inside the piston compressor. If you cut open the case and remove the motor, then it will be suitable for any purpose. It has high power and quiet operation.
Asynchronous motors are rarely used. For example, the manifold configuration is plugged in if speed control is not required.
Using a washing machine motor
The design of washing machines assumes the presence collector motor... Its speed is regulated by a thyristor key. If the motor is powered directly from the outlet, then the rpm will be high, but they will not reach 6000 in the absence of a belt gear. In this case, the spin function is quite achievable.
How to make the unit suck in dust?
Commercials often talk about the vacuum created in a vacuum cleaner. The engine supposedly contributes to the discharge, into which the drawn in air stream rushes. But is it really so? Rather not, because at negative pressure, a bypass valve is connected to ensure balance. But this is not the essence of the work. A hermetically sealed housing is used to suck in dust, thanks to which the flow of nitrogen and oxygen molecules rushes in the desired direction. The container does not play any role in this case.
If you adhere to the factory configuration, then a steel or plastic bucket is required, the bottom of which has an air intake hole. The motor is mounted on the axis, and something like a squirrel cage is installed on the shaft. The air flow is captured by the blades and thrown out onto the perimeter. This provides traction. A hose is sealed to the bottom. We will assume that the assembly of the vacuum cleaner with your own hands is complete.
How does a mini vacuum cleaner work?
How to make a mini vacuum cleaner? The unit speed is controlled according to the thyristor circuit. Any electronic part from an old vacuum cleaner, washing machine, or food processor will come in handy.

The main thing is the method of slicing, not the power of the engine. But the key is also overheating. It is easy to see if it matches if you compare the power of the device from which the diagram was taken with the power of the engine. If the thyristor index is low, then it is advised to attach a radiator to it, and forced cooling is already available.
How to make a container for a homemade vacuum cleaner?
The vacuum cleaner is designed so that it will not work without a container.
Suitable for a homemade unit:
- ordinary bag;
- container filled with water;
- cyclone chamber.
Filtration of the bag is problematic. If you will be vacuuming crumbs off the table, this will work. The type of container is selected according to the type of waste. For example, dust collection is best done with a water filter or cyclone chamber. Both container types are easy to design. The unit itself turns out to be stationary. If such a device is used by a gardener, then it can be hoisted on a cart and moved around the garden.
The cost of stationary models of vacuum cleaners is high, therefore homemade construction will come in handy.
The most simple model container - a large tank filled with water. It plays the role of an aquafilter. In this case, the dust will sink. The inlet of the hose is made with a view so that the flow collides with a water obstacle. A typical flat-bottomed box is two-thirds filled with water. In addition, a partition hangs from the ceiling above the filter surface. All dust settles in the water and sinks. Such a device requires periodic cleaning. This design will not be suitable for gardening, as the weight of the water is large. Therefore, it is replaced with air.
When assembling do-it-yourself garden vacuum cleaners, adhere to the following rules:
- Air enters the tall barrel tangentially.
- Along the axis of the container, up to about two-thirds of the height, there is a pipe that provides an outlet.
- Garbage settles to the bottom due to the fact that it is carried to the periphery by centrifugal force.
- The air flow comes out in the center.
- The smallest particles enter the engine in any case. Therefore, it is recommended to equip the container with a HEPA filter at the outlet. It is not worth saving on this. Otherwise, you will have to constantly expose the engine to lubrication. If the vacuum cleaner sucks in water, it will end up in the barrel.
Such homemade vacuum cleaner great for the gardener. The unit can be made versatile. For example, cut the barrel to fit the diameter of the tank with standard sizes and equip the device with a van for movement. This will remove the entire park.
How to make a mini vacuum cleaner from a plastic bottle?
Today, almost everyone has a computer at home. As you know, its body is periodically clogged with dust, which interferes with the cooling of many parts. The circuits should be vacuumed from time to time. To facilitate the process, you can use a homemade mini vacuum cleaner.
To manufacture the unit you need:
- fan from the computer;
- plastic bottle;
- hose;
- polystyrene;
- power supply unit 220 V / 14 V;
- insulating tape;
- paralon.
Progress
- The plastic bottle is cut in half. The part that remains with the cork is taken. A filter is cut out of the foam rubber. It is inserted into the neck. The material should fit snugly.
- A hole is made in the plug into which the hose is inserted.
- The cork is screwed onto the bottle.
- The fan is taken from the computer (its corners are smoothed). It is inserted into the bottle in such a way that during operation the air flow is directed towards the wide side of the bottle.
- The place where the cooler is located is wrapped with insulating tape. A wire is used for a strong fixation.
- The power supply is connected to the fan. The red wire goes to the plus side and the black wire to the minus side.
How to make a do-it-yourself industrial vacuum cleaner?
How to make appointments? One of these units is based on the Ural PN-600 model.
You will need:
- bulgarian;
- a branch pipe with a diameter of 4 cm and a length of 20 cm;
- plastic bucket with handle and lid;
- scotch;
- insulating tape;
- drill;
- self-tapping screws;
- glue;
- medical bandage.
Stages of work
- First of all, it is necessary to modify the "Ural" waste bin. For this purpose, the wheels are unscrewed from the very bottom with a screwdriver. The holes are sealed with tape.
- Then you will need a grinder, with which the latches and fasteners are removed. A plug is installed, rewound with insulating tape.
- A hole with a diameter of 43 mm is drilled in the bottom.
- Gaskets are cut from the seal, the thickness of which is 4 mm.
- The gasket, bucket lid and centering tube are placed in the bin.
- Using a drill, a hole is made with a diameter of 2 mm.
- The cover is fixed with self-tapping screws 4.2x10 mm.
- An external opening is made for the suction inlet. It is outlined at an angle of 15 degrees. The hole is cut with metal scissors.
- The branch pipe is fixed with self-tapping screws. For sealing, use an ordinary medical bandage, which is impregnated with Titan glue. The bandage is wound around the nipple.
Second way
To assemble the unit in the second way, you will need:
- old home vacuum cleaner;
- oil-based filter;
- 20 L bucket with tight-fitting lid;
- pP corners 90º and 45º with a diameter of 40 mm;
- meter of plastic pipe with a diameter of 45 mm (a corrugated pipe 2 m long and 40 mm in diameter is suitable).
Assembling the device
- To begin with, take the lid of the bucket. A hole is cut in it at an angle of 90º. Then a corner of the same size is inserted.
- When a corner is inserted into the cover, all the cracks are covered with glue using a construction gun.
- A slot is made in the side of the bucket, into which a 45º corner is inserted. All cracks are also covered with glue.
- To connect the corrugation to the corner, it is necessary to cut a piece of pipe with a diameter of 40 mm. The corrugation should fit snugly. If it does not fit on the inlet pipe, then you can resort to using the model from the siphon on the kitchen sink.
- The narrow end of the corrugation is fitted to the 40 mm pipe. The other end connects to the opening of the vacuum cleaner.
- To extend the service life of the filter, pull a nylon stocking over it.
Can an old vacuum cleaner come in handy?
There is an old vacuum cleaner at home. What can be done from an unnecessary unit?

If the device works, then it can be used for another purpose. Some methods require technical training, since alteration of equipment is dangerous. In particular, you should understand how motors work.
This article will describe the safest methods.
Air blower
If you connect the hose to the outlet, which is available in most models, you can get a unit for inflating rubber mattresses, pools for children and other similar things. At the same time, the vacuum cleaner container needs preliminary cleaning of debris residues.
What can a Typhoon vacuum cleaner do?
What to make of an old Typhoon vacuum cleaner? The principle of operation of the unit is characterized by a high level of performance.

The body of a Soviet-made vacuum cleaner is perfect better fit to create a device for chopping grass. It has a top hole of a suitable diameter. Typhoon is a great option, but not the only one.
What else can you apply?
- The body of the device can be replaced with a cylinder-shaped container. For example, a pan, bucket, or a piece of pipe is used.
- The 180 watt motor comes from an old washing machine.
- A hacksaw blade is used as knives. For the rack, you need a rectangular profile with a size of 15x15 mm.
- The sleeve for fastening the knives is turned on lathe... Its height is 40 mm.
- The motor with the pulley removed is attached to the container by means of studs from below.
- To clamp the knives, use 32 mm water pipe nuts.
- A hole is cut for the motor shaft.
- For reliable fixation on the shaft, a pair of holes with a diameter of 7 mm and an M8 thread for locking bolts are made in the bushing.
- On the back of the motor shaft, platforms are machined to increase the level of reliability of fastening the sleeve with locking bolts.
Making a grain crusher
To make a grain crusher, a person must have experience in working with technology. Self-production devices without proper knowledge are not recommended.
- A sheet of plywood is taken in a square shape. An electric motor is fixed on it so that the shaft goes down by 40 mm.
- The steel plate is mounted on a threaded shank. It is secured with nuts, bushings and washers.
- The leading edges are sharpened on both sides of the axle.
- An axial hole is made in the middle of the insert.
- To create the working chamber of the future unit, a body is made in the form of a ring. It is based on the correct design of the part involves bending the edges of the rings outward. They should form 10 mm flanges. It is with their help that the body is attached to the base. A sieve is screwed onto them.
Making an attraction for children
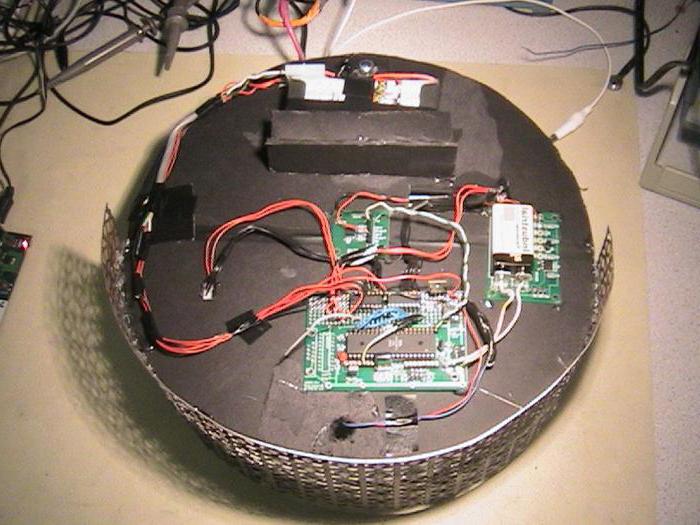
What can be made from an old children's vacuum cleaner? If the motor of the unit is running, then it can be used for the attraction.
To this end, the tennis ball is pierced through with a pin, so that the ends of the pin are on either side of the ball.
After that, the propeller is made. A jar made of polystyrene is used. The propeller is attached to the top of the ball. One strip is enough for him. It is cut out with scissors.
The propeller is pierced in the middle and pushed onto the pin shaft. For speed and ease of rotation, it is advised to make bearings from beads. They are attached to both sides of the strip.
The upper edge of the pin is folded in such a way that there is no large backlash on the axis.
Such a ball can be launched into the air through the outlet. If desired, the ball is decorated with sparkles.
Conclusion
This article has described how to make a vacuum cleaner. There are many assembly options. It has also been described what can be done from a vacuum cleaner.
Remember that you shouldn't get down to business without proper technical knowledge. In this case, it will be difficult to make a vacuum cleaner yourself. It is better to seek help from a specialist.
Making a homemade vacuum cleaner with your own hands is very easy. Such a device will come in handy in various everyday situations.
Need a vacuum cleaner urgently? And it broke or was not at hand? Did you know that you can do it yourself? For this, it is enough to have the most common items that are present in any apartment: empty bottles, wires, scraps of tubes, hoses, broken toys that you were sorry to throw away. First of all, you need to get somewhere a small working electric motor. This is the backbone of the basics. It can be borrowed from a broken children's toy or any unnecessary electrical appliance. Having obtained it, you can start making a small vacuum cleaner.
- Take a plastic lemonade bottle and cut the neck off where it expands. Measure the excess part from the neck cut and cut it off so that the remaining space is enough for the dust collector and motor.
- Fan. You can borrow an old fan from the computer system unit. If not, find a piece of soft metal suitable size... Can be from under a can of beer. The main thing is that it can be easily cut with scissors and then bent. The diameter of the fan wings must match the inside diameter of the bottle. Cut out a circle, mark it into 6-8 equal parts. Cut the marking lines, leaving 5-10 mm to the center of the circle.
- In the center, make a hole for the motor rotor, and bend the fan blades at an angle so that they suck in air during rotation, and not vice versa. Fasten the fan and motor rotor with glue, being careful not to distort the connection.
- Make holes in the bottom of the bottle to let the air flow out. Attach the motor to the bottom of the bottle. A plastic cover comes in handy for this. Glue it to the motor, after passing the wires from it into the hole on the side.
- Place a fan inside the bottle and glue it to the bottom. Glue the seal to the top of the bottle on the inside.
- Make a ring out of any wire. Place the ring on top of the gasket and glue a circle of fine fabric onto it. Close the structure with the top of the bottle. Then glue a small hose to it. The nozzle can be made from half of an unnecessary plastic vial.
As you can see, making a homemade vacuum cleaner with your own hands is quite easy. Such a device will come in handy in various everyday situations. The power of a small vacuum cleaner, for example, is quite enough to clean the keyboard from dust and bread crumbs. The made device can be easily carried from place to place, not only in the house. It can be used to clean seats and panels in the vehicle interior.


