Five main reasons why a modern iron fails. Repair of irons. Causes of iron breakage Is it possible to repair the iron
I love puzzles ... especially unexpected ones. Here is such an unexpected puzzle "fell on my head" today. More precisely, it fell not on my head, but on my shirt, and did not fall - but fell off.
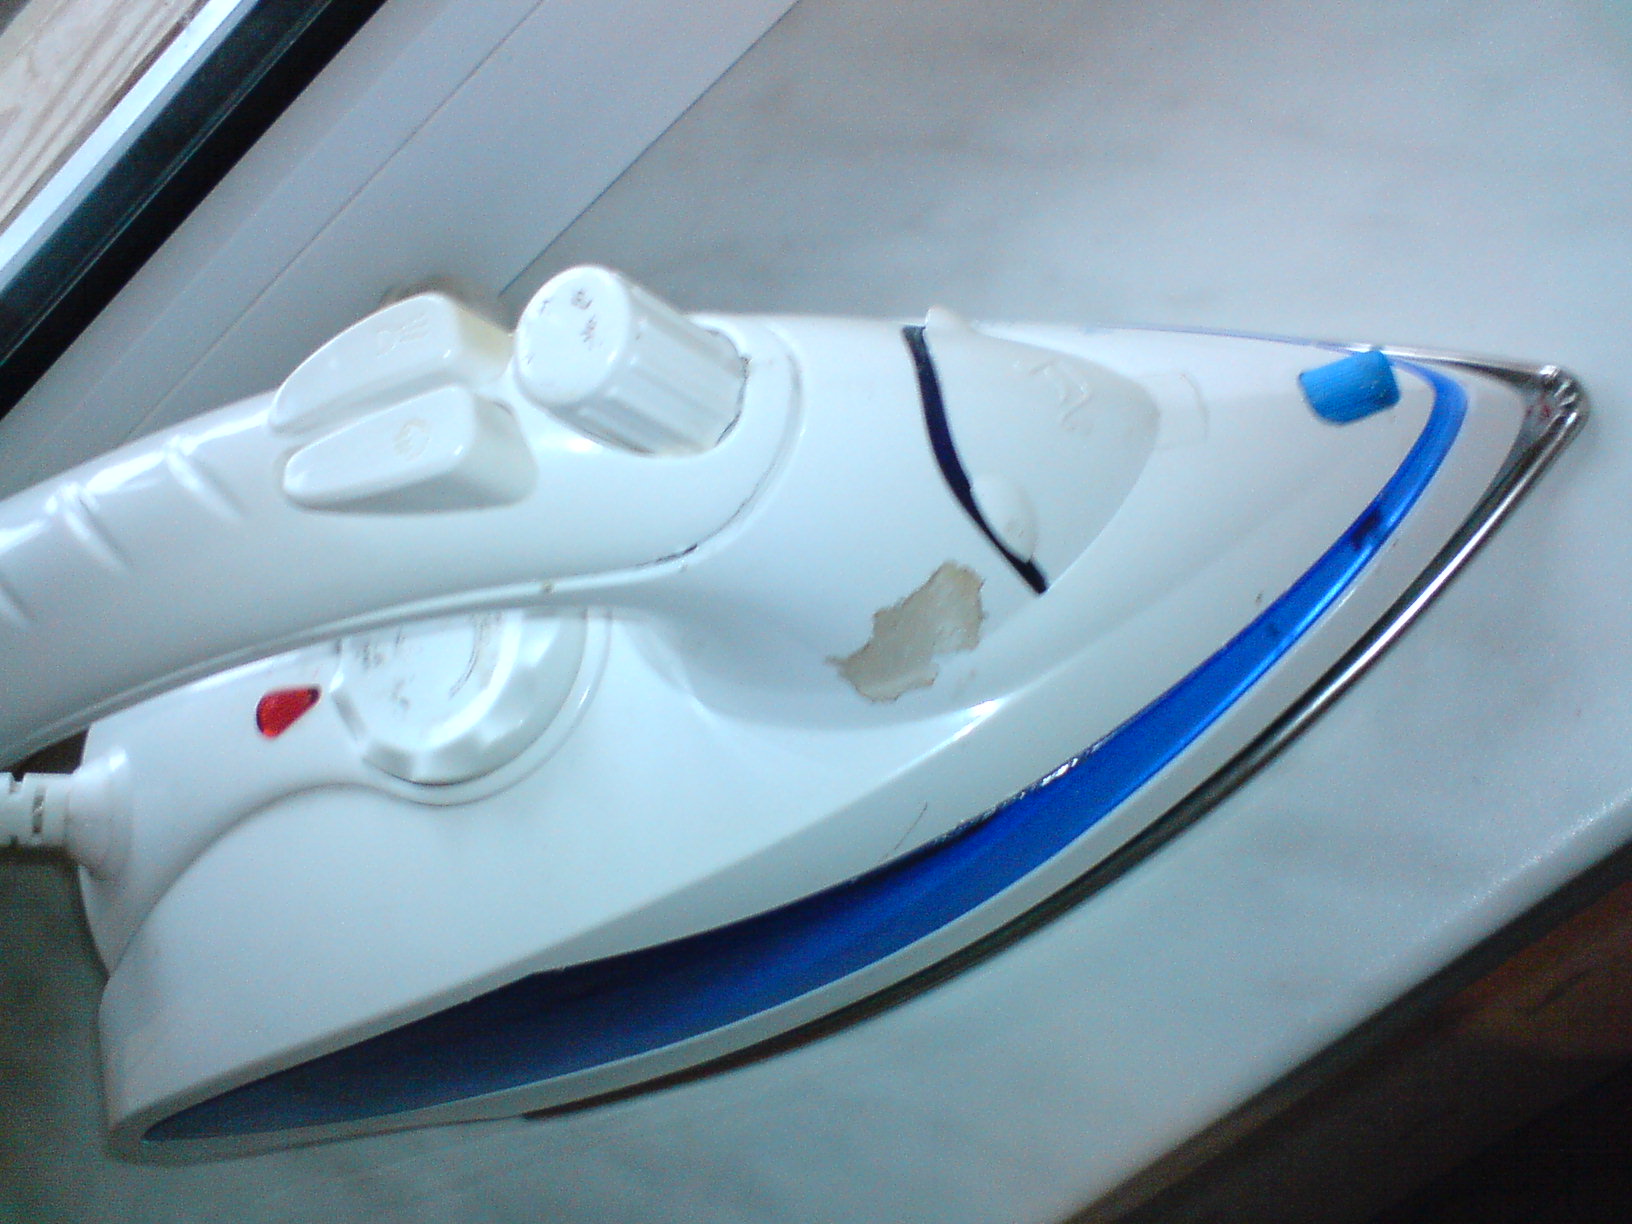
An iron fell apart in my hands, while ironing a shirt…. just like that, the sole took and fell off (it remained hanging on the wires). The case turned out to be one screw that had been unscrewed (the flimsy fastening of the iron soleplate aroused my suspicions from the very beginning), which fastened the sole to the "nose" of the iron.
To screw this screw into place, it was necessary to disassemble the entire iron, which was a puzzle. A quick "google" did not bring a solution and had to "storm" the iron ... So I decided to combine the solution of the puzzle with a photo session. Maybe someone will be useful, although the model of the iron is not known…. but still..
This is how my iron looked at the very beginning, a fallen off potash and an assembled top of the iron:

The heel of the sole is fastened without screws, with some kind of anchor grips)) Ie. the reliability of the design rests on the very screw on the iron spout.

Note that I took the photographs after disassembling the iron ... so there will be a "reconstruction of events" further.
So welcome - the iron itself:
Disassembly should start with a dastardly hidden screw under the lid of the water tank:

But you need to remove the cover from the closed state, hook it with a screwdriver and lift it up.

Unscrew the first screw:


We take out the "horned bullshit" from the end of the handle and take out the rotary control. To do this, unscrew it counterclockwise until it stops, and then pull it up.

Screw this screw, this is the second hidden screw. I found it only when I was assembling the iron ... I broke it or it was broken before me (the iron is not mine) will remain a mystery !!! In my case, there is an option to buy super-glue or find dichloroethane and glue the plastic:


The next 2 screws are hidden under the cover of the temperature controller. It will have to be brutally ripped out with a screwdriver. (in my case it was easier, I pushed it out from the inside, because the sole had not yet been screwed on)

Unscrew the screws here and near the heel of the sole... There will be 4 more screws: two large and two smaller ...

We remove the part:


Mesh filters at the bottom of the cylinders ...
You also need to watch out and not rip (as I did) the tube leading to the spray on the iron spout:

EVERYTHING, I finally got access to the ill-fated screw on the toe of the sole. It can be screwed on and iron assembled. But I recommend checking the integrity and tightness of all contacts. And in general, to carry out maintenance of the iron, the races have already been dismantled….
When assembling, do not forget to put in place various little things, so that there are no "extra parts" left after the repair:

two crap I almost forgot to put on. These are some kind of gaskets ...
Everything, I tighten the ill-fated screw:

And I start assembling ... in the reverse order to disassembly ...
The only thing I will note is that in order to properly assemble the temperature regulator, I unscrewed it all the way clockwise and accordingly knew in which position it was necessary to put on the regulator cover itself ... this was the position of the maximum temperature:

Look like that's it…. do not forget about the screws and do not get nervous during assembly and disassembly))))
This entry was posted on October 5, 2008 at 13:47 and is filed under with tags. You can follow any responses to this entry through the feed. You can, or from your own site.
If the iron stops heating, you can buy a new one, but often the damage is not very serious and you can fix it yourself. If you know how to work with a screwdriver and a multimeter, you can. How to repair the iron with your own hands and we will talk in this article.
General device
Since irons are produced by very different companies, they differ slightly - in shape, heating speed, quality of spare parts, etc. But the overall structure remains the same. Available:
- Sole with heating element built into it. If there is a steamer function, the soleplate has a number of holes for steam to escape.
- A thermostat with a handle that allows you to set the required heating temperature of the sole.
- Container / tank for water used for steaming.
- There is a nozzle for spraying water, forced steam. There is also a steam regulator. With its help, the frequency of the automatic supply of evaporated water is set.
- The iron is connected to the network using an electric cord, which is attached to the terminal block located in the back under the plastic cover.
After you have familiarized yourself in general terms with what is where, you can start repairing the iron with your own hands.
What will be needed for work
To work, you need a set of screwdrivers - cross and flat. You will need a wide knife or an unnecessary plastic card - pry parts of the iron with snaps. To check the integrity of the parts, you will need a multimeter (). It may also be required - if you have to change any parts.

All of the tools, but in the process of work sometimes you need electrical tape or heat shrink tubes, you may need sandpaper, pliers.
How to disassemble the iron
The first difficulty faced by those wishing to repair the iron on their own is disassembly. This is far from simple and obvious. The easiest way is to remove the back panel. There are several screws that are visible and which are difficult to unscrew. In addition to screws, there may be latches. So, having unscrewed all visible fasteners, we pry the cover with the tip of a screwdriver or an old by plastic card, separate the cover from the case.
Under it, a terminal block is found to which the cord is attached. If there are problems with the cord, you can not disassemble the iron further. But if everything is fine with the cord, you will have to disassemble it further, and problems may arise with this.
In some irons - Philips (Philips), Tefal (Tefal) there are also bolts under the lid. We unscrew them too. In general, if we see fasteners, we remove them.

Removing the back cover is the first thing to do when disassembling the iron
Each manufacturer develops its own design, and it often changes from model to model. Therefore, difficulties arise. But there are several points that are found in almost any manufacturer.
Immediately you need to remove the temperature regulator dial and the steam supply buttons for which you need to hold them in your fingers and pull them up. The buttons may have latches, so you might need something thin to squeeze them out a little - you can pry them off with a screwdriver.

Some irons, such as the Rowenta, as shown in the photo, have bolts on the handle (found in some Scarlet models). If there are any, we unscrew them. A screw is also hidden under the removed buttons, we also unscrew it. Then we remove the upper plastic parts... They are usually fastened with latches. To make it easier to remove them, you can put a knife blade or a piece of plastic (plastic card) into the lock.
There are usually some bolts under the covers. Having unscrewed them, we continue disassembling until the body and sole are separated. Unfortunately, it is impossible to give more precise recommendations - there are too different designs. What can be advised - to act slowly and carefully. And a few videos on how to disassemble irons of different brands.
Power cord
Failure of the electrical cord is a fairly common type of breakdown. With such damage, the iron may not turn on at all or work in fits and starts, the sole may not heat well. The cord can bend, curl, the insulation is damaged at the bend, some wires can be frayed completely or partially. If there is such damage, it is better to replace the cord, regardless of whether it is the cause or not. In any case, all places with damaged insulation must be insulated.
In case of any damage, any repair of the iron begins with an inspection of the cord. To accurately determine whether it is normal or not, you need to ring it. To do this, simply remove the back cover. The terminal block will become available, to which the cord is connected. You will need a tester or multimeter. We put it in the dial mode, press one probe to one contact of the plug, with the second we touch one of the wires on the block. When you touch the "correct" wire, the multimeter should squeak. This means that the wire is intact.

The color of the insulation of the conductors can be any, but yellow-green is necessarily grounding (it must be checked by installing the probe on a small metal plate at the bottom of the plug). The other two are connected to the pins of the plug. Here one of these two wires should ring with the pin to which you pressed the multimeter probe. We repeat the same operation with another pin.
For complete confidence in the serviceability of the cord, you need to wrinkle / twist it during the dialing. Especially in places where there are insulation problems. If the squeak from such actions is interrupted, it is better to replace the cord. It also needs to be replaced if one or both pins do not ring. You may be lucky and you will not need further repair of the iron.
Checking the performance of the heating element
If the iron does not heat up at all, the heating element may have burned out. If so, then it is worth buying a new iron, as replacement will cost almost the same amount. But first of all, you need to make sure that it is the heating element that is to blame.

In order to check the heating element, we get to the very sole of the iron. On it, closer to the back, there are two outputs of the heating element. We transfer the multimeter to the position of resistance measurement (up to 1000 Ohm), take measurements. If the numbers on the display are of the order of 25 ° Ohm, then the heating element is normal, if more, it is burned out. As already mentioned, if the heating element burns out, it is not worth repairing the iron - it is more profitable to buy a new one.
Checking the thermostat
The thermostat looks like a plate with a group of contacts and a protruding plastic pin, on which the disc is then put on.

Two contacts fit the plate. We install the multimeter probes on them and check the performance (we ring). In the "off" position, the sound of the multimeter should disappear; when turned on and turned to any position, it should continue to sound.
The damage may consist in the fact that in the "on" position there is still no contact - then the iron does not heat at all. The situation may be different - it is not disabled by the regulator and / or does not respond to the position of the regulator. Both reasons are in contacts. And, most likely, they are burnt.
In the first case, carbon deposits can interfere, which can be cleaned off by sticking a piece of sandpaper with a fine grain between the contacts and a couple of times and "sliding" along the contacts. If there is no sandpaper, you can use a nail file, but you must act carefully - the temperature settings depend on the bending of the plates. So you can't bend them too much.
In the second case - if the iron does not turn off - the contacts may have burnt - melted. Repairing the iron in this case consists in trying to separate them. But this trick rarely succeeds. The way out is to replace it.

There may be another point: when falling, the contacts could somehow interlock. When the soleplate of the iron is heated, the bending thermoplate presses on the contact groups, but the contacts cannot open. The result is the same - the iron does not turn off when heated. Repairing the iron is also similar - we are trying to return mobility to the plates, trying not to bend them. If it doesn't work, we change it.
Fuse check
A thermal fuse is installed in approximately the same area as the thermostat. It stands in case of overheating of the sole of the iron - it burns out if the iron heats up to dangerous temperatures. Usually a protective tube is put on this fuse and most often it is white.

Find contacts, call. In the normal state, the fuse "rings", if it is blown out - silence. If desired, you can move the tube, ring it directly - there may be a break / burnout of the connecting wire. If the fuse is blown, you solder it, look for a similar one and install it in place.
It is not worth excluding the thermal fuse from the circuit - it will save you from fire in case of problems with the thermostat: it will simply burn out and the iron will not work. And even though the iron will require repair, your home will be safe.
Steam spray system
If almost no steam comes out of the iron, and there is water in the container, the holes are most likely clogged with salts. You can restore your performance with a simple trick. In a dish with low sides (a frying pan or baking sheet is suitable), pour water and vinegar (ordinary, table vinegar without dyes). One glass of vinegar per liter of water. The second recipe - 2 teaspoons of citric acid for 250 ml of boiling water. In the dishes with the prepared liquid, lower the disconnected iron. The liquid should cover the sole.

Put the container with the iron on fire, bring to a boil, turn it off. Wait until it cools down. Warm up again. This can be repeated 3-4 times. Until the salts dissolve.
Sometimes water stops coming out of the spray arm. Most likely, this is due to the fact that the tube is disconnected. In this case, the repair of the iron consists in the fact that it is necessary to disassemble the panel on which the injection buttons are fixed and reinstall all the tubes and wires.
The second way to descale the iron is to disassemble it completely so that only one soleplate remains. Cover the sole with tape so that no water seeps out, but you can also put it in a dish. Pour hot water with vinegar or citric acid inside the sole, let it cool, drain, pour over again. Continue this way until you are satisfied with the result. Then rinse with water and collect.
- a guarantee of neat things and a neat look. Responsible and respectable housewives experience not very pleasant emotions when the device breaks down - not everyone can afford its expensive repair. And why give extra money if there is an opportunity to fix the device yourself. Let's look at what are the main malfunctions of the ironing device and how you can repair the iron at home yourself.
Before disassembling the ironer, check all external structural elements, perhaps the problem is in them. The main parts of the iron are located in its bottom, and they serve as the main reasons for breakage. These include:
1) Temperature regulator.
2) Electric cord
3) Water regulator
4) Steaming system
5) Iron sole
6) Heating element
The origin of the iron
The first ironing facility was invented in ancient Greece - turned heated stones were used to pleat clothes. When the first iron similar to the modern form appeared, it was used exclusively for ironing silk.
Interesting fact: The bodies of the first irons were filled with hot coals.
It is not known who and when invented the semblance of a modern iron, but the invention of the first electric device is attributed to Henry Seeley. The American registered the mechanism under the name "Electric flat iron" in 1882.
Weight electrical device was six kilograms. Therefore, it is not difficult to imagine what the ironing process was. After the method of heating by means of a carbon arc was introduced into the mechanism, the care of fabric things became much easier.
In 1892, the Crompton Co and General Electric Company began producing irons on an electric spiral. Further, a current regulator and steam supply, protection against scale and other important options were introduced into the devices. In accordance with the fashion, the design of the irons changed.
Iron device
The principle of the ironing mechanism is as follows: the current heats up the coil, which directs the derived heat to the sole of the mechanism. The rather complicated design of the ironing machine includes the following elements:
- Electric wire. In such devices, wires with a cloth braid are used; it protects the wire sheaths from heating and chafing.
- Steam regulation system. Special buttons on the mechanism serve as a signal for the supply of steam or water spray.
- Container for water. In a special compartment, liquid is processed to supply steam.
- Thermostat. Due to thermoregulation, the device does not overheat, thereby not spoiling things.
- Iron sole. The part is used to directly iron the garment.

To determine the malfunction, the device must be diagnosed. That is why for self-repair it is recommended to know the design features and the principle of operation of the ironing machine.
Diagnostics of the iron and determination of possible causes of malfunction
The iron may not work for various reasons; poor care, the duration of operation, the water used and many other factors affect its breakdown. Consider the main device malfunction signals.
What does it mean when the iron beeps? Each device of this type has a thermal relay, they periodically turn on and off. They can be diagnosed using an electric tester. To do this, disassemble the iron and check the electrical signal with a tester.
Iron leaks: what to do? A leak can be due to two reasons: a malfunctioning valve or improper operation. In the first case, water flows out of the steam generator iron: when the valve is closed or the liquid does not heat up enough to produce steam. To check the part, fill with water and plug in the appliance. Shake the device horizontally and turn off the steam. If water flows out, the valve is not closed tightly. With Philips ironing devices, such a malfunction occurs less often, especially long-term operation is typical for models and.

What if the iron does not steam well or does not release steam at all? The reason may lie in the scale. In this case, you need to clean the mechanism with a lemon solution: pour the citric acid mixture into the iron and put it on the steaming mode. Wait until steam is completely restored and rinse the device with distilled water.
Why doesn't the iron heat up? Optimal heating stops when the following parts break down: a pump, a thermal fuse, or simply loose contacts. For an accurate determination, the device should be diagnosed, you can do it yourself or entrust a specialist. For diagnostics, open the device and check the suspected parts with an electric tester. In the event of a malfunction of one of the parts, the device will stop beeping.
Why does the iron take a long time to cool down? The problem may be with the thermostat. You can check the breakage with a multimeter as follows: open the case and sand the contacts on the bimetallic plate with sandpaper. Check them with an electrical tester and turn the governor tiller. Number 1 on the display of the device will indicate its malfunction.

How to disassemble the iron
Disassemble the mechanism old construction not a problem, it's more difficult to deal with new models. Modern three-tiered irons consist of a handle, body and sole. Find hidden under plastic trim screws can be difficult, for this you need to know the main places of their location. The fastening elements are located in the end part, under the temperature regulator and the handle, as well as under the buttons. Take a suitable screwdriver or other wrist object and gently pry off the housing. After removing the body of the device, unscrew the last three screws on the inside of the sole. Now, we can consider that the last stages of dismantling have been completed. The mechanism is assembled in the same way. Watch the video: How to disassemble the iron in 3 minutes.
Advice:Take special care and caution when unwinding the iron. In most cases, it is impossible to disassemble the mechanism without breakdowns. You can find out the details of the design by reading the instructions, so there are more chances to protect the device from mechanical damage.
Power cord problems
Most often, the cord is frayed near the plug and the casing. If the cord is faulty, the part needs to be replaced. Perform electrical tests first, they will help determine the exact cause of the breakdown. Tests are carried out by means of a multimeter, a test lamp, a phase indicator and with the help of a "liar". The principle of operation of the devices is the same. All of them are used to determine the electrical signal at given points. In some models of irons there is no power cord, it belongs to such devices.

Advice: In some cases, to resume normal operation of the iron, it is enough to clean the contacts on the plug. In this case, it is not necessary to change the wire.
Malfunction of a tubular electric heater (TEN)
Before replacing the main heating element - try to descale it. It is limescale that becomes the main reason for poor heating. When used correctly, the heating element must be cleaned of corrosion, scale and other damage every 3 months. Also, due to strong overheating, the spiral on the heating element may break, this serves as another reason for replacing the part. Before buying a device, determine the required power, size, heat transfer conditions for the future part. The process of replacing the old heating element with a new one is simple, for this, connect a new one to the place of the faulty device. Teng is screwed on with screws.
Advice:The more power the iron is, the faster it will heat up. Powerful mechanisms include models and.

Advice:Since the tens release different designs, choosing an element for a new model of iron will not be a problem.
Thermal fuse defective
The thermal fuse is designed to protect the electrical system of the device from mains overvoltages or short circuits. The part is placed near the main heating element. To diagnose a thermal fuse, use a multimeter ( inexpensive option -): connect the “plus” and “minus” contacts to the two ends of the part. The number one on the display means an open circuit (complete malfunction of the device). As practice shows, a thermal fuse becomes a common cause for iron breakdown. However, you should not be very afraid, during normal operation of the temperature controller, the device is capable of functioning without the help of a fuse.
Irons, as household appliances, have appeared for a long time. They were bulky, heavy, and awkward to use. The advantage of these devices was their "indestructibility" due to the simplicity of the design. They became unusable only when hot coal burned through their metal bottom.
Today, an iron is a high-tech device, consisting of several units that have precise settings and work well-coordinated.
Figure: 1. Repaired iron
When all this is violated, the device jumps and eventually fails. This happens for various reasons. Improper use, dropping the appliance, using chlorinated water for the steam generator and much more. As a result, such a necessary device turns into a useless piece of plastic and metal.
What if your favorite device stops heating up? The main thing is not to panic, but to try to return the iron to its working capacity. The cause of the malfunction is often minor and easily remedied.
Below, the article will describe how to troubleshoot an electric iron and how to fix it and repair it yourself.
Of the tools, you only need a Phillips screwdriver, a multimeter or ohmmeter and small pliers called "ducklings".
Although this iron does not have a steam generator, its electrical circuit and design are practically no different from the first ones. Therefore, the method for diagnosing and repairing the electrical part is identical.
Photo 2 shows a device that does not heat up when it is plugged in and the thermostat wheel rotates.
 Figure: 2. We turn the regulator, and the iron does not heat up
 The mains voltage is present, visually the cord and plug have no visible damage.
Judging by the tag (Figure 3), the power of the device is 1000 W. This is not a big indicator, since there are instances of up to 2500 watts. The more watts the iron consumes, the faster it heats up, but more current flows through its circuits and contacts. Therefore, such devices are more likely to be subject to conditions under which they fail.
 Figure: 3. Specifications
 As with many irons, you should start by removing the back cover (Figure 4). It is held in place by one screw located exactly in the middle of the cover.
 Figure: 4. Remove the back cover
 Use a Phillips screwdriver to unscrew this screw.
After the screw is unscrewed, the cover can be freely removed and the incoming electrical circuits of the iron can be seen.
 Figure: 5. Electric circuits of the iron
 For ease of installation, there is a terminal block inside (Figure 6), to which the incoming cable comes. On the other side of the terminal block, the wires go deeper into the device.
With a high power of the iron in this place, wires may burn out or the terminal block case may melt. The fact is that this method of clamping with screws is not entirely reliable, since over time the connection heats up and the screw looses.
In this case, the connection heats up even more and, as a result, the wire burns out. And this place is often a weak link in the electrical circuit of the device.
 Figure: 6. Terminal block
 But everything looks great in the photo. No hints of heating and even less a wire break. This is most likely due to the low power of the heater.
But in order to make it convenient to disassemble in the future, it is necessary to remove the cord clamp, which is held by two screws.
 Figure: 7.remove the upper part of the iron body
 Using the same Phillips screwdriver, unscrew one screw and loosen the other.
When the cord is free, pull it out and unscrew the case screws.
 Figure: 8.Unscrew the screws of the case
 Now we go to the front. Both screws in this place are under the water container. This is a common spray bottle for irrigating clothes before ironing.
 Figure: 9. Press the release button
 To remove it, press the lock button (Figure 9), and take out the sprayer itself. Next, we take out the container for water.
 Figure: 10. We take out the spray
  Figure: 11. Water container
 Under it are two screws that fasten the body to the sole of the iron. We unscrew one and then the second screws.
 Figure: 12. Unscrew the 2 screws
 After these manipulations, the top cover can be easily removed.
 Figure: 13. Remove the top cover
 All that remains is the sole with the protective casing and electrical circuits.
 Figure: 14. Iron sole
 Photo 15 shows that the indicator lamp is moving away from the terminal block.
 Figure: 15. Indicator light
 It should signal the operation of the iron when the mains voltage is applied directly to the heater.
In the center is the thermostat slider (Figure 16) with an oblique guiding cut. This cut is required to dock the regulator wheel on the top cover with the temperature sensor slider.
 Figure: 16. Thermostat engine
 We take out the neon lamp from the seat (Figure 17) and unscrew the three screws securing the protective casing of the sole (Figure 18).
Further, it is necessary to disconnect the wires going under the casing, otherwise they will interfere. The wires, both incoming and outgoing, have the appropriate color, so there is no need to mark them before disconnecting.
 Figure: 17. Take out the light bulb
  Figure: 18. Unscrew the 3 fastening screws
 But before that we check if the problem is in the cord. To do this, we connect the leads of a device capable of testing the circuit with blue and brown wires (Figure 19). These colors correspond to the phase and zero of the 220 V network. We turn the thermostat engine first in one direction and then in the other direction.
The device does not show anything, which means that the break is located further under the protective casing.
 Figure: 19. Looking for an open circuit
 In turn, unscrew all the wire clamps.
 Figure: 20. Turn off the rest of the wire clamps
 After removing the wires from the clamps, carefully remove the protective cover.
 Figure: 21. Remove the protective cover
 We put it aside and again take the chain pointer. We connect its ends with the terminals of the heater or heating element. The device shows that the heating element is intact, and this is good news, since it is pressed into the sole of the iron.
 Figure: 22. Checking the heating element
 Only the temperature regulator remains.
A brown wire comes to one of its conclusions, which goes directly from the network. Having connected the device with this output of the temperature sensor (Figure 23), as well as with the white wire that goes to its second contact, we turn the regulator again.
 Figure: 23. Checking the thermostat
 Nothing happens, then the thermostat is defective.
What can be done in this case? The simplest thing is to replace the regulator. But finding the same one will most likely be problematic, especially a worker.
Some people short-circuit the temperature sensor with a piece of wire, thus removing it from the circuit.
But this is not an option, since at best, if the iron overheats, it can burn delicate fabric. And at worst, the whole apartment or house, if it is accidentally left plugged in. Therefore, direct connection is not an option.
What then can be done? Just readjust the bimetal plate of the thermostat. If you look closely, you will notice that the thermostat contacts are open in any position of the regulator knob.
But if you press your finger on the bimetallic plate, the contacts will close at some point. So you need to bend the plate a little and everything should work.
We take the "ducklings" and grabbing the bimetal plate with them, slightly rotate it counterclockwise (Figure 24 and 25).
 Figure: 24. Rotate the bimetal plate
  Figure: 25.
 This must be done as carefully as possible and in the middle position of the thermostat engine. At some point, a click will be heard, and the contacts will close.
We make measurements after revision (Figure 26). It can be seen that the contact part of the temperature sensor is closed.
 Figure: 26. Measurements after revision
 Now we put the wires into the hole in the casing and stretch them with our fingers from the other side. We also lay out the wires carefully. We put on the upper part of the case and tighten the screws that secure it.
It is very important that when connecting the body to the sole (Figure 31), the axis of the regulator wheel fits exactly into the cut on the thermostat slider.
To check if these two parts are correctly connected, you need to turn the adjuster wheel in different directions. If it is fixed in two directions, then everything is connected correctly and you can continue the assembly.
 Figure: 31. We connect the body with the sole
 We fix the body with screws and put the container with the spray bottle.
Figure: 34. Put back the back cover
We turn on the iron and turn the wheel.
Photo 35 shows that the iron has turned on and is heating up.
 Figure: 35. The iron is running
 At some point, he turned off himself, having typed the desired temperature.
We turn the wheel to the maximum, and it turns on again. We can assume that the regulator is working correctly and will not fail at the right moment. At this, the repair can be considered completed.
It should be remembered that all work must be done with the device disconnected from the network.
In our life, the iron occupies a very important place, it gives our clothes beautiful view, smoothes out all folds after washing, and, conversely, if it is necessary to specially form arrows, it helps to give our clothes a finished look.
In our life, it happens that our assistant fails, and not all functions work for him, the steamer may work poorly, and what is worse is not to heat at all.
In this article, we will analyze how to repair an iron with your own hands so as not to throw out the old one and not buy a new one. At the moment, we operate a lot of types of irons: from the simplest to irons with steam generators.
It should be noted that the basic design of these irons is the same. On the market, they are represented by a large number of companies, for example, Philips, Rowenta, Tefal, Bosh, Braun (brown), etc.
In contact with
Classmates
The main breakdowns of the iron
When the iron works properly, it is, of course, good, but there comes a moment when something goes wrong. Therefore, we will consider the most common breakdowns. These include:
- Broken wire. This is manifested by the fact that the iron does not heat up, the light does not light up.
- Damage to the thermostat. The iron works in one position or does not work at all, does not respond to switching of the regulator, or it heats up all the time without shutting down.
- Teng burned out. The light is on, but the iron is not heating.
- Broken steamer. At the same time, garbage is poured, there is no steam, water is pouring and so on.
Getting started repair
For repairs, we need a straight and Phillips screwdriver. It is advisable to have on hand a multimeter, a knife,:
- A wire break is the simplest breakdown of the iron, as a result of which voltage is not applied to the iron and the heating element does not heat. In this case, it is required to determine the place of the cliff. This often happens in places of inflection, mainly at the entrance to the iron.

After determining this breakdown, we open the wire insulation with a knife, strip the wire on both sides and twist it, do not forget to insulate the wires, this will ensure you from defeat electric shockas well as from a short circuit in the iron.
The design of the thermostat is quite simple. It consists of a bimetallic plate (which, when heated, bends and opens the contacts) and a pair of contacts, all of which can be enclosed in a case. In the cold state, the contacts must be closed, and the resistance of the thermostat must be zero. It is easy to check with a multimeter. 
Also, contacts should easily disperse. If this does not happen, then they are burnt. It is required to disconnect them and clean them with a zero or a small file. If the iron does not obey the regulator, then it is necessary to replace the thermostat, since this is a mechanical breakdown and repairs are more expensive and of lower quality than replacing the iron with a new one.

2. Checking the heating element. (TEN - tubular electric heater). Often, if the heating element does not heat, then it is required, first of all, to ring it with a multimeter. A serviceable heating element has a resistance of several tens of Ohms, depending on the power of the iron.

A non-worker will have a resistance equal to infinity. If the heating element burns out, it needs to be replaced, if possible, or the iron will be more efficient at all.
3. If the lamp is on, but the heating element does not work, there may still be a breakdown of the thermal fuse. In this case, its replacement is required. When replacing, it is advisable to take exactly the same or at a higher temperature. It is installed with clamps, since soldering is not effective at this temperature.

4. If the steamer or spray system does not work well, then you need to clean it. To do this, prepare a solution of water and vinegar in a ratio of 1 liter to 200 grams of vinegar. You can also buy special descaling solutions.

Having removed the top bar of the iron, you can see two pumps (the one on the left is for steaming). Examine the pump carefully for any deposits on the pump
To do this, pour the solution into a wide container, set the iron in this position, with the sole in the water, but so that the water does not get inside. We heat the water to a boil, leave it to cool, repeat this procedure 3-5 times. Based on experience, it should be enough. The steam or spray button may also not work, in which case it must be replaced.
5. Also, the fuse installed in some models of irons may simply blow out. The people suggest simply closing it, but in such cases the iron will work without protection, so it is recommended to replace it with exactly the same one.

Completion of the repair

There will be resistance in all positions of the regulator. If the position is disabled, in this position the resistance will be equal to infinity.
Note: during assembly, all wires must be separated from each other, not touching the bare part to the metal.
More serious malfunctions require repair in a workshop household appliances... Please note that sometimes buying a new iron is justified by the cost of repairing it.
From this video You will learn how to repair your iron yourself:
In contact with
Do you see inaccuracies, incomplete or incorrect information? Do you know how to make your article better?
Do you want to offer photos on a topic for publication?
Please help us make the site better! Leave a message and your contacts in the comments - we will contact you and together we will make the publication better!