Mixture for preparing artificial stone. Production of artificial stone from cement. How to make artificial stone
Today, finishing building facades with natural stone is very common. However, such a stone is quite expensive. As an alternative, you can use a solution that involves making artificial stone yourself. It should be noted that stone made in artisanal conditions will not be inferior to natural stone, and you will save a lot of money. Using artificial stone to decorate facades, you can create a unique design. With all this, making artificial stone yourself is not such a difficult task.
Advantages of artificial stone
According to some studies, when properly manufactured, artificial stone can surpass natural stone in mechanical properties and durability. The following characteristic advantages stand out:
- Can be produced in thin tiles. This will reduce the weight of the object on which the stone will be mounted.
- You can make stones of different textures and colors.
- It is possible to produce artificial stone directly at the site of future installation, so there is no need to spend additional money on delivery.
- To avoid polishing, grinding and sawing, you can immediately produce tiles that are smooth to a shine.
- It is possible to produce rubble stone of irregular shape.
Note! If you create an imitation of a polymer binder, the product will be thermoplastic. Accordingly, the workpiece can then be formed, bent and joined seamlessly.
Types of artificial decorative stone
Do-it-yourself artificial stone can be made using different technologies:
During manufacturing, the stone is fired at the required temperature. This type of stone must be produced over large areas, so it is not suitable for home production.

This stone can be produced at home. Gypsum artificial stone is used only for interior decoration.

The service life of molds for producing stone from concrete is significantly less, in contrast to molds intended for casting gypsum stone. In terms of cost, concrete stone will cost a little more than gypsum stone, but such stone can also be made at home.
Reinforced concrete.
Its production is carried out piece by piece. In this case, production takes place directly on site. Thanks to free forming, you can make cobblestones, artificial boulders and slabs, subsequently creating, for example, a rock garden.
Polyester artificial stone with hot-curing mineral filler.
This stone has outstanding mechanical and decorative properties. However, it is not suitable for home production, since special conditions must be created for it to harden.
Cold curing cast acrylic.

Perhaps its handicraft production. Manufacturing conditions are similar to those required for the production of gypsum stone. After manufacturing, the shape of the stone can be changed, which does not in any way affect the quality of the finished product.
Liquid stone on a helium acrylic binder - gelcoat.

As for its mechanical properties, it is second only to cast. The thing is that a smaller part of the mineral filler can be introduced into the gel. At home, you can make stones of quite complex configurations.
So, it’s up to you to choose which method of making artificial stone. If you want to make stone for interior decoration, then give preference to acrylic and gypsum. As for external finishing work, a material that is not afraid of moisture is needed. Therefore, the best would be a cement-based composition. If we talk about price, then acrylic stone is the most expensive, followed by concrete stone and gypsum stone. To ensure high quality of the finished product, fillers can be added to the mixture: sand, marble chips, fine crushed stone. Among other things, this will save on the source material. Fiber fiber is additionally added to increase strength. This product prevents the appearance of microcracks in finished products. It is recommended to use a plasticizer. This way you can increase the density of the artificial stone, since the amount of water in the solution is minimized.
How to achieve the desired color

To give artificial stone a beautiful look, you can first paint it. How to do it? Special pigments are used for coloring. For example, they can be applied to the mold immediately before pouring the solution into them. In this case, the form must be partially painted over, which allows you to create an imitation of natural stone.
Note! It is extremely important to use not just a color for paints, but a high-quality pigment. They are iron oxide inorganic dyes.
To prevent the paint from cracking or washing off, it is mixed with a fresh solution and first applied to the mold. Subsequently, it will penetrate approximately 3 mm deep into the stone. And this is enough so that the paint does not wash off. As for the volume and quantity of pigment, its specific proportion is determined by the sampling method. To do this, you can make several experimental tiles and, after drying them completely, see what color you get. This is the only way to achieve exactly the color you need.
Let's consider three methods of making stone: from gypsum, acrylic and cement.
Making artificial stone from gypsum

The method of making artificial stone from gypsum is considered the most popular. To produce gypsum stone you will need a set of the following materials:
- white plaster,
- anhydride,
- warm water,
- fine sand,
- container for mixing ingredients,
- matrix,
- pallet,
- corrugated glass,
- water based paint.

You won’t need a lot of work space, but despite this, the work area should be well equipped. It’s a good idea to have racks or shelves nearby on which the workpieces will be laid out. All working tools should be at hand. The entire work process goes according to the following plan:
- When mixing gypsum, you should not make a reserve. Gypsum hardens very quickly, so try to accurately calculate the required amount of gypsum solution. Of course, there won’t be a big problem if a little plaster remains.
- You will purchase gypsum in dry form, so it should be mixed with water; determine the proportion yourself by eye.
- During the mixing process, add gypsum gradually, this will make it easier to achieve a homogeneous mass. The consistency of the mass itself should be thick.
- To give the future workpiece strength, you need to add sand in the amount of 10% of the total volume of the mixture.
- At the next stage, the mold should be greased with wax and turpentine. If you ignore this step, you will not be able to remove the workpiece from the mold. Make a water bath to dissolve the wax. This way you can apply a thin layer of wax to the surface of the mold.
- During the drying process, shells may form in the workpiece. To eliminate them, you can pour liquid gypsum.
- If you need to add color to the stone, add pigment while mixing the plaster. We talked above about how to do this correctly.
- When the mixture is poured into the mold, it is necessary to level it with a spatula and compact it thoroughly.
- To ensure that the gypsum is evenly distributed over the mold, corrugated glass is placed on the surface and the vibration process is performed for two minutes.
- The plaster itself will harden within 20 minutes. The glass is then separated from the mold without any problems. The form itself is removed. When all the workpieces have been removed, they must be placed in fresh air where they are completely dry.
- After the plaster has dried, you can additionally apply paint in several layers.

After all these steps are completed, the artificial gypsum stone is ready for installation. If you work well during the day, you can make a lot of stones.
Making artificial stone from acrylic

A small acrylic stone can be made within three hours. It must contain the following components:
- Hardener 2-4%.
- Acrylic resin 25%.
- Composite material or other filler 70%.
- Pigment.
The work process is quite simple and does not require special technology.
- First of all, all the above components are thoroughly mixed.
- Afterwards the mixture is poured into the prepared form.
- The hardening process should take place at a temperature of 25 °C. These are ideal conditions.
Note! Acrylic resin tends to stick. Therefore, a form is needed to which it does not stick: metal, glass, polyethylene.
The entire drying process of acrylic stone can take about two hours. If there are enough molds, then you can make them with a short interval, and each batch should dry well, and only then it can be removed from the mold.
Making artificial stone from cement

To make an artificial stone from cement, you will need to first prepare the following tools and material:
- Portland cement.
- Warm water, preferably purified.
- Putty knife.
- Container for mixing cement.
- Fine sand.
- Composition for separation.
- Forms for stone.
- Mesh to give strength to the stone.

So, when you have everything at hand, you can begin the manufacturing process.
- For the first layer, it is necessary to mix sand with cement in a ratio of 3:1. The solution should be distributed in silicone or polyurethane form.
- After adding water and thoroughly mixing, the mass should resemble sour cream in consistency.
- As for adding paint, it is best to do it at this stage.
- So, when the mixture is ready, spread it halfway up the mold.
- Then the mesh is cut to the required size, which will be laid in the next layer. This will make the stone durable. After laying it on the mixture, fill the remainder with silicone.
- Once pouring is complete, run a sharp object across the surface to create a groove that will provide better adhesion to the surface.

After all this, the stone should dry thoroughly. After twelve hours, the blanks are removed and placed in the fresh air until completely dry.
Note! Regardless of what you will make the artificial stone from, the molds must be thoroughly washed at the end of the work. This will allow them to be reused in the future if necessary.
Where can I get a mold for artificial stone?

Without such a simple object as a form, it is impossible to make an artificial stone. Moreover, its quality directly depends on the form itself. The easiest way out is probably to go to a hardware store and buy ready-made forms. However, if we talk about the difference between store-bought forms and those made yourself, then you won’t be able to save much.

The only advantage of making it yourself is the uniqueness of the shape. You can save money by making several molds of different sizes at once. Molds can be made from wood and silicone.
Making a wooden mold

At first glance, the option of making forms from wood may seem primitive. But actually it is not. For the base you do not have to buy expensive material. A few old boards and slats are enough to make sides. To make the front part of the stone have a unique appearance, take old boards, which may even be slightly broken. But as for the sides, they must be even. The same applies to partitions inside the form. This will ensure that the seams are even during the laying process. Although you can specify a shape of any size and type. It all depends on your imagination and creativity. The entire workpiece is nailed together. It is important to compact it to such an extent that the solution does not leak out of it. This is how you can very simply and quickly make a mold for artificial stone. Filling is carried out using the technology you choose.
This option can be called budget. So to speak, in case there are no other available options. As practice shows, working with such forms is problematic, but quite possible. Today, there are other technologies that make it possible to make more convenient forms for pouring stone, for example, from silicone.
As for this mold making technology, it will require more time from you. You will need to purchase consumables.
First you need to collect samples for the mold. This will largely depend on the shapes and sizes you want to achieve in the end result. For example, you can choose natural stone. Moreover, it can be broken into fragments or the edges of the stone can be ground/cut off. Next, you will need to make a mold for casting. To do this, you need to use an old wooden box. If it doesn’t exist, then you can put it together yourself. Each blank must be well fastened together so that the box does not fall apart during the pouring process. Then place the prepared stones on the bottom of the box. Place them flat side down. There should be a few centimeters between the stones.

Note! To prevent silicone from flowing under the samples, the bottom of the box can be coated with liquid plasticine and a stone can be placed on top of it.
Now it's time to prepare the silicone. There is nothing complicated here. The most important thing is to strictly follow the instructions for preparing it. All components must be thoroughly mixed using a mixer. When the mixture is ready, let it sit for about thirty minutes. After this time, you can begin pouring.

Immediately before pouring the silicone, make sure that the stones are positioned correctly and each one is in its place. In order for the silicone to lay evenly, it must be constantly compacted, this will prevent the formation of voids. Silicone should be poured until it covers the surface of the stones by 50 mm. After filling, place the mold with filled silicone in a dark place for two days. Depending on external factors, the hardening process may take up to one week. When the mold has hardened, you need to remove the side sides of the box and carefully detach the finished silicone mold from the stone. The silicone mold is ready! You can also make a mold from polyurethane.

Now you know how to make artificial stone and the molds for its production.

Many of us consider artificial stone to be a new material, however, it has been known to people since time immemorial. Ordinary clay brick, cement, gypsum and lime mortar are types of artificial stone.
The popularity of this material began to grow after new polymer compositions and forms appeared that made it possible to use it for interior decoration and landscape design.
In particular, artificial stone can be used to make tiles for cladding walls and floors, steps and other elements of stairs.
It is used for the manufacture of countertops, decorative stucco and sculptural compositions, borders and paving slabs.
In terms of strength and durability, some types of artificial stone are not inferior to natural stone, surpassing it in ease of processing and ease of finishing. This material can be made into very thin tiles, which reduces its weight and reduces cost. For natural stone, such a thickness is unattainable due to its high fragility.
Not inferior to natural material in terms of color and variety of surface textures, artificial stone is more profitable to use for several reasons:
- it can be immediately made perfectly smooth, which eliminates expensive sawing, grinding and polishing operations;
- there is no need to transport it, since this material can be made with your own hands at the place of use;
- the amount of waste is minimal, since there are no losses for transportation and processing;
- In addition to a rectangular shape, it can be made figured or shaped, which allows you to finish surfaces exactly in place without additional adjustment.
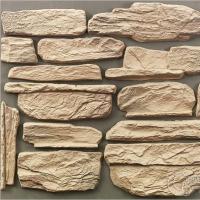
Types of artificial stone
When considering the question of what artificial stone is made from, it is not difficult to choose a technology acceptable for use at home.
Depending on the raw materials and methods of processing, artificial stone is divided into the following types:
— Ceramic (tiles) – the manufacturing process requires the creation of high temperatures to roast raw materials and transform them into a monolithic conglomerate.

— Plaster (cast). It can be done at home. The costs of raw materials and production are minimal, however, such stone is suitable only for interior decoration, since it is not resistant to frost.

— Concrete molded. The cost of production is more expensive than gypsum, since the resource of molds for casting concrete is less. Suitable for self-production. Frost-resistant.

— Free-formed reinforced concrete. This artificial stone is made piece by piece, usually at the site of use (artificial cobblestones, boulders, slabs).

— Hot-curing polyester. In terms of its mechanical and decorative characteristics, it is superior to some types of natural stone, but the synthetic compound hardens only in a vacuum at elevated temperatures. It is not suitable for home production.

— Cold-hardening cast acrylic stone. Suitable for home production. In the temperature range from +175 to 210 it is thermoplastic, therefore it allows additional molding after casting.

How to make artificial stone with your own hands?
This requires two basic components: mold and casting mixture. The home technology for producing artificial stone can be implemented both in a factory-made polyurethane mold and in a home-made silicone one. It all depends on the total footage of the finishing and the budget allocated for this work.
The polyurethane matrix is quite expensive, but it allows you to make several hundred high-quality impressions. Silicone mold is more suitable for small-piece stone production and home sculptural crafts. Its resource usually does not exceed 20-30 castings.

For making your own silicone molds a set of natural stone or tiles is laid out on a horizontal, stable and flat surface, having previously covered it with polyethylene. After this, a frame made of wooden slats or plastic is placed on it. The height of its sides should be 1-2 centimeters higher than the height of the copied material.

The surface of the tile and the inside of the sides are coated with solid oil or cyatim. You can take the cheapest silicone - acidic. It is squeezed out of the tube into the mold in a spiral, starting from the center to the sides until it is filled.
To prevent the formation of bubbles, the silicone is smoothed with a wide fluted brush. It needs to be dipped in a solution of dishwashing detergent. Soap solution is not suitable here because it is alkaline and can ruin the acidic silicone. After filling, the surface of the future form is smoothed with a spatula, also moistened with detergent.
Dry molds for making artificial stone at room temperature in a ventilated area. The drying rate of the silicone composition is approximately 2 mm per day.
Molding mixtures
Gypsum artificial stone
The mixture for gypsum stone is prepared from gypsum grades G5 - G7. It is made in small portions, counting on simultaneous filling of no more than two forms, since the setting time of this binder does not exceed 10 minutes.
Composition of the mixture: gypsum, citric acid to slow down hardening (0.3% by weight of gypsum), water - 60-70% of the volume of gypsum. The pigment is taken at the rate of 2 to 6% of the weight of the gypsum. The dosage of the coloring substance is selected on test samples of castings.
concrete stone
You can make artificial stone inexpensively and with high quality with your own hands from concrete. Unlike construction, here the initial composition of the components is slightly different: take 3 parts of cement for 1 part sand. The proportions of the pigment (you need to use an alkaline resistant one!) are the same as for gypsum stone.
The addition of polymer additives reduces the brittleness of this material and increases its abrasion resistance.
Cold hardening acrylic stone
This material is made on the basis of acrylic resin and hardener. The recommended volume of mineral filler to acrylic is 3:1. The amount of pigment is taken depending on the total weight of the filler (on average from 2 to 6%).
As an inexpensive filler, you can take gravel, stone chips or granite screenings. Before preparing the mixture, the filler is washed with dish gel, then calcined over a fire and rinsed with clean water.
The preparation process consists of three stages: first, the pigment is mixed with the filler. Then the acrylic resin is mixed with a hardener and a filler with pigment is added to it.
The time during which the acrylic mixture must be poured into the mold (from the moment the hardener is introduced into the resin) is no more than 20 minutes. The setting time of the mixture lasts from 30 to 40 minutes. The product requires 24 hours to completely harden.
If you are interested, the best materials for their manufacture are concrete or acrylic. The concrete product is heavier and does not allow you to create surfaces as varied in pattern as when using acrylic resin. However, the low cost of raw materials and the simplicity of the casting process partially compensate for this disadvantage.
Release agents
For different types of artificial stone, different compositions are used to separate the form from the product.
For gypsum stone, the optimal solution is one consisting of artificial or natural wax in turpentine in a ratio of 1:7. To do this, add wax shavings in small portions, stirring, to turpentine heated in a water bath to +50 - +60 C.
For concrete stone, conventional lubricants are used (litol, emulsol, cyatim). Before pouring the acrylic composition, the mold is lubricated with a solution of stearin in styrene (proportion 1 to 10) or cyatim.
When using a homemade silicone matrix, it must be protected from deformation that occurs when the hardening gypsum stone and acrylic resin are heated. To do this, before pouring the working mixture, it must be placed in a tray with fine dry sand so that the thickness of its layer is from 2/3 to 3/4 of the height of the mold.
Useful video
The construction business today is growing rapidly. The production of artificial stone at home is a profitable investment for those who want to open their own enterprise. Thanks to the latest technologies, it is not difficult to make decorative stone using an artisanal method today. The scope of its application is quite wide:
- landscape design;
- external cladding of buildings;
- interior decoration of premises;
- restoration of historical buildings.
Properties of artificial facing stone
Artificial stone is more profitable than its natural counterpart. It is stronger, cheaper and comes in a variety of colors.
Types of artificial stones
They can be used to design an interior of any stylistic direction. It has specific advantages over natural stone:
- It is environmentally friendly and hygienic, as it does not have scratches or microcracks on the surface, which contribute to the proliferation of harmful bacteria.
- Artificial stone is much lighter.
- Has high sound insulation.
- It is unpretentious: easy to install, easy to install.
- Retains all its positive qualities for a long time.
Decorative facing stone does not lose its properties under the influence of temperature changes, excess moisture in the atmosphere, or chemicals. It does not change color under the influence of ultraviolet rays. It also has high thermal conductivity - a quality that is very valuable when finishing interior surfaces of a room.
Classification of decorative stone
Depending on the production technology and the raw materials used, artificial stones come in several types. Some of them can only be produced in industrial enterprises. In artisanal conditions, decorative stone is produced from gypsum, cast acrylic and concrete (reinforced or molded) stone.

Artificial stone for external cladding, in particular reinforced concrete, is made from the following materials:
- sand;
- cement;
- fillers;
- colored mineral pigments;
- hardening accelerators;
- special plasticizers.
Concrete stone is used to make decorative cobblestones and boulders, which do not differ in appearance from natural ones, as well as for cladding the outside of buildings.
Artificial acrylic stone is made on the basis of acrylic resin with the addition of a composite material, hardener, and colored pigment. It is used for interior decoration in residential and public spaces. The disadvantage of this material is that it can be easily scratched.
But it is compensated by the ability to restore the glossy surface with simple polishing.
The composition of gypsum cast stone includes:
- gypsum;
- white cement;
- pozzolanic additions;
- oxide pigments.
Such additives make gypsum less brittle. It is used only for interior decoration, as it is not resistant to low temperatures.
Decorative gypsum tiles are environmentally friendly, practical to use, maintain natural humidity in the room, are also suitable for long-term use and are inexpensive.
DIY artificial stone
Organization of the workroom
Before starting the production of decorative stone, you should properly plan the upcoming work and think through options for marketing the products.
The production of gypsum tiles at home and other facing stones in small quantities can be done in a small room - a personal garage or barn. If you want to organize an enterprise on a larger scale, you need to select a building of a larger size and taking into account certain requirements.
- Renting premises. It is more profitable to rent a work space on the outskirts of the city - it is easier to find a spacious and inexpensive building here. In addition, you will not have to deliver products from the center to customers.
- Water. The manufacture of artificial building material requires significant use of water. Therefore, you should rent a room near water wells or a water treatment plant. In such conditions, process water will be much cheaper when purchased, and its delivery to the place of stone production will cost minimally.
- Heating. Heating is not required for the warehouse space. If the finished product warehouse is located outside, it is necessary to make a rain shelter over it. The temperature of the main room reserved for the production of decorative stone must be positive so that the water necessary for work does not freeze. In a place specially designated for drying the stone, you must constantly maintain 30 degrees of heat and dry air. Rooms for auxiliary workers are also heated. We must not forget about ventilation in the room.
- Wiring. An important point is proper electrical wiring. When producing stone, a lot of electricity is consumed. Therefore, electrical wires must be in perfect condition and of the required size so that equipment breakdown or fire does not occur in this enterprise.

Faulty electrical wiring can lead to irreversible consequences
The production of stone in large quantities requires the recruitment of working personnel - at least two people: a technologist and an auxiliary worker.
Before starting a business, it should be registered with the relevant authorities.
Equipment and work tools
To make artificial stone at home, you need equipment and various tools, which are purchased depending on the scale of production. A small volume of decorative stone can be made using a vat, a drill-mixer, a trowel and self-made molds. For example, you can make your own plaster tiles.
Special equipment for the production of artificial stone on a large scale includes:
- Vibrating table It is used to compact the material by removing air bubbles from it.
- Vibrator - for moving the vibrating table.
- Vibrating conveyor for moving bulk materials.
- Concrete mixer and mortar mixer for mixing water and dry material until smooth.
- Elastic silicone or stone molds. A varied assortment is obtained by using various forms in production.

Silicone mold for making artificial stone
But you also need tools and other work equipment:
- work tables;
- drill with a special attachment for mixing;
- boxes for finished stone;
- scales;
- racks with pallets;
- drying chambers;
- forklift for transporting goods;
- container for coloring pigment;
- pallets;
- vibrating sieve

Technological process
The technology for producing artificial stone is divided into two types.
The first is vibrocompression. This method is characterized by low cost of goods and fully mechanized production. This technology is suitable for the production of a large number of products.
The second method is vibration casting. Its advantages are inexpensive equipment, high-quality surfaces, a large selection of products, and the rich color of artificial stone. Vibratory casting technology is appropriate for the production of medium quantities of products.
The technological process includes several sequential actions:
- Creation of a master model. To get started, three pieces are enough.
- Preparation of forms. There should be at least ten of them if you need to get different textures, since each of the forms is used only once a day.
- Prepare a mixture of the required components by mixing them in a mortar mixer until smooth.
- Pouring the resulting mixture into molds.
- Compact the solution on a vibrating table for at least two minutes. Thus, air is expelled from the solution.
- For several hours (8-10) at a temperature of 30 degrees, the solution in the molds is in the dryer until it hardens. Then it is transferred to a room with normal temperature and humidity for two days.
- The molds with the frozen mixture are transferred to a special work table and the products are separated from them. Then high-quality finished products are selected, placed on pallets and sent to the warehouse.
- At the end of the work, the molds are washed with acid to remove any remaining solution.

Acid for cleaning solution residues
The production of gypsum tiles has some differences from the production of other types of artificial stone:
- casting molds - small in size and weight;
- a vibrating table is not used for production;
- the process of painting the finished stone is quite simple and inexpensive;
- ready-made gypsum mixture has a low price.
Producing decorative stone is quite simple and profitable. A competent approach to the enterprise and excellent product quality will make your income high and stable.
Video: Making stone from gypsum at home
The use of stone in interior design is an aesthetic technique for creating a special atmosphere. However, for many reasons, natural stone is not as practical to use as artificial stone. The latter is of high quality and can be made even at home. Artificial stone is not so heavy, expensive and there is no need to worry about its delivery from the mining site. A wide variety of shapes and textures makes it possible to embody any design ideas.
Facing stone panels are made in several main ways:
- cement-based;
- gypsum based;
- based on polymer materials.
In order to choose between these options, you can proceed from what this stone will be used for or from the available materials.
It is better not to use gypsum stone panels for exterior decoration because they will absorb water and deteriorate.
And for flooring, sidewalk paths, steps, and terraces, it is better to use cement stones.
To make stone panels you will need a special mold, which can be purchased at a hardware store. It is silicone and gives the material the shape and texture of stone. These shapes imitate different types of stone, so you can choose the one that best suits your design idea. In addition, you will need:
- drill with mixer attachment;
- brushes, large spatula;
- grease;
- coloring pigments;
- raw materials for mixing the solution.
There is a wide variety of dry dyes for stone on the market: yellow, brown, red, all shades of ocher, the natural color of red brick, and the like.
Silicone molds
It can be purchased at a hardware store, or you can make it yourself. For this you will need:
- silicone;
- solid base;
- sample stone;
- soap solution;
- a solid box, or other available materials that will serve as formwork;
- solid oil

First you need to install the form. Its edges should be higher in height than the stone. A thick layer of grease should be applied to all internal surfaces of the mold and to the stone samples.
 Place stones at the bottom. Pour in silicone. It needs to be leveled with a regular paint brush, and at the very end - with a spatula. The brush and spatula should be moistened in a soapy solution.
The form will dry for 15 days. After this, the box can be disassembled and the finished form taken out.
Soap solution can be replaced with dishwashing detergent, for example Fairy .
Cement stone
Cement-based stone is used for interior and exterior decoration. For optimal strength, the cement to sand ratio should be 3:1. Expanded clay sand is also used, and for sidewalk paths or steps the stone is made with the addition of crushed stone.

Drying should take place in a dry, warm room with good ventilation, but not in bright sun.
After 12-14 days, the model will acquire the strength of stone.
7. Rinse the mold and begin making the next batch.
A video on making cement-based artificial stone can be viewed here:
The video describes the technology of making stone with dry coloring pigment, which is applied directly to the mold.
Gypsum stone
Gypsum stone is made in the same way as cement stone, but with some differences.

From the second or third time, you usually manage to adapt to your shape and calculate the required amount of materials for kneading so that there is enough for exactly one time without any leftovers.
In the given manufacturing method, proportions and combinations of materials are given in which you can make your own personal improvements. The ratio of water and gypsum is determined experimentally. Also, for gypsum stone there is no need to lay a reinforcing mesh.
To make the stone stronger, you can add slaked lime to the forming mixture (a sixth of the total volume).
Necessary:
- 5 kg. gypsum GVVS16;
- 1.5 kg. coarse sand;
- 2 l. water;
- coloring pigments, approximately 50 ml, yellow and brown, but there should be more brown;
- 400 ml. water mixed with a pinch of citric acid;
- acrylic varnish on stone;
- form.
Add coloring pigments to the water in the desired proportions and pour in the water and acid. Citric acid somewhat slows down the rapid crystallization process of gypsum. Mix sand with gypsum. Combine liquid and bulk ingredients. Mix the finished mixture thoroughly. Place the silicone mold on a hard tray, this will help shake the mold. Dry pigment can be used to tint selected areas directly in the mold. Then, without delay, pour the mixture into the mold until it is half full. Using light vibration, distribute the solution over the mold. Add the rest of the solution, spread and smooth it with a spatula. The sides of the mold between the individual stones must be clean so that the finished casts can be easily separated from each other.
The plaster hardens quickly, after about 30 minutes you can separate the stones from the mold. To be sure, you can knock on the tiles; if they ring, it means they have already frozen, if not, then you can wait a little longer. To get the impressions, you need to cover the mold with a sheet of plywood of the same size, turn everything over and remove the silicone mold. Another way is to cover the mold with corrugated glass immediately after pouring. It releases freely from the plaster and is used like plywood to reach the stones.
The casts are tinted with a cloth soaked in primer and pigment to create shadows. The final layer is acrylic varnish for stone, but it can be applied after all the tiles have been installed on the surface.
Tile adhesive stone
This method is an example of improvisation with different materials for making artificial stone. The choice of textures, shades and shapes of stone is very large.
Materials: Litokol tile adhesive, black grout, coloring pigment and sea salt.

- Mark the boundaries of each individual stone. They can be the same in size and shape or different.
- Remove the film and leave the raw materials to dry for 12 hours.
- After this, the stones are separated from each other and final processing is carried out. If a relief with chips is required, you need to wash the salt with water. If it is better to leave small grains, then the surface of the stone is fixed with varnish.
A detailed video about making stone from gypsum can be viewed here:
The video shows all the proportions of the materials used. Colors for painting stone can be mixed in  arbitrary proportions or not to use them at all in the initial stages, but to give the stone the desired color at the final stages of processing.
Giving the desired color can also be done on a ready-made stone. To do this you need to use special paint. The surface of the stone is cleaned of dust and wiped with a dry cloth. After this, paint is applied. If necessary, a second and third layer can be applied, but each new layer can be applied only after the previous one has dried.
Installation
Installation of artificial stone panels is very simple. The beauty of the stone on the wall will depend on how carefully the work is done and how the individual stone tiles are arranged. Installation is carried out as follows.

Gypsum stone panels are lighter than cement panels and will adhere firmly to glue, but heavy cement panels must be laid on a specially prepared surface.
First, the desired area is strengthened with paint mesh and plaster. A cement adhesive mortar is applied to such a surface and spread with a notched trowel. Stones are being installed.
- The edge cut of the stone is easily formed using cutting tools, which is necessary for the beautiful design of local areas with stone panels.
When installing the panels, it is important to ensure that the material on which the stone is glued does not get on its outer part, because it will be very difficult to remove.
After laying the stone, remaining chips or small cracks are eliminated using an airbrush, which consists of calibration paste, water and acrylic varnish.

Before starting installation, it is important to choose a fastening method that will match both the surface and the type of stone. If the surface is wooden, then it is necessary to make moisture insulation and sheathing. If the wall is brick or concrete, then simply level the surface.
If the stones are laid with gaps between each other, this distance should not exceed 2.5 cm. And the seams are treated with grout.
Step by Step Actions
The process of making stone is quite simple and affordable. Depending on the materials, the technology may differ slightly, but the following algorithm of actions remains unchanged:
- preparation of the workplace and necessary equipment;
- selection and preparation of the form;
- mixing the solution;
- pouring into the mold and distributing the mixture;
- releasing the cast from the mold;
- cleaning the mold;
- grinding, finishing and painting of stone;
- preparing a wall or other area for installation;
- installation of stone slabs;
- finishing of the finished wall.
Artificial stone is a great way to create an exclusive design for the interior or exterior of your home. The wealth of colors and materials leaves room for experimentation and embodiment of your ideas.
Make a mold. Since concrete is quite heavy, you will need a mold to make artificial stone. Make a certain mass the size of a stone from foam and cover it with a 5-7 centimeter layer of concrete. Thanks to this, the artificial stone cannot be distinguished from the real thing by sight and touch, even though it will be much lighter. Next, you need to wrap the form in wire mesh or reinforcing steel mesh so that the wet concrete can stick to something on a vertical surface and provide overall bond strength to the concrete.
Sculpt with concrete. Use a trowel to sculpt the concrete after you have applied it to the form. Familiarize yourself with what the rock formations look like and be patient. Stone sculpting is a difficult process and requires patience if you want to get the desired result.
Shape the concrete. Take a sea sponge and give the stone a weathered, pockmarked effect. Surface texture imprints from real stones will enhance the cosmetic value of your stone. Nothing will look more convincing than an imprint made from real stone. The textured surface will also help provide some inspiration for the sculpting process, as you can continue to change the texture with your own hands. Another technique is to use a regular plastic bag. Wear it like a glove and make random marks on the stone.
Let the concrete dry. It will take a month for the concrete to dry completely, but after one week it will be 75% dry. If you leave the stone in direct sun during the early stages of drying, noticeable cracks will form on it. Soak it in water to minimize cracking and ensure proper drying.
Clean the concrete. Allow at least three full days from drying before proceeding with this stage. Wait longer if you are in no hurry. Take some sandpaper and sand down the entire stone to remove any rough edges from the concrete. When finished, your stone will be as smooth as the real thing.
Wash the concrete. Rinse the concrete thoroughly before adding color. Use a stiff (but not wire) brush to remove concrete dust from all gouges and crevices, as this will look nasty later. Allow the concrete to dry completely before painting it.
Paint the concrete. Take a spray bottle and water paint and apply several coats of complementary colors over and over again to give your concrete a deep, true stone color. Examine a real stone carefully to see which colors produce which effects. When looking closely at a real stone, the most common colors are blue, green, red, orange, yellow, brown and others. The better quality your spray gun is, the better the end result will be. Ideally, you should spray very gently with each application to avoid staining.