Scheme of installation of car alarms. How to connect an alarm. How to connect an alarm
Connecting a car alarm to the lock is a time-consuming and difficult process, which is recommended to be carried out in a car service. Having a desire and having read this instruction, it is quite possible to do it yourself. A strong argument in favor of personally connecting a security device to the central lock is that, violating the installation algorithm adopted by professionals, it becomes much more difficult to break into a car.
Varieties of elements of the central lock
Central locks have a simple structure:
- input sensors. These are lock microswitches and machine door limit switches. The microswitches determine the actual location of the central locking elements. Limit switches determine the location of the doors and send a message to the control unit.
- Executive mechanisms(also called actuators). They are electrical machines direct current that are associated with the converter. Pneumatic actuator may be used.
- Control block. Acts as a transmitter of certain messages to the control units, as well as to the actuators of the trunk roof lock and to the gas tank hatch.
 The scheme of the central lock in the car
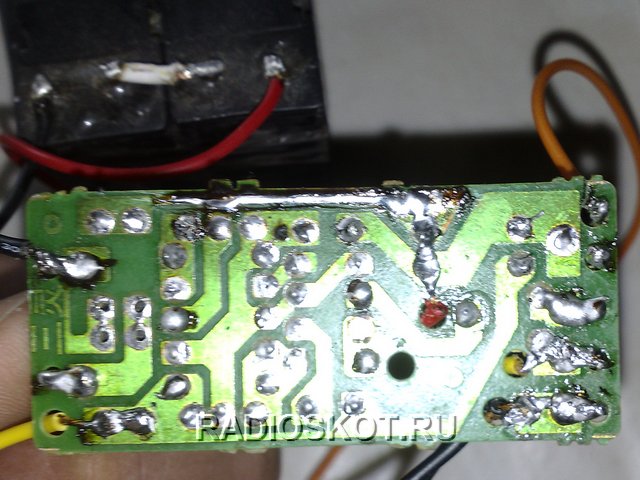
Do-it-yourself car alarm connection
Security mechanisms are quickly installed in car services. Consider how to connect them yourself. This process has several parts. The result directly depends on whether you follow the instructions.
Before directly connecting the alarm to the central lock, you need to familiarize yourself with the structure of the lock itself. After that, we are looking for access points that are shown in the diagrams of instructions for using and installing the device on a vehicle. Alarms like starline a91 are universal, they are suitable for installation on cars with different types of engines (turbocharged, diesel or gasoline) with both automatic and manual transmissions. 
Work materials
To install the alarm you will need:
- insulating tape;
- screwdriver;
- protective LED;
- driver's door activator;
- soldering iron (with rosin and solder);
- the alarm itself.
Important! Do not start the connection without first reading the theoretical material.
Step-by-step instruction
It is worth remembering that the methods of installing the security mechanism may differ from each other (most often it depends on the manufacturer). After all the materials have been collected and all the introductory information has been read, you can begin the installation.
- Shock sensor connection. This stage is easy. The sensor is connected to the block through a switching connector with three pins (which is located on the right side from the bottom of the block body). Connect the LED indicator connector on the left side of the alarm unit housing. Connect the button to the contact located on the bottom of the alarm unit housing.
- Central locking. Posting yellow color and a yellow wire with a black stripe is connected to the positive terminal of the battery (“+”). The wire orange color and an orange wire with a black stripe is connected to the negative terminal of the battery (“-”). Both remaining wiring white color connect to the central ignition lock actuator.
- Signaling. Has 10 wires of different colors.
Video: connect the alarm
Consider their connection:
- yellow wire(uppermost) connect to the contacts of the relay power coil. Normally closed contacts of this relay are inserted into the place of the break in the power supply circuit of the ignition coil. You need to cut the cable that connects the relay power coil and the ignition switch. The ends formed after cutting must be connected to two relay contacts (wires Green colour). Then, connect the wiring coming from the ignition switch to another contact of the relay coil;
- black wire you need to connect to the negative terminal of the battery (the orange and orange-black wires from the central lock are also connected to it);
Important! It is necessary to disconnect the battery for the period of connection, so as not to damage the electrical wiring of the vehicle.
- both wires are brown connect to the turn signals (the first to the right side, the second, respectively, to the left);
- the wire Pink colour connect to the siren (to its red wire). The black cable of the siren is connected to the housing or to the negative pole of the battery;
- red wiring connect to the positive terminal. The yellow and yellow-black wires of the central lock must be connected to it;
- green wire(also called "trunk opening minus"). To be able to implement this function, you need to install an additional relay and connect this wire to its supply coil;
- orange wire connect to the brake pedal switch;
- white wire (ACC) must be connected to the ignition lock (to the contact that closes when the key is turned, and the supply voltage appears on it);
- posting of blue color connect to the door limit switches.

What difficulties may arise and how to overcome them
The connection process is quite time-consuming, so users may experience some problems:
- The problem of choice with a wide variety of security systems. Buyers, choosing an alarm system, first of all, should be guided by their wishes and ideas about the functional features of this device.
- Installation of a car alarm to the central locking system. To solve this problem, it is necessary to determine the points of connection of the security mechanism, taking into account a number of features (a type of signaling, the exclusivity of the car, the location of the central unit of the car alarm of the vehicle).
- The problem of choosing an installation scheme (color designations of various mechanisms may be intended for other functions). It is advisable to use the original diagrams for your car alarm model.
Did you know? The most expensive car in the world is the Italian sports car Lamborghini Veneno Roadster, worth $4.5 million.
Connection diagrams
We present a universal connection scheme.  Wiring diagram Despite the rather time-consuming process of installing a car alarm with your own hands, the efforts spent will not be in vain, because this will save a good amount of money (most often, the cost of professional services is equal to the price of the alarm kit itself).
Did you know?The most stolen cars in the world are brandsMercedes-Benz (C-Class), BMW 3, Infinity (G-series).
In addition, it will bring a lot of pleasure to those who like to do everything with their own hands.
Alarms for cars perform the function of alerting the owner of the vehicle about the penetration of unauthorized persons into the inside of the car. They are different types, many manufacturers are engaged in the production of security systems for cars.
If the owner of the car found the right security system for himself, brought it to his home, this means that the system must be installed.
ATTENTION! Found a completely simple way to reduce fuel consumption! Don't believe? An auto mechanic with 15 years of experience also did not believe until he tried it. And now he saves 35,000 rubles a year on gasoline!
The motorist can trust in this matter professionals or their loved ones. But this is not particularly necessary, because the instructions for installing the alarm are always attached to the security device.
What the owner of the vehicle needs to know about alarms
Models of security, automotive systems of different brands and types differ from each other not only in terms of appearance and equipment.
Each installation can have its own scheme, using which the owner of the car will be able to place all parts of the alarm system in the correct order.
The pitfalls of this process can be hidden not only in the schemes, but also in the following indicators:
- in different alarms, wires of the same color can perform different functions, which will not be identical;
- some types of alarms require more effort in terms of installation on the part of the owner of the car, because they may have additional elements responsible for different functions of the system;
- the connection diagram of the alarm system itself may not be suitable for a certain type of car - you should choose a security system for a specific car model.
If a person has taken into account all the features of his vehicle, considered a number of possible complications for working on installation and realized that he can do it, installing an alarm with his own hands will not be a problem for him.
Preparation of tools for installation work
In order to quickly, correctly, and qualitatively install an alarm on your own car, you need to stock up on endurance and strength, and also prepare the following tools:

Having prepared an alarm with an auto start function for mounting, the owner of the car can install an alarm on the car in a few hours. It is desirable that at hand were not only necessary tools, but also a diagram that will help to do everything right.
Installing a car security system on your own - in what places is the connection made
Automotive, security systems with auto start work on the same principle and their installation scheme is the same. The alarm connection points on the car are as follows:
- Free cavities that are behind the dashboard.
- Parking brake section.
- Places for locking and unlocking doors.
- Stator and turn signals.
- Near the door and trunk opening sensors.
- Near the brake pedal and parking brake.
All these points for signaling with auto start can be found by the owner of the car using the indicators of the UCH module or looking behind the dashboard. Alarm connection points in cars of most brands are located in approximately the same places. 
Making the process of installing a security system with your own hands
By choosing a car alarm with auto start and feedback, a person should take care of her correct installation. The general algorithm of actions, which involves the installation of a car alarm with feedback and an autorun function, is as follows:
- the instrument and steering panels are removed;
- the lower lining of the steering column is carefully removed;
- installation of the alarm system unit in the hidden meta;
- wires are laid, protected and extended;
- a shock sensor and a siren are installed in the luggage compartment;
- connect the wires of the required colors, according to what the diagram shows, to special points on the machine;
- alarm wires are connected to the power supply system of the machine.
- the functionality is checked by auto-starting the alarm with feedback.
Self-installation of an alarm on a car requires a lot of effort and a supply of temporary resources on the part of its owner. The installation diagram helps to carry out each process correctly, step by step.
It will be easy to set the alarm on the car yourself if you use the instructions for the security system. 
Additional facts to keep in mind when installing an alarm with auto start
Alarms for cars with auto start function and feedback require special attention during installation. Every owner who wants to protect his car from theft by installing a powerful car alarm should know that its proper operation depends on the installation method. In addition to what is written in the instructions, a person must be guided by the following rules:

Installation cards for car alarms are present in the instructions for the device. If it will be easier for the owner of the car to use their Internet schemes, this is also a good solution. Each driver will be able to independently install alarms with an autostart function and feedback. To protect his car, he needs the security system itself, a diagram for its installation and a set of tools. You need to check the feedback and autorun functions immediately after mounting the system. Three beeps - installation failed. If only one signal everything is fine.
Self installation security system for a car with autorun and feedback is possible, but for this you need to be patient and do everything according to the rules.
A mandatory addition to the purchased vehicle is the installation of a car alarm. It is unlikely that anyone would want their car to be stolen, and an alarm can help reduce the risk of such incidents.
Wiring diagram for alarm on VAZ
VAZ cars still continue to be popular. Many have had them since the nineties, and someone, on the contrary, is acquiring them now, being a patriot of the domestic automotive industry. Let's look at the connection diagram of the alarm on the VAZ.
First you need to remove the trim from those doors on which the activators will be installed. Electric locks should be installed in such a way that during operation they have minimum load. Parallel to the standard traction, the drive rod should be positioned.
After attaching the stem, you need to run the wires through the rubber bushings inside the door. Next, in the rack and the door, you need to drill coaxial holes. Their size depends on the rubber bushings.
Using a rubber seal, it is necessary to lay the wires in the engine compartment, where the headlight hydrocorrector tubes should pass. To do this, you need to make a hole, and carefully, without damaging all the elements that are nearby.
The limit switch must be attached to the left fender liner using a bent mounting plate, which should come with the alarm. On the same fender liner, next to the air filter, you must also install the siren directly.
Connection diagram for an alarm with auto start

Today on the market you can find alarms with auto start. They are in great demand. Autostart is an additional alarm function to satisfy some customer needs. Remote start can be done by timer, or from a key fob. To connect such an alarm, you need to use the instructions that came with the equipment, or find a detailed wiring diagram for installing an alarm of your particular type on a car of your brand.

GSM alarm connection diagram

When connected GSM alarm remember that the scheme, in general, will be the same for all such alarms, but it will certainly differ in details. Therefore, be sure to use electronic measuring instruments for a call. They will help you get connected.
The main points for connecting such an alarm will be: brake, dimensions, doors, ignition, central locking, starter. In the instructions for this alarm, you will find recommendations for its installation and tips that should make your work easier. When you decide where exactly in the car the alarm will be located, make sure that you have enough wires available. Otherwise, they will need to be purchased. Be careful and remember the cross section, which should be similar to the cross section of the alarm wiring.
Scooter alarm connection diagram

By the way, it is not necessary to set the alarm only on the car. If you have eg. Scooter, then you can install an alarm on it. There are a lot of schemes for connecting an alarm to a scooter - it all depends on the brand of your vehicle and the type of alarm that you plan to install. It is best to seek help from those who have already been involved in such an installation, or have experience in working with alarms. You can, of course, do everything yourself, but for this you should carefully study all the instructions attached to the alarm and find on the Internet a scheme that suits you with a detailed description of it.
Burglar alarm working principle
Alarm installation - theory in plain language.
Central locking. Connection of the central lock.
The idea of creating a laser alarm was not new, but I didn’t find time to assemble it all the time. And finally, the weekend has arrived. In the store, a ready-made simple alarm system for a car was purchased for $ 3. A compact piezoelectric head, inside which the alarm circuitry itself is assembled.
When connected to a power source, the alarm emits a very high-pitched sound that resembles a police car.

So, the task was to make a sensor for signaling. The transmitter is a laser diode. A simple red laser pointer ($1) was also purchased from the store, then the diode with optics was removed from the factory case of the device.

The button from the laser was soldered off.

The minus of the laser diode is connected directly to the power source, and the plus is connected to the power source through a 30 ohm limiting resistor. The power source is a switching power supply from a DVD player, since the unit produces the voltage we need 6 volts.

The photodiode was used from a KODAK camera. The circuit is designed so that in the presence of light - the photodiode does not allow the transistors to open, since its resistance is greater than the resistance of the resistor by 100K, therefore, the current will flow through the photodetector. For a simple signaling circuit diagram, see the figure (click to enlarge).

As soon as the illumination weakens or disappears altogether, the resistance of the photodiode increases and the current begins to flow through the 100K resistor to the base of the first transistor and the junction opens, after which the second transistor opens to the collector of which the alarm is connected. After the alarm is triggered, the relay instantly turns off the laser diode, this is done so that after the presence of lighting, the alarm does not turn off until you turn it off yourself.

Any relay will do, I used a relay from an imported voltage regulator without any alterations.
It should be noted that the photo- and laser diode must be at the same level so that the laser beam illuminates the photodiode, the latter must be in a dark case, since sunlight interferes with the correct operation of the device. The sensitivity to light depends on the value of the 100K resistor, with a decrease in its resistance, the sensor will be more sensitive.
The distance between the laser diode and the photodetector can reach several meters. When an object passes through the activation zone of the sensor, for a moment the laser beam falls on its body and does not illuminate the photodiode, at this moment an alarm is triggered and the laser is turned off at the same time so that later it does not illuminate the photoresistor. This sensor can be used as a sensor to turn on the yard light, you just need to put a second relay instead of an alarm, which will turn on the light.
Discuss the article ELECTRICAL ALARM CIRCUIT
Security alarms are multifunctional systems that are designed to provide the required level of security at the facility and prevent intruders and robbers from entering its territory.
In order for the alarm system to fully fulfill all its functional purposes, it must be properly installed and configured.
Therefore, connecting a security alarm is an important aspect of its correct operation over a long period.
It must be carried out in strict accordance with the established regulatory documents used in the formation of security systems for residential and non-residential facilities, as well as in accordance with the technical regulations for the installation of security alarms.
Connection methods
If the user decides to install a security system at home, in the country or in the office and the appropriate burglar alarm has already been selected, there are several ways to connect it.
by the most simple option the security system will be connected with the help of specialists from companies providing installation, configuration and Maintenance security systems.
If the alarm connection scheme is notable for its simplicity, then the installation and configuration of the security system can be done independently in accordance with the instructions that are included with each alarm.
Via installation company
Professional alarm connection can be carried out by special companies that have the appropriate license to carry out installation and maintenance work with such systems.
The main advantage of this connection method is that all work is carried out by professionals who are well trained and know all the intricacies of installation and configuration. different types security systems.

All work is carried out in strict accordance with regulatory documents and technical regulations. Installation, testing and configuration of alarms is carried out using special high-tech equipment.
The main task that should be implemented by the security company is to build a unified system of instant response to violation of the security perimeter of the entrusted object.
In the process of implementing this task, a detailed project of the future security system will be created, which takes into account all the nuances and features of a particular object, as well as an optimal structural diagram for connecting a security alarm.
This will allow you to choose the most suitable set of equipment for the multifunctional protection of material assets stored at the facility.
All installed devices will be interconnected by a single algorithm of work, which will allow timely detection of an attempt to penetrate and warn the relevant services and owners about this.
The process of installation and connection of the alarm system includes the following steps:
- Departure of a specialist to the object to the client;
- detailed inspection of all premises and hazardous areas through which penetration is possible;
- a block diagram of the security alarm is drawn up and its coordination with the customer;
- selection of an appropriate set of devices for the implementation of the compiled security scheme;
- performance installation work and alarm setting;
- checking the security system performance by simulating situations in which it should work.
After completing all of the above steps, the user will have a fully functional security system for their home from "uninvited guests".
DIY installation
In addition to connecting a security alarm with the help of specialists from security companies, you can install it yourself.
Today, there are many ready-made sets of domestic and foreign companies on the consumer market, which include all the necessary devices to organize a security system at home.

Detailed instructions are attached to each such kit, by radiating which you can independently install and configure the security system.
An independent option for installing security systems will be justified only if the security alarm connection scheme is simple and does not require the use of additional devices that are not included in the standard set.
Main connection problems
During the installation and connection of a security alarm, various problems may arise due to various factors. Let's consider the main ones.
If a wired alarm is used, then during its installation there will be a problem with laying the alarm loop. A large number of wires that stretch from the sensors to the central unit will spoil the interior of the room.

In this case, you will have to perform additional work for laying cables, after which it may be necessary to repair the premises.
At facilities that have many rooms, as well as many entrances / exits, windows, the OPS connection scheme will be somewhat more complicated.
This is due to the fact that additional sensors will have to be installed, which will have to exclude penetration in any possible way.
If the security alarm is planned to be connected to the remote control of the security company, then there may be problems with connecting those that were installed by oneself.
It will not be possible to connect such security alarms to the remote control, since security companies can only work with those systems that were installed by specialized services.

Conclusion
Summarizing the above, we can come to the following conclusion. If the user requires a stand-alone alarm with basic protection functions for a small object, then the best option there will be an inexpensive ready-made kit that you can install and connect yourself.
If you need a multifunctional system with multi-level protection of a large number of zones, then you should seek help from specialists who will carry out the appropriate installation.
Video: Security alarm for the house. Installation. Options


